
How to Set Pergola Height for Headroom, Roof Movement and House Proportions
Pergola planning
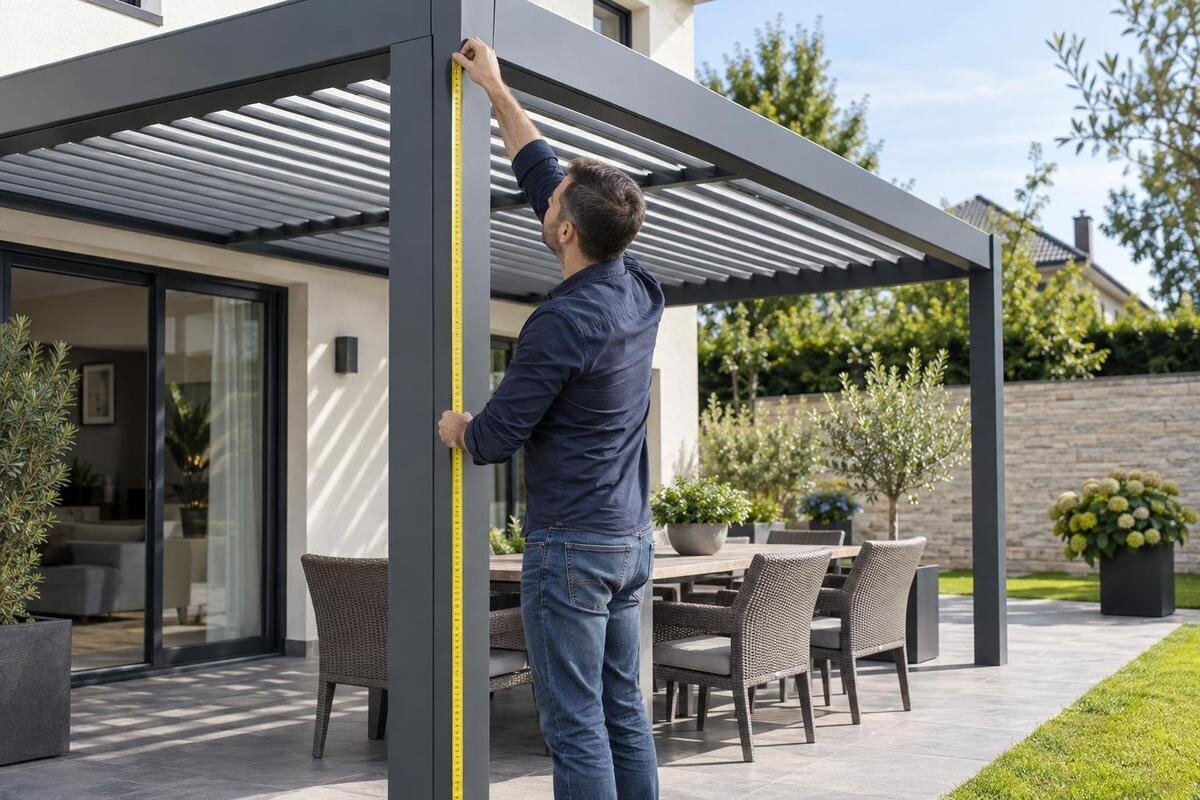
Pergola height is not just the distance from paving to the roof’s highest point. A beam can reduce usable headroom, a moving roof can occupy space that a closed drawing hides, and a roof line can sit awkwardly against doors or eaves. Before comparing proposals, use a scaled side section that relates the finished surface, the frame and the house façade. That single view makes the key dimensions easier to check against the actual terrace rather than a product image.

Overall height, frame height and clear headroom
People often ask for a pergola height as if it were one figure. A useful section separates the top of the roof, the underside of the fixed frame, the lowest point above a route and, where relevant, the space occupied by moving parts. Those measurements answer different questions: overall height helps show the structure against the house, while headroom is measured below the lowest obstruction. A roof’s highest point is not necessarily the limiting point for someone walking underneath. Label each measurement by what it describes instead of putting one unqualified number on a plan. If you receive a dimensioned image, check where each arrow starts and ends.
Use a side section through the terrace where the house opening and a support line appear together. Draw the wall, opening, eaves, finished paving and roof to a common scale, and mark fixed and moving components separately. Choose a cut through a route that matters rather than an arbitrary middle point, so a low beam does not disappear from view. The Bloomcabin Pergola product page identifies the named product and gives an area range of 9 to 24 m²; floor area does not state frame height or usable clearance. Ask for a section of the exact configuration, not a height inferred from an image. Label units and dimension arrows so nobody mistakes a concept sketch for a measured drawing.
Set the datum at the finished paving
Set the datum at the top of the finished surface where people will stand, not at soil, an unfinished slab or paving that is still only an estimate. If paving, tiles or decking have yet to be installed, list the planned build-up using dimensions confirmed by the person responsible for that work. The difference matters because a beam measured from the base can lose clearance once the final surface is added. Label the finished floor level (FFL) clearly on every section and use the same reference on the plan and supplier drawing. State whether the level is existing, proposed or provisional.
Do not use a single floor mark if the terrace changes level. Record the finished surface at the house threshold, the intended post positions and any step or change in plane; show slopes on the section, not just as a note. If the exact paving level is unresolved, mark it provisional and identify who will confirm it before the pergola dimensions are fixed. Record the level at each relevant point rather than writing only ‘sloping terrace’. Where a threshold or step creates a separate level, show it as a transition rather than part of the general paving plane. A level survey or drawing from the relevant building or paving professional is more dependable than judging the difference by eye.
Measure headroom along the routes people use
Usable headroom is the vertical gap from finished paving to the lowest fixed part over the space people use. Check it on the route from the house door into the seating area, at a table edge where someone stands, and beneath any crossbeam that spans the way. The side view should show the actual walking line as well as the structure; measuring only at the centre can miss a beam or fitting at its edge. A beam near the entrance may be the limiting point even if there is generous space in the middle. Consider the people who use the terrace and their ordinary activities, but do not treat one household measurement as a universal clearance standard. Mark the tightest point, not an average.
Activities beneath the frame can reveal clearance problems that an empty terrace plan misses. If chairs are moved, doors are opened or items are carried beneath the frame, check where those activities take place in relation to the beams. Mark a fixed light or other specified fitting below a beam; if a fan or later addition is planned, obtain its dimensions and have installation clearances confirmed by the appropriate professional. Keep the height decision provisional until the space required for those accessories is known. A change to the furniture layout may be simpler than accepting restricted headroom along the main route.
Show every position of a moving roof
An adjustable or retractable roof cannot be assessed from its closed outline alone. Depending on the design, parts may rotate, slide, fold or gather, and the space they occupy can change above, below or beside the frame. Ask for a dimensioned section showing the relevant end positions, plus a plan view if components travel horizontally. The drawing should show the movement envelope—the full space occupied during travel—not just an open or closed symbol. A pair of icons may not show whether parts project towards the house or remain over the same footprint. Ask which roof position creates the least clearance, and what surface each stated dimension is measured from.
The Bloomcabin Bioclimatic Pergola product page identifies the product category, but the listing alone does not establish the roof mechanism, movement path or required clearance for a selected configuration. Do not infer those details from the word ‘bioclimatic’ or from a lifestyle image. Request the drawing for the exact roof option and compare its travel with the house eaves, window openings and any wall-mounted fittings. That keeps the height discussion about the configuration being quoted, rather than a generic picture or category label. If a movement position is unclear in the drawing, ask for the relevant dimensions before using it in a height comparison.

Include the full frame and any specified fittings
Once roof movement is understood, add every fixed part that can reduce the opening: beams, fascia, brackets, channels, motor housings or other items where they form part of the selected configuration. A simplified outline may omit beam depth or show the roof skin as if it were the lowest element. Ask the supplier to mark the underside of every fixed member above a route and identify optional fittings separately. If an overall height is measured to the roof top, it cannot by itself tell you the clear gap below the frame. Keep overall height and underside clearance as separate labelled dimensions, and show whether any included fitting hangs below the beam.
For a wall-mounted layout, distinguish the attachment line on the house from the front support line. When discussing the Bloomcabin Wall-Mounted Pergola, ask for a section showing both the proposed mounting level and the clear height beneath the frame. Have the attachment and site conditions checked by a suitably qualified professional. Do not use an assumed fascia or gutter line as a fixing datum unless the project designer confirms it. If the mounting line is undecided, mark it provisional rather than deriving it from existing wall trim. This separates a visual alignment you prefer from an attachment position that still needs to be confirmed.
Compare the roof line with the house façade
Read the roof line against the house elevation as well as in section. Mark the tops of nearby doors and windows, window sills, lintels, eaves, fascia and the main roof edge. These give visual reference lines and can reveal practical conflicts: a deep frame may cut across a window head, while a roof set very low can make an opening feel compressed. The aim is not to match one feature at all costs; it is to see the proposed height in relation to the parts of the façade that will remain visible and in use. Note which views or openings need to stay clear.
Draw at least two plausible roof lines on a scaled elevation, then compare them from the terrace and from inside the room that opens onto it. A photograph can help if its perspective is understood, but do not judge height from a wide-angle image alone. When considering the Bloomcabin Pergola, use the proposed frame outline to compare how much of each nearby opening remains visible. Note whether you are comparing the top of the roof or the underside of the beam: those lines show different aspects of the proposal. Keep the paving and façade unchanged between versions so the effect of the height adjustment is clear.
Label roof levels at both support lines
On sloping or stepped paving, one height label can hide different clearances at opposite sides. Mark the roof level at the wall or rear support line and at the outer support line, showing both the top edge and underside. If these levels differ, the drawing should explain whether the variation belongs to the selected roof geometry or follows an agreed site condition. Paving levels can change the clear gap even when the roof edge is level. Record all levels against the same reference, while showing the finished paving beneath each measurement. This distinguishes a difference in roof level from a difference in headroom caused by the surface below.
Where the roof position changes, ask whether the stated dimensions apply to all operating positions or only one. For the bioclimatic pergola option, keep the front and rear reference points labelled on the configuration drawing so you can follow the same points between views. If the house wall and front supports sit over different finished levels, have the designer reconcile those levels before you agree the height. Do not treat equal post lengths, a level roof edge and equal headroom as interchangeable descriptions. The drawing needs to make clear which relationship is intended and how it relates to the paving.
Read the section, elevation and plan together
An elevation shows how the roof relates to the house; a section records height and headroom; a plan shows where the frame and moving parts sit over doors and routes. Read them together to see whether a beam crosses an entrance, whether an opening enters the covered space and where a component has room to travel. Ask that all views refer to the same orientation and exact configuration. A perspective render can communicate appearance, but it cannot replace labelled vertical dimensions or establish a reliable measurement by scaling its pixels. If a view is missing, note the unanswered question rather than filling in a dimension from an illustration.
For a wall-mounted pergola proposal, provide clear front and side photographs, measured paving and threshold levels, and recognisable façade references. Label unconfirmed values as estimates and identify which side faces the house. Use the same labels for doors, supports and section lines across the photographs and drawings, so each view can be matched to the others. A beam shown beside an opening in plan should be identifiable in the elevation and section too. If the views disagree, ask which one represents the current proposal rather than combining details from different versions. This helps the supplier resolve the layout without relying on ambiguous photographs.

Compare quotes using the same height questions
Height comparisons are useful only when quotes use the same datum and configuration. Send the same site section, planned paving level, façade references and intended routes to each supplier. Ask each to state the overall roof height, clear height below the lowest fixed element, levels at both sides where they differ, and roof positions represented in the drawing. Ask whether each figure ends at the roof top, underside or another named point. A number without its start and finish points cannot be compared fairly. If a proposal shows only an outline, request a dimensioned section rather than assuming two figures describe the same measurement.
Name the product and selected option shown on each drawing, and record whether any height-affecting fitting or wall interface is included, optional or undecided. For a quote covering the regular Bloomcabin Pergola, keep that product name beside the configuration details so it is clear what the dimensions describe. Ask who confirms the finished surface and which drawing revision will govern the order. If one quote includes a fitting below the beam and another leaves it undecided, record that difference alongside the headroom figures. Keep estimates separate from confirmed values so an apparently similar height does not conceal a different set of assumptions.
Keep the agreed datum on the final project drawing
Before committing to an order or installation, review the latest section against the confirmed paving level and actual façade. Keep the reference level, headroom, roof movement envelope and frame line on the same drawing, and mark superseded drafts clearly. If paving thickness, a threshold, roof option or wall opening changes, recheck the height relationships instead of carrying an old figure forward. A change at floor level affects headroom; adjusting the roof to compensate can also change its position against the house. Identify who will confirm any provisional level and when, so an unresolved assumption is not mistaken for an agreed dimension.
For the Bloomcabin Bioclimatic Pergola configuration being ordered, retain the drawing that records the chosen roof option and its relevant operating positions. Where attachment, an existing structure or local project requirements affect the proposal, ask the relevant qualified professional to verify them. Keep the agreed dimensioned drawing with the order so the installer can set out from the confirmed reference level, not an illustration. Record any agreed change on the current drawing rather than leaving it only in a separate message. The final record should make clear what is measured, from where and in which roof position.
Frequently asked questions
Is there a standard height for a pergola?
There is no single height that suits every site. Set the proposal from the clear headroom needed along regular routes, the fixed frame below the roof and the travel space of any moving parts. Measure from finished paving and check the roof line against the house.
Where should I measure pergola headroom?
Measure vertically from the top of the finished paving to the underside of the lowest fixed part over a route people use. Check more than one point if levels or beams change, and record any moving components separately.
Should pergola height be measured from the slab or paving?
Use the finished paving level as the reference. If the paving is not installed, mark the level as provisional and include the planned build-up using dimensions confirmed by the person responsible for that work.
Does an open roof need more headroom than a closed roof?
That depends on how the roof moves; parts may occupy space above, below or beside the frame. Ask for dimensioned drawings of the relevant positions and compare the full movement envelope with the house and the space below.
How can I judge pergola height against my house?
Plot the proposed roof line on a scaled elevation with doors, windows, eaves and fascia. Review it from the terrace and the adjoining room. There is no universal façade ratio, and visual balance does not replace checking headroom and roof movement.
Good pergola height is a relationship between people, the moving roof, finished paving and the house—not a catalogue number in isolation. A scaled section makes those relationships visible: it records usable clearance, the mechanism’s travel, the fixed underside of the frame and the roof line against the façade. With every dimension tied to a confirmed floor datum, you can assess a proposal for the actual terrace instead of judging it from an image. Choose a height whose headroom and appearance both work, and keep the same reference on the final project drawing.
