
What Solar-Powered Pergola Lights Can Realistically Provide
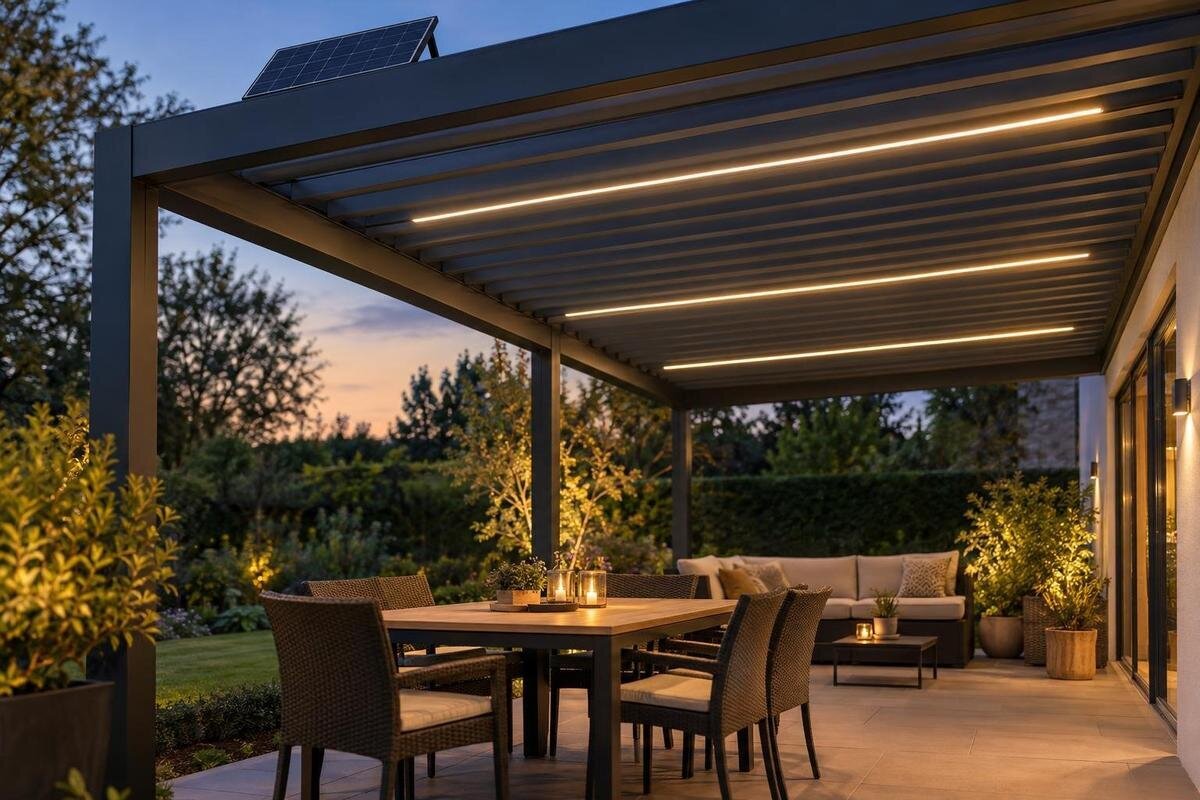
Pergola lighting
Solar-powered lights can make a pergola more inviting after sunset, but they are not automatically a substitute for a mains-powered lighting plan. Useful output depends on what the light must do, where its panel receives daylight, how its battery is used and how much charge is available in that season. Define the task first—soft ambience, a decorative accent, route marking or light for an activity—then compare the exact fixture’s output and runtime with the site you actually have.

Define the job each light must do
Begin by naming the job in plain terms: a warm glow around a lounge area, a small pool of light on the table, visibility along a path, or enough light to read a label while serving food. These are different demands. Decorative points can be attractive at relatively low output; a route light must be positioned so people can see a step or turn; close work needs useful light on the work surface, not merely a bright-looking bulb overhead. Avoid writing “light the pergola” as the specification. It gives no clue about how much light you need, where it should fall or how long it must last.
Sketch the intended positions and the surfaces people use after dark: the dining table, chairs, braai preparation area, doorway and paths in or out. Note whether you need light across the whole footprint or only in a few zones, and how long each zone is occupied. The Bloomcabin Bioclimatic Pergola listing gives available sizes from 9 to 24 m²; that helps identify the scale under consideration, but square metres alone do not show how much light a solar fixture will spread. Keep ambient lighting and task lighting as separate requirements on the sketch.
Panel position matters as much as lamp position
Solar lights need a panel exposed to daylight, while the lamp is often wanted beneath a roof or beside seating. A self-contained panel-and-lamp unit ties those positions together; a product with a separate panel may allow the lamp to sit in shade while the panel is placed somewhere sunnier. Whether that arrangement is available, how far apart the parts can be and how the panel may be mounted are product-specific. Check the maker’s manual rather than assuming every solar light has a remote panel or a long lead.
Draw the panel location as well as the lamp location on your site plan. Nearby walls, eaves, trees, fences and the pergola itself can block sunlight for part of the day; a panel that looks exposed at midday may be shaded earlier or later. A wall-mounted layout can have its own shade pattern, so assess the actual wall and surroundings. The Bloomcabin Wall-Mounted Pergola listing identifies a structure option, not a guaranteed sunny place for a panel. Do not choose a position solely because it hides the hardware if it reduces the panel’s charging opportunity.
Allow for seasonal charging conditions
Charging conditions vary through the year. In South Africa, daylight hours and the sun’s angle change with the seasons. Local cloud, trees and nearby buildings further affect what reaches a panel. A sunny summer afternoon is therefore a poor sole test for a light you expect to use on winter evenings as well. More daylight can improve the charging opportunity, but it does not establish a particular runtime: the panel, battery and control settings also affect how much energy is available to the light.
Observe the proposed panel position at different times of day and, where possible, in the season when you expect to rely on it most. Note whether a roof edge or shifting shade blocks sunlight, and whether cloudy weather is common during the relevant period. When considering the Bloomcabin Pergola, mark both its proposed footprint and the panel location on your plan. That keeps the size comparison separate from the question of how much charge the light can receive. Ask about the light maker’s charging conditions and compare them with the site, not a generic “sunny day” assumption.
Read runtime claims in context
Treat an advertised runtime as conditional information, not a promise for every night. Check the exact light model and the conditions behind the figure: does the test start with a fully charged battery, is the lamp on its highest or an economy setting, and does it stay on continuously or activate intermittently? A motion sensor may extend the time between charges by reducing the hours the lamp is on, but that is not the same as providing uninterrupted illumination. If the specification leaves these points unclear, ask for clarification before relying on the stated number.
Write down your own evening requirement before comparing claims. Decide whether the light must stay on steadily from dinner through clean-up or only come on when someone approaches; the actual duration and pattern matter more than a maximum runtime with no stated mode. Consider periods of low charge after cloudy weather as well as a fully charged start. Check whether the light dims, switches off or changes behaviour as the battery runs down. If the supplier cannot explain the test conditions, treat the runtime as uncertain rather than comparing it directly with another model’s figure.

Brightness depends on more than lumens
Lumens describe the amount of light a source emits, but they do not show by themselves how bright a table or path will look from a particular position. A narrow beam may light one spot and leave nearby chairs dark; a broad or diffused beam may feel softer while spreading the same output over a wider area. Optics, mounting height, spacing and nearby surfaces all influence the result. Where available, look for a beam pattern or other lighting data alongside a lumen figure, and check what the information represents. A single headline number is not proof that a fixture will cover the full pergola.
Test the question against the job: can guests see one another without looking into a bare light source, can someone find the edge of a step, and is the table lit for the planned activity? If you can trial a sample or temporary arrangement after dark, it may reveal glare and dark gaps better than a product photo viewed in daylight. For a layout based on the wall-mounted pergola, include the wall, seating and table in the trial rather than judging a single light in isolation. Ask for information tied to the exact luminaire and proposed arrangement.
Match the battery to your evening routine
The battery is the buffer between the day’s charging and the evening’s use. The useful question is not only how large it sounds on a label, but how much stored energy the light can use at the selected brightness and how its controls manage low charge. Some models have adjustable settings or sensors; others may offer fewer choices. Compare the stated modes, charging input and expected operating behaviour with the task you defined. Check whether the battery is replaceable, what replacement part is specified and whether the manual describes routine care. Do not infer serviceability from the appearance of the casing.
Think about how often the area is used across a week. An occasional supper may allow for a separate rechargeable lantern as backup, while a light expected to run every evening leaves less room for uncertain charging. If you plan a backup, make sure it suits the outdoor setting and can be used without creating a cable or trip hazard; follow its own instructions. Consider what happens when the battery ages or needs replacement. Long-term usefulness depends on access to the specified battery and on the light continuing to meet the task, not merely on its performance during its first evening.
Confirm mounting approval and clearance
Confirm that the exact fixture can be mounted at the proposed point on the exact pergola. A product page naming a structure does not establish that a separate luminaire, panel or cable is approved for its frame, or that a particular fixing point can take it. For the bioclimatic pergola model, request mounting information for the chosen light and position. If the pergola has moving roof parts, confirm that the arrangement will not obstruct their operation. Do not drill, clamp or attach equipment based on a generic photograph or a guess about the frame.
Check clearances and movement in the actual layout. A fitting may reduce headroom, conflict with an opening panel, obstruct access to a control, cast unwanted shadows or put a cable where it can be snagged. Record the light’s dimensions and proposed position, then ask the pergola supplier or a suitably qualified installer to confirm compatibility. If fixed electrical work is involved, have a qualified electrical professional assess it. This is a compatibility check, not a reason to improvise alterations to the roof or structure.
Check outdoor suitability for every component
“Outdoor” does not describe a single exposure. An open-sided pergola can leave a fitting exposed to rain, wind-driven moisture, dust and strong sun; a roof may reduce some exposure without removing it, particularly near the edges. Check the exact fixture’s stated outdoor or ingress-protection rating and the manual’s limits, rather than relying on a general retail label or the fact that the lamp has a solar panel. Ratings may differ between the lamp, remote panel, battery compartment, sensor and connectors. Verify that each component is suitable for its proposed position, and note any cleaning or storage conditions specified by the maker.
A wall-mounted pergola configuration is a structure decision, not an outdoor rating for a light added later. Check what faces the weather at the mounting point and whether water could collect around an enclosure, cable entry or connector; follow the product instructions and seek qualified help where needed. Check that the stated temperature range suits the site, particularly if equipment will sit in direct sun. If replacement batteries or detachable panels are separately exposed, check their limits too. A light that charges well but is not rated for its position is not a practical choice.

Use solar ambience where it fits the task
Many solar models make more sense for low-level ambience, decorative accents or marking an approach than as the only source for an activity that needs consistent, broad light. If you routinely read, prepare food or host late, compare the fixture’s documented output and worst-season runtime with that requirement. Do not assume solar means mains-equivalent brightness or that a decorative design can be upgraded simply by adding more units; each light still needs suitable charging exposure and approved mounting. If those conditions cannot be met, plan a dependable alternative for the task rather than expecting a small solar unit to cover every use.
Think in layers: a restrained background glow can make the setting welcoming, while a separate, purpose-selected source can illuminate a work surface or route. The sources need not use the same power arrangement, but each outdoor fixture must suit its location, and any fixed electrical connection needs qualified assessment. When reviewing the regular Bloomcabin pergola model, treat the pergola and the lighting package as separate decisions unless a specific light is confirmed for that configuration. Product images alone do not prove what is supplied, what fits or how bright it will be.
Compare lights against a realistic evening
Compare each candidate against one written scenario: the season, panel position, expected charging conditions, activity, light setting and evening duration. Then record the exact model’s output and distribution information, runtime by operating mode, charging conditions, battery replacement details, outdoor ratings for every component and mounting approval for the proposed position. If an item is missing, label it “unknown” rather than filling the gap with an estimate. This makes it easier to see whether the product’s claims answer your need instead of comparing unrelated headline figures across different models.
If the pergola is still being selected, keep its footprint, roof or wall arrangement and furniture plan alongside the lighting brief. If your shortlist includes the bioclimatic pergola model, remember that the structure listing is not a lighting specification; verify the exact fixture and its proposed mounting position separately. Ask which fixtures, if any, are confirmed for the chosen configuration and what mounting approval applies. Choose solar where the panel can receive the required charge and the documented runtime meets the task. For uses that cannot tolerate an unlit evening, plan a suitable backup or another verified lighting arrangement.
Frequently asked questions
Can solar lights replace mains-powered pergola lighting?
Sometimes, for a modest and clearly defined task; not automatically for lighting a whole area or supporting detailed work. Compare the exact fixture’s output, panel exposure and runtime with your needs and the season. If you need steady light for long evenings, do not infer mains-equivalent performance from a headline figure. Look for documented performance in the mode you plan to use, and arrange a reliable alternative if it falls short.
Will a solar panel charge beneath a pergola roof?
Only if enough daylight reaches the panel for that product’s charging needs. A roof or nearby shade may reduce its exposure. A light with a separate panel can sometimes let you place the lamp and panel in different positions, but the manual determines the permitted arrangement, cable reach and mounting. Check the proposed position at different times and in the season when you expect to rely on the light.
How many hours can solar pergola lights stay on?
There is no universal runtime. It varies with the exact panel and battery, the charge received, brightness setting, sensor pattern, weather and battery condition. Compare the maker’s figure for your intended mode, and check whether it assumes a full charge or intermittent operation. Ask what happens when charge is low. Plan around conditions you are likely to experience, not an unexplained maximum.
Are all solar lights suitable for outdoor use under a pergola?
No. Suitability depends on the specific light and where each component will sit. Check the manual and outdoor rating for the lamp, panel, battery enclosure and connectors. Solar operation alone does not establish protection from rain, dust, direct sun or wind-driven moisture. Confirm that every part is suitable for its proposed position, and use only a mounting arrangement approved for the fixture and pergola.
What should I use on winter or cloudy evenings?
Treat seasonal charging as a limit to plan around; an optimistic runtime claim does not remove it. Check the exact fixture’s charging and operating conditions against the weather and exposure you expect. For a task that cannot be interrupted, such as seeing a route or preparing food, plan a suitable independent backup or a different verified lighting arrangement. Do not rely on a summer trial alone.
Solar lights work best when the task, panel exposure and expected runtime are clear. Plan for the season when you most need them, not only a bright summer afternoon, and assess the light where people will sit or work. A modest light that reliably provides a decorative accent may be a better match than a brighter-looking fixture with uncertain charging. For reading, food preparation or long evenings, compare documented performance carefully and plan another source if solar cannot meet the brief. The exact light needs a suitable place to charge, an approved place to mount and enough verified output for the job.
