
Pergola Gutter Overflow: Checking Each Drainage Point
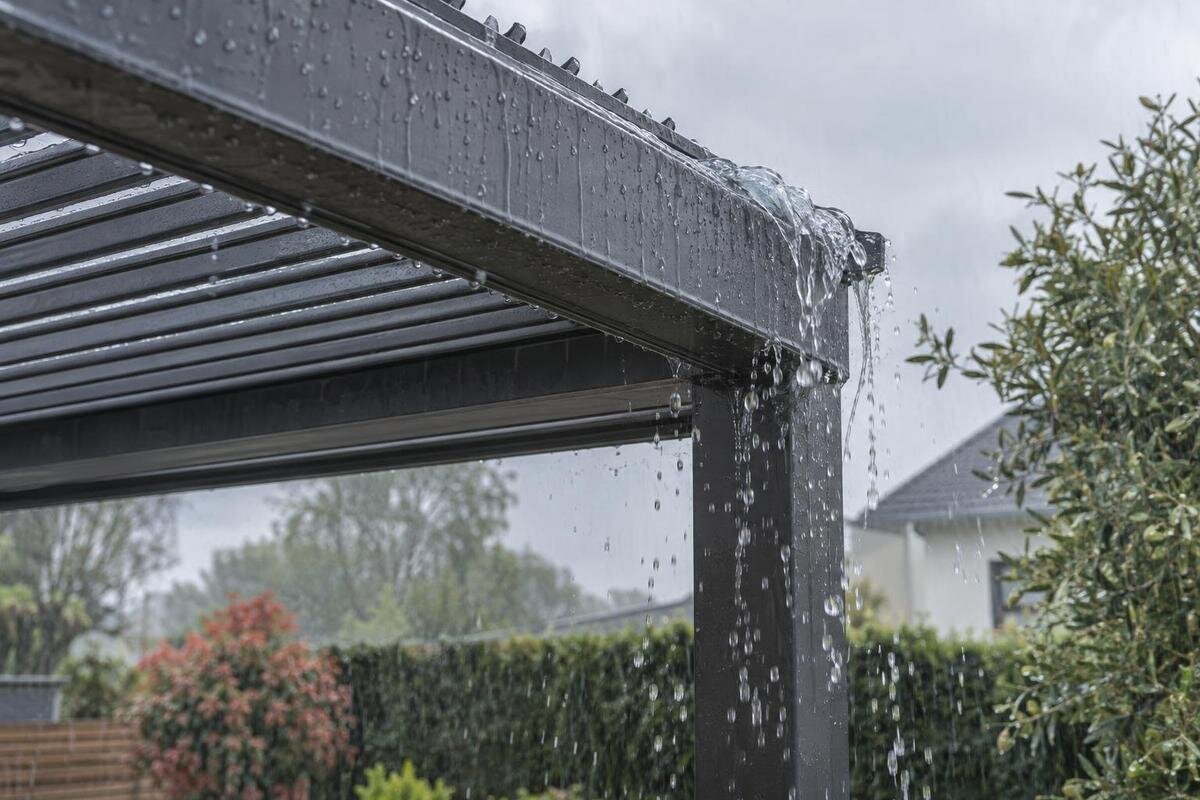
Pergola drainage
An overflowing pergola gutter is a symptom, not a diagnosis. Water may be held back by debris in the channel, restricted at the outlet, slowed farther along the downpipe or arriving faster than the particular system is designed to drain. A leaking joint or rain driven under the roof can look similar from below, so begin by finding exactly where the water escapes and when. The sequence matters: clearing the channel first can erase useful evidence while leaving an outlet or downstream restriction untouched. This guide follows the route from collection surface to final discharge, using safe observations and the documentation for the installed model. It is about tracing a fault, not a routine cleaning schedule or a promise that any pergola will cope with every storm.

First distinguish overflow from a leak
Overflow means water has reached and escaped the edge of a designed collection channel. That is different from water dripping through a roof joint, running down a support, or being blown in from an open side; all can appear beneath the same part of a pergola. After the rain, look for a wet line or deposit at the channel lip, a mark at a connection, or a trail beginning somewhere above it. From a safe position during rain, note whether water visibly rises in the channel before spilling. A wet beam or post alone does not show that the gutter has failed.
Classify the visible source as closely as possible: over the channel edge, through a join, from a downpipe connection, or from under the roof with no visible route from the gutter. Note whether the first water appears only after the channel has filled or from the beginning of the rain. This timing can help distinguish a likely overflow from a direct leak, but it cannot identify a blockage or prove there is one. If you cannot see the path, record it as uncertain. Avoid taking fittings apart just to turn an unclear symptom into a more confusing one.
Record one rain event before changing anything
Before clearing leaves or moving an outlet, capture one event as it happens, but only if you can observe from a safe, sheltered position. Record the date, roughly how long rain had been falling when overflow began, whether it was brief or sustained, and whether wind was driving rain from one side. Note the point of first spill, whether flow stayed there or spread along the channel, and when it stopped. These observations need not estimate rainfall in millimetres; they are a record for comparing events, not a capacity calculation. If you have a local weather record, save it as context rather than treating it as a measured test.
Take photos or a short video from ground level, including the affected edge, the point where water leaves the system and, if visible, the downpipe outlet. Do not stand beneath a bulging section or lean over a wet edge for a better view. Record the exact model and any changes to the roof or enclosure. If the paperwork only identifies a regular unit, the Bloomcabin Pergola product page can help identify that product family; the page name does not replace the drainage drawing for the installed model. Save the images with the event notes.
Map the full drainage route
Trace the route on paper before probing anything. Start at the roof collection surface or edge, follow any gutter or internal channel to the outlet, then follow the downpipe through visible bends and joins to its final discharge. Some parts may be concealed within the frame or support, so use the installation instructions or drainage diagram to establish the intended path. Mark which points you can verify by sight and where the drawing is needed. Do not assume that every side collects water, that all channels connect, or that water runs through a post because another design does so.
Make a simple sketch with the roof edge, each visible collection channel, outlet, support and the place where water is meant to exit. Label concealed sections as unknown rather than drawing an imagined route. For a bioclimatic structure, match the model listed under Bloomcabin Bioclimatic Pergola to the installed configuration before choosing a drainage drawing. A diagram for another roof type may not describe the route you are tracing. For a wall-fixed or enclosed layout, mark the boundary next to the building and any changes made to that edge. The sketch should distinguish what you can see from what still needs confirmation, without requiring you to remove covers or alter the assembly.
Inspect the channel for a local obstruction
Look for material that can make a dam at one point: leaves, seed pods, fine grit, roof debris or compacted organic matter. A pile just before an outlet, material caught at a seam, or a mass against a guard can restrict flow even if the rest of the channel looks clear. Focus on a visible obstruction that coincides with the spill, rather than treating a light film of dirt as proof. Check for a displaced cover or insert only if the system has one and its instructions identify how it should sit. Note the location before anything is removed; the distribution can help explain why one point backed up.
Do not climb onto the roof, reach across a wet edge or work from a ladder in rain to inspect a channel. Where the gutter is high, concealed, damaged or impossible to see safely, ask a qualified installer to inspect it. If you are identifying a wall-mounted model through Bloomcabin Wall-Mounted Pergola, distinguish the product listing from the drawing needed to locate its wall-side collection route. A wet wall joint is an observation to record, not evidence that the joint forms part of the drain. Do not push rods or sharp tools into a hidden gap, where they may damage a fitting or send debris farther along the line. Clear only a visible obstruction by a method allowed for that model.

Check the outlet opening and any guard
Once the channel is visibly clear, examine the outlet separately rather than treating the gutter and pipe as one component. A strainer, leaf guard or fitted cover can collect debris across its face; it may also be displaced or damaged. Check whether water could reach the opening from the channel, and compare the visible part with the installation information. Do not remove a guard automatically: it may be part of the specified arrangement. Not every opening is intended to be enlarged, reshaped or fitted with generic mesh. If the fitting is missing or its purpose is unclear, take a photograph and ask for identification before changing it.
Notice whether the channel holds water up to the outlet while little appears to enter the opening, or whether the channel remains clear there and the spill occurs elsewhere. Record these observations separately from anything you can see at the pipe’s discharge: the outlet view alone may not reveal a concealed blockage. When sourcing a replacement for a model shown in Bloomcabin’s regular pergola listing, confirm the correct outlet or guard and its fitting method for the exact installed model. A similar-looking part is not a reliable compatibility match. Keep the photograph of the existing fitting with the model details so that the enquiry concerns the component actually installed.
Follow the downpipe to its discharge
After the outlet, inspect every visible section of the downpipe, including bends, joins and the termination. Look for leaves at an open end, a disconnected joint, visible damage, a crushed section or water escaping before it reaches the intended discharge. Overflow at the gutter can be an upstream sign of a restriction farther down, whereas water leaking from a joint may indicate a separate connection fault. These clues are not conclusive when a pipe disappears into a support, wall or ground. Mark where visibility stops; a concealed section should not be treated as clear simply because no blockage is visible.
During rain, observe the discharge point from a safe position. Is water arriving? Does it appear to stop at a connection or back up at an accessible end? Check whether the outlet feeds a container or connected drainage system that could be full or obstructed, without opening buried lines. For a structure identified through Bloomcabin’s wall-mounted pergola page, use the installation drawing to establish where its drainage connects to the site’s discharge route. If that connection is concealed, mark it for the installer to investigate rather than assuming it is clear. Avoid improvised flushing with a hose, which can send water into the wrong part of the structure and does not recreate rainfall conditions.
What the spill location and timing can reveal
Use the spill position as a clue, not a verdict. An isolated overflow near one outlet, especially when there is visible debris there, makes that point the first place to investigate. A spill at a channel join directs attention to the join; water at a downpipe connection makes the connection and route below it relevant. If several points overflow together, or a long stretch spills only at the peak of a downpour, do not assume each outlet is blocked. A common restriction, the rate of incoming water, or conditions beyond the system’s stated limits could be involved. More than one issue can exist at once.
Compare the timing and location across separate rain events. Overflow that starts soon after rain begins, appears on one wind-facing side, or eases as rain slows can help describe the fault, but does not prove a cause: wind-driven rain, roof layout, hidden restrictions and drainage limits can overlap. Record the roof configuration and whether adjacent roofing feeds the same area. If you are comparing a setup with the Bloomcabin bioclimatic range, keep observations about the installed roof separate from information about other configurations. Note which details are confirmed and which remain uncertain. That distinction makes the event record more useful than assigning a cause solely because the spill coincided with a downpour.
Check the model’s stated drainage conditions
Before deciding that a clear channel is too small, find the documentation for the exact model and installed arrangement. Look for a drainage diagram, intended outlet positions, the roof layout it covers and any stated weather-performance limits. The catalogue name alone cannot establish drainage capacity or watertightness. Check whether the structure has been changed, whether accessories or an enclosure alter the original configuration, and whether runoff from an adjacent roof is entering its collection route. Do not apply a generic rainfall figure, a guarantee from another product, or a limit for a different model.
If you are choosing a replacement or comparing layouts, identify whether the product is regular, bioclimatic or wall-mounted, then request technical information for that exact model and configuration. When considering Bloomcabin’s bioclimatic pergola listing, frame the enquiry around the proposed roof, enclosure and drainage arrangement rather than asking whether pergolas in general can withstand a storm. Ask the seller or installer which drainage diagram and weather guidance apply to those options and the site. Keep the answer specific to the configuration being considered. If no model-specific answer is available, leave that performance question unresolved rather than treating the product’s appearance or category name as evidence of suitability.

When to ask an installer to investigate
Ask the installer or manufacturer for help if the outlet or pipe is concealed, a joint has shifted, a component looks distorted, water enters at a wall connection, or you cannot inspect safely. Professional help is also sensible when the route appears clear but overflow recurs, symptoms began after an alteration, or clearing a visible obstruction made no difference. Do not loosen supports, cut a guard, enlarge an outlet or reshape a channel to improve flow; those changes can affect the assembly and make the original fault harder to assess. If water is entering the building or causing damage, describe that promptly when arranging an inspection.
Send a concise inspection summary: exact product model and configuration, purchase or installation records, a sketch of the route, dates and conditions of observed spills, photos or video, recent alterations, and what you could see at each outlet and discharge. If Bloomcabin’s regular pergola page appears to match the installed structure, include it as a reference alongside the available records, not as confirmation of the exact model. State which identification details remain uncertain before parts are ordered. Describe what happened first, where the water escaped and whether it reached the final discharge. This gives the installer a clearer starting point than saying only that the gutter leaks.
Confirm the repair during a later rain event
After an obstruction or confirmed connection fault has been corrected using the manufacturer’s instructions, observe the system again during a naturally occurring rain event. Use the same safe viewpoint and note whether water reaches the outlet, travels through the visible downpipe and leaves at the intended discharge without the earlier spill. Keep the new observations alongside the original event record so that changes in both the symptom and the rainfall remain clear. This can show whether the symptom has stopped under those conditions; a dry day or a light shower cannot establish how the system behaves in heavier rain. Compare similar events where possible, and describe any differences that limit the comparison.
If overflow remains, report what changed and what did not: where debris was removed, whether the outlet was inspected, which pipe sections remain concealed, and where the spill still appears. Ask the installer whether the next check is a hidden restriction, a fitting issue or the documented limit of the exact model. Keep work within the product instructions and leave elevated or inaccessible components to a qualified person. The useful outcome is a cause supported by observations and the correct drainage information, not a guess based on the wettest point of a storm.
Frequently asked questions
Does overflow at one point always mean that point is blocked?
No. A spill near an outlet makes it a useful first inspection point, but water may be held back farther down the pipe or exceed the system’s documented conditions. Look for an actual obstruction and trace the route before deciding.
Why does the pergola overflow after I have cleared the gutter?
Clearing the visible channel does not clear a restricted outlet, a pipe bend or a concealed drain. Check where water leaves the system and whether the spill returns in comparable rain. If the route appears clear, verify the model’s limits and installed configuration.
Can I test the drain with a garden hose?
Avoid an improvised hose test. It can send water into places not reached by normal runoff and does not reproduce a rain event. Observe natural rainfall, or use only a test method specified by the manufacturer or installer.
Should I remove a leaf guard to stop overflow?
Not without checking the instructions for the exact model. A guard may be part of the specified arrangement; clear or replace it only as directed. Do not cut, reshape or substitute a generic mesh.
When should I contact an installer?
Ask a qualified installer for help if the route is concealed, access is unsafe, a component is damaged, a wall connection leaks, or overflow persists after visible obstructions are ruled out. Provide photos, timings and the exact model name.
Reliable diagnosis comes from following the water rather than guessing from the size of the puddle. Establish whether it is true overflow, mark the spill point, inspect the channel, outlet, downpipe and final discharge in sequence, then compare the evidence with the documentation for the installed configuration. A visible obstruction may be straightforward to identify; a hidden restriction or a limit that appears only under particular rain conditions needs model-specific assessment. Keep the observations, and avoid changing parts until the route is understood.
