
Choosing a Pergola Before Patio Works Begin
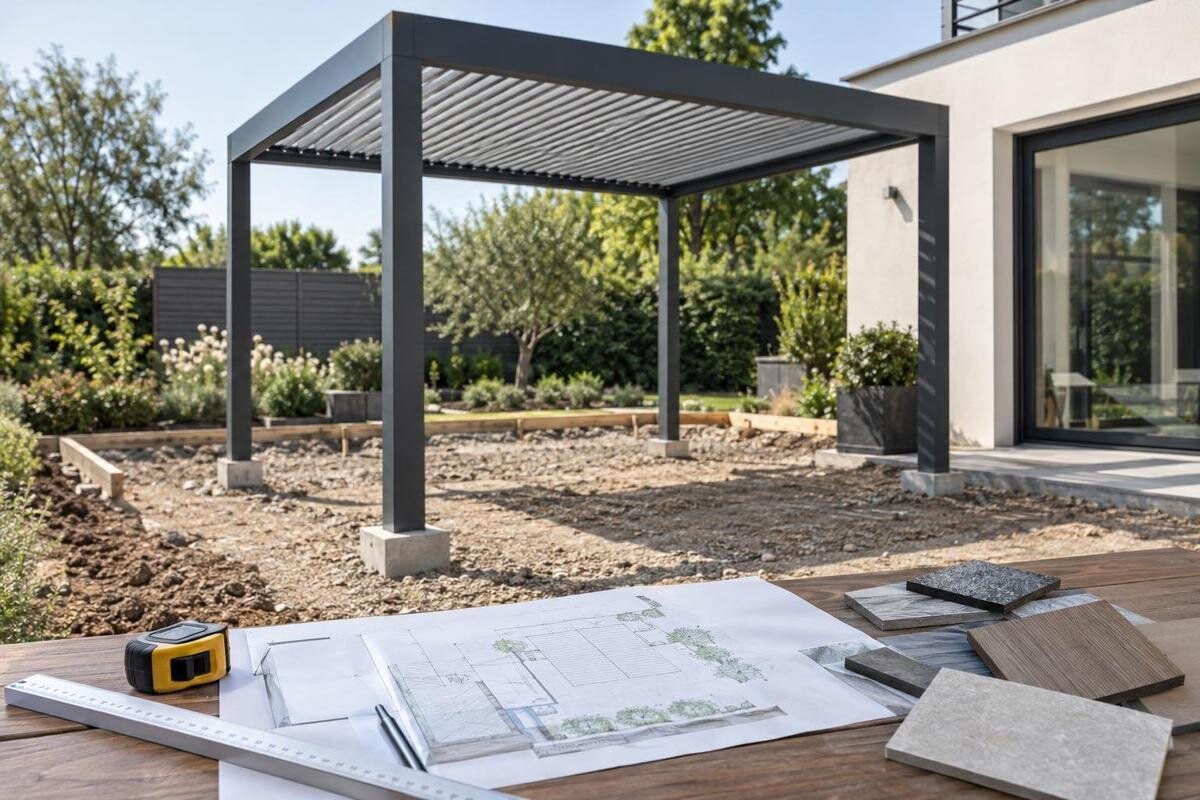
Pergola project planning
Pouring a slab or laying pavers can lock in levels, edges and support locations long before the pergola arrives. Settle the proposed position and get dimensions for the exact product configuration while the patio plan can still change, then coordinate those details with the builder, landscaper and relevant service trades. This guide focuses on the handover between pergola and patio works: what needs to be drawn, who must confirm it, and which decisions should not be left until the finish is down.

Choose the pergola layout while the patio plan is flexible
Begin with the area you want to use, then place a provisional pergola outline on the house or landscape plan. Include dining furniture at its intended size, the route between the house and garden, garden beds, steps and any gate or pool access that must stay clear. Check the position from inside the house as well as from the patio: sightlines, door operation and nearby windows can change the preferred location. If you expect later additions such as screens or lighting, mark their proposed location and access needs now. This separates the roofed footprint from the space needed to move around and use the patio. A shifted outline can still be reconsidered on paper; after concrete or paving, it may mean cutting finished work or changing support locations.
Record why the position works, its orientation, approximate area and fixed constraints such as a boundary, gutter, tree or existing service. If the Bloomcabin Pergola listing is on your shortlist, treat it as a product to discuss rather than a set-out plan: its name or image cannot tell the paving crew where supports belong. Ask for dimensions for the exact configuration under consideration and carry them into the patio drawing. Mark measurements that are still provisional, so the builder or landscaper knows what can change. This gives everyone a common starting point while the location and finishes are still flexible.
Put the footprint and support points on the plan
Treat dimensions as a set of reference lines, not a single advertised width and depth. The project drawing should show the pergola’s overall external footprint, all support and fixing locations, any projection beyond those points, and relevant heights against the house and proposed finished patio. Ask which measurements apply to the exact configuration and whether each is taken to an outer edge, a centre line or a fixing plate; these are not interchangeable. The Bloomcabin Pergola range is listed from 9 to 24 m², but area alone cannot tell a contractor where to place a support or how far the structure extends over the patio. Request any clearance dimensions identified for the chosen configuration as well.
Overlay the drawing on a scaled site plan showing the house, existing slab, boundaries, doors and windows, steps, drainage points and fixed garden features. Mark a door’s opening arc and the routes people need to use; check that furniture will not block a path or access to a drain. Use the same fixed references, such as a house corner and a boundary line, on the plan and at the site set-out. If the supplier and builder use different measurement references, have them agree which one applies before dimensions are transferred. Ask the builder or installer to confirm the proposed points on site before excavation or concrete work. A perspective image may help with appearance, but it is not a reliable measuring document.
Agree how the supports meet the finished patio
Find out what must be below every support point before deciding how to build the patio. Ask the supplier for the support requirements of the selected configuration, then have an appropriate structural professional apply them to the actual site and ground conditions. Do not assume pavers, tiles or another hard finish can carry a post simply because they feel solid underfoot. If a new slab is proposed, its designer and the concrete contractor need the confirmed support layout before the slab details are finalised. If an existing slab is to be used, have its suitability assessed instead of guessing from its appearance. For the Bloomcabin Wall-Mounted Pergola, request the support and fixing layout for the chosen configuration.
Make responsibility explicit: who specifies the support design, who prepares the ground, who forms or installs it, and who checks its position before it is covered. If the site has a slope, fill, a retaining wall or ground that has changed, raise that condition with the structural professional rather than relying on a patio sketch to settle foundation details. Keep any existing slab or site information with that review, so the proposal reflects what is actually there. If excavation reveals a drain or another obstruction at a proposed support point, refer the change to the people responsible for the design before moving a post or altering concrete. That keeps an on-site adjustment from becoming an unrecorded structural decision.
Coordinate roof runoff with patio drainage
Set patio levels and water paths together. Mark the proposed finished surface, house threshold, any drainage channel or pit, and where runoff from the pergola roof could land. Ask for the roof and water-management detail for the selected configuration: does it direct water to identified outlets, or shed it around an edge, and where are those points? Do not assume every pergola has the same gutters or outlets. If the Bloomcabin Bioclimatic Pergola is on the shortlist, base the discussion on its specific configuration drawing, not its product category name. Include existing downpipes and drainage access points on the same plan.
Take the proposed route to the landscaper or drainage contractor while levels can still be changed. Confirm how any pergola runoff joins the wider patio drainage plan, whether existing pits remain accessible, and whether a proposed connection or discharge needs local approval. Avoid leaving water to collect at a house threshold, a support location or a low corner, and do not let an outlet shown on a drawing disappear beneath paving. A drainage professional can advise how the site should manage runoff. The project team still needs to record the route, the responsible trade and any unresolved outlet detail before the finish is laid.

Check the house wall before choosing a wall-mounted layout
Where the pergola meets the house, check the actual building fabric before fixing the patio line. Cladding, eaves, gutters, windows, downpipes, vents and roof overhangs can affect the available position, while a finished wall surface does not show what is behind it. The wall-mounted Bloomcabin Pergola option is a reason to request a model-specific fixing detail, not evidence that any wall is suitable. Have the supplier identify the proposed interface and ask an appropriately qualified structural or building professional to confirm the house can accommodate it before groundworks are set around that location. Check that doors and windows can still open as intended.
Include weatherproofing and finish repairs in the scope if the chosen layout affects cladding, flashing, roof edges or other parts of the building envelope. Agree which trade handles any penetration, sealing and reinstatement, and how the patio finish meets the house without obstructing existing drainage or service access. Check that nearby meters, vents and other service points will remain accessible. If the proposed wall position cannot be confirmed, keep the patio drawing flexible and resolve the attachment or revise the layout before concrete and paving are fixed. A general note saying wall-mounted is not a construction detail; keep the relevant drawings with the version sent to the patio trades.
Reserve service routes before the surface is laid
List services you may want at the patio before finalising paving: lighting, a fan, controls, an outdoor kitchen, a water point, irrigation or speakers can affect where a cable, pipe, outlet or access point needs to go. Separate what is part of the pergola supply from what requires a separate service design; do not infer included equipment from a product photograph. Ask each relevant trade to locate proposed connection points and routes on the shared plan, checking them against supports, drainage and doorways. Mark where switches or controls need to remain reachable, so a post, bench or finished surface does not block them later. This is the time to reserve routes, not improvise them after paving.
If the bioclimatic pergola listing is being considered, ask the supplier whether the exact configuration calls for an electrical connection or reserved clearance before the electrician completes the rough-in; the model name alone does not establish that. A qualified electrician should decide how electrical work is designed and installed under applicable local requirements. The patio plan needs to show the agreed route and termination points, not specify how to wire them. Where no services are planned, record that too, so later work does not cut across support locations or drainage without a review. Keep proposed service points visible on the final paving plan.
Set patio levels and paving details around the pergola
Agree finished levels, not just current ground level. If paving, tile or another raised finish is added after a slab, its build-up changes the height at the house threshold and around the pergola base. Ask the builder and landscaper to show the final surface height against door thresholds, steps, drainage channels and garden edges on the same drawing. Check that paths remain usable and drainage points retain access; a small height change can affect door operation, create an awkward step or leave a cut edge exposed. Where levels are not yet established, mark them as provisional instead of letting each trade assume a different reference level.
Coordinate the paving layout with the confirmed support positions. Decide how paver joints, cuts, border courses and edge restraints will meet any base plates or posts shown on the drawing, and keep access to drains and service points. Agree whether the finish runs beneath or around those supports from the actual support detail; there is no need to guess a single method. Do not shift a support just to line it up with a paving joint unless the supplier and relevant structural professional agree to the revised position. Also agree the installation sequence and protection for finished paving rather than leaving every cut to be solved on site.
Write down each trade’s scope and handover
Write a short responsibility schedule beside the site plan. Name who measures and sets out the pergola, who specifies and prepares the supports, who supplies and assembles the product, who lays the patio, and who deals with drainage, electrical work, wall repairs and reinstatement. Some contracts include only a defined part of that chain; do not assume the pergola installer pours the slab or that the landscaper provides fixing details. For each task, note its inclusions and exclusions, what information must be supplied first, and what counts as completion, including any check or sign-off required by the responsible professional.
Agree the handovers with the lead builder or project manager before work starts: which drawing revision each trade will use, who confirms set-out on site, and who must be contacted if a service, wall condition or level differs from the plan. Set a pause point before supports are covered by concrete or paving, and name one person to circulate changes. If pergola installation and patio construction are contracted separately, record the boundary between them, including access for assembly, protection of new finishes and repairs if work is disturbed. State who can approve a site change, so an informal decision is not missed by other trades.

Survey the site and check local approval requirements
Prepare a site pack for the supplier, builder and landscaper: a measured plan, photos from more than one angle, the intended pergola position, assumptions about finished levels, known drainage points and visible services or constraints. Mark which dimensions are confirmed and which remain provisional; photos alone do not show heights or buried services. When requesting a quote or discussing a configuration for the Bloomcabin Pergola, send the same marked-up plan to everyone and identify its current version. Include existing plans as background, but use actual site measurements and appropriate service-location work to confirm what is present. Label the reference points used for measurements so each trade can read the plan consistently.
Check whether local approvals, property conditions or insurance requirements apply before committing to irreversible work. Requirements depend on the site and relevant local rules, so ask the local council or a building certifier where appropriate; involve an owners corporation or strata manager if applicable, and check insurer requirements where relevant. Arrange for underground services to be located through the appropriate local process before excavation, and refer structural uncertainty to a qualified professional. A product quote or supplier drawing does not substitute for consent that may be required or for a site-specific assessment. Keep written advice or approvals with the final drawing so contractors can see the constraints that affect their work.
Agree a final drawing and hold point before paving
Before patio work is locked in, agree on one current drawing that identifies the selected pergola and configuration, overall footprint, support or fixing locations, relevant heights, connection to the house, drainage route and any service points. Mark the revision and date, then send it to every trade whose work touches those areas. If the product choice changes, replace the old drawing and check the knock-on effects on the slab, paving, drainage and services instead of relying on a verbal update. If you choose a Bloomcabin bioclimatic model, make sure the final drawing reflects that exact configuration rather than an earlier option.
Walk the position on site with the relevant contractor before excavation, pouring or laying the finished surface. Confirm that marked supports, clear routes, door openings and service or drainage points match the drawing and actual site. If a clash appears, pause the affected work and have the responsible supplier, designer or trade agree a change before anything is moved, cut or covered. Record the revised position and notify every affected contractor. A documented hold point is easier to manage than discovering after paving that a support, outlet or access point sits in the wrong place.
Frequently asked questions
When should I choose a pergola during a patio project?
Shortlist the pergola while the patio position and levels are still flexible. Before slab details are settled or paving is ordered, get the dimensions and support information for the exact configuration, then review them with the builder, landscaper and relevant trades. The order date depends on the project, but support locations, levels and service routes need to be settled before the groundworks they affect begin.
What drawing should I give my builder or landscaper?
Provide a dimensioned plan showing the overall footprint, support or fixing points, relevant heights, projections and any connection to the house. Add a site plan with doors, drains, services and level changes, and label anything still provisional. A catalogue image or area figure cannot replace those project dimensions.
Can a pergola post sit on a paver?
Do not assume that it can. A paver does not confirm that the structure beneath it meets the pergola’s support requirements. Ask for the requirements for the selected configuration and have an appropriate structural professional check them against the actual slab or ground before paving.
Should roof runoff be included in the patio drainage plan?
Yes. Check how water from the selected roof arrangement is shed or discharged, and where it reaches the patio. Show any outlet and route on the drainage plan, then coordinate levels, pits and thresholds with the landscaper or drainage professional. Do not assume every pergola handles runoff in the same way.
Do I need council approval for a pergola?
There is no single answer for every property. Ask your local council or a building certifier whether approvals apply to the proposed installation. Check any relevant strata or property conditions and insurer requirements as well, before excavation or a concrete pour makes changes harder.
Choosing a pergola early lets the patio team coordinate its supports, levels, drainage and service routes before construction fixes their positions. Agree the layout and responsibilities, and make sure each trade is working from the same current drawing. If a site condition, product detail or local approval remains unresolved, pause the affected work until the relevant supplier or professional has clarified it. Resolving these details before paving helps avoid cutting or altering the finished patio.
