
To improve the quality of the content of this website and to adapt it to the needs of users, cookies are used - including third-party cookies. By continuing to use this website, you agree to the use of cookies and to possible communication when you enter your contact information in one of the forms on the site.

Bloomcabin Wall-Mounted Pergola

  • Wall-mounted to the house
  • Practical addition to your patio
  • Customisable design
The greater the purchase, the bigger discounts you get.
Estimated delivery:
We offer the opportunity to CHOOSE A SUITABLE DELIVERY WEEK, which you will find in the last step of the shopping cart.
The greater the purchase, the bigger discounts you get.
Personal Bloomcabin consultation
Personal consultation?
We are happy to help with questions about models, prices and delivery.
+49 152 28196712

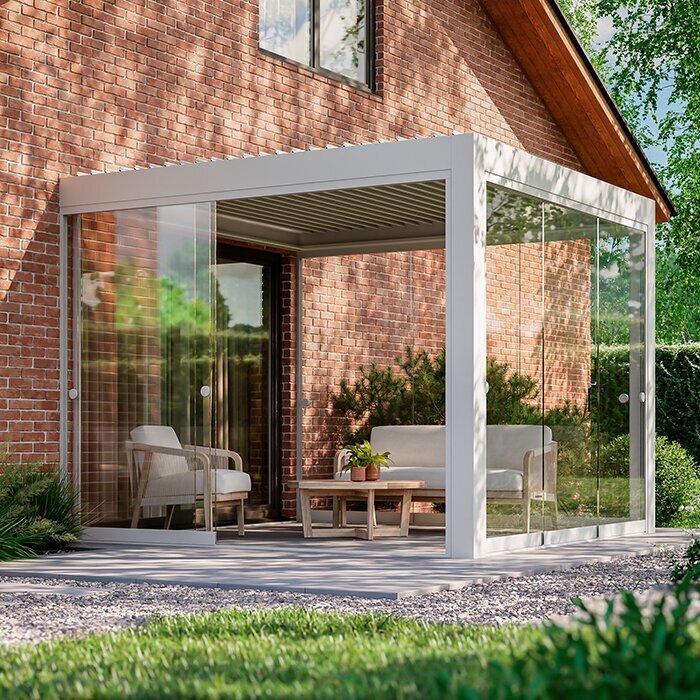
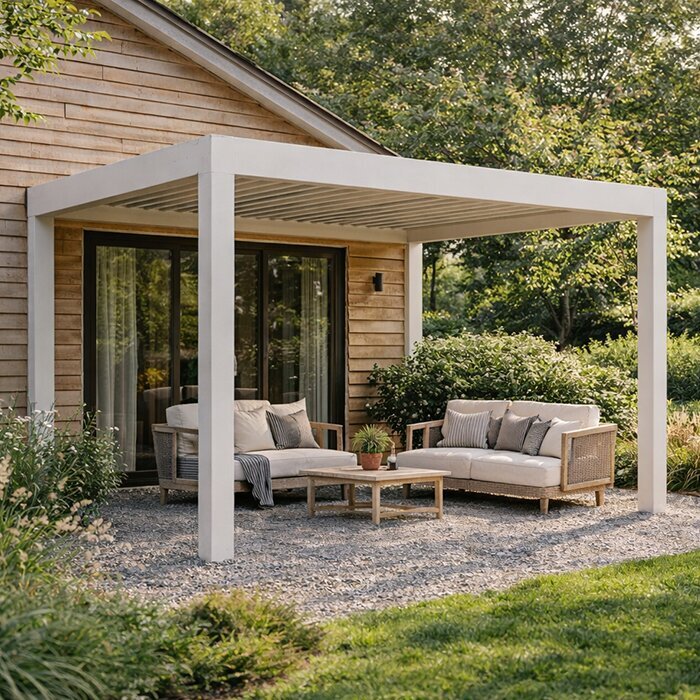
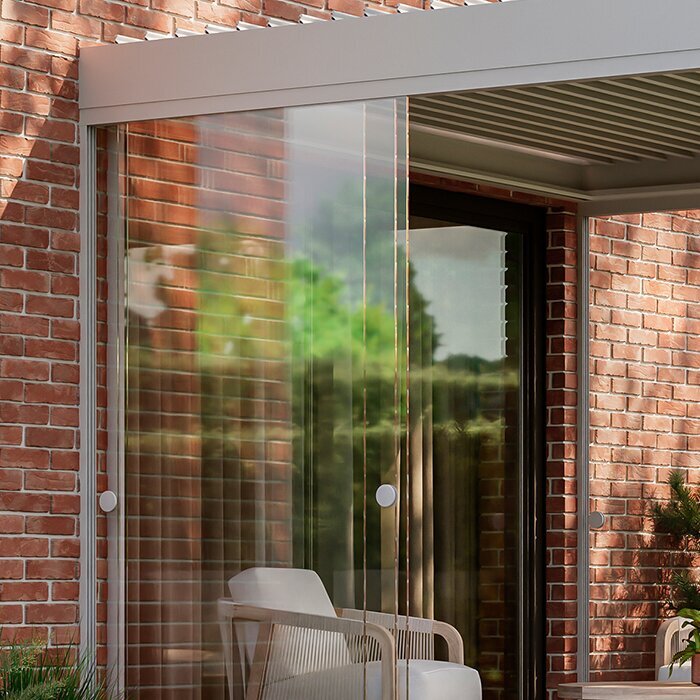
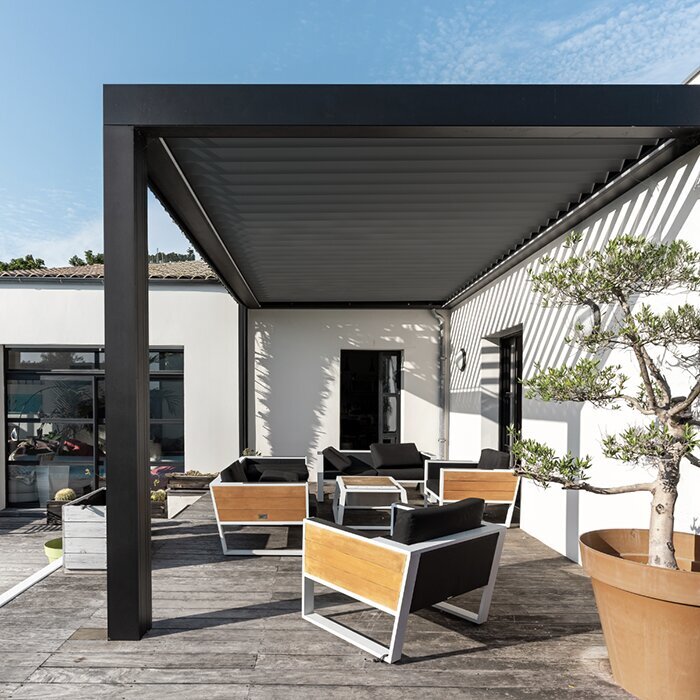
The Bloomcabin wall-mounted pergola extends living space outdoors immediately beside the building, combining practical use with an attractive appearance. Quality aluminium profiles form a carefully designed structure, while contemporary styling coordinates with the architecture of your home. This approach brings comfort and a harmonious finish to the adjoining outdoor area.

Why choose a Bloomcabin wall-mounted pergola?

Fixed to the building wall
Secure fixing to the facade gives the pergola stability while helping you make full use of the outdoor area. Position it over a balcony or patio, or use it to define a restful space immediately beside the house.

Functional patio cover
Enjoy shade and a sheltered place outdoors that still feels open and airy. Whether you are eating outside, unwinding each day or spending a quiet afternoon on the patio, the pergola provides an inviting setting.

Choice of sizes
The Bloomcabin wall-mounted pergola is available in sizes covering 9 to 24 m² and can be matched to both compact and more generous patio spaces.

Quality materials
Aluminium forms the structure, combining lasting stability in everyday use with low maintenance demands. Its attractive finish can be retained over many years, making durability and straightforward care central to the choice of material.

Customisable design
Select from various RAL shades when ordering. The colour choice lets you coordinate the wall-mounted pergola with the facade and surrounding outdoor space.

The pergola includes an integrated gutter and drainage system for efficient water run-off while maintaining a clean, architecturally cohesive appearance.

With its precisely developed structure, the Bloomcabin wall-mounted pergola is straightforward to assemble. It is an attractive, practical investment that improves patio comfort and increases the overall value of your property.

Customer reviews 

“The wall-mounted pergola complements our patio and house façade perfectly. It is stable, visually elegant and exceptionally practical day to day.”
— Thomas Schneider

“We chose a wall-mounted pergola to cover the patio directly beside our home – the outcome feels genuinely high quality and well considered.”
— Julia Wagner

“I am very pleased with the construction quality and design. The pergola performs its role exceptionally well and looks modern.”
— Markus Weber

Order today for a high-quality wall-mounted pergola, creating a comfortable, functional and attractive outdoor area directly beside your home.
More information
SPECIFICATION

Dimensions:
9–24 m²

Overall height:
250 cm

Material:
High-quality aluminium profiles

Features:

  • Robust, stable profiles provide a secure structure

  • Integrated guttering for efficient water drainage

Warranty:
12-year extended warranty

Benefits:

  • Durability: Aluminium construction for lasting, reliable use.

  • Functionality: Integrated gutter system for water drainage.

  • Adaptability: Available in 9–24 m² and RAL-chart colours.

  • Design: Modern pergola with clean lines.

Bloomcabin wall-mounted pergola

A contemporary patio cover attached directly to your home

The Bloomcabin wall-mounted pergola mounts against the house for patios and outdoor areas immediately beside the building. It frames the area along the façade and creates a flowing connection between indoor living and the garden while keeping the patio open. It is especially suited to homes with their main outdoor dining or sitting area outside the kitchen, dining room or lounge.

Available configurations cover 9–24 m² and have an overall height of 255 cm , with frames made from high-quality aluminium profiles. Water is carried through channels inside the structure by the integrated gutter and drainage system. A choice of RAL colours allows the exposed frame to complement the façade, windows, doors or other permanent elements of the home.

Plan in stages. Begin with a professional assessment of the wall layers, structurally suitable fixing zone, patio base and fall. Next, map the patio depth against doors, windows, furniture and walking routes. Select the final configuration after confirming the outlet location and ensuring cleaning points will remain reachable. Bloomcabin Australia.

Bloomcabin wall-mounted pergola adjoining a patio
Bring the patio closer to home

Give the outdoor area beside your home a clear purpose

A wall-mounted pergola works particularly well when the patio meets the living area and is used often. Its proximity to the kitchen, dining room or lounge also makes carrying meals, crockery and outdoor cushions back and forth more convenient.

Attaching the pergola to the building visually completes the patio edge. The result remains open rather than becoming an enclosed addition, so views towards the garden and access along the sides of the property are retained.

Because the structure is always seen alongside the façade, doors and windows, its scale affects the appearance of the entire home. The width may align with openings, but the depth must serve the intended activities. Consider the finish, furniture layout and post locations as one design.

Attached to the home

Designed for patios next to living spaces

Unenclosed connection

Keeps the home, patio and garden visually connected

Choice of RAL colours

Coordinate the frame with doors, windows or the façade

Built-in water management

Gutters and drainage paths are contained within the frame

Make the patio layout practical

Doors, furniture and circulation define the pergola dimensions you need

Do not select a size simply from the area of empty paving. Start with the activities planned beneath the cover, then allow enough room to move around them. A compact sitting arrangement needs a different footprint from a dining setting that must also accommodate serving and a route into the garden.

For dining, leave room for people to rise and walk behind chairs while they are occupied. Lounge furniture needs workable gaps between the sofa, armchairs and table. Posts and furnishings must also stay clear of outward-opening doors, sliding panels and frequently used paths.

Following established architectural lines can make the pergola feel part of the home. Patio edges, doors and windows provide useful guides, but visual symmetry should never take priority over everyday function or structurally appropriate attachment.

Bloomcabin wall-mounted pergola above a patio
Plan before selecting dimensions

Use these four checks to guide planning and installation

Draw each possible configuration to scale. Include the areas available for furniture, clearance in front of every door and the proposed post locations. Reviewing the drawings side by side reveals which option makes best use of the patio without reducing essential circulation space.

01

Attachment position

Ask a suitably qualified person to assess the fixing line, structural substrate, wall layers, insulation, openings and other façade features.

02

Furniture

Plot dining furniture, lounge pieces, planters and chair movement accurately on the scaled patio drawing.

03

Access routes

Preserve clear paths linking the interior, seating area, garden and side access.

04

Water flow

Align the discharge point, patio fall and downstream drainage to carry water away from the home.

Essential specifications

A quick view of dimensions, construction and installation

Available area

9–24 m²

Choose according to usable furnished space rather than the patio’s outside measurements alone

Total height

255 cm

Check this measurement against doors, windows and every nearby façade feature

Frame and load capacity

High-quality aluminium framing

Straight-edged aluminium construction made for attachment to the home

Installation

Mounted against an appropriate building wall

Arrange prior professional checks of the wall, structural fixing area and proposed fasteners

Drainage arrangement

Internal guttering and drainage channels

Determine the discharge point and subsequent water path before work starts

Warranty

12 years

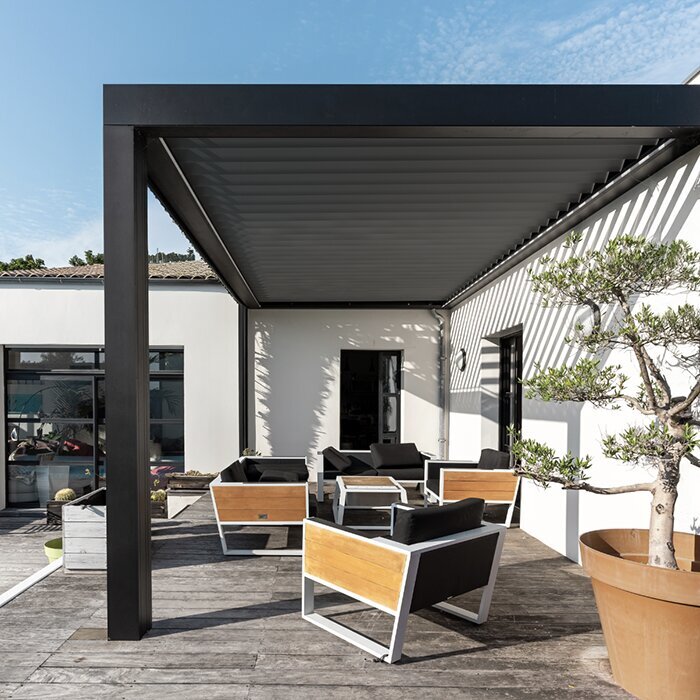
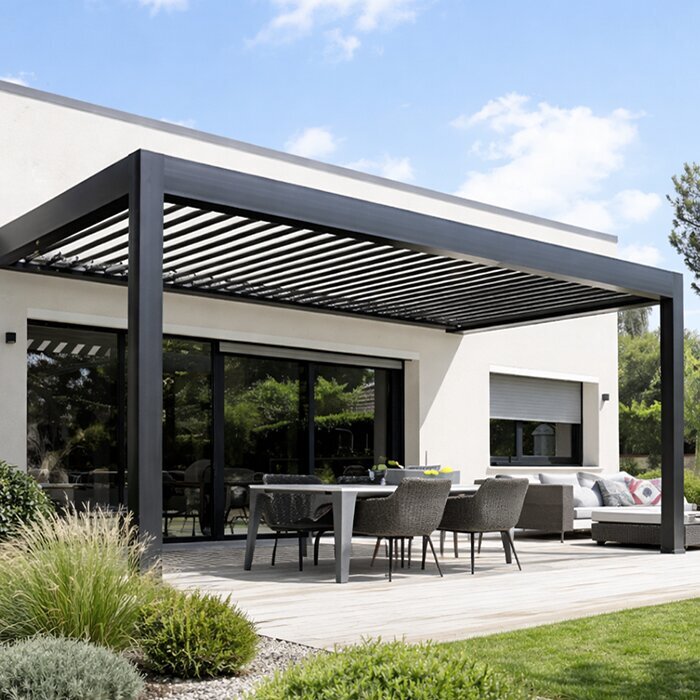
Integrated drainage inside the Bloomcabin wall-mounted pergola
Aluminium care and finish

A crisp appearance paired with manageable upkeep

High-quality aluminium profiles form the enduring, rectilinear outline of this attached structure. The understated design can sit comfortably with modern homes or plainer architecture. Review post placement and profile colour against the façade’s strongest horizontal and vertical lines to achieve a balanced composition.

The gutters and water passages are concealed within the pergola frame. Reliable operation depends on how this system meets the site drainage. The connection needs to suit the patio while preserving access for cleaning and routine inspection.

Note the selected RAL code in the project records. This provides a reliable reference for future façade repairs or coordination with other fixed components. Use the physical colour selected for the project as the reference, because displays can render it differently.

Ideas for use and styling

Four ways to arrange a patio alongside the home

01

Dining under cover

Positioning the table near the kitchen or dining room reduces carrying distances. The plan still needs to include chairs when pulled out and a practical serving path.

02

Lounge facing the garden

Combine a sofa, armchairs and a low table for relaxed seating. Keeping one side open towards the garden maintains the outlook and provides straightforward access.

03

Space for entertaining

During gatherings, the indoor room and patio can function together. Leave the doorway and the route between the separate seating areas free of obstructions.

04

Architectural alignment

Aligning the frame with window centres or patio boundaries helps it belong to the existing architecture and gives the elevation a composed, orderly rhythm.

Choosing the position and wall junction

Attachment to the home is what technically separates this design from a freestanding pergola. Fixings transfer forces into the wall, and the front posts pass their loads into the patio base. The wall system, fixing zone, supporting ground and drainage must therefore be resolved together; appearance alone cannot confirm suitability.

Understanding the wall and fixing area

Rendered, brick and externally insulated walls have very different layer arrangements. In particular, the outer face of an insulated wall may provide no suitable structural support. Connection details and fasteners must correspond to the actual wall build-up, allowing secure anchorage without harming the building envelope.

Survey the proposed attachment line for window sills, roller-shutter housings, eaves, downpipes, lights, vents and surface-mounted services. Items just outside the pergola footprint can still restrict tools, connections or future maintenance access.

Confirm both the structural wall zone and the supporting base with a suitably qualified person before ordering a final size. If the preferred location proves unsuitable, the design can still be revised at this point. Changes become much more difficult once patio work is complete or installation is about to begin.

Track sunlight and existing shade

House orientation affects the hours when sunshine reaches the furniture, patio and façade. Trees, nearby buildings, roof overhangs and the form of the home also alter exposure. Observe the area at the parts of the day when you are most likely to use it.

Pale paving and façades may bounce extra light across a sunny patio, whereas darker finishes retain heat. Arrange seating to balance comfort with the preferred view. Avoid leaving delicate fabrics or plants permanently in positions exposed to direct sun for hours.

A larger covered footprint does not guarantee greater comfort. Better results may come from orienting the table or lounge carefully while maintaining an open link to the garden. Plotting the sun’s movement on a sketch makes the furniture plan easier to judge realistically.

Supporting the front posts

Each post requires a suitable structural base. Deck boards and pavers show only the surface; support depends on what lies below. Footings, service runs, voids, edge restraints and drainage components may all limit where posts can stand.

On an established patio, investigate whether the construction beneath each proposed post can carry the load or requires preparation. For a new patio, coordinate these locations with its builder from the outset. The finished surface can then meet the posts neatly without later cutting into completed work.

Account for the existing fall as well. It must drain away from the home without preventing correct placement of the posts. Measure edges, steps and changes in level rather than relying on appearance, because a patio that looks flat can vary in height across its surface.

Comfortable everyday use

A functional patio assigns enough room to dining and lounge areas, door clearances, serving paths and garden connections. Include any proposed lighting or power supply early in the layout. Arrange for outdoor electrical work to be designed and completed by appropriately qualified tradespeople.

Moving easily from indoors to outdoors

A small landing surface near the doorway is useful when laying the table, provided it does not reduce access. Assess the route while every chair is occupied and pulled back. Someone carrying plates or a tray should still reach the table without weaving between diners and the open door.

Every patio door needs its full operating clearance, plus nearby space for standing, carrying items and letting others pass. Furniture can easily create a pinch point around steps, thresholds and narrow openings, so test these locations carefully.

Route regular garden traffic around, rather than through, the most confined part of the seating layout. With two exits, one may handle daily movement while the other serves the dining or lounge zone. This arrangement protects the comfort of the seating area and keeps the garden accessible.

Prepare lighting and services early

For evening use, softer background lighting with a dedicated table light is generally more comfortable than one intense fitting. A wall light can define the junction with the home, while lower sources draw attention to furniture. Aim fittings away from interior rooms and neighbouring properties to limit glare.

Locate powerpoints, switches and cable runs before pergola installation. Identify which services will emerge from the home and where exposed wiring might appear. Adding surface-mounted cables later can disrupt the finished look and obstruct access to connections or gutters.

Keep all luminaires and wiring clear of attachment points and drainage paths. Specify components suited to their exact outdoor position, with installation and connection entrusted to qualified tradespeople. Even without immediate plans for fixed lighting, the design can allow for future conduits or connection locations.

Match furniture to the main activity

Dining layouts are governed by table dimensions, chair widths and rear clearance. Lounge planning instead centres on sofa depth, the outlook and convenient reach to the low table. If both activities must fit, prioritise one generous zone rather than leaving each permanently cramped.

Early drawings often omit barbecues, substantial pots and outdoor storage. These items occupy valuable floor area and cannot be allowed to hide drainage or inspection locations around the posts and façade. Choosing movable pieces makes it easier to reset the patio when guests arrive.

Assess more than a tidy arrangement with every chair pushed in. The real test has diners seated, another person serving and the patio door operating simultaneously. Before ordering, outline the intended furniture on the paving with removable tape or movable objects.

Side access and easier, low-threshold movement

A side passage may provide the only practical route to bins, bikes, garden beds or a shed beyond the patio. One misplaced post can make that route awkward. Plan for objects routinely carried through the area, not just movement around the dining table.

For a route with minimal threshold changes, coordinate the doorway sill, patio surface and drainage. Adding a pergola does not alter how the door junction must perform. Record existing levels and, if rebuilding the patio, resolve them alongside the home’s waterproofing.

A pram, serving trolley or bulky outdoor chair requires more width than a person walking alone. Put these movement needs on the drawing before fixing post and planter positions. In daily use, one generous main passage is more valuable than several unusable slivers of space.

Plan drainage and upkeep for the long term

Long-term practicality involves more than selecting dimensions and colour. Nominate where the internal drainage discharges and ensure inspection and cleaning zones remain available. The frame is a lasting decision, while movable pots and furniture can be rearranged as household routines change.

Relate the colour scheme to the home

Colour controls whether the wall-mounted pergola recedes into the elevation or reads as a distinct feature. Repeating the finish of a window or door can unite the composition; a contrasting frame can instead place a clear visual boundary around the patio.

Look beyond the wall finish to the roof edge, base course, paving and any permanent balustrades. An excess of unrelated colours can crowd a small elevation. Take cues from durable building materials rather than cushions and planting that may change with the season.

Whenever practical, hold the preferred RAL sample against the home in natural daylight. Reflective glass, textured render and brick can each alter how the finish is perceived. Some colours also reveal dust and water splashes more readily, a useful consideration for a patio in regular use.

Choose the integrated drain outlet

A definite connection is required between the internal gutters and the site’s continuing drainage route. Establish both the exit location and the means of carrying water away from the building before installation. Without that plan, uncontrolled discharge at the patio perimeter could leave standing water or splash surrounding surfaces.

Where suitable site conditions and competent workmanship allow, the route might incorporate an existing downpipe, infiltration area or rainwater tank. Connections should never be improvised. Discuss uncertain arrangements with the patio contractor or another appropriately skilled specialist.

Resolve drainage before undertaking fresh paving, slab or stormwater work. This allows pipes and junctions to be built into the supporting layers instead of adding exposed channels or later cut-outs. On an existing patio, first verify that the intended discharge location can be reached.

Routine cleaning and visual inspection

A pergola alongside the home will collect pollen, dust, leaves and other debris. Inspect outlets and gutters frequently, particularly when trees overhang or adjoin the patio. Clear deposits before they narrow the flow path or become baked onto exposed finishes.

Use non-abrasive products appropriate for the aluminium finish. Harsh chemicals and scouring cleaners may harm the visible coating. Read the product’s care directions before cleaning a large area and test the chosen cleaner discreetly first if necessary.

Include the wall junction, visible fixings, joints and drainage passages in each inspection. Any movement or other change should be assessed by a competent person rather than hidden or disregarded. Keep furniture and pots from blocking these points over the long term.

Keep the layout adaptable

The way a household uses its patio—and the furniture it prefers—may evolve well before the pergola does. Today’s large dining setting could eventually be replaced by a lounge or smaller table. Well-located passages and uncommitted edge space make these changes possible without modifying the frame.

Permanently mounted fittings, built-in cabinets and heavy planter boxes reduce that freedom. Position them away from principal paths and all inspection or drainage points. Mobile pots and storage units can be shifted more readily for maintenance or a revised arrangement.

Review the arrangement from inside the adjoining rooms too. The posts and furnishings remain in view even when nobody is outside. Balanced placement can protect sightlines into the garden and keep bulky furniture away from windows.

Get the site ready for installation

Complete final checks and clear the work zone

Recheck the measurements, wall build-up, supporting ground, levels and discharge position before work begins. Shift loose pots and furniture away, and clear an uninterrupted route between the delivery location and patio. Protect vulnerable flooring and façade finishes in a manner suited to the planned tasks.

Identify any downpipes, outdoor lights or surface services crossing the work zone, including those that must stay reachable. Manage entry to the home so household traffic does not pass through the installation area. Set aside an uncluttered place for tools, packaging and components to keep work organised.

Once installation is finished, examine the junction with the wall, areas around each post and all planned drainage routes. Delay furnishing the patio fully until that review is complete. Important details stay visible, and large pieces do not need to be shifted twice.

Compare your options

Wall-mounted, freestanding and bioclimatic designs explained

Wall-mounted pergola

This version attaches to a structurally appropriate wall and organises the patio immediately alongside it. Planning must respond closely to the façade layers, openings and site-specific drainage arrangement.

Freestanding pergola

Independent of the house, this design can establish a separate destination elsewhere in the garden. It requires its own assessment of location and supporting base, but does not depend on a structural fixing into the home.

Bioclimatic pergola

The term bioclimatic refers to a pergola fitted with an adjustable roof for varying the amount of light and airflow. Decide whether that control suits the intended activity separately from choosing between an attached and freestanding arrangement.

Questions to resolve before ordering

Bloomcabin wall-mounted pergola: common questions

How much space should I allow for dining or lounging?

Make a scaled drawing of the lounge or dining setting, including pulled-out chairs, walking space, open doors and the garden route. Use that completed footprint to select an area from the available range.

How do nearby windows, doors and shutters affect planning?

Check the model’s stated total height against eaves, window heads, shutter housings, lights and other façade details. After installation, every window and door must retain its full range of operation.

What care do the aluminium profiles need?

Lift off dust and deposits with mild products approved for the relevant surface. Follow the specific care directions and avoid cleaners that are abrasive or aggressive.

What should be checked before attaching the pergola?

Have a competent person assess the wall layers, structurally suitable fixing zone and proposed fastening method. The review should also include insulation, shutter boxes, services, lights and downpipes.

What is the best way to choose a RAL colour?

Take cues from lasting elements, including door and window frames, balustrades and the base course. Where possible, compare the sample against both the façade and patio surface outdoors in daylight.

How should the drainage route be arranged?

Before installation, nominate the point where water leaves the concealed gutters and enters the site drainage arrangement. From there it needs a controlled route away from the home, with the junction kept reachable for inspection and cleaning.

Is installation possible on an existing patio?

That depends on the construction beneath each post, the patio fall, changes in level, buried or surface services and existing drainage. The visible decking or pavers cannot establish whether adequate structural support exists below.

What must stay reachable for inspection and maintenance?

Maintain access to gutters, discharge zones, exposed fixings, post bases and the wall junction. Avoid placing cupboards, large pots or other difficult-to-move furnishings permanently in front of them.

Make the final choice

Fit the Bloomcabin wall-mounted pergola to your patio and home

Confirm your selection only after reviewing the building’s technical suitability and the intended patio use in the same plan. The chosen configuration can then respond precisely to conditions at the site.

Bloomcabin Australia

Final planning checks

✓ Start with the main activity, then select enough area from the available range

✓ Assess the structural wall zone, patio depth and support beneath every post

✓ Mark out furniture and posts, then operate each patio door through its full movement

✓ View the chosen RAL colour beside the façade, glazing frames and paving

✓ Decide where water discharges and how it continues away from the home

✓ Clear the installation route and retain access to every maintenance point

Close x
10 year warranty
Bloomcabin takes pride in its high-quality products and maintains these standards every day through a range of manufacturing and quality-control processes. This is backed by a 20-year warranty covering wood rot in timber structures and a 10-year warranty covering functional defects.
GET A 45% BETTER PRICE WHEN YOU BUY ONLINE
Shopping online is convenient and cost-effective
Ask us!
Get in touch
Email:
This email address is being protected from spambots. You need JavaScript enabled to view it.
Reg. No.:
38944924
Address:
Thriges Plads 6, 5000 Odense C, Denmark
Social media
Follow us on Instagram, Facebook and Twitter to find out about news and offers from Bloomcabin:
X
Have questions and want us to call you back?
+61
−
✖