
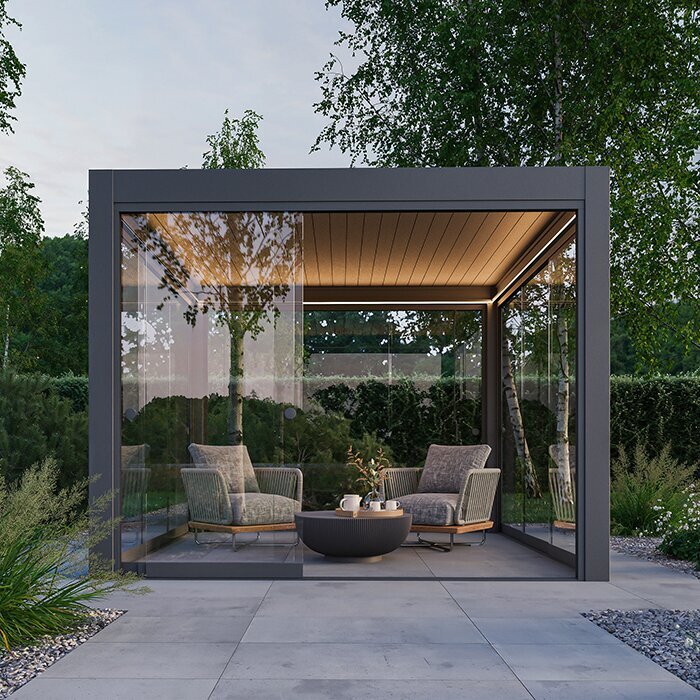





Bloomcabin bioclimatic pergola
Bioclimatic aluminium-louvre pergola for responsive shade, airflow and rain shelter
A Bloomcabin bioclimatic pergola is designed for patios where a permanent roof would limit how the space can be enjoyed. Its aluminium louvers can be opened, angled or closed as sunlight and weather change. This lets the patio feel open and airy, gain shade where it is useful, or become more sheltered when rain arrives. Such versatility suits an outdoor area used differently from breakfast through to dinner.
Available configurations range from 9–24 m² and stand approximately 250 cm. The design brings together high-quality aluminium profiles, concealed rainwater management and a selection of RAL colours. Automation and side treatments are optional, allowing convenience, privacy, shading and wind protection to be selected for the intended setting.
Begin with a careful survey of the patio. Map the sun’s movement and prevailing weather, then note entrances, windows, current drainage and furniture clearances. Where a motor and LED lighting are planned, determine the power connection and cable path before completing the patio surface or surrounding work. Bloomcabin for Australia.
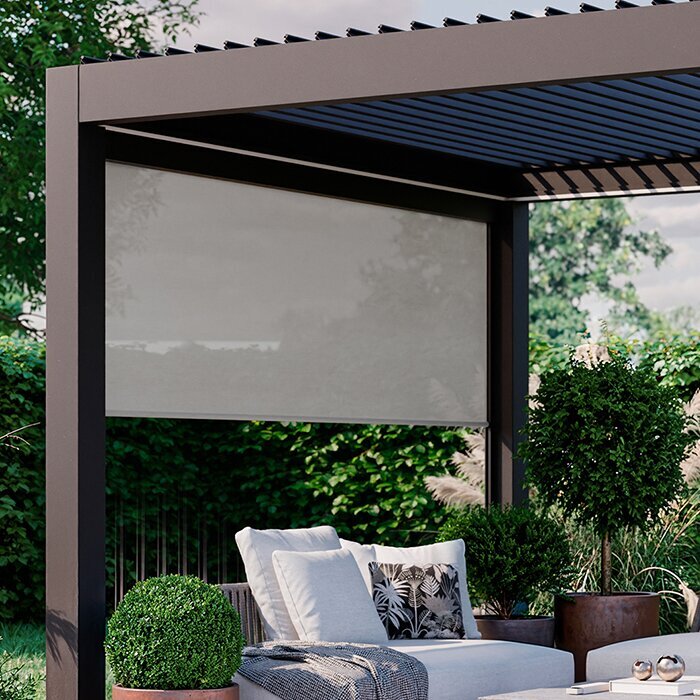
Control light and air above
Adjustable louvers adapt the patio to time and weather
The aluminium louvers provide options that a fixed pergola roof cannot. Open them for light and an uninterrupted skyward view, or tilt them to cut direct sun while retaining an open roof. Closing the louvers creates a more sheltered zone. The preferred setting will vary with the hour, the sun’s angle, temperature and the activity taking place on the patio.
Angling the louvers can shade the area while giving rising warm air a path out. This is valuable above dining or seating zones, where a sealed roof may feel oppressive in hot weather. Closing the roof increases shelter from rainfall and direct sunlight. It remains an outdoor structure, so weather-sensitive items still need suitable storage.
Adding motorisation makes frequent roof adjustments more convenient. With suitable configurations, operation may also extend to selected side components.
Adjustable louvered roof
Adapt overhead shade, ventilation and rain shelter as conditions change
9–24 m²
Several configurations for patios of different sizes
Optional automation
Motorised operation of roof louvers and selected side elements
Outdoor options
Integrated LEDs, screens, side panels and glass walls
Quality aluminium construction
Robust aluminium profiles, integrated drainage and clean-lined design
High-quality aluminium profiles give the pergola crisp lines without demanding complicated care. Maintenance is still necessary: check finishes, joints and moving components periodically, and clear grime before it builds up. The site layout should also preserve practical access to louvers, gutters and side treatments.
Water travels through concealed paths in the frame, avoiding prominent gutters that would disrupt the clean form. This system does not replace the property’s drainage arrangements. Before installation, identify the discharge point and a route that keeps runoff away from the façade, footings, paving and busy paths. Connecting the outlet to the site solution is part of preparing the location.
RAL colour choices can coordinate the frame with doors, glazing, cladding, pool surrounds or paving. Echoing nearby metalwork gives a restrained architectural result; contrast makes the structure a deliberate feature. Do not judge colour from a small sample alone. The pergola’s scale, surrounding finishes and changes between bright light and shade all affect its outdoor appearance.
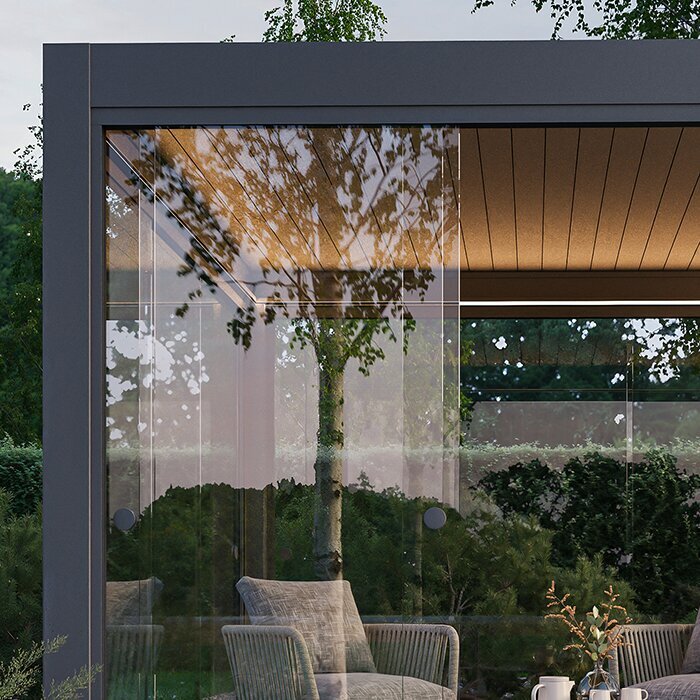
Louvered roof and side options
Plan the louvered roof first, then choose suitable side protection
Adjustable louvered roof
Roof angle governs both the overhead light and the route available for rising warm air. Start by identifying the patio’s main activities and the hours when shade matters. Then assess each side separately for any genuine need for protection from sun, views or wind.
Outdoor options
Optional screens, solid panels and glass walls each solve a different problem. Screens provide adjustable privacy and shade, while glass can retain the outlook and lessen wind entering from one direction. Panels create a more enclosed edge. Because every choice affects light, views, circulation and ventilation differently, assess the sides individually rather than automatically repeating one treatment around the pergola.
Product data
Key technical details of the Bloomcabin bioclimatic pergola
Area
9–24 m²
Available configurations
Overall height
approx. 250 cm
Height for site planning
Construction
Quality aluminium profiles
Clean-lined outdoor structure with manageable care needs
Roof
Adjustable aluminium louvers
Open, tilt or close
Drainage
Integrated gutter system
Plan connection to on-site drainage
Guarantee
12-year guarantee
Subject to applicable guarantee terms
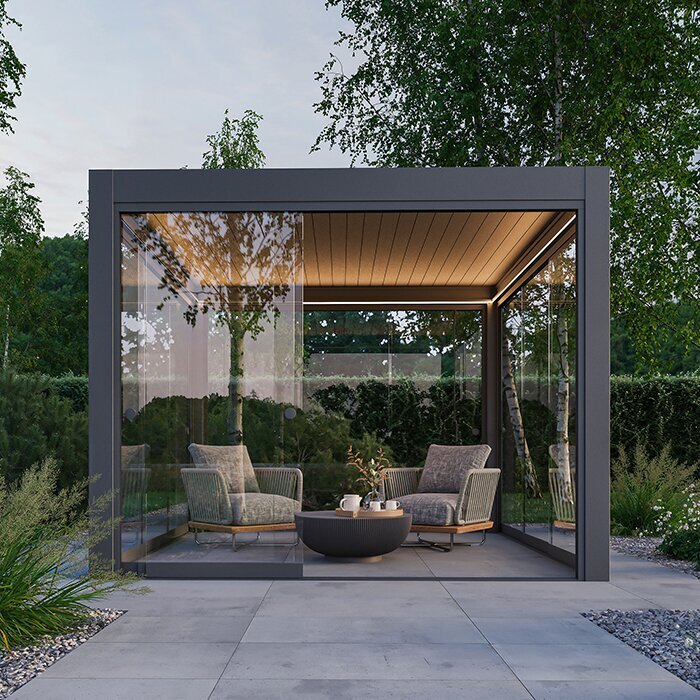
Setting louvers day to day
Choose the right roof position for each use
Open the louvers widely when daylight and a clear upward outlook are priorities. If moving sun begins to reach the seats, angling the blades can cut direct exposure while preserving an escape route for warm air.
When a shower arrives, close the roof. Purposefully positioned side treatments can address low-angle sunlight, overlooking or crosswinds without unnecessarily screening every other edge.
The pergola extends usable outdoor space, yet remains an uninsulated outdoor area even with closed louvers and side elements.
Ideas for use
Four ways to use a flexible patio area
01
Dining area
Create a permanent dining spot with controllable shade and optional LED light.
02
Garden lounge
Arrange low lounge seating, then vary the roof angle for the current light and weather.
03
Wellness area
Combine a spa or quiet retreat with selected screens or side treatments.
04
Patio for entertaining
Arrange adjustable shade above dining and seating for shared food and easygoing evenings.
Site, weather and orientation
Let the conditions on your own patio determine its orientation, louvers and side elements. Note when sunlight reaches the seating area, where rain and wind normally come from, and which views are worth retaining. Bright façades and broad glass areas may also change how much light is felt. This practical observation offers a sounder basis than compass direction by itself.
Changeable weather
In spring and autumn, sun, wind and showers can change quickly. An adjustable louvered roof allows a prompt response without repositioning separate sun protection. On persistently exposed sides, though, a targeted side solution is often more useful than enclosing the entire pergola.
Account for doors, floor-to-ceiling glazing, eaves and familiar paths linking the house, garden and patio. Avoid placing posts or side treatments where they constrict access or spoil valued indoor views. Beside the house, confirm that openings retain their full movement and that the façade remains reachable for future upkeep.
Put side elements where they have a clear purpose. On the weather side, lateral protection may be the priority; towards neighbours, privacy; and on a sunny side, protection from low-angle light. Deliberately open sides, by contrast, preserve the garden connection, clear routes and natural airflow.
North- and west-facing patios
On north- and west-facing patios, base the layout on when the area will be used. Observe the actual morning, afternoon and evening light across seats and nearby glazing. Those observations show how to angle the roof for overhead shade and whether a particular edge needs extra protection from low sun.
Check more than the centre beneath the roof. As sunlight shifts, a table, individual chairs and circulation areas may receive different levels of shade. Judge the design by the occupied parts of the patio rather than by one roof-wide louvre setting.
Do not assess the patio in isolation. Even when seats are shaded, sunlight may strike adjacent full-height glazing or produce glare inside. Check conditions both outdoors and from the rooms used most often, then decide the roof orientation and side treatments.
Power planning and integrated LEDs
Choose the supply point and cable path early when adding a motor or built-in lighting. Coordinate both with the final post positions and selected equipment, avoiding exposed cabling across completed patio finishes.
Discreet wiring should not make joints or connection points inaccessible for inspection and service. Set their locations alongside the footing, drainage, furniture and side-element plans before the patio or façade work is finished.
Arrange outdoor electrical work under the requirements applying at the installation address, with the equipment and control locations confirmed beforehand. In NSW, a licensed electrician must perform or supervise permanent wiring. In another state or territory, check the applicable licensing and certification requirements locally.
Drainage and ground conditions
Closing the roof sends rainfall along channels within the frame. Plan the complete journey from the louvre surface, through that built-in system, to the place where it enters patio drainage, an infiltration area or another designated discharge solution.
Inspect the proposed outlet for falls, paving edges, planting beds and obstructions. Runoff should neither collect there nor return towards the façade or cross a busy route. Confirm its onward path before installation begins.
The pergola needs a level fixing area that can support the structure. Finished paving does not reveal the construction beneath it. Establish the base build-up, levels and anchor locations, and locate services and drainage, before approving drilling or installation points.
Configuration and comfort
Consider dimensions, furniture, side treatments and powered features as one layout. A large footprint can still become awkward when chairs, doors, screens and access routes overlap. Look beyond the outside measurement to the practical room left among posts, furnishings and components that move.
Furniture at the right scale
Allow more than the tabletop footprint: chairs need room to pull back and people need space to pass. Deep lounge seating uses a different shape of floor area and changes circulation. Include the serving route from the house, access to the garden and clearance for side treatments. Furniture should work comfortably without contacting posts, glazing or screens.
Use a scale drawing to test chair movement, clear passages and the operation of doors and side treatments. Mark both each item’s outline and the extra area occupied during use. Any conflicts then become apparent before the pergola dimensions are selected.
Plot permanent planters, barbecue equipment and storage units as well as the table, chairs, lounge or spa. Next, reserve clear areas for reaching the house, garden and technical parts of the pergola.
Sun angle, not only direction
Louvers mainly manage sunlight arriving from overhead. Morning or evening rays at a low angle may pass beneath the roofline into seats or neighbouring rooms. Assess viewing directions, seating positions and normal hours of use alongside the compass orientation.
Screens and the roof perform separate roles. Overhead louvers create shade and release warm air when opened; a screen deals with light or views arriving from the side. Combining them where required is more effective than closing the entire roof to manage lateral glare.
Observe the site at the hours when people usually sit outside. Morning, midday and evening photos can document moving shade lines, reflected glare and light entering from the sides. Use that record to place a screen only where needed and retain worthwhile outlooks elsewhere.
Screens or glass walls?
Screens can be adjusted for privacy and shade. Glass walls leave the outlook visible and may temper crosswinds, but they remain in place and require cleaning access. Weigh shelter and openness against upkeep and the preferred visual link with the garden.
Treat each edge according to its setting. A street or neighbouring boundary may call for privacy, while a sheltered garden outlook may deserve to remain open. Side components should preserve important access, views and useful air movement.
Write down the purpose of each proposed side treatment, the times that issue occurs, and whether the response should be fixed, transparent or adjustable. This makes it easier to compare panels, glazing and screens without duplicating solutions.
Motorisation and controls
Place the roof control where the operator can see the louvers clearly. Plan the LEDs around their task as well: focused light above a table serves a different need from balanced illumination across the whole covered area.
Decide before purchase which parts require a motor and which will remain manual. The electrical preparation can then match the final selection. Coordinate roof movement, lighting and any powered side treatments through one practical control plan.
Locate clearly identified controls within easy reach of the normal seating area. Test that open doors, chairs and moving side components cannot obstruct them. A sensible final position depends on first resolving the furniture arrangement and circulation.
Planning for the long term
Furniture and styling can be changed relatively easily; footings, water discharge and service access cannot. Resolve the permanent work first, preserving unobstructed reach to roof blades, gutters, finishes and side components for cleaning, inspection and repair.
Keep drainage inspectable
Pollen, leaves and other material may interfere with the concealed water paths. Keep outlets and gutters reachable and inspect them routinely, especially beneath nearby trees. Removing loose matter early prevents it compacting into a drainage obstruction.
Trace the water after it leaves the outlet, because paving falls, joints, edges and depressions may divert it from the planned course. Detail the connection so façade splash and prolonged damp around posts or fixings are avoided.
Once installed, observe the discharge during appropriate weather to confirm it behaves as intended. If paving, garden beds or borders are altered later, reassess the route first; those changes can redirect runoff.
Maintenance access
Ensure roof blades, gutters, screens and glazing can be reached safely for cleaning and inspection. Choose non-abrasive methods appropriate for coated aluminium, avoiding tools that may mark the finish. Never apply force to a jammed moving component.
Do not let bulky furniture or heavy pots permanently occupy service zones. Retain working clearance beside posts, ahead of screens and beneath outlets. Include these occasional access needs in the furniture layout from the outset.
Routine visual inspections can reveal debris in channels or around moving louvers and side components before operation is affected. After exceptional loading or an extended idle period, inspect the mechanism again before putting it back into use.
Check configuration before ordering
As a final check, compare the outside size, usable space within the posts and the selected site. Draw roof coverage, furniture, posts and movement clearances together. The result should cover the intended patio zone without constricting entrances or garden routes.
Check the chosen version against every fixed feature: cladding, windows, doors, eaves, paving boundaries, drainage and the electrical feed. Resolving a mismatch before ordering is far simpler than discovering it after the base has been prepared.
Document the RAL colour, roof controls, side treatments, lighting and automation in a single schedule. It provides a shared reference for appearance, technical preparation and everyday operation, rather than allowing each option to be decided separately.
Allow for later changes
Needs and outdoor furniture may evolve. Leaving the layout ordered and comfortably spaced makes a later switch from dining table to lounge, or the addition of seats, much simpler. Whatever arrangement you choose, protect the circulation routes and areas needed for maintenance.
Where the selected equipment allows different furniture layouts, do not align power connections and lighting exclusively to one item of furniture. A flexible floor area supports later changes between dining and seating zones without altering the pergola structure.
Fixed glass walls warrant more detailed planning than movable furnishings. Test their consequences for views, airflow, cleaning and access. Screens adapt more readily as shade or privacy needs change, although their function differs. Select each treatment according to the issue on that particular edge.
Plan further with Bloomcabin
Guides to size, footings, pergola comparison and ordering
Frequently asked questions
FAQ – bioclimatic pergola
What makes a pergola bioclimatic?
A roof of movable louvers is the key feature. Their angle controls direct sunlight on the patio and the opening available for rising air. Closing them increases shelter from sun and rain. “Bioclimatic” therefore refers to an outdoor structure that can respond to different activities and conditions, not to a fully air-conditioned room.
How do I choose the right pergola size?
Measure the patio and plot the intended furniture first. On the same scale drawing, include extended chairs, access paths, openings, posts and any moving side parts. Select the model that leaves all these zones practical and free from clashes.
What should I check beside the house?
Survey wall openings, eaves, exterior lights and the regular route between indoors and the patio. Doors and windows need their full operating clearance. The location must also accommodate power, water discharge and access for later maintenance.
Can the roof be motorised?
Yes. Optional motors are offered for the louvre roof and certain side components. Determine the electrical supply, wiring path and control location before finishing the patio and surrounding surfaces.
Does every side need the same equipment?
No. Choose glass walls, panels or screens only for an identified purpose on that edge. Privacy, shade, outlook and crosswind exposure will vary around the structure. Keeping a suitable side open may preserve circulation, garden views and ventilation.
What on-site rainwater drainage needs planning?
The built-in channels carry water only as far as the pergola’s site outlet. From that point, route it according to the available fall and local drainage arrangement, keeping flow away from the façade, fixings and busy paths. Leave both channels and outlets reachable for routine checks.
How are aluminium frames and louvers maintained?
Clear foliage and loose grime at regular intervals with mild methods intended for aluminium finishes. Inspect drainage channels and the travel area of each moving component at the same time. If a louvre or side treatment sticks, look for ice, debris or another blockage rather than forcing it.
What information helps prepare for advice?
For a useful consultation, provide patio measurements, door and window locations, furniture plans, sun movement, the exposed weather side and any preferred side elements. Include the proposed water discharge, electrical supply and RAL colour. Site photos and a scale drawing help clarify the final configuration.
Bloomcabin bioclimatic pergola
Extend the patio with a flexibly adjustable louvered roof
Bloomcabin pairs an aluminium frame with louvers that adjust to changing outdoor conditions. Angle, open or close the roof according to sunlight, desired ventilation and rainfall.
Before ordering
✓ Choose a suitable size within 9–24 m²
✓ Plan furniture to scale
✓ Select screens or glass walls as needed
✓ Prepare a level, load-bearing installation surface
✓ Confirm RAL colour and automation
✓ Plan LED lighting and power supply early
