
Choosing the Right Position for a Pergola Heater
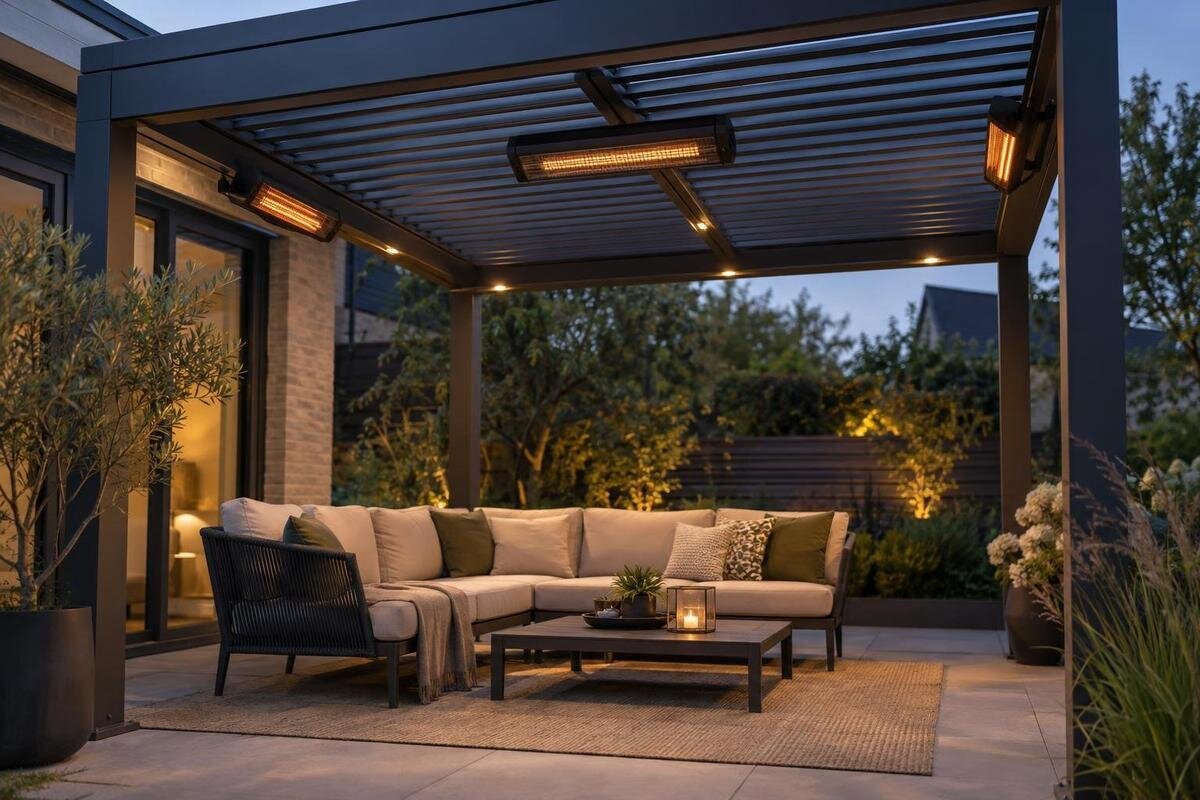
Outdoor heating
Good pergola heater placement is a layout decision as much as a product decision. Start with the seats people use most, then work back to the heater’s stated direction, required clearances, weather suitability and an approved place to mount it. A convenient-looking beam is not automatically an acceptable fixing point, and there is no universal distance or central position that suits every heater. Use the exact heater and pergola documentation, then have the proposed location reviewed by the relevant manufacturer or a qualified installer before work begins.

Map the seating area before choosing a position
Draw the pergola footprint and mark the places people actually sit: dining chairs, a lounge, a bench or a preferred corner. Include the table edge, the space taken by pulled-out chairs and any route used to move around the furniture. A heater centred over the frame may miss seats at one end; a position that suits dinner may be poorly aligned with a separate lounge. Treat the regular occupied area as the target rather than choosing the easiest-looking beam. If everyday use and entertaining use different layouts, sketch both and label the seats that matter most when you expect to use the heater.
Use the furnished layout when comparing pergola configurations, rather than relying on an empty floor plan or total area alone. An extending table or a group gathering at one end can change which seats need warmth, even though the structure stays the same size. The Bloomcabin Bioclimatic Pergola listing spans 9 to 24 m²; plot the dimensions of the particular configuration you are considering alongside your furniture. That range describes pergola size, not heater coverage or approved mounting points. Keep the seating plan consistent when comparing structures so differences in usable space are easier to judge.
Match the heater’s direction to occupied seats
Heaters do not all distribute warmth in the same way. With a directional radiant model, the useful question is whether the manufacturer’s stated direction or coverage reaches the people in the marked seating zone. Do not assume warmth will spread evenly across the whole pergola or pass around a post, screen or other obstruction. If the manual specifies a fixed orientation, design the seating plan around that direction; if the unit can be adjusted, stay within the positions the manufacturer permits. The appliance type and its instructions—not a general product description—determine how the location should be assessed. If the manual gives no clear direction or coverage guidance, ask for placement advice before treating a candidate position as suitable.
Draw a simple side view as well as a floor plan: a point can look central from above but direct warmth across chair backs, towards an empty walkway or away from seated occupants. Mark walls, open edges and objects that may interrupt the specified direction. When comparing a house-side layout with the Bloomcabin Wall-Mounted Pergola, show where the seats would sit relative to the wall and open side. This helps separate the layout question from the mounting question. The pergola’s wall-mounted designation does not, by itself, authorise attaching a heater to the wall, frame or beam.
Follow the clearances in the exact heater manual
Once a likely position is marked, check it against the installation manual for the exact heater model. Clearances depend on the appliance, its orientation and the surfaces around it; a dimension quoted for another model is not a substitute. Check all specified distances above, beside, behind and below the heater, as applicable, along with any requirements relating to people or nearby items. Measure from the reference points shown in the manual, rather than from a convenient edge of the bracket. If the heater has an optional guard or bracket, use the instructions for that combination. Record the required distances on the plan so everyone is assessing the same location and orientation.
Assess those distances in the furnished arrangement, not only on a bare-frame drawing. A tall chair, umbrella, hanging decoration, shade or later addition can put an item closer to the heater than the original plan suggests. Include access needed for controls, inspection and servicing where the manufacturer requires it. If the clearance boundary cuts through the main seating zone, move the proposed position or reconsider the heater and furniture plan; do not reduce the specified distance to keep the layout unchanged. Where a diagram is unclear, ask the manufacturer or installer how it applies to the site instead of converting it into a guessed measurement.
Confirm the mounting point is approved
A sturdy-looking beam, post or cross-member is not proof that a heater may be attached there. The heater manufacturer needs to approve the bracket and orientation, while the pergola documentation must identify or permit that fixing arrangement. The approval should relate to the exact models and configuration, not just a similar-looking product or a general statement about outdoor use. Where the documents do not clearly match, request written confirmation from the relevant manufacturers and involve a qualified installer. Do not drill, clamp or hang equipment from an unapproved frame point; visual thickness or a convenient position cannot establish that the attachment is acceptable. A product photo is not mounting approval.
For a structure on your shortlist, such as the Bloomcabin bioclimatic pergola, identify the exact model and selected configuration when requesting a mounting review. A model name or area range is not enough to establish which fixing points are approved for a heater. If any part of the overhead structure moves, show its full operating range in the proposal and have the mounting position checked against it. Neither a moving component nor a nearby frame member should be assumed suitable. Keep the manufacturer’s answer with the plans so the installer can match it to the pergola and heater that will actually be fitted.

Account for people, furniture and movement
Plot more than the seats themselves. Include the space people occupy when standing up, sitting down, carrying items to the table or walking around it. A heater near a narrow route deserves particular scrutiny because people pass beneath or beside it repeatedly; its position must still meet the model’s clearances. A proposed location above the centre of a table also needs to be assessed against anything placed below, not just an empty table surface. Use the specified distances as boundaries around the heater, then see whether ordinary movement and the chosen furniture fit outside them. This helps distinguish an open-looking plan from one that works in everyday use.
Furniture rarely stays exactly where it appears in a drawing. Allow for pulled-out chairs, reclined lounge seats and occasional extra seating, rather than counting on a gap that disappears when a chair shifts. Mark the space these items occupy in use, not just their positions when neatly arranged. When planning a layout for the Bloomcabin Pergola, use the selected configuration to assess how furniture and circulation space fit together. Keep the heater’s clearance diagram alongside that layout and its mounting approval with the installation documents. People should be able to use the seating naturally without having to avoid an area beneath the heater.
Check weather exposure around the pergola
An open pergola can have different exposure from a sheltered room. Note which sides are open, where wind reaches the seating and whether rain can reach the proposed heater position. Exposure affects the conditions the appliance must be suitable for, and gusts may also make the occupied area feel different from a still, enclosed space. Do not infer outdoor suitability from the heater’s appearance, the pergola overhead or another model’s rating; use the exact heater documentation. Consider the conditions where the unit will actually operate, rather than relying on how the site looks in a calm-weather product image.
If practical, observe the area during the weather in which it is usually used and note where gusts or wind-driven rain enter. For a house-side layout with a wall-mounted pergola from Bloomcabin, include both the sheltered wall side and the open edges in those observations. A sheltered corner is not automatically the best heater position if it misses the seats or cannot meet the clearances. Screens, blinds or covers may alter exposure and nearby surfaces, so have the combination assessed rather than improvising a shield. The heater’s own outdoor rating and installation limits must suit the actual location.
Include electrical planning in the location review
For an electrically powered heater, the mounting location affects where a qualified electrician will assess the supply, switching and route to the unit. Bring the exact heater model and installation manual to that conversation before the location is fixed. The plan should not commit to an unapproved spot and then rely on an improvised way to reach power. This is a planning brief, not a wiring task: have the electrical work and the selected equipment reviewed by a qualified professional. If a different heater type is being considered, follow that model’s own installation and service requirements rather than assuming the same plan applies.
Think about how the controls will be reached and used while respecting the manufacturer’s limits on their location and exposure. Mark existing lights, motors and other equipment on the same plan so the electrician or installer can account for access and possible interaction with moving parts. If you are considering the Bloomcabin pergola model, identify the chosen configuration in the electrical brief rather than treating its product listing as a specification for heater wiring. Keep cable routing and control placement within the documented mounting and clearance requirements. A convenient route to power is not a reason to select an unapproved fixing point.
Decide which seating zone takes priority
One position may suit a compact dining group, while separated dining and lounge areas raise a different question. Mark the primary seating zone and ask whether the selected heater’s documentation supports a position and orientation that serves it within all required clearances. Do not assume a central mount or a larger-sounding product description will cover every seat. If the manufacturer gives a coverage area, read the conditions attached to it, including orientation and any stated assumptions; do not treat an illustration as a promise for a different layout. Compare the occupied areas, rather than simply matching a heater to the pergola’s total floor area.
If no single approved position works for both groups, prioritise the area used most often or ask a qualified installer to review an alternative arrangement with the manufacturer. Additional units bring their own clearance and mounting requirements, so adding one is not a simple way to fill a cold corner. When comparing sizes of Bloomcabin’s bioclimatic pergola model, use the footprint to establish where each seating group would fit, not to estimate heater coverage. Keep structure dimensions, model-specific heater coverage information and the priority seating zone separate in your comparison so one figure does not stand in for another.

Prepare a placement plan for review
Prepare a clear sketch showing the selected pergola configuration, seating, walkways, doors and any nearby wall or screen. Mark the candidate heater position and the direction the manufacturer permits it to face. Add site measurements taken from the relevant surfaces, then highlight which manual clearances need to be verified; do not write in a guessed mounting height or copy figures from another model. A photograph can help explain the site, especially where a beam or open edge is hard to describe, but it should support—not replace—the product documentation and written mounting approval. A top view and a side view can make different obstructions easier to spot.
For a proposal involving Bloomcabin’s wall-mounted pergola option, label the exact configuration on the sketch so the review concerns the structure you intend to use. Ask the reviewer to identify the heater model, approved fixing location, mounting orientation, required clearances and suitability for the site’s weather exposure. For an electric model, include the electrician’s assessment of the proposed position and controls. Keep relevant manuals and written answers with the marked-up plan, making clear which details have been confirmed and which remain open. Any unresolved compatibility question needs clarification before installation, rather than an assumption based on appearance.
Reassess the position when the setup changes
A position accepted for one arrangement may need another review if you add a side screen, blind, awning, lighting, ceiling fan or taller furniture. These changes can bring new surfaces closer, interrupt the intended direction of warmth or affect exposure. Before placing anything near the heater, compare the change with both sets of instructions and seek updated advice if they do not clearly cover it. Do not assume that a previous approval automatically applies to a different configuration, even if the heater has not moved. Keep the approved heater area visible when updating furniture or accessory plans.
If the pergola has moving parts, assess the heater against their full operating range, not just the position shown on the installation drawing. Use the manufacturer’s guidance to establish which combinations of heater use and component positions are permitted. A location that clears a component in one position may not clear it in another. Revisit the seating map if chairs or lounges move as well, especially when the main occupied zone changes. The final position should suit everyday use, maintain the specified clearances and have a documented fixing arrangement for that heater and structure—not simply occupy the most convenient spot during installation.
Frequently asked questions
Should a pergola heater go in the centre?
Not by default. A central position works only if the selected heater’s permitted direction reaches the regular seating zone, its clearances fit the layout and the pergola documentation approves the fixing point. A position that serves an empty area or relies on an unapproved beam is not a sound choice.
How high should a pergola heater be mounted?
There is no universal height for every model. Follow the exact heater manual, including any stated mounting height, orientation and clearances, then compare the proposed point with the pergola’s mounting documentation. Do not copy a measurement from another heater or rely on a product photo.
Can I attach a heater to any pergola beam?
No. A beam’s appearance cannot prove that it is an approved fixing point. Use only an arrangement permitted by the documentation for the chosen heater and pergola. If the instructions do not clearly cover the combination, get written confirmation and have a qualified installer review it before attaching equipment.
Is a sheltered corner always the best position?
No. A sheltered spot still needs to direct warmth towards occupied seats, meet the heater’s clearances and suit the actual weather exposure. A screen or blind can change those conditions, so do not add one as an improvised shield without checking the relevant product instructions.
Can one heater warm the whole pergola?
You cannot infer heater coverage from the pergola’s floor area. Compare the occupied seats with the exact heater’s coverage and orientation information, if provided. If separate seating zones are not served by an approved position, seek a model-specific review; another unit would need its own clearances and approved fixing.
A well-chosen heater position is where the seating plan and the appliance instructions agree. Map the occupied area, test the heater’s permitted direction and clearances, and confirm the fixing point and exposure for the actual pergola and site. If the documents leave a compatibility question unresolved, get it clarified before installation rather than relying on appearance or a generic measurement. The practical answer is the location that suits everyday use without improvised attachments or guessed spacing.
