
Converting an Old Awning Area to a Pergola
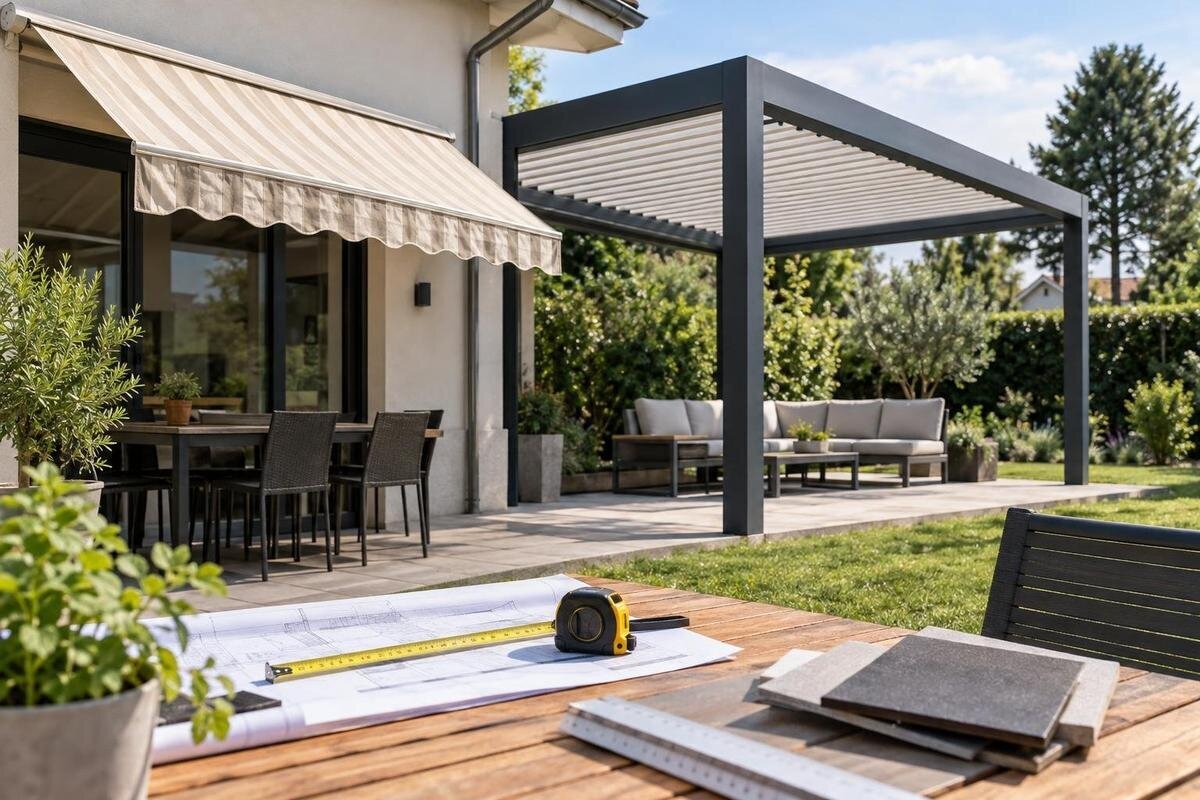
Pergola conversion guide
Replacing an awning over an existing patio can look like a straightforward swap until its brackets come off. The old shade may have left anchors, patched holes, faded paint or clues to earlier repairs, while the new pergola may require different support positions and a new route for roof water. The planning task is to document what exists, decide what must be removed and repaired, and agree how the new structure connects to the house and patio. A measured site record and written scope make those decisions clear before installation work begins.

Define the conversion work before ordering
An awning-to-pergola conversion has two linked work packages: remove the existing assembly and prepare the site for a different structure. The old awning may be fixed to a wall, fascia or another part of the building; the new design may call for attachment points, posts and clearances that do not line up with those fixings. Treat old positions as evidence of the existing installation, not as a ready-made layout for the pergola. Before ordering, set the finished coverage and work boundary: what stays, what is removed, and which parts of the wall, patio and drainage are included. Note any retained gutter, light or screen that still needs access.
Set the sequence before trades are booked. Removal can uncover holes or damage that cannot be priced accurately from an outside photo, so agree how newly exposed conditions will be recorded and how extra work will be approved. Decide whether the patio surface is to stay, be locally repaired or be altered; identify retained planting and fittings; and state who protects the house if removal and installation happen on different days. Keep awning disposal, electrical disconnection where required, surface repairs and painting separate from pergola supply and installation unless the written quote explicitly includes each item. A defined boundary is more useful than a single line saying replace awning with pergola.
Record the awning and its fixings
Before removal, make a site record while the awning and its fixings are visible. Photograph the whole patio from fixed viewpoints, then take close-ups of each bracket, visible fastener, patched area, stain or crack. Measure the awning's width, projection and mounting height from identifiable points, and note nearby doors, windows, gutters, downpipes and lights. Include a wide view showing the awning against the house and close-ups with a scale reference; a tight crop alone may not show where a bracket sits in relation to an opening. Record whether the unit is powered and whether controls or wiring are visible, without disconnecting anything as part of measuring.
Gather original awning paperwork, building or renovation drawings, invoices for earlier repairs and photos taken before the awning was installed. These records can help explain changes but may not reflect the current wall or concealed services, so flag any mismatch. If your enquiry is for the Bloomcabin Bioclimatic Pergola, identify the exact catalogue model and attach current supplier information alongside a measured site sketch. Do not ask a supplier or installer to infer new support positions from a picture of the old shade. Mark unknowns, such as wall areas hidden by the awning, an undocumented repair or uncertain wiring, so the person preparing the scope can say what needs inspection before the price is final.
Plan removal of redundant brackets and anchors
Old brackets need their own removal plan, because the visible metalwork may be only part of the job. Record how many brackets and cover plates are present, where they sit relative to joints and openings, and whether there are signs of corrosion, staining, movement, cracking or earlier patching. Some fixings may be hidden behind fascia, cladding or a cover, so do not price every point as a neat surface patch before it is exposed. If the awning has a motor or wiring, include appropriate disconnection by a qualified electrician. Name who removes and disposes of the fabric, frame, brackets, anchors and redundant controls, and whether that work is part of the pergola installation quote.
Do not assume an old anchor is suitable for a different structure because it looks sound, or that a new fixing can use the same hole. The condition and construction of the substrate, the proposed connection and the chosen configuration need to be assessed by the responsible designer or installer. Show any approved reuse or replacement in the installation plan rather than leaving it to an on-site guess. Describe the finish wanted after removal: fasteners out, holes repaired, damaged coating or cladding restored, and any larger repaint identified. A patch may remain visible, so agree the practical finish and the process for approving concealed-damage variations before the work begins.
Specify wall repairs and the finished surface
After the awning is removed, the wall may show faded paint, old sealant, holes, corrosion marks or damage hidden behind brackets. Separate those repairs from the question of where a new pergola connects. Record the wall construction and finish as far as known—brick, rendered masonry, timber framing or cladding—and flag areas that have been repaired or are difficult to inspect. The former bracket positions do not establish where the next connection belongs. If considering the Bloomcabin Wall-Mounted Pergola, ask the project designer to specify how the proposed configuration would connect to this particular building; a product name cannot establish whether the existing surface is suitable.
Write down the finish expected after removal in practical terms. Clarify whether the quote covers bracket stubs, filling old penetrations, cladding or render repair, resealing, repainting the affected area or repainting a larger section to reduce colour mismatch. State which trade supplies matching materials and whether final paint is included. Signs of water entry, soft material or previous patching should prompt an inspection and an agreed repair allowance rather than simply being covered by new trim. If a new wall penetration is required, name who details and reinstates the surrounding finish and weather protection. This separates a connection decision from cosmetic work.

Set out new supports against the patio layout
An awning's shaded footprint does not establish where pergola posts or other supports can go. Draw the proposed roof outline and each support on a measured plan, using fixed references such as a house corner, door opening and paving edge. Test the positions against how the patio is used: door swings, walking routes, dining chairs, gates, bins, clothesline or garden access. A support just outside the old shade can still interrupt a path or occupy a useful paved bay. Show dimensions between supports and to the building, and mark surfaces to be retained. A photo with a rough outline is useful context, but it is not a setting-out plan.
Mark tentative support locations on site with removable markers and review them from inside the house and across the patio before the layout is final. Check that doors and windows remain accessible and that gutters, taps or equipment can still be maintained. Have the installer confirm dimensions against current drawings for the selected configuration; do not scale them from a marketing image. If the quote is for Bloomcabin Pergola, use that exact catalogue name in the brief and request the project drawing showing the proposed footprint. Any agreed change to a support position should be reflected in a revised plan before ground preparation starts, so the finished layout and the work below the surface remain coordinated.
Check the surface and buried services
Establish what is known about the existing patio surface before committing to support positions. A paved patio may consist of pavers over a base, a slab beneath, or several altered areas; decking, a retaining edge or a drain may also affect the work. Appearance alone does not confirm what lies below or whether a proposed connection is appropriate. Record cracked or rocking pavers, uneven joints, patched concrete, surface falls and nearby drainage covers, then ask the installer what must be inspected before setting out. State whether lifting and reinstating paving, cutting a surface, repairing concrete or finishing around supports is included. The responsible building professional must determine the support method for the actual structure and substrate.
Locate buried and concealed services before any intrusive work is planned. Check available site or renovation records for water, gas, electricity, drainage, irrigation and communications, then arrange appropriate on-site verification where a route is uncertain. A remembered line or old plan is not enough to authorise drilling or excavation. This matters where a proposed support falls close to a house wall, drain, garden bed or paved edge. If considering the wall-mounted Bloomcabin pergola, ask the supplier and installer to identify all support points and any required groundwork for the exact configuration rather than assuming the label removes the need for surface checks. Record who coordinates service checks and resolves any conflicts revealed by the work.
Agree where roof water will go
Water needs an explicit plan because removing an awning and adding a roof can change where rain is caught and where it falls. On a site sketch, mark the existing house gutter and downpipes, the proposed roof edge, any collection or outlet points shown on the supplier's drawing, and the intended discharge location. Check whether that route sends water towards a doorway, across a main walking path, onto a boundary or over a part of the patio that should stay dry. Do not assume an existing downpipe or drain can simply take an additional connection; its capacity and suitability need to be checked by the relevant professional. Identify overflow paths as well as the normal route.
Ask for water-management details to appear on the project drawing and in the quote, not just in a conversation on site. Clarify who supplies and installs any channels or downpipes, whether connection to an existing drainage point is included, and who checks that outlet against site conditions. Note any gutters, fascia or wall details affected when the old awning is removed, and specify repairs separately from the new installation if they are excluded. For a quote for Bloomcabin's Bioclimatic Pergola, request the current drawing for the exact selected configuration and the proposed water route at your house. The drawing should distinguish the pergola's water-management details from any separate work needed to connect them to the site's drainage.
Check clearances around doors, gutters and services
Compare the new structure's drawn position with every nearby opening and fitting, not just the old awning edge. Measure door and window opening paths, head clearance, external lights, fans, air-conditioning lines, taps, eaves, gutters and downpipes. Check for items that need cleaning, servicing or replacement, and for a window sash that must still open fully. If the proposed configuration has moving components, use the supplier's stated clearances and drawings for that exact model; do not estimate from a photograph or the outline of the old awning. Show overhead and wall features on the site plan so a contractor sees potential conflicts before ordering or preparing the surface.
An installation can fit on the patio and still make routine access awkward. Consider how a ladder reaches gutters, how windows are cleaned, whether a garden gate opens and whether an external unit can be serviced without moving the structure. Record the location and access needs of anything retained; agree in writing if an item will be relocated and who will arrange that trade. If you are considering the Bloomcabin Pergola model, have the installer verify final clearances against current drawings for the proposed configuration and actual house dimensions. If a clearance cannot be confirmed until the old awning is removed, record that installation must wait for confirmation and name who approves any revised layout before work proceeds.

Separate removal, repairs and installation in the quote
Ask each tenderer to break out the conversion work so the same job is being priced. Name who removes the old frame, fabric, brackets and controls; who arranges electrical disconnection if needed; who disposes of material; and who protects the house and patio. List wall and paving repairs, painting, new connections, support preparation, drainage work and final clean-up as included, excluded or subject to inspection. State whether the quote includes supply, installation or both, and whether a specialist trade is required. If hidden damage changes the work, require a written description and your approval of the price and scope before repairs proceed.
Attach the measured site plan, photos, current supplier drawing and an itemised description of the chosen configuration. If the tender refers to the Bloomcabin Wall-Mounted Pergola model, make sure that identifies the product being quoted, while separate lines describe the wall inspection, removal of old fixings and making good. A product name alone should not be read as confirmation that demolition or repair is included. Note which dimensions and finishes are provisional, the drawing revision used, how access is provided and who resolves conflicts with services. Before accepting, compare exclusions, variations, disposal and return visits as carefully as the headline total; similar-looking quotes can rely on different assumptions.
Confirm local requirements and keep handover records
Check the approval and property requirements for the exact address and proposal before committing to irreversible work. Requirements can vary with location, property type, size and attachment method, so confirm the position with the local council or a suitably qualified building certifier. For a rental, strata or shared property, obtain the relevant owner's or owners corporation's approval and clarify access and repair responsibilities. Ask your insurer whether the change needs to be notified. Do not infer that a pergola is already authorised because an awning has been there for years, or that one approval covers the other. Keep copies of written responses and the drawing that was reviewed.
At handover, keep the final approved drawing, product and installation documents, agreed changes, records of concealed conditions and photos of repaired areas. Ask the installer to identify completed support locations and water outlets on the as-built record, and collect maintenance instructions and paperwork for specialist work or approvals relevant to the project. Walk through door and gate operation, access for cleaning and the finish around former brackets; note outstanding touch-ups in writing before closing the job. For your selected Bioclimatic Pergola, keep the exact model and configuration details with the project drawings. Those records make future repairs or changes easier to discuss without relying on memory.
Frequently asked questions
Can the pergola use the old awning brackets or holes?
Do not assume so. Existing brackets and holes document the old installation; they do not establish that a different structure can use them. Have the proposed connections assessed for the actual building and configuration, and show any approved reuse in the project drawings. Include repairs to unused holes in the written scope.
Should I plan the pergola over the same footprint as the awning?
Use the old shade area as a reference, then draw the proposed roof and support positions on a measured plan. Check door and window access, walking routes, nearby fittings, the patio surface and water discharge. The final layout should be confirmed against current supplier drawings and the site conditions.
Who should remove the old awning?
Name the responsible contractor and specify whether removal, disposal and repairs are included. If the awning has a motor or wiring, arrange disconnection by a qualified electrician. State who will patch or repaint the wall and make good the patio so these tasks are not left between trades.
Do I need council or strata approval?
Confirm requirements for the specific property and proposal with the local council or a suitably qualified building certifier. For a rental or shared property, check with the owner, strata manager or owners corporation as relevant. Ask your insurer directly about any notification requirements; the existing awning does not establish approval for a pergola.
What should I include in a pergola quote request?
Send measured site dimensions, photos of the awning and its fixings, any useful building records, and a plan showing proposed supports and nearby services. Identify the product you are enquiring about, and describe removal, disposal, wall and paving repairs, drainage and electrical work that may be needed. Ask for exclusions and assumptions in writing.
A useful conversion plan connects the existing conditions to the finished proposal: where brackets come out, how the wall and paving are restored, where supports land and where water goes. Pair that record with a written scope naming responsible trades and the process for approving variations. When the old awning is documented before removal and new connections are assessed for the actual site, the project can be priced and handed over on defined work rather than assumptions.
