
Can You Extend a Pergola with Another Module Later?
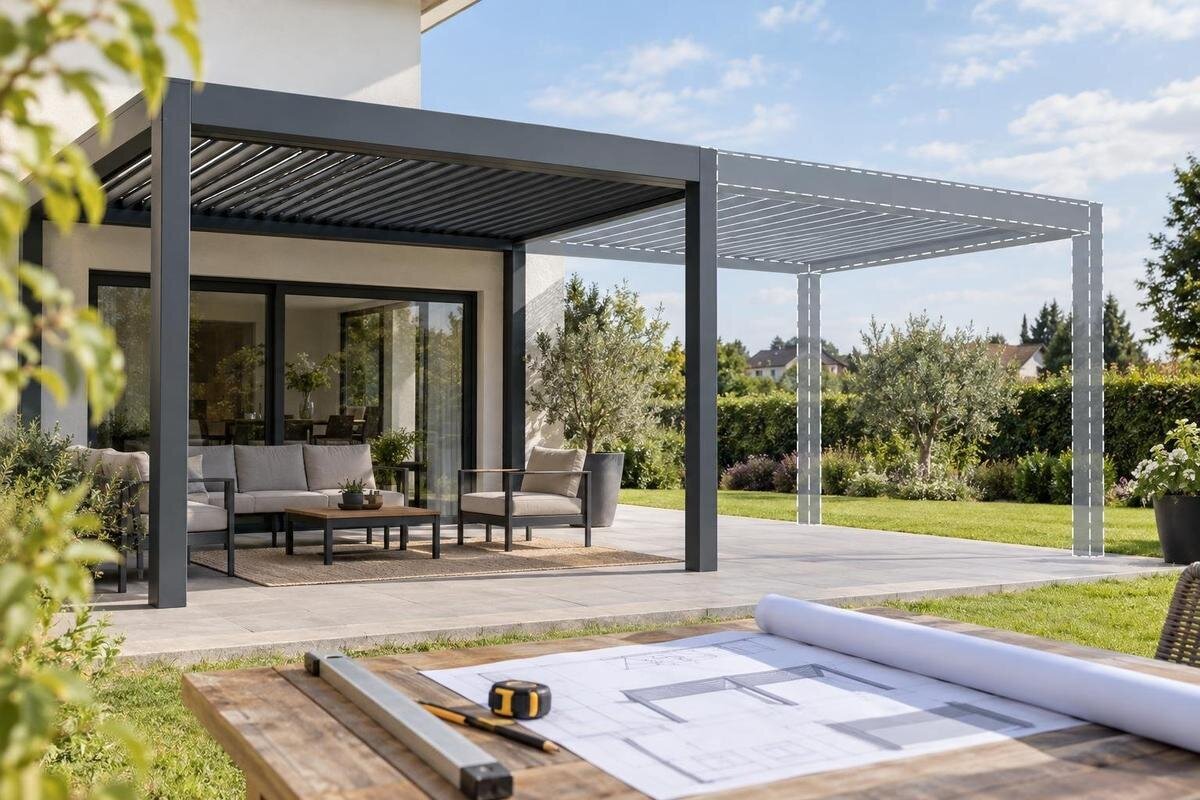
Pergola planning
Planning to add a second pergola module later? It may be possible, but only if the exact system is approved for the joined layout and the site can support its final arrangement. A matching appearance, the same product name or unused paving beside the first structure is not evidence that modules connect. Before ordering, resolve the connection detail, roof drainage, support positions and future supply. If a continuous structure is not essential, two separate pergolas may be an alternative, but their proximity does not make them one system.

What counts as a pergola extension?
A genuine extension is more than placing a second frame alongside the first. The supplier needs to confirm that the specific model, size, orientation and production version can be connected in the proposed arrangement. A product range may include several sizes or styles without every pair sharing a standard joint. End posts, perimeter beams, gutters or trims can form part of the original layout, so do not assume an edge component can be removed or reused. Ask whether an approved drawing shows both modules together, rather than relying on separate drawings of each one.
Sometimes the better plan is two separate modules rather than an attempted join. They may sit beside each other and serve one outdoor area, yet remain distinct structures with a gap, separate edges and separate support and drainage arrangements. Draw the gap honestly and check that the layout suits how you want to use the space. If uninterrupted cover, a flush roof line or a shared appearance matters, say so before choosing a configuration. Do not plan to cut away a post, beam or gutter unless the supplier has approved that exact change in writing.
Plan the final footprint before the first installation
Draw the first pergola and the intended final layout on one measured plan. Use dimensions from the selected configuration’s supplier drawing, then mark the house, doors and windows, eaves, fences, steps, paths, downpipes, trees and fixed outdoor features. Show the direction the second module would extend and where a join or gap would fall. A listing such as Bloomcabin Pergola can help identify the candidate model, but a product name or image cannot show how it fits your site. Base the footprint on the issued drawing, not visual proportions in a photograph. The planned seating area and walking route matter too: a support near the join may affect circulation.
Label the first-stage and completed footprints separately, and mark the reference points used for the measurements. Include expected support positions from the supplier’s drawing, finished surface levels and any existing slab edges, joints or drainage channels. Compare how you would use the area at each stage: show the table, chairs and main walking route rather than leaving the footprint empty. This helps you judge whether the first module works on its own and whether a support at the future join would obstruct the completed seating area. Record buried services where their locations are known; do not assume they avoid the future work area. Photos taken before paving or other work hides details can help a later installer understand the site, but are not a substitute for checking conditions again. Keep the plan and site records with the project documents.
Get a connection drawing for the exact model
Ask for a project-specific connection drawing showing the first pergola and the proposed later module together. It should identify the models or revisions being paired, the joining side, overall footprint and any support, beam, gutter or trim that is shared, retained or added. The Bloomcabin Wall-Mounted Pergola name identifies a candidate model; it does not confirm that another module can attach to it. Ask the supplier to answer for the exact configuration and direction you have planned, not just for the product family in general.
The drawing or written confirmation should make clear whether the first unit needs a different arrangement from day one, what parts are required for the join, and which items are supplied now or with a later order. Ask how the two stages are assembled and whether the connection requires access to parts of the original structure. Have the supplier distinguish components that stay in place from those that would be removed, replaced or repositioned. If the first-stage drawing shows a finished outer edge, ask how that same edge is represented in the completed layout. This makes it easier to understand what the later installation involves rather than treating the second module as an isolated purchase. Confirm whether any proposed site modification is permitted and whether it affects the agreed installation or warranty conditions. Save the approved drawing, its revision or date, and the related correspondence with the quote so a future installer is not working from an old image or assumption.
Plan drainage for the joined roof
A later module can change where roof water needs to go. An edge that drains freely today may become a junction, sit beside a new roof section or need a different outlet arrangement once the layout changes. Do not assume that gutters can simply be continued, shared or removed. Ask for a drawing of the completed roof that shows the collection paths, gutters, outlets, overflow routes and discharge points. It should also clarify whether each module drains separately or whether the approved design uses a shared path, and what happens to the original drainage arrangement.
If the proposed roof has moving sections, ask whether their operating positions affect the intended water path and which drainage arrangements apply. When discussing a Bloomcabin Bioclimatic Pergola, include those questions in the request for project-specific drainage details. Check where water will discharge in the completed layout and whether that point works with the existing site drainage. Ask the supplier to distinguish the drainage arrangement needed for the first stage from any changes needed for the second. A visually neat seam does not by itself show how water is managed, so resolve the drainage plan before fixing the first layout.

Check foundations for the completed layout
Supports selected for the first pergola should not be presumed suitable for a larger final arrangement. Adding another module changes the structure and its support requirements; the appropriate design depends on the exact system and site. A paved area or visible slab does not establish what lies below it or whether it is suitable for the proposed supports. Ask a suitably qualified professional to review the supplier’s information and the actual site, and to confirm whether the first-stage support plan can form part of the completed design.
Compare the planned positions for both stages with slab edges, joints, drains, known services and the access available for future work. A later support may fall where a service, path or existing feature makes construction difficult, even if the overall footprint appears to fit. Do not choose larger or shared footings by guesswork, or assume that a new post can be fixed to an existing frame or base. Keep records of what was installed and where; if those details are missing when you plan the extension, have the site assessed again before relying on the original foundations.
Separate roof controls do not prove modules can join
Physical connection and roof operation are separate design questions. Joined modules do not necessarily have independently operated roof areas, while two separate structures may each have their own controls. Decide whether you want the roof areas to operate together or as distinct zones, then ask how that requirement works in the exact final configuration. Describe the use you have in mind: for example, you may want one roof area to remain in its chosen position while you adjust the other. Ask the supplier to explain whether that is possible rather than relying on the phrase ‘separate controls’, which may leave your intended operation unclear. Confirm what controls, equipment and commissioning are included for the first stage and what would be required when the second module is added.
When enquiring about roof-control options for the Bloomcabin Pergola, ask the supplier to show the boundary between the proposed zones on the plan. The response should describe how the system would operate once both modules are installed, not just how the first roof works on its own. Do not infer independent operation from the appearance of two roof sections or from modules being sold separately. If independent control matters to you, make it a written requirement and ask the installer how it will be demonstrated at handover. That gives you a clear way to compare the proposed arrangement with the operation you requested.
Allow for access and local site checks
Think about how a future installer would reach the new work area after the first module is in place. Check the route through gates and around the existing pergola, and note whether a fence, planter, paving, downpipe or other fixed feature could restrict access to the planned join or support positions. Ask the supplier or installer what clearance and access the later work will need, and whether the connection can be made with the first structure remaining in place. A layout that fits on paper may still be awkward to build if the working area will be blocked.
Check what reviews, if any, apply to the actual property and final arrangement. Requirements and insurance conditions can depend on location and circumstances, so ask the relevant local council, building certifier or insurer rather than relying on a general statement. Do not assume a check for the first stage automatically covers a changed final layout. If you are considering a bioclimatic pergola, include the proposed site plan and completed footprint in your enquiries. Identify which work is planned now and which would happen later, so the response addresses the staged proposal rather than only the initial structure.
Confirm future component availability
A product name or appearance may stay familiar while a model, finish or component changes. Ask the supplier how to identify the exact first-stage configuration and how future compatibility will be confirmed. Record the model, options, finish, order details and drawing revision, and keep any information about approved connecting parts. If you choose the wall-mounted pergola model, save the listing alongside the details of your actual order. The listing helps identify the starting product, while the order records distinguish the configuration you bought. Neither guarantees that a matching module or connection component will be available later.
Ask whether the supplier can provide written compatibility information for the later stage and what details they will need from you. Treat future supply as unconfirmed unless the relevant terms state otherwise; a quote or online listing does not by itself reserve stock or prove a later module will match. If the original model is no longer available, a substitute may need a fresh design review rather than an improvised join. Before placing the second order, recheck the model version, connection details, drainage plan and site conditions against current supplier information.

Separate the two stages in the first quote
Tell the supplier that the first purchase is part of a planned two-stage layout. Ask the quote and drawings to distinguish what is included now from what would need to be ordered or completed later. List the specific items that affect the join, such as additional supports, connection parts, roof-edge components, drainage work, controls and installation tasks. State clearly whether the later module itself is included, excluded or still undecided. If the regular Bloomcabin Pergola is your starting choice, use its name consistently in the enquiry and identify the configuration shown on the drawing. Keep possible future work separate from the current order total rather than leaving it mixed into a general description of the project. Ask for any unresolved items to be labelled as such, so an allowance or preliminary discussion is not mistaken for a confirmed inclusion.
Ask who is responsible for confirming the existing support layout before the later installation, updating the drawings if the product changes, and completing the connection work. Record any assumptions about access, site preparation and how drainage or roof controls will be handled. Ask what conditions apply if the chosen future module differs from the current one, and which warranty or installation terms are relevant to a later addition. These details help separate a product listing from the actual work you expect; an unrecorded discussion is easy for a future owner or installer to misinterpret.
Decide whether a staged extension suits your plans
Before choosing a staged purchase, decide which features of the completed pergola are essential and which are preferences. Consider uninterrupted cover, support positions, roof-control zones and a matching appearance. For a wall-mounted pergola option, assess the proposed completed layout as well as the first module. If a necessary connection or drainage detail remains unresolved, ask whether you would still be satisfied with the first pergola on its own. If the answer is no, the proposed extension is central to your purchase decision, not simply a possible later improvement. Do not rely on an unapproved modification to achieve the final arrangement.
Compare the alternatives against those priorities. A confirmed joined layout may meet your need for continuous cover; two separate structures may be acceptable if you can accommodate the gap and separate supports. You may also prefer to leave the later addition as a new design project rather than commit to a particular connection now. Record which approach you are choosing and which questions remain open. Reconfirm compatibility and availability before ordering the second module, and have the layout reviewed again if site conditions have changed. This keeps the first purchase useful in its own right without treating a future extension as guaranteed.
Frequently asked questions
Can any pergola take a second module from the same brand?
No. A shared brand or similar appearance does not confirm that two modules can be joined. Check compatibility for the exact models, configurations and production versions, and ask for written confirmation and a drawing of the combined layout.
Can I put two pergolas side by side instead?
Possibly, if the site and intended use suit two separate structures. They may still have a gap, separate supports and separate drainage, so this is not the same as one physically extended pergola.
Will the second module have independent roof controls?
Not necessarily. Physical connection and roof control are separate questions. If you want to operate each roof area independently, confirm that the exact combined configuration supports it and that the controls are included in the agreed scope.
Should I install larger footings now for a future module?
Do not guess at a future footing layout. Ask a suitably qualified professional to assess the proposed final arrangement, site conditions and supplier drawings, and confirm whether the first-stage supports can be part of that design.
What records should I keep for a later extension?
Keep the model and configuration details, approved connection and drainage drawings, quote inclusions, supplier correspondence, and records showing the installed support positions and site conditions. Reconfirm compatibility and availability before ordering the later module.
A second module is worth planning for, but spare space and a matching appearance are not enough. The key is a confirmed arrangement for the connection, supports and drainage, with roof-control requirements considered separately. Keep the first pergola useful on its own if future supply remains uncertain. That way, your purchase meets today’s needs without depending on a later join that has not yet been established.
