
Laying Out a Pergola for Supervised Family Play
Family pergola planning
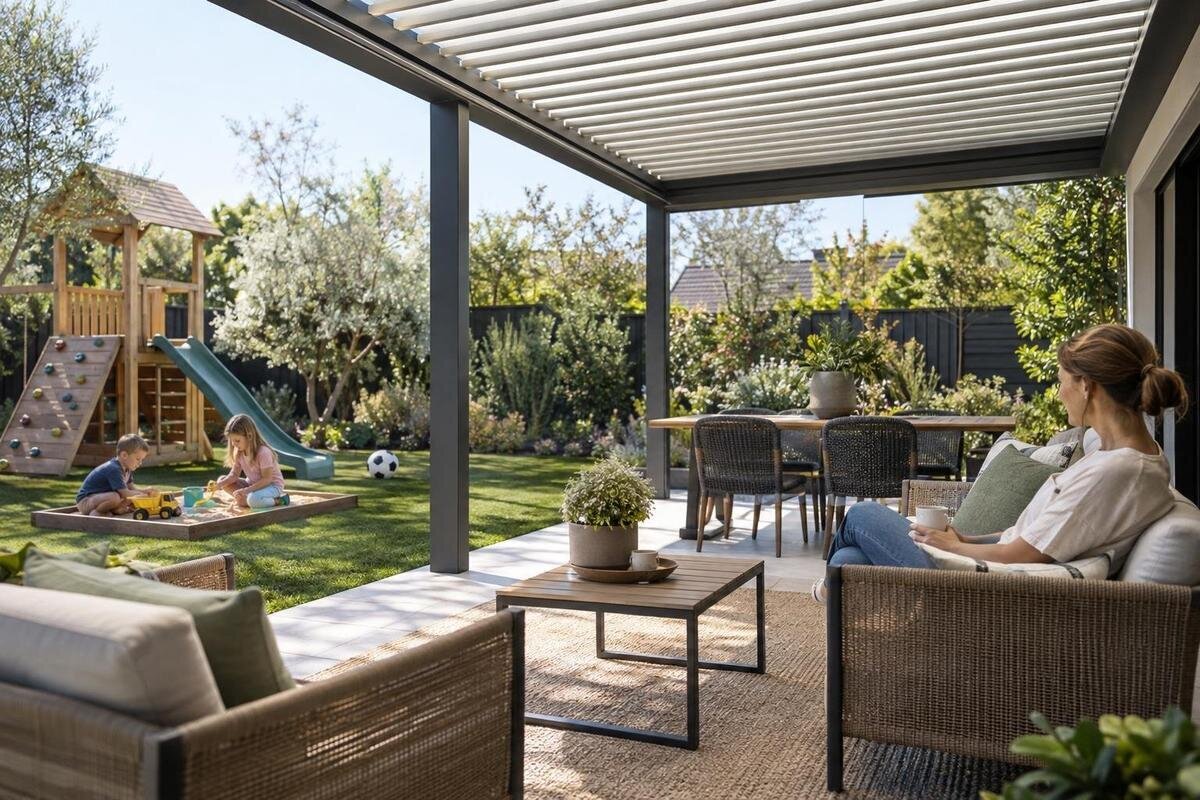
A family pergola layout works best when adults have a clear view of play, with furniture and play gear positioned around that view. Start from the adult’s normal supervision position, then map the play zone, everyday walking routes, doors and equipment clearances. A pergola can organise an outdoor area, but it is not child-safe by default and does not replace supervision or suitable barriers. Use measured furniture and equipment footprints; treat any sketch as a concept until the selected model and site details are confirmed.

Choose the supervision viewpoint first
Choose the place where an adult will genuinely supervise during ordinary family use, rather than assuming the centre of the pergola is the best spot. It could be a chair near the house, a bench beside a play table or a standing position used while someone moves between indoor and outdoor tasks. Base the plan on real routines, not an idealised view of the yard. Mark the adult’s likely position, then mark the area where play will take place, including the edges children may reach as they crawl, run or carry toys. The useful question is whether the adult can see what is happening clearly without shifting furniture each time.
Check the view from a seated position as well as from standing, and consider whether an adult can still notice play while turning towards a doorway or speaking to another person. A post, tall pot, privacy screen, established plant or high-backed chair can hide part of the area; several small obstructions can combine into a blind corner. Test the intended arrangement with temporary markers before making purchase decisions. If supervision may happen from inside, check the actual view through the doorway or window, including reflections and different door positions. A clear view can support attentive supervision, but it cannot replace an adult’s attention or make a structure, surface or piece of play equipment child-safe.
Map sightlines across the whole play area
Draw the whole area at a usable scale before deciding where equipment goes. Include the house edge, doors and windows, steps, boundaries, fixed garden beds, large pots, screens and any posts or other confirmed obstructions. Add the actual dimensions of chairs, tables, toy storage and play equipment rather than generic boxes; furniture needs more room when people are sitting or pulling chairs out. If the pergola has not been selected, mark a provisional footprint and label it as such, then replace it with the dimensions for the chosen configuration. A plan that omits fixed features can make an apparently open view look better than it is. If a sketch is not to scale, label it clearly so it is not mistaken for a dimensioned plan.
Trace a sightline from each supervision position to every part of the play zone. Look for places where a child could disappear behind a post, furniture back, planter or screen, and check whether one adult can see multiple activities at once. If not, make the play area more compact or rearrange the activities so each is visible from the intended supervision position. Concept only: an adult seat at one edge, a low play table in the open area directly in view, and a walking route along another edge illustrate simple zoning, not a universal plan or construction drawing. Your own dimensions and fixed features determine whether that arrangement works.
Keep everyday routes outside active play
Map everyday movement separately from play: the route from the house to the yard, outdoor seating, a side gate, garden storage or other frequently used parts of the property. Keep the main passage outside the area where children run, ride, build or use equipment. This makes it easier for someone to carry items without cutting through an activity, and avoids relying on children to move aside whenever an adult passes. Where the space is narrow, decide which use takes priority rather than squeezing a path through equipment’s required clearance. Measure the route with the people and objects that actually use it, not only an empty strip on paper. Consider whether people can pass when someone has stopped nearby.
Keep this route clear after adding the structure and furniture. If the Bloomcabin Pergola is on your shortlist, compare the confirmed outline and support positions of the selected configuration with the route, not just the open floor area. The listed area alone cannot show where a support will sit or how much room will remain for passage, so confirm the relevant dimensions before positioning furniture. A path that only works when chairs are pushed in or toys are packed away is not a dependable everyday route. Recheck it with doors open and the play zone set up as it will be used.
Give play equipment its own clear zone
Treat each piece of play equipment as a zone, not just an object with a footprint. Mark its base and the space needed for its intended use, including any movement, access or fall-clearance area stated by its manufacturer. Keep that whole zone out of the everyday route and away from furniture that will be pulled into it. A toy that is harmless when parked may occupy more room once a child starts using it, and a ball game may spread beyond a small marked spot. Use the equipment instructions for required clearances and surfaces; a pergola plan is not a substitute for those directions. Keep separate activity zones apart unless the instructions and layout confirm they can share space.
Do not assume the pergola frame can carry a swing, hanging seat, climbing rope or other added play fitting. Use an attachment only where the selected product is expressly intended for it and its suitability has been confirmed by the manufacturer and a suitably qualified professional. A catalogue name is not a load rating: the Bloomcabin Bioclimatic Pergola listing identifies a model, but does not establish whether any play attachment is supported. If there is no such confirmation, choose equipment designed for independent use and follow its instructions.

Match the pergola footprint to family activities
Measure the usable ground area and the pergola footprint rather than relying on an overall patio estimate. The Bloomcabin Wall-Mounted Pergola is listed in sizes from 9 to 24 m²; that range is a starting point for comparison, not a promise about the exact outside dimensions, support positions or uninterrupted floor area in the configuration you choose. Confirm those details for the selected model before arranging play and furniture. The space a family layout needs includes access and equipment clearances as well as the area beneath the roof. A generous footprint can still leave a poor route or obstruct a key view if positions do not line up.
Test a proposed arrangement at full scale. On paving, use removable markers; on grass, a hose can trace the outline. Mark confirmed support positions, equipment’s use area, the adult’s normal seat and a route that stays clear. Put actual chairs and a table in place, then pull chairs out and walk through as family members would. Include a pram or bulky item only if it is part of your real routine. Repeat the test with doors in their usual open positions and toys laid out. This mock-up reveals where usable floor space disappears and helps you compare configurations without assuming the listed area is all open play space.
Arrange seating for a clear view of play
Arrange adult seating to face the play area without requiring a constant twist or a view past a tall chair back. A chair turned towards conversation or a dining table may leave a child behind it, even when the pergola has plenty of floor area. If more than one adult is likely to sit outside, plot both seats and check that the second does not block the first person’s view. Keep the play zone where a seated adult can see the activity, not merely the edge of a mat or equipment. Where one seat cannot cover all activities, simplify the zones rather than relying on quick glances between hidden corners.
Use the actual chairs to test the drawing; seat height, armrests and backs change what is visible. Sit in the usual position, look towards activities at ground level, then check the view while another person walks along the route. When comparing the regular Bloomcabin pergola, include its confirmed support positions and the space occupied by people sitting in the chairs. An empty outline will not show these obstructions. Include any planned privacy screen or tall storage unit in the trial as well. This test should reflect the way adults will sit and supervise during normal use, rather than an arrangement that offers a clear view only when the space is empty.
Check where shade falls during play
Do not assume the shade line matches the pergola footprint. Sun angle and time of day change where shade falls, while nearby buildings, trees and the season can alter the pattern. Note when the family is most likely to use the play area, then observe the site at those times if possible. Check both the adult’s seat and the part of the ground used for play; a shaded chair is little help if the equipment is exposed, and a shaded play spot is less useful if the supervising adult has no comfortable view. Avoid moving equipment into a route just to chase a changing patch of shade.
Ask for details of the exact roof configuration under consideration and assess how it would shade the site alongside nearby trees and buildings. When reviewing the bioclimatic pergola listing, distinguish the model name from configuration details: the name alone does not establish when or how much shade will reach a particular play zone. Keep equipment in a position that meets its own instructions, and assess shade for the adult’s seat and play area together. A single observation cannot describe every seasonal pattern, so revisit the layout if the family’s routine shifts to a different time of day.
Keep toys and storage out of the way
Give toys, drawing supplies and loose play items a home that is easy to reach but does not interrupt the clear route or hide a child from the adult’s seat. Tall storage, a row of bulky pots or a toy box placed at the edge of an activity can create a blind spot even if the main play equipment is visible. Keep frequently used items together where possible, and think about where they will sit when being used, not only when neatly stored. Avoid using a narrow access strip as overflow storage, since it can become blocked during busy family use.
When comparing the Bloomcabin Pergola listing, include toy storage, occupied chairs, the play zone and walking route in the same measured sketch; do not treat the listed square metres as unobstructed floor space. Allow room to get equipment out and put it away without stepping into an area where other equipment is in use or blocking a door. A basket or low unit can be convenient, but it still needs a position that preserves the adult’s view. Check where items are left during play as well as after packing up, and revisit the arrangement as children acquire larger or different equipment.

Plan around doors, steps and access points
Draw every doorway and access point in its working position. A door leaf, screen door, step or gate can alter the route or the view when open; a straight line on a closed-door plan may not match daily use. Include the path between the house and play area, and consider where an adult will stand while carrying items, helping a child or moving a chair. Keep that movement out of equipment clearances, and avoid putting a chair where it narrows the usable doorway. If a particular opening is the best supervision point, test the view with the door both open and closed.
When considering a wall-mounted pergola model, put the actual wall, windows, openings and walking route on the same plan as its confirmed configuration. Allow for the space doors occupy when open and the access your household needs along the wall; these details may limit where furniture or play equipment can go. If the proposed arrangement depends on changing a doorway, attachment points or site levels, obtain the relevant dimensions and site-specific advice from the responsible supplier or a suitably qualified professional.
Review supervision and boundaries together
Include boundaries and nearby hazards in the final drawing, particularly if a pool, driveway, road access or another restricted area is close to the play zone. A pergola, its posts, furniture and an adult’s sightline do not function as a safety barrier. Plan any needed separation independently and seek suitable site-specific advice where the layout meets another risk. Keep the play area where an adult can supervise it, and do not route children through a hazardous access point simply because it is the shortest way to the garden. Supervision and physical boundary arrangements are separate parts of the plan.
Before settling on a model, review the same annotated plan against the chosen configuration, furniture footprints, equipment instructions and normal routes. The listed wall-mounted option is one candidate to assess, not proof that a particular family layout will fit or be suitable; verify actual dimensions and any site requirements for the exact configuration. Repeat the review if the household changes a seat, adds play equipment or moves a storage unit. As children grow, the equipment and places they use may change, so keep the layout easy to reassess rather than treating the first plan as permanent.
Frequently asked questions
Does a pergola make a play area child-safe?
No. A pergola can help organise an outdoor space, but it does not automatically make the structure, surface or equipment suitable for children. Plan clear views and routes, follow equipment instructions, arrange any necessary barriers separately, and maintain active adult supervision.
How can I test a clear sightline before installation?
Mark the proposed seating position and play area, then try the view from a real chair and from standing. Include posts, plants, furniture and open doors in the test. A temporary full-scale layout can reveal blind spots that are easy to miss on a plan.
How much space should I allow around play equipment?
Measure the equipment and the space needed to use it, not just its base. Follow the manufacturer’s instructions for clearances and surfaces, and keep those areas clear of furniture and everyday walking routes. There is no single allowance that suits every product.
Can I attach a swing to a pergola?
Do not assume a pergola can support a swing or other play fitting. Use an attachment only if the selected product is intended for it and its suitability is confirmed by the manufacturer and a suitably qualified professional.
Will a pergola shade the play area all day?
Not necessarily. Shade changes with the sun, season and nearby trees or buildings. Check the site at the times your family uses it and confirm what the selected configuration provides; a model name alone cannot show where shade will fall.
A useful family layout keeps the actual play area visible from a real supervision position, leaves everyday routes open and respects the clearances required by play equipment. The test is not simply how much of the patio sits beneath the pergola, but whether people, furniture, doors and play still work together when used at once. Keep the plan adaptable as children, equipment and routines change, and never treat the pergola itself as a barrier or proof of safety.
