
Pergola Gutters Overflowing: A Step-by-Step Check
Pergola drainage
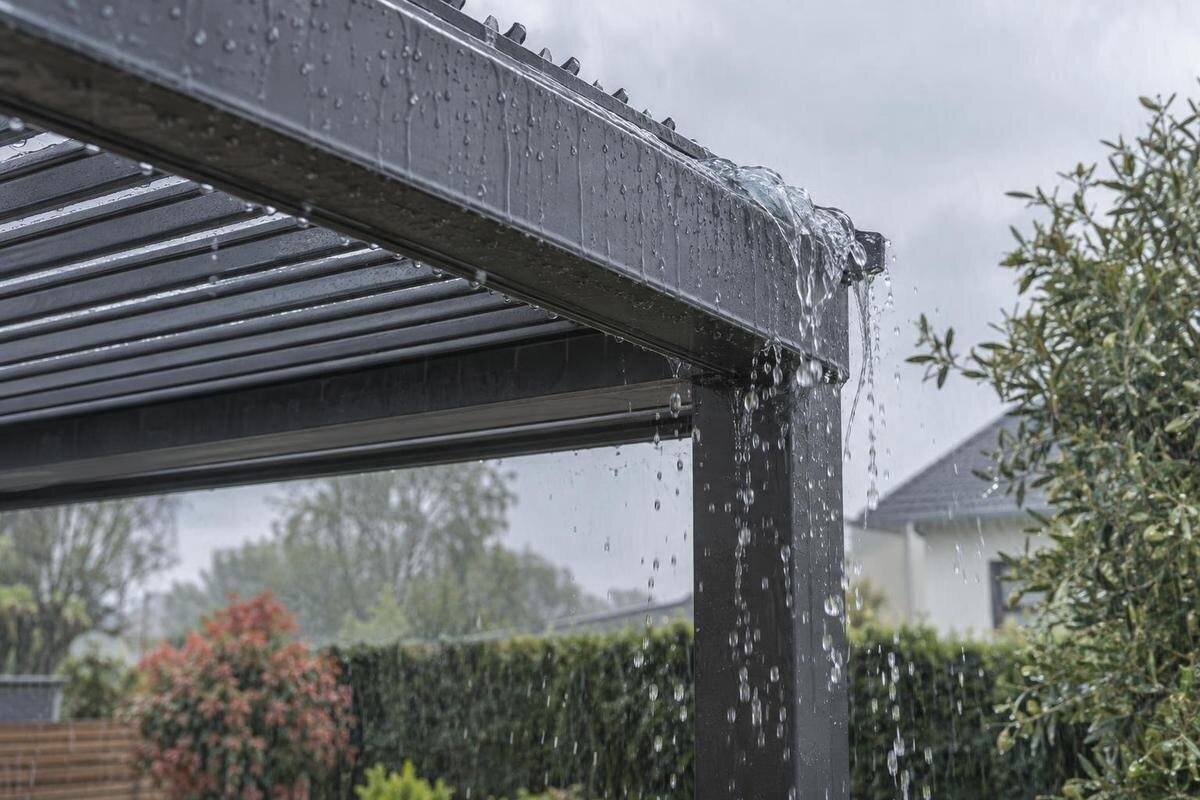
When water spills from a pergola gutter, leaves are only one possible cause. A restricted outlet, a blockage farther down the downpipe, a shifted joint or rainfall beyond the system’s intended limits can produce similar symptoms. Follow the water path in order and record where the first escape occurs. That helps distinguish a local obstruction from a downstream or design issue without assuming every overflow means the pergola has failed.

What pergola gutter overflow looks like
Treat it as gutter overflow when water overtops a channel or pours out at its end while rain is arriving from the pergola roof. Record the first escape point: along a straight run, at a corner, near an outlet or at a joint. Note whether the gutter fills across a broad section before spilling, or whether a narrow stream appears at one fitting while the rest stays low. That difference helps organise the checks that follow, but does not prove that the channel, joint or outlet is faulty. If you see both a sheet of water and separate drips, record each rather than combining them.
A wet patch beneath a pergola is not enough to call it gutter overflow. Water may pass through another part of the roof arrangement, run along a frame member or be driven sideways by wind, then fall some distance away. Observe the first place water leaves the structure, not just where it lands. If it escapes from a seam or roof edge rather than the gutter, record that as a separate symptom; it may need a different check. Do not reach overhead or move components to trace it. A photo from a safe position can help distinguish the paths later.
Record the conditions before inspecting
Do not inspect a wet roof or reach for a gutter during a storm. Avoid climbing a ladder when surfaces are wet or wind is gusting; use a sheltered, ground-level view or wait until conditions are safe. Before clearing anything, record the date, approximate duration of the rain, whether it arrived in a brief intense burst or a steady period, and which side of the pergola faced the wind. These details help explain whether the issue appears only under a particular combination of conditions. They also make a second observation more useful than relying on a memory of how wet the patio looked.
Note the roof’s operating position and any installed enclosure where those details matter to that model’s instructions. If the manufacturer specifies a rain position for an adjustable roof, record whether it was in that position; do not change it in active weather just to test the gutter. A short video from a safe spot can show whether overflow starts at once, builds gradually or follows a change in wind. Avoid deliberate high-volume hose tests: they can create an unrepresentative flow and make it harder to identify where the restriction lies. Wait for a suitable natural observation instead.
Trace the intended water route
Find the product manual or drainage drawing before judging whether water is taking the right route. A pergola’s gutter, collection channel and outlet arrangement are model-specific; the visible edge alone does not show where each run is meant to drain. On some designs, water may be directed through parts of the frame rather than an obvious outer channel, so use the drawing to locate collection points. Mark the intended outlets on a simple sketch, then compare them with what you can see. If you are identifying a unit, use the Bloomcabin Pergola listing alongside your order details to establish which model’s drainage information you need.
Check whether the observed overflow is on the route shown in the documentation, and whether water should travel to another side or a concealed outlet before reaching the downpipe. Do not assume every corner is a drain, that each channel connects to the nearest downpipe, or that an added screen or wall leaves the flow unchanged. A neighbour’s pergola or an online photo is not a reliable substitute, even when the structures look similar. If the installation differs from its drawing, photograph the difference and ask the supplier or installer to identify it; do not drill, reroute or seal a channel on guesswork.
Check for a local obstruction
Once you understand the route, look for a visible blockage in the gutter section that overflowed and around its outlet. Leaves, twigs, seed pods and accumulated dirt can form a dam, while a small amount of debris at an outlet may restrict flow even if most of the channel looks clear. Check the length feeding that outlet, not just the few centimetres beside the spill: material farther upstream can hold water back. This is a targeted fault check, not a routine cleaning schedule. Note what you see before removing anything, so you can compare the symptom afterwards.
Only remove material that is safely reachable and that the maker’s care instructions allow you to handle. For a Bloomcabin Bioclimatic Pergola, check the care guidance for your installed configuration before deciding which parts you can access. Do not push a stick or wire into an outlet, or direct a pressure-washer stream into it; debris can be forced out of sight and components may be damaged. If access requires roof work, dismantling or an unsafe reach, leave it to a suitable professional. Take before-and-after photos if you do clear an accessible obstruction, then observe the next natural rain rather than changing several parts at once.

Separate outlet problems from downpipe blockages
Inspect the outlet as a separate point in the route. Look for leaves or sediment covering the opening, a displaced cover if the instructions show one, or water rising around the inlet while the rest of the gutter is not full. Do not remove a guard or fitting unless the product instructions say it is removable. A clear-looking opening does not rule out a restriction below it: the outlet throat or a connected section may be obstructed out of view. Avoid poking or forcing anything down the pipe, and note if you cannot see far enough to confirm that it is clear.
Then follow the downpipe as far as it is safely visible. Note whether water appears at its discharge during rain, whether a joint leaks, or whether water seems to back up at the top; each is a clue, not a diagnosis. If the pipe runs into a buried drain or an inaccessible connection, a visual check cannot isolate a blockage farther along. A drainage professional can inspect that section. When discussing a Bloomcabin Wall-Mounted Pergola with the supplier, ask them to identify the connection between the outlet and downpipe on the model’s drawing, particularly where that part of the route is concealed.
Read the overflow pattern
Use the location of the spill to rank possibilities rather than name a cause. One corner overflowing while other lengths stay low points towards a local outlet, joint or alignment issue; water overtopping a broad section suggests that the incoming flow is exceeding what the route can carry, or that a restriction is holding water back. Neither pattern proves the cause: a hidden obstruction can affect more than one section, and water may travel along a channel before it spills. Mark the location on your sketch and compare other sections during the same shower, if you can do so safely.
Timing adds another clue. Overflow that begins as soon as a heavy shower arrives may reflect a sharp inflow or a restricted route; overflow that develops later can mean water is collecting as a partial obstruction slows it. If it continues after the rain eases, note whether water is still draining slowly rather than assuming the roof is leaking. Compare observations from similar conditions when possible, but do not wait for dangerous weather to repeat the test. If you are assessing a regular Bloomcabin Pergola as a replacement, use this record to explain the existing problem and ask how the proposed drainage arrangement compares.
Follow the route beyond the downpipe
Do not stop at the bottom of the downpipe if its discharge is visible. From a safe position during rain, see whether water exits, sprays from a joint or appears to return towards the gutter. A restriction beyond the pipe can make a clear gutter overflow, while splash-back from a hard surface may look like a new leak underneath. Water pooling below the outlet may simply be its discharge, so distinguish that from water spilling over the channel. Record whether the first escape is at the gutter, pipe connection or discharge point; those locations call for different parts of the route to be checked.
If the pipe connects to an underground drain or another part of the site’s stormwater system, do not disconnect it or try to clear it by force. Note where the pipe disappears and whether the symptom recurs in similar rain; a plumber or drainage specialist can inspect concealed sections. Surface pooling alone does not prove that the pergola outlet is blocked. If you are considering the bioclimatic pergola model for an existing site, discuss the proposed outlet connection separately from the roof choice. Confirm how it would connect to the existing discharge route rather than assuming the model’s name or footprint establishes compatibility.
Compare heavy-rain events with design limits
A clear gutter and downpipe can still spill when rainfall reaches or exceeds the system’s intended drainage conditions. A very intense burst, wind-driven rain or water arriving from an unexpected direction may produce a different flow from ordinary conditions. There is no universal threshold that applies to every pergola, and one overflow during extreme weather does not by itself show a defect. Conversely, repeated overflow in modest rain should not be dismissed as a design limit without checking the route and product guidance. Record the wind direction and roof position as part of the event, not as proof of capacity.
Look up model-specific weather limits and drainage diagrams, including any stated operating conditions, before deciding that the gutter is undersized or faulty. Note the roof configuration and any enclosure, because these may affect how water reaches a collection channel; do not infer the effect without documentation. The Bloomcabin Pergola size options cover catalogue areas from 9 to 24 m²; those figures describe area only, not drainage capacity or a storm guarantee. When comparing sizes, keep your questions about area separate from questions about drainage performance. Ask for information tied to the exact model and setup, rather than applying a general rule to every pergola.

Look for alignment or configuration changes
After checking for visible debris and a downstream restriction, look for changes in the route: a shifted joint, a visibly altered or sagging channel, a loose end piece, or an outlet that no longer sits where the drawing shows. Compare the installation with the manufacturer’s diagram instead of assuming the gutter should look level or adjusting its angle yourself; drainage arrangements are specific to the system. Note whether the condition appeared after a repair, impact, relocation or installation of an accessory. A photo taken in dry conditions can help an installer compare the current arrangement with the documented one.
Do not reseal a joint, add an outlet or alter supports as a diagnostic experiment. A change may send water elsewhere without fixing the original restriction, and an unapproved alteration can make later assessment harder. If you are considering a different model, identify its exact configuration rather than comparing names alone. For the Bloomcabin bioclimatic model, request the drainage drawing for the configuration you intend to order and ask the installer to assess it against the proposed site arrangement. Include details of any existing changes that are not shown in the original plan, so the discussion addresses the installation as it stands.
Give a useful fault report to the supplier
Give the supplier or installer a concise record: model name, any product label or order details, the date and character of the rain, roof position if applicable, exact spill point, whether other sections overflowed, and what you could safely see at the outlet, downpipe and discharge. Include clear photos or a short video taken from ground level, plus the drainage diagram if available. Describe where water first leaves the structure rather than writing only that it leaks. Say what you could not inspect, especially concealed pipework, so a visual check is not mistaken for a complete investigation.
Ask specific questions: does the drawing show this point as an outlet, is the observed flow consistent with this configuration, and should someone inspect the channel, connection or downstream drain? If considering a wall-mounted Bloomcabin replacement, explain the existing overflow before discussing the new installation. Ask how its proposed drainage route would differ and which parts of the current discharge arrangement need assessment. Seek professional help when the route is inaccessible, components look displaced or overflow persists despite an apparently clear path. The observations you have gathered will help direct that assessment towards the part of the system that needs attention.
Frequently asked questions
What is the most common cause of pergola gutter overflow?
There is no single cause to assume across all pergolas. Leaves and other debris, a restricted outlet or downpipe, a problem farther along the discharge route, heavy rain or an installation change can all produce similar signs. Follow the water path and check the model-specific guidance before deciding.
Why does the gutter overflow only in a heavy shower?
A short, intense burst may send water into the gutter faster than the drainage route can carry it, or reveal a partial restriction that is less obvious in lighter rain. Record the weather and where the water spills, then compare the pattern with the pergola’s drainage and weather guidance.
Can I clear a blocked pergola downpipe myself?
Only deal with material that is safely accessible and that the product instructions say you can remove. Avoid pushing rods or tools into a pipe or using high-pressure water. If the blockage is concealed, the pipe is difficult to reach or the instructions are unclear, ask a drainage professional to inspect it.
Does overflow mean the pergola is defective?
Not by itself. A visible blockage, restricted downpipe, changed joint or rainfall beyond the system’s intended conditions can all cause overflow. First rule out accessible obstructions and check the documented route. If the path appears clear but the problem recurs, ask the supplier, installer or a drainage professional to assess it.
Can the pergola’s area tell me whether its gutter is adequate?
No. The listed area alone does not establish drainage capacity or weather performance. Roof configuration, collection points, outlet and downpipe arrangements, and the model’s documented limits all matter. Use the drainage diagram and guidance for the exact model rather than estimating from its footprint.
A useful diagnosis follows the water, not just the wet patch: record the conditions, confirm the intended route, check visible obstructions and separate gutter, outlet, downpipe and discharge issues. If the route appears clear but overflow recurs, compare it with the exact model’s drainage guidance and share your observations with the appropriate professional. That sequence helps distinguish an accessible blockage from a hidden restriction or a system operating beyond its documented conditions.
