
After a Storm: A Ground-Level Pergola Inspection
Pergola care
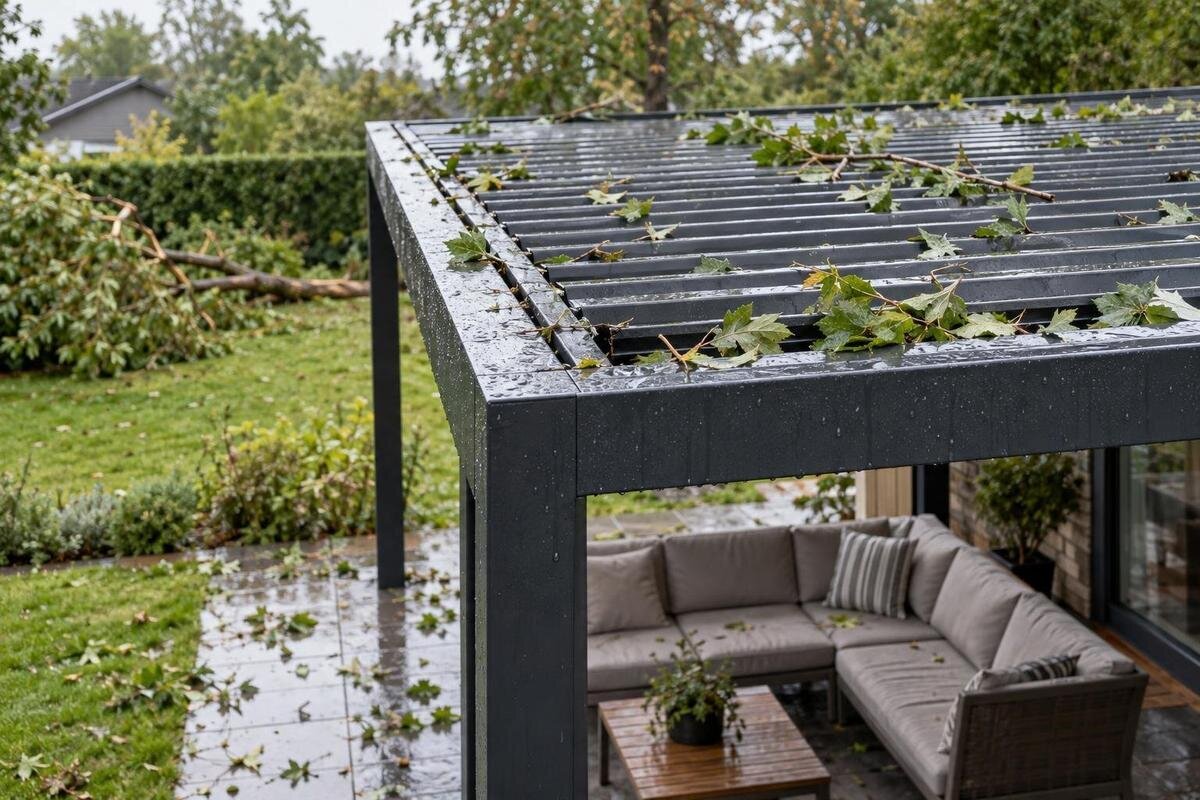
A storm can leave a pergola looking much as it did before while hiding a shifted support, a loose overhead component or a changed water path. The first inspection should be modest: wait for safe access, look from stable ground and record what is visible without climbing, touching suspect parts or testing mechanisms. A consistent check helps you notice changes and gives a service professional useful evidence. It does not confirm that concealed joints, fixings or electrical equipment are safe. This guide sets out what to observe, what to photograph and when to stop and arrange a professional assessment.

Wait until the area is safe
Do not go outside simply because the rain has eased. Lightning, strong gusts, falling branches, surface flooding, slippery paving and soft ground can make the approach unsafe. Look for hazards from a sheltered place first, including a limb hanging over the pergola, roof debris still shifting or damaged overhead power lines. Wait until conditions have settled and any relevant official warnings have ended. Never cross floodwater just to get a closer view; its depth or movement can be difficult to judge. Check whether the route itself is stable, not only the space beneath the pergola. If a hazard remains, keep clear and seek appropriate emergency help rather than starting a routine inspection.
Once access is safe, keep the check visual and ground-level. Do not use a ladder, chair or roof access, lean on a post, pull at a panel or stand beneath a section that appears displaced. Do not remove a heavy object from the frame or try to straighten anything. If a power line is down or electrical fittings appear damaged, keep well clear and seek appropriate qualified help. A ground-level view is an initial screen, not a structural clearance: it cannot confirm concealed fixings or show every upper surface. Keep children, guests and pets away while concerns are unresolved. If the structure looks unstable, stay back and arrange a professional assessment.
Start with a view of the whole pergola
Begin from a stable place outside the likely fall zone and look at the whole pergola before concentrating on details. If it is safe to move around it, view each accessible side without walking beneath the roof. Scan the overall outline: a post that appears less upright than before, a beam that seems lower, a roof edge that now looks uneven, or a new gap may be worth noting. Use daylight where possible and compare with pre-storm photos or a familiar view of the structure. A shadow or viewing angle can distort straight lines, so record an apparent change rather than deciding from one viewpoint that the frame has moved. If one side is unsafe to reach, note that it was not inspected rather than assuming it matches the visible sides.
Find the owner’s manual, receipt, installation paperwork or model label if you can read it without climbing or reaching. Note the exact product name and any visible model or serial details; do not remove a cover to find them. If your paperwork identifies a Bloomcabin Pergola, save the Bloomcabin Pergola listing alongside your records as a product reference. Record the installed unit’s age and version separately if known, as a current listing does not establish those details. The aim is to give a service professional accurate context. If a label is out of reach or hard to read, record that and leave it for someone equipped to inspect safely.
Look for movement in the frame and connections
Look at each visible post-to-beam joint, frame corner and roof-to-frame connection from a safe distance. Note any new separation, a member that appears bent, a crack, a displaced cap or a fastener that looks missing or backed out. If you can safely change your viewpoint, check whether the same apparent gap remains from another angle; a shadow or wet surface can be misleading. Compare with older photographs, but do not assume that every detail in a new image shows damage. Never push the frame, test a connection by hand, tighten bolts or use a level to prove alignment. Note if more than one joint looks different, without trying to judge what the pattern means.
Write down the location in a way another person can find, such as the rear corner nearest the house, and say whether the change is definitely new, possible or simply not previously noticed. If the manual identifies the installed model as a Bioclimatic Pergola, include that name in your enquiry, with the Bloomcabin Bioclimatic Pergola listing as a reference. Keep the model details, visible symptoms and any earlier repair details separate rather than drawing a conclusion from the product name. A note about which direction you were facing can help distinguish one corner from another. Matching documentation and professional inspection are needed to interpret the connection.
Check the ground around the supports
After heavy rain, inspect the ground at each visible support from a safe position. Look for soil washed away, a new void or gap beside a base, cracked or lifted paving, a post foot that appears different from older photographs, or water collecting where it did not before. Note the exact location and take a wide photo that shows the nearby ground. Damp soil on its own does not prove movement, and surface water may change as it drains. Do not dig beside a support, lift a cap or chip out paving to expose an anchor. Avoid stepping on loose or lifted pavers to get closer. Hidden footing details cannot be judged from the surface, and the ground may still be soft or unstable after a storm.
If you see a shifted base, a new gap beneath a post, a cracked support area or a connection that appears displaced, keep people away and arrange an assessment rather than trying to stabilise it. Do not wedge, grout, pack or retighten anything; that could hide evidence without addressing the cause. For a model matching the Wall-Mounted Pergola product listing, distinguish concerns at the ground supports from those at the building connection when describing the problem. Send clear ground-level photographs showing the location, together with the installation documents you have. If the ground is too wet or damaged to approach safely, note that and wait for professional advice.

Inspect visible roof elements and drainage
From outside the fall zone, check the roofline and visible surfaces for a piece that looks lifted, displaced, cracked, dented or missing. Look for debris resting above, a section sitting differently from its neighbours, or broken material on the ground. If the design has adjustable or retractable elements, note their visible position but do not reach for or operate them. Hail marks, leaf litter and rain streaks may be cosmetic or inconclusive, so describe what you see rather than diagnosing a failed panel. Never climb up to inspect the upper surface, even when a closer view seems useful. Anything hidden from ground level can be included in a professional assessment; do not move an object that may be resting on a damaged part.
Observe where rainwater is draining and whether there is unusual overflow, a new drip line, water running towards the house, or persistent pooling near supports. Look at visible outlets only from the ground; do not poke them with a pole, remove an overhead guard or spray water to reproduce a leak. Note whether the observation occurred during rain or afterwards, because timing helps explain what you saw. A stain may identify a path worth checking, not its cause. Use the installed model’s manual for drainage information; a general catalogue page cannot show how your unit is configured. If investigating a blockage or leak requires access above ground, leave it to a suitable professional.
Check the wall junction on an attached pergola
For a wall-mounted pergola, view the junction with the building from a safe place. Record any new gap, visible separation, cracked render or masonry, shifted trim or water staining around the connection. Look at the nearby wall or soffit for related changes, but do not pull at a cover, scrape a surface or try to seal a gap. A crack in the finish does not show what has happened behind it; visible separation or movement is a reason to seek prompt professional attention. When describing the attachment, use photographs of your own installation rather than an illustration from the Bloomcabin Wall-Mounted Pergola page.
Rain can reach this junction from more than one place, including the building roof, an adjacent gutter or the pergola itself. Take a photograph that shows both the connection and surrounding wall, then note where you first noticed staining or dripping. Do not assume a mark proves the pergola is the source, and do not climb onto the house roof or a neighbouring structure to trace the flow. If water is entering the building, an exterior component looks loose, or there is visible separation, arrange the appropriate building or pergola assessment. The purpose of the ground-level check is to preserve useful clues without assigning a cause.
Leave powered and moving components alone
If the pergola has lighting, a motor, controls, a retractable screen or another powered feature, treat visible electrical damage as a separate hazard. From a dry, safe position, look for a hanging cable, cracked fitting, water around a visible enclosure, loose light or exposed conductor; do not touch, unplug, reset or operate it. Keep people away from the affected area and contact a licensed electrician or authorised service professional for assessment. A switch that still works does not prove the equipment is safe, and a dry-looking exterior does not rule out water inside. Do not make an electrical test part of your storm checklist, even if the controls appear to be working normally.
Keep moving parts still during the inspection. If a louvre, screen, panel or mechanism looks jammed, bent or out of position, do not try to open or close it to see what happens; operation may move a damaged component. Note its position from the ground and photograph only what is safely visible. Do not use a remote or wall control to test it. Use the exact owner’s manual or ask the installer or service provider which checks are appropriate after the structure has been assessed. If you recognise your model on the Bioclimatic Pergola product page, still use its own service documentation for the installed mechanism and controls.
Record damage with photographs and notes
Take one wide photograph showing the pergola in context, then closer images of each concern from a place you can reach without climbing or entering the fall zone. Keep a fixed feature such as a wall corner or paving edge in view where practical; a close-up of a joint is easier to locate when a wider image shows which side it is on. Do not put a ladder beside the frame, stand on furniture, hold a phone under a loose section or move debris to improve the picture. If a detail is too high or unsafe to photograph, note that for the assessor instead of getting closer. Take another angle only when the route to it is safe.
Keep the original image files and add a note with the date, approximate time, storm conditions, when you first noticed the change and whether it was present before the storm. Use plain descriptions such as ‘gap at rear wall junction’ rather than ‘failed anchor’ unless a professional has confirmed the cause. For a matching wall-mounted unit, you can include the Wall-Mounted Pergola catalogue entry with the enquiry, clearly separate from photographs documenting the damage. Store the manual, receipt and earlier photos together. Keep unedited originals, label copies by date and location, and retain anything you send to an insurer or service provider.

Know when to stop and seek professional help
Stop at observation and seek professional help if you see a leaning post, changed frame alignment, a newly open joint, a cracked or bent structural member, a shifted support, a loose or fallen roof part, separation at a wall connection or debris resting on an unstable area. Do the same if you observed movement during the storm, heard a new unusual sound or noticed a new leak, even when the cause is unclear. Do not stand underneath or use the pergola while there is a concern. Keep family, guests and pets out of the affected area, and do not test the opposite side by pushing or pulling because one corner looks stable.
Choose help according to what is visible: the installer or authorised pergola service team can check model-specific assembly and parts, a structural professional can assess reported movement, and a licensed electrician should handle suspected electrical damage. Share the photographs, exact model information and a short timeline, including any earlier repairs you know about. If there is immediate danger, contact the appropriate local emergency service rather than waiting for a routine appointment. If replacement is later discussed, you can refer to the Bloomcabin Pergola product page when asking about options, while keeping the site assessment separate from the choice of product.
Follow-up checks and repair enquiries
If the ground-level check shows no obvious change, save your notes as a baseline rather than treating them as a safety certificate. Rain, poor light, foliage and concealed joints can limit what you see. When conditions are fully safe and the area has dried, make a second visual check for new staining, standing water or damage that was obscured; if a component looks out of place, stop rather than trying it. Note any side or overhead area you could not see. Follow the installed pergola’s instructions for ordinary care, and do not resume use while there is a specific concern. A clear visual check has limits and does not replace professional assessment when warning signs are present.
For a spare-parts or repair enquiry, provide the model and serial details from paperwork if available, approximate installation age if known, wide and close photos, the location of each concern and what changed after the storm. If a detail is missing, say so rather than guessing. Ask the supplier or service team to confirm exact compatibility and the approved repair process; a part that looks similar may belong to a different version. If you are considering a replacement shown on the Bloomcabin Bioclimatic Pergola page, ask about suitability for the site rather than assuming it will match the existing installation. Leave structural repairs and wiring to qualified people.
Frequently asked questions
When can I inspect my pergola after a storm?
Wait until lightning, strong winds, flooding, falling branches and other hazards have passed, and the route to the pergola is stable. Do not go underneath to begin the check. If debris is still moving or a power line is down, keep away and seek appropriate help rather than inspecting it.
Which signs mean I should stop and get help?
A new lean, gap at a frame joint or wall connection, bent or cracked member, shifted base, loose overhead part or damaged electrical fitting calls for caution and professional assessment. Do not push or operate a component to confirm whether it is loose. A ground-level inspection cannot establish whether hidden connections are sound.
Can I open and close the louvres or screen to test them?
No. If a part is bent, jammed, displaced or potentially affected by water, leave it in place. Testing can move a component whose condition is uncertain, and powered parts should not be operated when electrical damage is suspected. Record what is visible and consult the exact manual or a qualified service provider.
What should I include in storm-damage photos?
Take a wide view that shows the pergola in context, then safe close-ups of each concern. Include a fixed landmark where practical so the location is clear. Note the date, approximate time, what changed and when you noticed it. Keep the original files, and do not climb or move debris to improve a picture.
Is a pergola safe to use if it looks unchanged?
Not necessarily. A ground-level view cannot show every concealed fixing or upper surface, and rain or poor light can hide changes. If you noticed movement, breakage, a new leak or electrical trouble, keep people away until a suitable professional assesses it. If nothing concerning is visible, retain your notes and follow the installed model’s instructions.
After a storm, the safest inspection is not an attempt to prove the pergola is undamaged. It is a calm, ground-level record of visible changes to the frame, supports, water flow, wall junctions and any powered or moving components. Clear photographs and exact model paperwork give a qualified person a useful starting point. If nothing concerning is visible, keep the record as a baseline; if movement, breakage or uncertainty remains, leave the area unused until it has been assessed.
