
How to plan pergola lighting for dining, reading and ambience
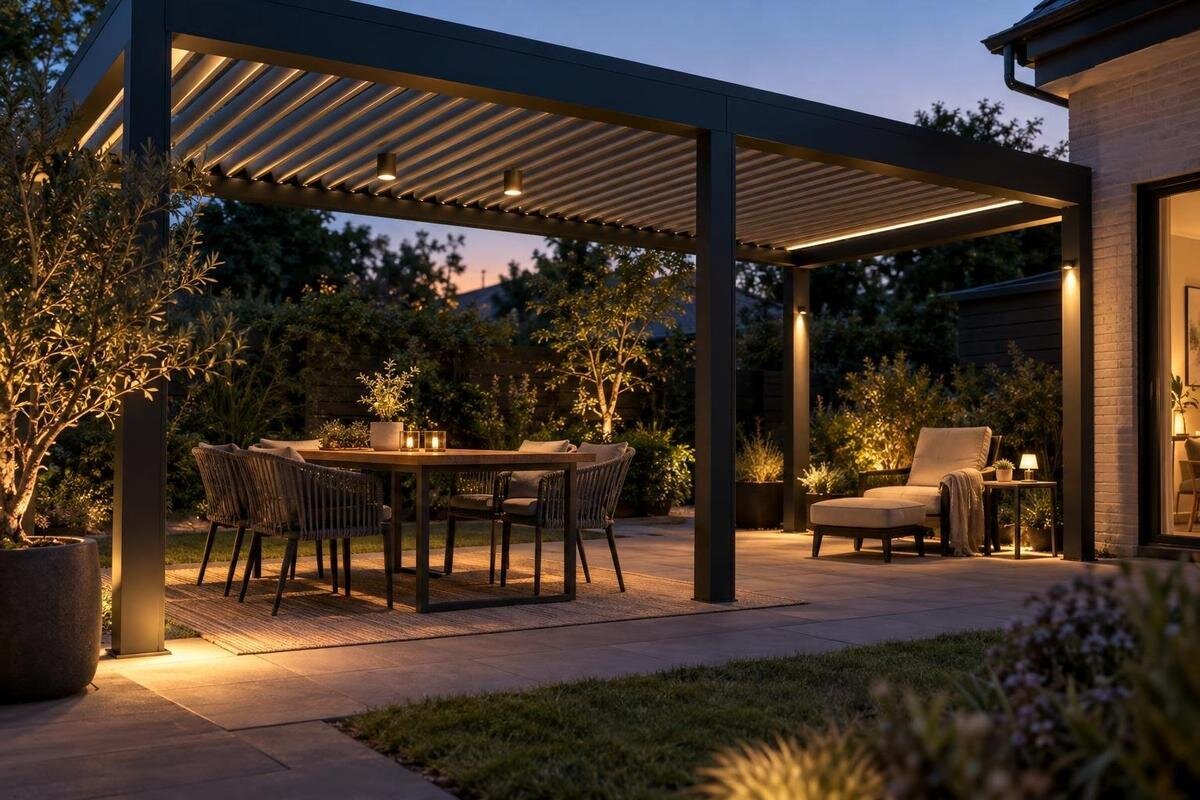
PERGOLA LIGHTING
A useful pergola lighting plan starts with what people will do under it, not with a catalogue of fittings. A meal needs useful light on plates and serving space without a bright source in anyone's eyes; reading calls for a local pool of light; conversation is often more comfortable with a softer background. Map those activities, check likely sightlines and discuss the electrical details with a qualified electrician before choosing fittings. This keeps the scheme useful across a long dinner and a quieter evening, without assuming that lighting can be fitted to a particular pergola or accessory.

Map activities and seating before choosing fittings
Draw a simple plan of the pergola and mark the table, reading seat, main conversation seats and the route between the house and garden. Add chairs as they are used, not just the table footprint: a pulled-out chair changes where someone sits and what falls in their line of sight. Note which tasks need light on a surface and which depend on people seeing one another. Mark doors, fixed posts and any step or threshold, too; they affect both furniture placement and where a route needs to be legible. A second sketch from typical seated eye heights can reveal a fitting that looks neatly centred on paper but sits directly in view from a regular chair. This is not an electrical drawing; it is a clear brief for choosing positions and talking with an installer.
List uses separately: eating and serving, reading, moving through the area, and relaxed conversation. One bright setting can feel harsh after dinner, while decorative glow alone may leave food or a path difficult to see. Describe the result you want—reading a page, seeing a meal clearly, or finding a step—rather than guessing brightness before positions and furnishings are known. The Bloomcabin Bioclimatic Pergola listing gives a size range from 9 to 24 m²; compare the chosen size and any supplied layout drawing with your seating sketch. Area is a starting point for spatial planning, not a guide to light output or approved fitting positions.
Plan comfortable light over the dining table
Plan dining light around the table people will actually use, not the geometric centre of the roof. Light needs to reach plates, shared dishes and the serving area, with enough spread that diners at the ends are not left in a dark patch. Check the view from each seat: a light directly over the middle can still be uncomfortable when someone looks up, and a narrow pool may leave faces or table edges in deep contrast. If the table is extendable, frequently turned or used with an extra place setting, mark both arrangements. Otherwise a scheme can work for a quiet weeknight but fail when more people gather or a serving dish moves to the far end.
Map the serving side and route to the house as carefully as the table surface, especially if people carry food through a doorway. The dining layer should not make adjacent seating feel like a dark void; a softer ambient layer can ease the transition without lighting every part equally. If a wall-mounted configuration is under consideration, include the adjacent wall and entrance when assessing Bloomcabin Wall-Mounted Pergola against the table plan. Keep the route and serving position visible in that sketch, then test a shifted table before deciding exact fitting positions. That simple check can expose furniture clashes while changes are still easy to discuss.
Make reading light practical
Reading calls for light on the page with less spill into the reader's eyes. Mark the hand used to turn pages, whether the reader leans back or sits upright, and the usual angle of a book or screen; these details influence where shadows fall. A beam near the page may still feel uncomfortable if the bright part of the fitting is visible from the chair, and a glossy screen can reflect a source that seems well placed from elsewhere. Check the view from an ordinary reading posture, not only while standing beneath the pergola. If more than one chair is used, draw each one rather than assuming a single position serves everyone.
Keep the reading layer independent from general ambient light where the design allows, so someone can see a page without raising brightness across the whole pergola. Local adjustment or a separate switch can help, but only if the exact fitting, driver and control are compatible; confirm this in the product manuals with the electrician. If Bloomcabin Pergola is the structure under consideration, use the relevant layout information when placing the reading chair, then confirm any permitted fixture position separately. A chair that may move during the evening also needs light that remains useful from its alternate position, or a separate reading spot.
Build a softer ambient layer
Ambient light gives the wider seating area a gentle background, so a lit table or book does not seem isolated against a completely dark pergola. It can help people find a seat, see one another and move between the house and garden, while task lighting remains responsible for detailed work. Aim for a calm, reasonably even impression, not equal brightness in every corner. Think about open sides, adjacent walls and garden planting: pale surfaces may reflect light, while an open edge leaves a darker background. These effects are specific to the site, and a plan should account for the actual surfaces people see from their seats. Consider where the light sits in peripheral vision as well as where it lands.
Treat accent lighting as optional. A feature or planter may benefit from a restrained highlight, but that glow should not become the only source for dining, reading or moving around. Extra bright points can compete with faces and the table, so add them only when they improve orientation or give the area a clear visual boundary. An ambient layer can be modest; its job is to connect zones, not mimic daylight or overpower the garden. When considering Bloomcabin's bioclimatic pergola model, compare the selected structure's layout with the ambient-light drawing. Confirm any actual fitting option and permitted position from documentation for the exact model rather than assuming decorative lighting is included.

Check glare from regular seats
Glare is easiest to miss when a layout is viewed from above. Mark the view from every regular chair and the main standing route, then note which sources could sit in someone's line of sight while eating, looking across the table or leaning back. Include a seat at each end of the table and the reading chair, not just the central viewpoint. Check likely reflections in glass doors, glossy tabletops and nearby hard surfaces as well as direct views of a fitting. The same position may feel different against an open garden or a bright wall, so include the surroundings visible at night. A symmetrical drawing is useful for planning, but it cannot prove that every seat will feel comfortable.
Use that drawing to identify where a source may be seen, rather than trying to solve glare by adding more light. A plan can flag an exposed line of sight before a fitting is selected; the actual fitting's optics and installation instructions still need professional review. If a documented moving roof or side element is part of the chosen design, check each permitted position because the visible source and reflected light may change. Where possible, ask a lighting professional to assess the proposed position from regular seats. This keeps the review grounded in how people actually sit, eat and read. Do not judge comfort from a product photograph or from standing eye level alone.
Light surfaces and paths clearly
Once the tasks are marked, note what the light needs to reach: the table surface, the page, faces and the path to the house. Add likely obstructions and shadows from roof members, posts, furniture, foliage or a planned side panel. A source can be close to a task yet leave its far edge in shadow; a broad spread can also send light into a boundary or the night sky when that is not the intention. Ask for the chosen fitting's distribution information and have a qualified person relate it to the drawing. This is about checking the effect on the intended surfaces, not calculating a specification from a sketch.
Mark the route for carrying plates and moving between seats, and flag any step or threshold separately from the dining zone. Include the route out to the garden if it is part of normal evening use. The aim is not to flood the whole path, but to check that edges remain distinguishable when someone moves from a brighter area to a dimmer one. If the Bloomcabin Pergola model is in your comparison, put its selected footprint into the path-and-task drawing before deciding where any light should sit. Keeping task light and route light distinct also makes it easier to spot gaps in the plan before fittings are chosen.
Controls for dining, reading and ambient light
Controls should follow the activities in your plan. A straightforward arrangement may separate the main dining light from the softer ambient layer, with a control near the reading seat if the fitting and design allow it. Then one activity can continue without leaving every other area at full brightness. Before choosing switches or dimming, check that the exact light, driver and control system are designed to work together; a label on one component does not prove compatibility with the others. Ask the electrician to confirm how each layer will operate and where controls can be reached from the usual entry and seating points. Decide on lighting scenes only once the selected equipment and its capabilities are known.
Think through the order of use: switching on before carrying dinner outside, lowering general light after the meal, then reading without disturbing others. Name controls by the layer they operate rather than by an installation abbreviation guests may not understand. If a control is intended to work from a phone or remote, consider who will use it and what happens if that control is unavailable. Automation is optional; keep it simple unless a specific compatible system has been documented. When reviewing Bloomcabin's pergola details, keep the structure and lighting controls as separate decisions until the actual options and routes are confirmed. A clear control plan can expose an unnecessary layer before anything is installed.
Verify outdoor ratings and mounting approval
Pergola lighting is exposed to outdoor conditions even when a roof provides some shelter. Rain may arrive from the side, and heat, dust, sunlight, moisture or cleaning practices can affect what a fitting is suitable for. Note whether the area is fully open or partly sheltered, and describe that accurately to the supplier. Check the exact model's outdoor rating and installation manual against the proposed position; a general description such as outdoor light does not establish suitability for every location. The same scrutiny applies to drivers, connectors and controls. A qualified electrician should review the specified set in relation to the actual exposure and manufacturer instructions, rather than treating one fitting's rating as proof that every associated part is appropriate.
Agree cable routes, access and mounting positions before ordering or altering the pergola. The supplier or manufacturer should confirm that an attachment is permitted for the exact structure, while the electrician confirms the electrical design and installation requirements. For the Bloomcabin Wall-Mounted Pergola listing, provide the exact model details and chosen fitting manuals to both parties as part of that discussion. Avoid drilling, cutting or adapting structural parts on the basis of a generic lighting diagram. Keeping the two approvals distinct—electrical suitability and documented mounting permission—prevents one being mistaken for the other. Raise any unknown cable route early, while the layout can still be reviewed rather than improvised.

Allow for furniture changes and maintenance
Light positions should suit the furniture you expect to use, with some allowance for a larger gathering or a changed table orientation. Note movable chairs, a spare seat brought in from the house, and whether the table is likely to be extended. If each alternate arrangement puts a bright source directly in someone's view or moves the reading place out of useful light, the plan depends too heavily on a single setup. Record the normal arrangement and one likely variation; there is little value in trying to illuminate every hypothetical position. Do the same for a serving trolley or side table if it is regularly used. This helps avoid an obvious clash between everyday furniture and fixed lighting.
Allow room for cleaning, inspection and eventual replacement of fittings, so access does not depend on shifting a heavy table or dismantling unrelated items. If Bloomcabin's wall-mounted pergola option is being considered, assess its proposed position alongside doors, adjacent walls and the furniture plan. Ask what access the manufacturer requires and whether a proposed location can be maintained without disturbing other parts. A fitting may suit a task on paper but be inconvenient if it is hard to check or replace. Include those access needs before finalising the plan, rather than leaving them as a maintenance problem to solve after installation. Record them alongside the fitting details.
Review the plan in real evening use
Review the design in the conditions it is meant to serve. After dark, consider each planned layer separately and check whether the table, page, faces and route are usable without a sudden jump in brightness. Use the actual furniture arrangement, including chairs pulled back from the table. Sit in every regular seat, look towards the house and garden, and notice direct glare or reflections; also check the usual standing and serving positions. If the exact fixtures have not yet been selected, ask the supplier or lighting professional for a representative demonstration instead of treating a sketch as proof. Any change to a fitting or its position should be assessed against the approved design and instructions.
Record the final purpose of each control group, the exact fixture and control references, the outdoor-rating documents and the confirmed mounting details. This gives the electrician and pergola supplier a shared record if a fitting is changed later. Keep the drawings and notes where the person arranging future work can find them, and include any approved changes made during installation. Revisit the arrangement when seating or table position changes substantially; a new chair location can alter a sightline even though the lights stay put. If you replace a component, check its compatibility, output and mounting requirements rather than assuming a similar appearance means it performs the same role.
Frequently asked questions
How bright should pergola dining lighting be?
There is no single brightness level that suits every pergola. Table size, fitting position, surrounding light and nearby surfaces all affect the result. Decide whether people need to see meals and serving dishes clearly, then check the selected fitting's information and assess the setting from seated positions. Keep task lighting separate from ambience if those needs differ.
Should reading and dining have separate lights?
Not necessarily separate fittings, but distinct controls or a local reading source can help if general dining light does not reach the page comfortably. Map the reading chair first, then check shadows on the page and whether the fitting is visible from that seat. Ask whether the exact equipment supports a compatible dimmer or separate switch.
How can I check for glare before installing pergola lights?
Mark proposed light positions on a plan that shows regular seated and standing views. Check direct views and likely reflections in glazing or glossy surfaces, then review the actual fitting against its instructions with a lighting professional. A drawing can flag possible trouble spots, but a product image cannot show how the light will feel from your seats.
Can indoor light fittings be used under a pergola?
Do not assume an indoor fitting is suitable because part of the pergola is covered. Exposure varies with open sides, rain, dust, sunlight and moisture, so check the exact fitting's rating and instructions. Have a qualified electrician assess it and any associated components for the proposed location, and confirm that its mounting is approved for the structure.
Who should confirm the electrical and mounting details?
Ask a qualified electrician to review the electrical design, fitting instructions, controls and outdoor ratings. Separately, ask the pergola supplier or manufacturer to document whether the proposed mounting location is approved for the exact structure. One confirmation does not replace the other; a generic diagram or model name cannot establish compatibility.
Plan the evening around three different jobs: clear light for meals, a local source for reading and a softer layer that lets conversation continue. A seating sketch makes those needs specific; a glare review and an outdoor-use check help keep the final arrangement comfortable and appropriately specified. The best result is not the most decorative or brightest scheme, but one that supports the way you actually use the pergola.
