
Planning Pergola Drainage to Avoid Neighbour Runoff
PERGOLA DRAINAGE GUIDE
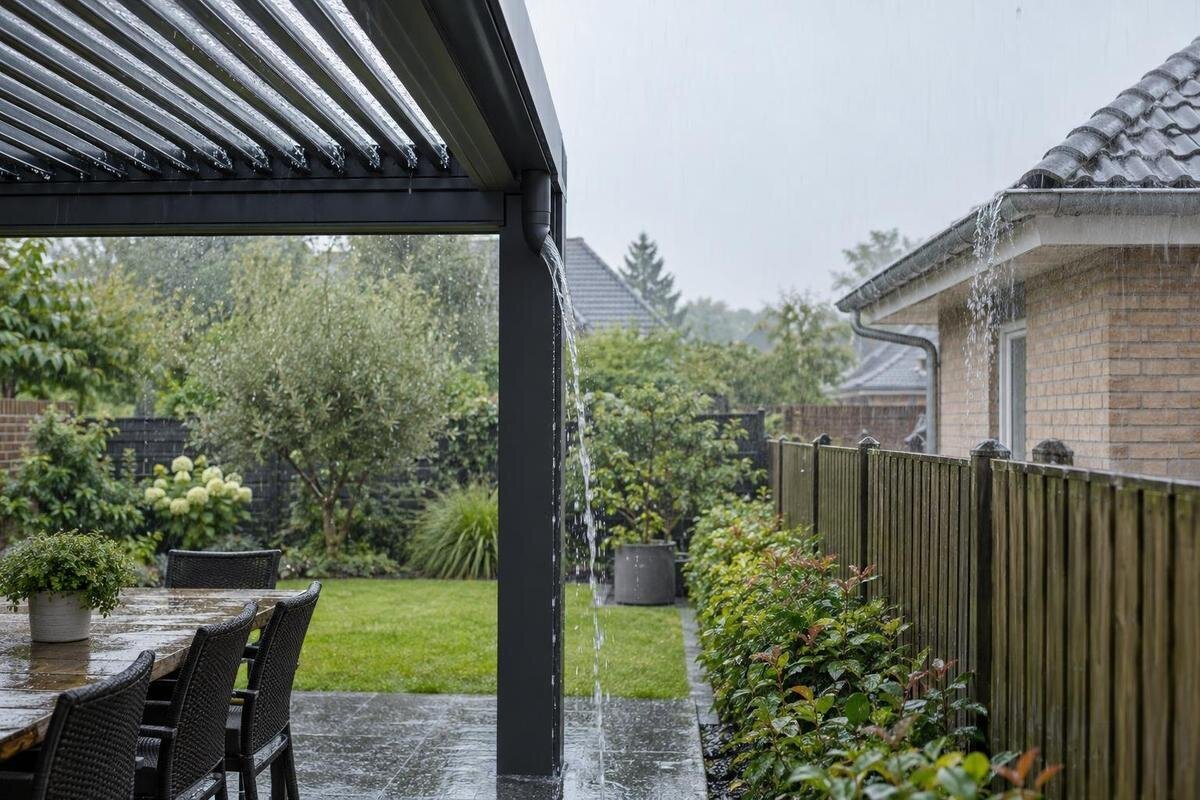
Pergola drainage is easy to overlook when the focus is shade, posts and paving. Yet the point where rain leaves the roof is only the beginning: a channel or gutter may carry it to an outlet, and the shape of the ground decides where it travels next. Concentrating water at one corner can change a garden’s runoff pattern, even when the site previously handled rain spread over a wider area. Before the pergola footprint and hard surfaces are fixed, trace the expected flow from roof to receiving point and across your block. That makes neighbour runoff a site-planning issue, not just a product feature.

Map the route from the roof to its endpoint
Draw the full water route rather than marking only the pergola footprint. Start at the roof surface, note where rain is collected or can leave the edges, then show each outlet, any downpipe or channel, its receiving point and the route away from it. Include both the normal discharge route and any documented overflow path. This sequence exposes gaps: an outlet might finish at paving that falls towards the boundary, or a pipe could direct water to lawn that later drains into a side passage. A drainage plan is useful only if it continues past the first downpipe to the place that will actually receive the flow. Mark confirmed details separately from assumptions, such as an unverified drain location.
Put the property boundary, house, existing downpipes, stormwater pits, paths, driveways, garden beds and retaining walls on the same sketch. Mark low points and openings where water could travel, such as a side gate or a gap beside a fence. If water already runs across the yard from higher ground, include that existing path rather than assuming the pergola is the only source. An annotated site plan can establish questions to resolve; it does not replace a level check or drainage design where the route is unclear. Don’t use neighbouring land as an assumed overflow area, and don’t rely on a fence to show which way the ground falls.
Confirm how the selected pergola handles rain
Pergolas with different roof designs can handle rain differently. Some configurations may collect water in channels or gutters; others may shed it from an edge, and an adjustable roof can behave differently according to its position. Treat these as possibilities to verify, not features to infer from a category name or photograph. If you are considering the Bloomcabin Bioclimatic Pergola, ask for the manual and model-specific drainage diagram for the exact version and configuration before setting out posts. Use those details to establish outlet positions and drainage capacity, then assess how the arrangement would fit your block.
Check where the manufacturer shows water entering the drainage system, where each outlet is, and whether the diagram identifies an overflow route for water that is not captured. Confirm the intended roof position or operating mode for rain rather than assuming the same route applies in every position. Ask how the planned orientation and any enclosure affect the documented arrangement, and keep the answer with your site sketch. Weather-performance documents may describe model-specific limits and controlled observations; read them as evidence about the stated model and conditions, not as a promise that every storm will be contained.
Observe the site’s existing water flow
Walk the proposed area after ordinary rain, where it is safe to do so, and watch water on the surfaces that already exist. Note where shallow puddles remain, which way water moves along paving, and whether it collects near a door, garden edge, driveway or low corner. A dry-day glance can hide gentle falls that are obvious when surfaces are wet. If rain is scarce or the site is being altered, use existing site plans and ask a suitably qualified person to check levels rather than relying on guesswork. Keep these observations alongside your product shortlist, whether you are considering the Bloomcabin Pergola or another model, so the site’s drainage needs remain part of the comparison.
Record both hard and soft areas. Pavers, concrete, compacted paths and lawn can send or slow water in different ways, and garden soil may become saturated. Mark existing drainage grates, downpipes, retaining edges and low spots; also show planned paving and future garden beds, not just the yard as it looks today. If the proposed pergola or a new path sits across an existing flow line, water may be redirected. Visual observations help map the site, but they don’t establish the exact fall or prove that a surface can accept extra water. Have levels checked if the plan depends on a subtle grade.
Mark boundaries and nearby low points
Locate the boundary with a reliable site plan, and arrange a boundary check if its position is uncertain; don’t treat a fence as conclusive evidence of the property line. On your drawing, show the fence, gate, retaining wall, side access, nearby house walls and known low areas beside the boundary. Include vulnerable receiving places visible from your property, such as a neighbour’s driveway or low garden. The aim is not to diagnose another property, but to see whether an outlet or surface fall could direct water towards it. Note openings where water could pass, especially at the ends of fences and beside gates.
A fence is not automatically a drainage barrier, and directing water along its base can still lead it towards an opening or lower point. If your layout is close to the boundary, show the pergola footprint and every planned discharge route on the same drawing. When considering the Bloomcabin Wall-Mounted Pergola, for example, include the house wall and the space between the proposed structure and the boundary. Treat the wall, boundary and receiving ground as separate parts of the layout, and check uncertainties before concrete, paving or other permanent work fixes the arrangement.

Choose outlet positions before fixing the layout
Choose outlet positions before the structure and surrounding paving are fixed. Mark each downpipe or discharge point where it can join the intended route and remain accessible, rather than leaving a last-minute pipe to the most convenient corner. Check the route against posts, doorways, paths, garden edges and the boundary. Avoid aiming an outlet directly at a fence, side gate, neighbouring driveway or unprotected soil beside the property line. The shortest pipe path is not necessarily the best drainage route: water can keep moving after it reaches the first patch of ground, especially where paving or a path carries it onward.
Decide what will receive the water at the end of that route. Depending on the property and local requirements, the answer may involve a suitable connection or a professionally assessed on-site arrangement; don’t assume a lawn, gravel strip or existing pit will take any amount of water. If assessing the wall-mounted Bloomcabin option, include the outlet and its planned destination, not just the wall attachment, on the same site drawing. Ask a qualified drainage professional or plumber, as appropriate, to check whether the proposed route is suitable and what local permissions or connection checks apply. Don’t let the plan rely on water crossing the boundary.
Coordinate paving and landscaping with drainage
Plan finished ground levels as carefully as the roof outlet. A new paved entertaining area, path or slab can create a continuous surface that carries discharge farther than it travelled before. Even if the outlet itself is well placed, the fall of the paving could send water towards a fence or low part of the block. If you are considering Bloomcabin’s bioclimatic model, coordinate its proposed position with the paving edges, door thresholds, existing drains and outlet route before surfaces are laid. Assess the patio levels as part of that layout rather than leaving them until the product choice is settled.
Landscaping can change the route again. Lawn, mulch, garden soil, gravel and planting beds don’t automatically absorb all water, particularly if soil is compacted or already wet. Don’t treat a narrow, permeable-looking strip as a drainage destination without checking the site conditions and intended flow. Mark proposed garden mounds, raised beds, edging and paving changes because they can redirect water or create a low pocket. If considering on-site absorption or dispersion, have its suitability assessed by a qualified professional; avoid improvising grades that push water towards a neighbouring property.
Include an overflow route in the plan
Plan for what happens if water arrives faster than the normal outlet can carry it, or if the receiving point cannot take it. Ask what the model documentation says about overflow and any water that bypasses the usual route; this is a planning question, not a reason to assume a system is faulty. If the Bioclimatic Pergola product page is part of your comparison, check the exact model’s weather-performance documents and drainage diagram for the conditions described. Have a qualified professional consider how local topography and the intended configuration affect the overflow route.
Map where water could go if it bypassed a channel or emerged at a different point from the one expected. Make sure the route does not end at a neighbour’s land, a doorway, a slippery access path or a place where it could enter a building. Don’t try to resolve uncertainty with an invented pipe size or slope; obtain the model-specific information and site assessment needed for a design. Rainfall intensity and receiving capacity are project considerations, not something that can be settled from the pergola name alone. If a suitable overflow route is unclear, resolve that before building rather than relying on later changes.
Account for the house and any enclosure
Attached and freestanding layouts present different points to coordinate, but neither automatically guarantees a better runoff outcome. When considering Bloomcabin’s wall-mounted model, plan its position in relation to the house roof, existing downpipes, openings and paved area. Don’t assume the house drainage can accept the pergola’s water; confirm the outlet arrangement and any proposed house connection in the relevant product and site documents. A freestanding layout still needs its outlet positions, nearby walls and ground flow mapped. In either case, assess the complete route rather than judging drainage by how the structure is supported.
Side screens, doors or other enclosure components can change where rain reaches the ground and how it moves around the structure. If you plan to add an enclosure now or later, ask for documentation for that specific combination instead of applying advice for an open layout. Confirm that access to outlets, drains and any inspection points will remain possible, and show additions on the drainage sketch. A later screen, new roofed area or changed opening can alter exposure and runoff, so revisit the plan if the configuration changes. Don’t assume an enclosure makes the pergola watertight or removes the need to manage water at ground level.

Check local requirements and document the route
Check project requirements before committing to a connection, excavation or surface alteration. Drainage and building controls depend on the location and proposed work, so ask your local council whether any approvals or specific discharge arrangements apply. If a stormwater connection is proposed, have the relevant authority or a qualified plumber or drainage professional confirm whether it is suitable and permitted for this project. Don’t assume an existing pit, pipe or street-facing outlet is available for extra water just because it is nearby. A professional can also identify site-specific constraints, such as uncertain levels or structures that affect the route.
Ask for a clear plan showing the exact pergola model and intended configuration, roof collection points, outlets, pipe routes, finished levels, property boundary, existing drains and final receiving point. It should also show the overflow path and any paving, retaining edges, thresholds or landscaping that affects runoff. This gives the installer, landscaper and drainage professional one shared reference, reducing the chance that an outlet is placed where another trade has set the ground to fall in the wrong direction. Keep model-specific drainage diagrams and weather documents with that plan; a product image is not a substitute for them.
Recheck the route after installation and site changes
After installation, compare what was built with the agreed drawing. In ordinary rain, observe from a safe position on your own property where water leaves the roof, where it exits the outlet and how it moves over the ground. Note persistent pooling, unexpected flow along the fence or water heading towards a gate or a neighbour’s side. Take dated notes or photographs from your property so any mismatch can be explained to the installer or drainage professional. Keep the exact product and configuration in your records. If you originally selected it through the Bloomcabin pergola product listing, retain the documents for the installed version alongside your site plan.
Revisit the route whenever you change the site: resurfacing a patio, raising a garden bed, installing a shed or roof, adding screens, moving a downpipe or altering a drain can redirect flow. A plan that suited one layout may no longer match the finished ground. Check that outlets remain visible and accessible and that the receiving point still works with the current arrangement; involve the relevant professional if it has changed. Routine maintenance matters, but keeping an inlet clear cannot correct a route that points towards the boundary. Treat drainage as part of the whole outdoor layout, not a fixed feature of the pergola alone.
Frequently asked questions
How do I find out which way a pergola will drain?
Ask for the drainage diagram and operating instructions for the exact model and planned configuration. Mark each outlet and any documented overflow route on your site plan. If the roof can move between positions, check which rainwater routes apply in the positions described by the manufacturer; don’t infer the answer from a product photo.
Where should pergola runoff go?
It should follow a planned route to a suitable receiving point, without relying on water spilling onto neighbouring land. The right connection or on-site arrangement depends on the property and local requirements. Ask a qualified drainage professional or plumber, as appropriate, to assess the route before work begins.
Will a fence keep pergola runoff out of my neighbour’s yard?
Not necessarily. Water can follow the ground, pass through a gate or gap, or travel around the end of a fence. Mark the boundary and openings on your plan, then trace the surface flow to its endpoint. Don’t treat the fence as a drainage barrier.
Do I need council approval for pergola drainage?
There isn’t one yes-or-no answer for every project. Requirements can depend on the location and the work proposed, particularly if you plan to connect to a drainage system or alter ground levels. Ask your local council and a qualified professional what checks apply before committing to the route.
What should a pergola drainage plan show?
Show the pergola model and configuration, roof collection points, outlets, pipe routes, boundary, ground levels, existing drains and the intended receiving point. Include the overflow route and any paving, walls, thresholds or landscaping that could change how water moves across the site.
Good pergola drainage planning joins three things: the model’s documented rainwater route, the actual levels and surfaces of the site, and a confirmed destination for the water. Mark each outlet, trace the flow beyond it and account for overflow, boundaries and later landscaping changes. When the complete route is unclear, resolve it before permanent work fixes the layout. The aim is to manage water all the way from the roof to a suitable receiving point, without leaving the neighbouring property to take the runoff.
