
Pergola Footings Now, Roof Later: Can You Build in Stages?
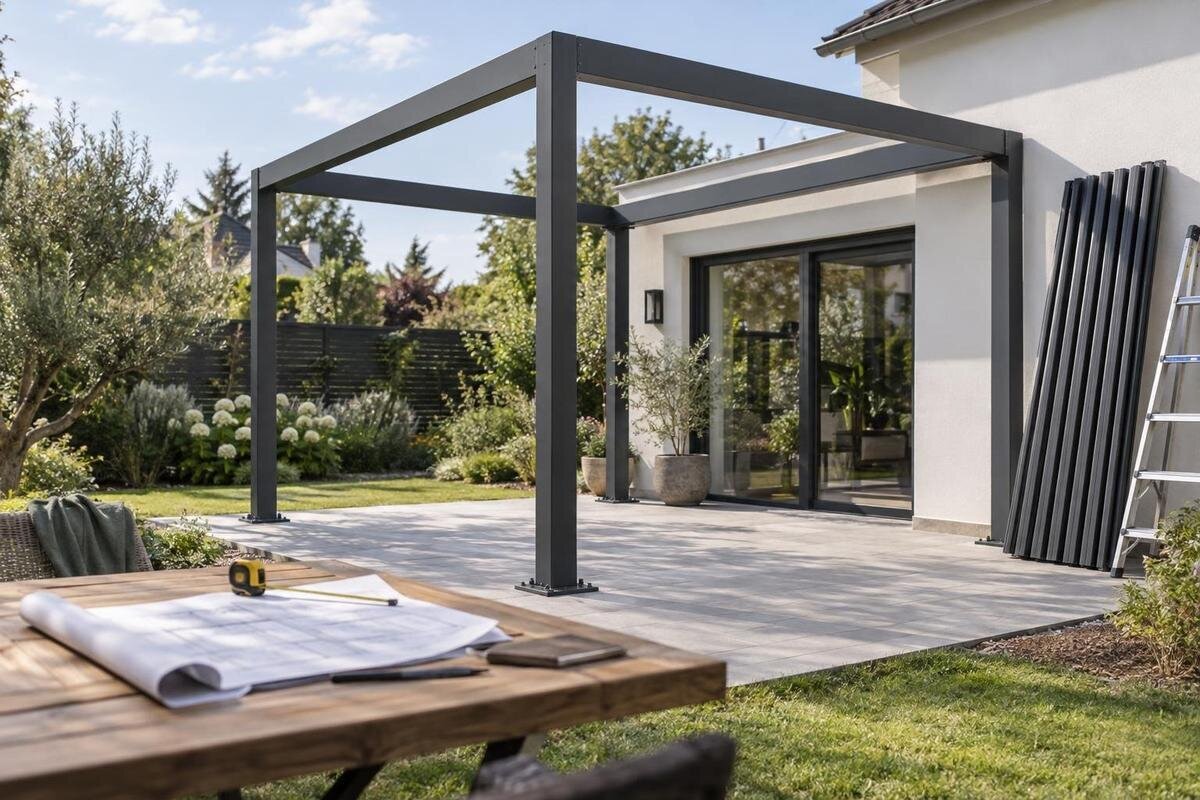
Pergola project planning
Putting pergola footings in now and fitting the roof later can be a sensible programme, but only when the finished structure is designed before the first permanent work. The foundations, post locations, attachment points and clearances must match the chosen model and intended roof, not a placeholder that may change. A footing-only phase also leaves work exposed and can create a second mobilisation, so the design, records, responsibilities and temporary protection need to be agreed in advance. If you have not settled the pergola type or roof configuration, treat that as a design decision to resolve before ground is broken, rather than a detail to leave for the installer returning later.

What to confirm before stage one 1
Plan both stages before starting the footings
Splitting a pergola project into footings now and roof later can work, but it is not a way to postpone every design decision. Permanent supports are the first part of one completed structure; their locations and design need to match the system that will eventually sit on them. If the model, span, post layout, wall connection or roof arrangement is still open, a footing plan based on a rough sketch may lock in the wrong geometry. The useful question is not simply whether two visits are possible. It is whether the finished design, the people responsible for each stage and the condition of the site in between can all be agreed before groundworks begin.
Put three stages on paper: design and local approvals; site and foundation work; then pergola supply and assembly, including the roof. State which tasks are included now and which are deferred. Foundations alone are different from a partly assembled frame waiting for its roof: the interim state affects access, exposure and handover. Staging may fit around landscaping or contractor availability, but it can mean another mobilisation and a period with an unfinished area. Decide why the roof is being delayed, what must be complete before the gap begins, and who accepts responsibility for the site during it. That makes the gap a planned stage rather than an assumption.
Choose the exact model and roof configuration first
Before commissioning footings, record the full product identity, quoted size, configuration and mounting arrangement, as well as any accessories that affect post positions or services. Use the supplier’s current project drawing and written specification, not just a catalogue name or inspiration photo. For example, the catalogue identifies a Bloomcabin Bioclimatic Pergola listing; that name alone does not tell you which configuration is quoted or establish that it suits your site. Ask for the selected version to be identified consistently on the quote, drawings, parts schedule and later installation scope. If several roof or control choices are available, note the one intended for the second stage, even if it is not being ordered now.
Define the completed arrangement: roof type and extent, how it meets the frame, and any operating clearance, drainage, electrical or accessory requirements that apply. Treat an unlisted change as a design revision, not a small substitution. If the future roof is still undecided, ask the designer to identify acceptable alternatives and show what remains common between them. Do not ask the footing contractor to guess from an overall width or product photo; neither confirms post centres, connection details or room for later parts. If no accepted alternative or documented allowance for change exists, delay the permanent layout until the selection is clear.
What to confirm before stage one 2
Design the foundations for the completed pergola
Ask a suitably qualified structural professional to set the foundation requirements against the fully specified pergola and the actual site, not just a bare support frame. The final roof arrangement can change what the structure must resist and how forces reach its supports; soil, slope, existing paving, drainage and nearby services also need site-specific consideration. These are design inputs, not details to guess from a photograph. There is no reliable universal footing size, depth or anchor choice for every pergola, and no catalogue image can establish what is adequate for your ground.
Before excavation or concrete work, obtain the responsible designer’s drawing and written specification. It should show post positions and the relevant foundation-to-post interface, record the design assumptions and site information still to be confirmed, and state who checks the work against the plan. If you are considering the Bloomcabin Pergola, ask the supplier for model-specific information for the designer to use alongside the site assessment. Ask a local structural professional to assess the ground. If changing the roof could change the design basis, resolve that before permanent footings are treated as complete.
Use one coordinated drawing for the set-out
Use one coordinated set-out drawing as the reference for every contractor. It should identify the pergola footprint, post centres, offsets from the house and other fixed edges, finished-floor datum and important clearances. Show it against terrace boundaries, doors, windows and access routes rather than as an isolated rectangle. If you are considering the Bloomcabin Wall-Mounted Pergola, have the proposed position shown in relation to the house so the building connection and groundworks can be coordinated. Add a revision date and make clear which drawing the groundworks contractor is to follow; a quote sketch should not quietly become the setting-out document.
Compare the drawing with the planned finished paving and levels, not just the ground as it looks today. Account for thresholds, steps, drainage routes, gutters and known underground services. Agree who confirms the levels and who checks the positions before concrete work, and how any discrepancy is referred back to the designer instead of being shifted on site. If landscaping or service work happens first, keep a dated record of locations and approved changes, and have the pergola drawing updated where necessary. Once foundations are covered, it can be harder to inspect their position or resolve a mismatch.

What to confirm before stage one 3
Resolve the house connection as well as the footings
A wall-mounted layout adds a building connection to the project; the footing plan alone does not describe the whole interface. Ask a qualified professional to assess the actual wall and proposed connection rather than assuming that any masonry, cladding or fascia is suitable. When discussing Bloomcabin’s wall-mounted model, identify the wall, roofline and proposed attachment so the assessment addresses the intended arrangement. Confirm who provides the connection detail, who checks the existing building and whether any building alterations are included in the work. Record those responsibilities before the footing contractor begins, even if the attachment itself will be completed in the later stage.
Coordinate the connection with nearby gutters, downpipes, eaves, doors, windows and external services so that the design does not create an access or drainage conflict. A freestanding arrangement has a different set-out to coordinate; changing from one arrangement to the other can affect both the building interface and the footing layout. Make any decision about that change before foundations are installed. Put responsibility for connection details and any repairs to affected finishes in the written scope, so one contractor does not assume another will handle them.
Confirm that the later roof is compatible
Compatibility means more than a roof appearing to span the frame. Depending on the selected system, a later component may require a particular frame version, brackets, tracks, operating clearance, drainage path or controls. Ask the supplier to confirm in writing which roof options are approved for the exact model and configuration, and whether installing one later changes any part of the structural design. If you are considering the Bioclimatic Pergola, include that model in your enquiry and ask for the current model-specific documentation covering the proposed roof connection. Keep the document revision and parts references with the project records.
If the roof will come from a different supplier, ask both suppliers to state the interface they support and have a qualified professional review any proposed change. Confirm who is responsible for connections and water management, and which work is excluded from each quote. If the later option involves powered controls, include the electrical requirements and trade scope in the plan; ask a suitably qualified electrician to advise on that work. Do not make a generic allowance for wiring or controls based on an unverified model. Resolve questions about compatibility before the footings are treated as fixed.
What to confirm before stage one 4
Create a written handover for the second stage
Prepare a handover pack before the first contractor leaves. Keep the approved drawings and revision dates, the product configuration, site records, approvals correspondence, contract inclusions and exclusions, and any written decisions about compatible roof options. Record who completed each task and who is responsible for confirming the work before the next stage. This gives the later installer more than a verbal description of what lies beneath the paving and helps distinguish approved changes from informal site adjustments. Store the records where the owner and the people returning to the project can access them.
Ask the supplier about future component availability, how a later order would be matched to the original model and what happens if that model or configuration changes. Do not assume that a product page remaining online guarantees future parts or unchanged compatibility. If the project specifies Bloomcabin’s bioclimatic model, record the exact configuration and model reference in the handover pack so a later enquiry can be matched to the original selection. Also ask whether staging affects any stated support or warranty conditions, and obtain the relevant terms in writing rather than relying on a verbal assurance.
Plan how the unfinished work will be protected
Before the first-stage crew leaves, agree an interim-site plan with the contractor. Identify what will remain exposed, whether any work needs covering, how access will be managed, and who is responsible for checking the area during the gap. Ask what arrangements are appropriate for the specific work and site; a generic cover or barrier is not a substitute for a contractor’s plan. Keep other trades informed about the unfinished area and the approved drawings so that work nearby does not damage or obscure it. Include these responsibilities in the stage-one handover rather than leaving them to the next installer.
If pergola components arrive before assembly, ask the supplier how they should be stored and who is responsible for receiving, securing and checking them. Keep the parts list and labels with the goods so components can be matched to the drawings later. Agree who owns the materials during the gap and who bears responsibility for their care under the relevant contract or policy. If storage will be on site, consider whether it will obstruct access or be exposed to damage. A long pause also makes it worth confirming any storage conditions and checking that the planned installation area remains accessible.

What to confirm before stage one 5
Check local requirements and ask your insurer
Do not assume that footings and the later roof will be assessed as separate projects. Requirements depend on the site and proposed work, so ask the relevant local authority and an appropriate building professional which plans, approvals or inspections apply to the completed pergola and each stage. A building certifier or surveyor may be relevant, depending on the project and location. Keep written responses with the drawings, and make sure the people carrying out the work know which design has been discussed. This is a local check, not a rule that can be settled from a general article.
Contact your insurer before work starts and ask what information it needs about the structure, attachment, roof, contractors and period when the project is incomplete. Ask specifically about the circumstances and materials involved rather than assuming an existing policy automatically covers the work or unfinished structure. For a proposed wall-mounted Bloomcabin pergola, describe the quoted configuration and building attachment as well as the gap between the footing and roof stages. This gives the enquiry a defined scope rather than just a product name. Provide the project documents requested by the insurer and keep its response with your contract and approval records.
Compare the full cost and timing of both stages
Compare the total staged scope, not just the first invoice. Ask each contractor to separate design and site work, footings, supplied components, assembly, roof work and any related drainage or electrical scope. Clarify what is excluded, who arranges inspections and whether a second visit, storage or later site preparation is part of the quote. Ask how the contractor handles changes if the model, roof or connection details are revised. This makes it easier to see whether the apparent saving from delaying the roof is offset by extra coordination or return visits, without assuming costs that have not been quoted.
Use a simple stage schedule and change record: what is approved, what remains undecided, who is responsible for each task and what must be confirmed before the next stage. If you select the listed Bloomcabin Pergola model, ask for its exact configuration and drawing revision to appear in the staged quote, with each contractor’s work clearly identified. Keep later changes in writing so you can see how they affect both the deferred roof work and the work already commissioned. Compare the cost and timing of the complete staged proposal with having the same pergola supplied and assembled in one stage.
Frequently asked questions
Can I install the footings before buying the roof?
Yes, if the exact pergola model and intended roof configuration are known, or a qualified designer has documented which alternatives the footing design allows. Have the design and post positions confirmed before permanent work. If the roof could change the supporting structure or connections, settle that before groundworks.
Will a roof from another supplier fit later?
Do not assume so from its appearance or overall dimensions. Ask both suppliers to confirm compatibility with the exact frame and model version, including any required connections and drainage details. Have a qualified professional review any change that could affect the structure.
Is a wall-mounted pergola easier to build in stages?
Not necessarily. A wall-mounted design needs coordination between the footing layout and the connection to the actual building. Ask a suitable professional to assess that interface and confirm who provides the detail. A product name alone does not establish that a particular wall is suitable.
How long can the footings be left before the roof is added?
There is no single interval that suits every site or design. Ask the designer and contractor what inspection, protection and handover arrangements apply during the gap, and whether the completed work will need to be checked again before assembly. Do not leave the interim condition undefined.
What should I keep for the second stage?
Keep the approved drawings and their revision dates, the exact product configuration, written compatibility confirmation, site records, approvals correspondence, contract inclusions and exclusions, and notes on who is responsible for unfinished work. Ask the supplier about future parts and any conditions that apply to storage or staged installation.
A sound staged pergola project is a complete design with staged delivery, not a footing-only guess. Choose the model and roof arrangement, have the foundations and interfaces assessed for the finished structure, and record who supplies and protects each part of the work. If a decision affecting post positions, attachments or the design basis remains open, move it ahead of groundworks. With those details settled, the roof can be a later stage without turning the first one into an expensive experiment.
