
Planning Pergola Footings Beneath Porcelain Paving
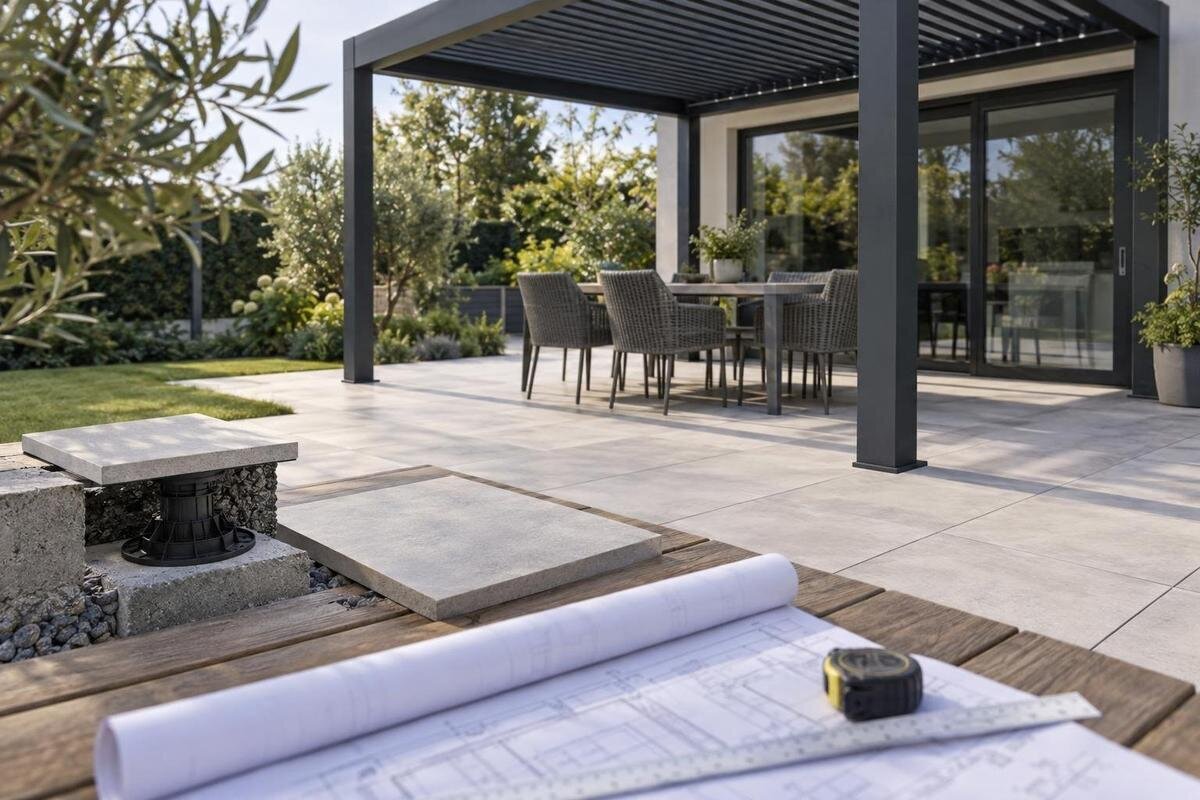
Pergola planning
Porcelain paving gives a patio a finished surface, but it is not a structural anchor for a pergola. The hidden build-up might include a slab, bedding, pedestals, drainage layers or several of these, and the tiles alone do not show how the assembly supports a post. Plan the footings, post positions, tile cuts and finished levels together, before the paving pattern or installation sequence is fixed.

Before work begins 1
Treat porcelain paving as a finish, not a footing
The footing question is about the complete load path, not whether porcelain feels solid underfoot. Each post and base needs a connection designed to transfer forces into suitable ground or another structurally assessed support. The tile is the visible finish, not the anchor. A plate fixed only to a tile, a fixing that engages only the paving unit, or a screw placed in a grout joint does not establish a sound structural connection. Porcelain can crack or loosen if asked to resist forces its bedding was not designed for; grout or sealant around a cut does not turn the finish into a footing.
Think of the patio as separate layers: porcelain, its bedding or support system, any slab or drainage layer, and the ground or structure beneath. Each can serve a different purpose, and they do not automatically act together as a footing. The tile's thickness, a solid sound when tapped or straight grout lines cannot confirm that an anchor is supported. Pedestals, membranes or floating paving can make the surface particularly poor evidence of what lies underneath. Two patios with identical tiles can have very different construction below them. Find out which layer the anchoring detail relies on before deciding how the paving will be cut.
Identify what sits below the tiles
Start with records and a site walk, not a drill. Look for paving specifications, construction drawings, renovation photos or invoices that show how the porcelain was installed. Note the visible tile grid, joints, drains, thresholds and any exposed edge where layers can be seen. These clues help build a picture, but an edge or old plan may not match the exact post locations after later work. Record the finished surface level and any known changes. Also note whether the paving is at ground level or spans a structure, and where steps, walls or retaining edges sit nearby.
If the build-up remains uncertain, arrange an appropriate investigation with a qualified builder or structural professional before setting the footing positions. A controlled check may be needed to establish whether there is a slab, a bedding layer, a drainage system, a membrane or another support arrangement at the proposed posts. Do not assume that what is visible at one corner continues across the patio, or lift tiles at random where waterproofing or drainage could be affected. If the paving is over a balcony, roof or other structure, assess that structure separately; do not assume a garden pergola is rated for a rooftop or balcony installation.
Before work begins 2
Set post positions from the approved layout
Choose the pergola model and configuration before finalising the set-out. Use the relevant approved anchoring drawing to establish the post centres; a product photo or advertised area is not a substitute for those dimensions. The listed Bloomcabin pergola models cover areas from 9 to 24 m², but an area figure does not show where the posts or footings go. Use the Bloomcabin Pergola product page to identify the model you are considering, then request the current drawing that matches its configuration and intended installation.
Overlay the post centres on a measured plan of the patio and its paving pattern. Show the footing outlines and tile cut-outs separately, rather than treating them as one mark. Check clearances to walls, steps, doorways, drains and the edges of the paved area, as well as any access route that needs to remain open. If a post clashes with a joint or creates an awkward cut, do not move it by eye. Take the conflict back to the designer or installer so any change is checked against the approved arrangement before work starts.
Match the footing design to the substrate
The support detail needs to suit both the pergola and the material below the paving. Depending on the site assessment, the design may use new footings or rely on an existing structural element, but that element must be shown to be suitable for the proposed connection. Ground conditions, the structure and the specified anchoring arrangement all matter. A qualified professional should set the footing type and dimensions; there is no universal hole size, depth or spacing that can be applied to every patio.
Coordinate the top of the support with the finished surface so the post base is installed as detailed, rather than bearing on porcelain or relying on grout to hold it in place. The tile opening should provide access to the connection and leave the paving finished as specified. If you are considering the Bloomcabin Bioclimatic Pergola, use its model name to identify the relevant anchoring drawing when discussing the support detail. Ask the designer to show the relationship between the support, base and paving in section, as well as marking their positions on the plan. This gives the installer and tiler a shared view of what belongs above and below the finished surface. Any uncertainty about which layer supports the base should be resolved before the tile opening is agreed.

Before work begins 3
Agree finished paving levels and drainage
Set levels from the finished patio surface, not just from an exposed slab or an early construction mark. Account for the paving and its support layer, the post base, nearby thresholds and any change in height across the site. A simple datum or reference level on the plan helps the builder, installer and tiler work from the same information. If the assumed tile build-up changes, the final post-base height and cut detail may need to change as well.
Keep the planned drainage path in view as the levels are coordinated. Paving falls, channels, grates and outlets should remain accessible and continue to work as intended; avoid a detail that traps water at a post or redirects it towards a doorway. If the Bloomcabin wall-mounted model is on your shortlist, include its model-specific layout in the same level review rather than assuming a picture shows how it meets your patio. Mark the reference level clearly and identify where each height is measured. A note that says only ‘patio level’ may leave the trades working from different points on a sloping surface. Resolve any mismatch between site levels and the drawing before footing or paving work proceeds.
Plan tile cuts around posts and bases
The cut-out should be based on the approved post and base detail, not guessed from the width of a visible post. A base plate or connection may have a different outline from the upright, so the tiler needs the relevant dimensions and an accurately marked position. Consider the paving grid at the same time: a small adjustment to the tile layout may avoid narrow offcuts or an untidy cut, but it must not shift the structural post position without approval. When comparing options in the Bloomcabin Pergola range, keep the tile layout provisional until the selected configuration is confirmed. Have the plan distinguish the post centre, the base outline and the cut edge so nobody mistakes one for another. Review the surrounding tiles too, rather than considering each opening in isolation.
Ask the paving contractor how cut edges will be supported within the chosen paving system and how the junction will be finished. Existing movement joints also need to be considered; do not casually bridge them with a rigid finish around a post. The detail should suit the paving assembly and its drainage needs, rather than relying on a bead of sealant to compensate for an unsupported edge or a poor fit. Confirm the cut lines on the plan and at the site before tiles are trimmed, particularly where a post sits close to a joint, threshold or drain.
Before work begins 4
Check services and the wider site
Footing positions can conflict with services that are not visible from the surface. Check available service plans and arrange appropriate locating before excavation; do not assume that a clear-looking patio has no buried pipes, cables or irrigation lines. Mark known routes on the same plan as the post centres and drains. If a proposed footing overlaps a service route, get advice on the options before the set-out is changed. Moving a post to avoid a clash still needs to be checked against the approved pergola layout.
Look beyond the post locations to see how surface water moves across the whole patio. Keep pits, grates and access points clear, and make sure footing work will not obstruct a drain or its maintenance. If the selected design collects or directs water, establish its documented outlet route and how that meets the site drainage plan. When considering the Bioclimatic Pergola model, confirm those details for the actual configuration rather than inferring them from its name or an image. Show any relevant outlet position alongside the paving drains so the installer and paving contractor can review the junction together. Distinguish the pergola's drainage arrangements from the patio's surface drainage on the plan; both need to be understood before the paving layout is fixed.
Coordinate excavation, footing and paving work
On a new patio, agreeing the footing positions before the paving is laid usually makes it easier to coordinate the supports, finished levels and tile cuts. The support work can then be checked against the set-out before the surrounding surface is completed. An existing paved patio may need selective opening and reinstatement instead, and the appropriate sequence depends on its construction and the approved design. Agree the stages that require inspection before another trade covers the work. Also decide who will protect the surrounding paving while the support work is underway and when the tiler can return to finish the openings. This makes the work order clear without assuming that every patio needs the same installation sequence.
Give the same dimensioned plan to the designer, builder or excavator, pergola installer and paving contractor. Agree who will confirm the post centres on site, who will check the footing against the approved detail, and who is responsible for the finished cuts and junctions. For the Bloomcabin Wall-Mounted Pergola, include the model-specific approved layout in that coordination. Record who is authorised to resolve a discrepancy if the site markings and drawing do not agree. Keep any agreed revisions in writing, with a date or revision reference, so each trade can identify the current version rather than working from an earlier sketch.

Before work begins 5
Allow for lifting and reinstating existing tiles
With an existing patio, decide how the paving will be opened only after its support system and the footing location are understood. Bonded tiles, tiles on a bedding layer and paving on supports may need different approaches. A tiler or builder can advise how to expose the required area while protecting any drainage or waterproofing that forms part of the assembly. Before cutting a finished patio, confirm the approved post centres and footing outline; the visible cut may not show the full area needed for the support work. Ask the contractor to distinguish the temporary work area from the final opening around the post. That distinction helps you understand how much of the patio will be disturbed and which surrounding tiles are intended to remain in place.
Plan reinstatement as part of the job, not as an afterthought. Confirm which contractor is responsible for the tile edges, support beneath the replacement paving and the finished junction around each post. If spare tiles from the original work remain, set them aside for repairs and note the paving product or installation details if known. If tiles must be sourced, discuss the proposed replacement with the paving contractor before the patio is opened. For a project using the regular Bloomcabin Pergola, keep the selected configuration and the agreed reinstatement layout together in the job records. Mark which tiles are to be lifted, retained or replaced, and agree the intended appearance of the repaired area rather than leaving that decision until the structural work is complete.
Record the final set-out before work is covered
Keep a coordinated plan that identifies the selected pergola model and configuration, post centres, footing arrangement, anchoring detail, tile cut lines and finished levels. Record dimensions and construction details as specified by the designer; do not fill gaps in the plan with assumptions. Add known services, drainage routes and any relevant site constraints. If you choose the Bloomcabin Bioclimatic Pergola model, record the configuration alongside its model-specific drawing rather than keeping only the product page. Separate the original proposal from the final record of the completed work, and label both clearly. This allows a future contractor to distinguish what was planned from what was installed without having to reconstruct the sequence from several unlabelled sketches.
Before paving covers any support or connection, have the relevant professional verify that the work matches the agreed detail and keep a record of what will no longer be visible. Photographing the completed work and noting any approved changes can help with later maintenance or tile replacement. If excavation finds an unexpected service or substrate, or a post must move, pause and obtain an updated design rather than improvising a new position. A clear record also makes it easier to understand how the finished patio was coordinated.
Frequently asked questions
Can I anchor a pergola through porcelain paving into concrete?
Possibly, but only if the concrete and the proposed fixing arrangement have been assessed and the anchoring detail is suitable for the actual site. The tile is not the anchor. Before drilling, confirm what is beneath the paving and check the relevant drawings with a qualified professional.
Do the footings need to go in before the tiles?
For a new patio, planning the supports before laying the tiles usually makes it easier to coordinate post positions, levels and cuts. An existing patio may need a different sequence, depending on how it is built. Agree the work order with the relevant trades before anything is cut or covered.
Should pergola posts line up with paving joints?
Only if the approved post layout and footing detail also work at that position. A grout joint is not a structural fixing point. Do not shift a post simply to make it line up with the paving pattern; ask the designer or installer to resolve any clash between the layout and the tile grid.
How deep and wide should the footings be?
There is no single size that suits every site. The footing arrangement depends on the selected pergola, the ground or supporting structure, and the site assessment. Have a qualified professional specify it from the relevant anchoring drawings and site information rather than copying a generic dimension.
What information should I give the installer or engineer?
Share a measured site plan, photos, any available paving or construction records, the selected pergola model and configuration, and details of known services, drains and level changes. Ask for a coordinated set-out showing the post positions, support arrangement, tile cuts and finished levels.
A successful installation is planned beneath the tiles as carefully as it is on the surface. Confirm what supports the patio, set post centres from the approved layout, and coordinate footing details, tile cuts, drainage and finished levels before work begins. If the site or its construction differs from the assumptions in the drawing, investigate and resolve that difference rather than asking the porcelain to do structural work. The finished paving should look deliberate, with each post connected to the support designed for it.
