
Pergola Height: Headroom, Roof Movement and House Proportions
Pergola planning guide
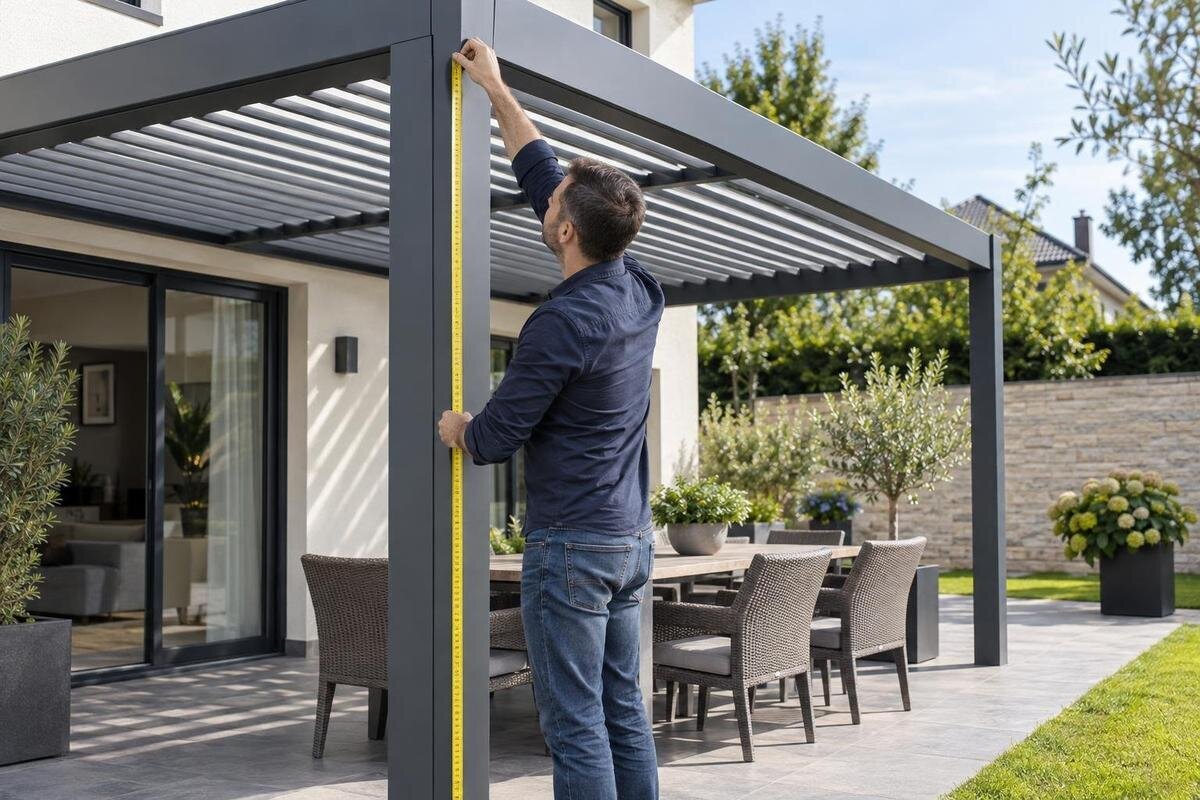
Pergola height is easy to underestimate when a plan shows only the footprint and post locations. The way it feels depends on clear headroom below beams, the paving level once finished, the movement envelope of any adjustable roof and the line the structure makes against the house. A measured cross-section brings those factors together. Use one vertical datum, distinguish proposed from existing levels, and compare the roof in each relevant position with doors, eaves and services. That turns a vague concern about a low ceiling into specific questions for the supplier and installer.

Draw the pergola in a measured cross-section
Begin with a side-on section through the house wall, the most-used doorway and the pergola span. Draw the existing wall and roof edge, the door opening, the proposed support line, the roof plane, beams and walking surface. Mark overall height separately from the clear distance below the lowest beam or other component. Use one vertical datum, usually the proposed finished paving level, and show levels relative to it. Clearly identify the endpoints of each height dimension. A readable scaled drawing rather than a loose sketch lets you compare the house and pergola at the same location. Use millimetres for site dimensions, and distinguish existing, proposed and still-to-be-confirmed levels. If the pergola runs across several openings, draw the section through the one with the least clearance, not a blank stretch of wall.
Ask how each height has been defined before comparing quotes. A stated height might refer to the top of the frame, the underside of a beam or another reference point; the drawing should identify which. Check whether roof covers, trims or a mechanism are included in the dimension, and do not assume a catalogue image reveals usable clearance. When requesting details for the Bloomcabin Pergola, send the section and ask the supplier to mark both the stated height and the lowest overhead point on it. That separates a nominal outside measurement from the space actually available above the finished patio. If two suppliers use different endpoints, ask each to restate the figure against the same datum rather than trying to convert an unexplained catalogue number.
Measure headroom from finished paving
Headroom is measured from the surface a person will actually stand or walk on to the lowest overhead part, not automatically from the concrete slab. If new pavers, tiles, a topping or another finish is planned, show its full build-up and proposed finished level. The difference matters even when the frame is unchanged: raising the walking surface reduces clearance below it. Record the level beside the door threshold and at each post location rather than labelling the whole patio level unless that has been confirmed. Where a step or change of surface is planned, mark its position on the section and plan. This is the level the installer needs to use for the height reference.
Where the patio falls, the lowest part of the roof is not the only height that matters. Take levels at the door, main walking route and each support point, then identify the highest part of the finished surface beneath the frame. Check clearance there as well as at a comfortable standing point; a measurement at the centre can hide a pinch point near an edge. Ask the paving contractor or site professional to confirm finished levels and drainage falls before the pergola set-out. If floor levels remain unresolved, mark the pergola height as provisional on every drawing and quote. Once the paving specification changes, recheck the section instead of relying on an earlier figure.
Show every position of a moving roof
With a fixed roof, the section still needs to show the full depth of the beam and roof assembly. With an adjustable louvre or another moving roof, add its complete movement envelope, not just the closed roof plane. Ask the supplier for drawings showing where parts travel in the relevant positions and which component becomes the lowest point. Include a mechanism housing, motor or trim only where the proposed configuration confirms one. This matters near a wall, eaves or beam: separate outlines can look clear on a basic elevation but intersect once a roof part moves. A plan view may also be needed if the mechanism projects sideways. Treat the movement envelope as part of the height check, not an optional technical note.
Request the matching drawing for the actual option, rather than a generic illustration. For the Bloomcabin Bioclimatic Pergola, ask which roof positions are shown, how far the moving parts project and whether the stated frame height refers to the top of the assembly or the underside of its lowest component. If those details are missing from the quote, request them before treating the selected height as final. Do not infer operating clearance from a photograph or from another louvre system: hinge, motor and support arrangements vary, so the configuration drawing must settle the geometry. Keep the relevant plan or side detail with the section so the installer can see where the movement occurs.
Check openings, eaves and services
Include the openings the pergola will sit beside. Mark door and window heads, sliding-door tracks, shutters and any awning that projects from the wall. Show the movement of hinged doors, outward-opening windows and other movable fittings. This does not mean every fitting will clash; it identifies what needs checking before beam height is fixed. A hinged door may need a clear path below a beam, while an outward-opening window or blind can occupy a different zone higher on the wall. Use a plan view to show the swing and a cross-section to show any overlap with the pergola structure. Include the door most often used to enter the patio, not just the widest opening.
Add the house eaves, fascia, gutter, downpipes, lights, vents and wall-mounted equipment that may meet the roof line or need access. Use site measurements or a reliable house drawing, and label uncertain positions for checking instead of treating them as precise. Raising or lowering the frame changes its relationship to openings and services, so do not solve one clearance by overlooking another. If the roof arrangement collects or directs water at an edge, ask how its height and discharge route relate to the building and paving. Have the supplier or site professional confirm the actual layout, including access needed to maintain existing fittings.

Compare the roof line with the house
Height changes how a pergola looks against a house even when the clearances work. In an elevation, compare the pergola's top line and underside with the eaves, fascia, window heads and existing verandah or balcony edges. A line well above the house's main horizontals may dominate the rear facade; a line close to a doorway or window head can make that opening feel compressed. These are visual judgements, not fixed ratios, so mark measured heights rather than choosing a proportion from a generic rule. When assessing the regular Bloomcabin pergola, use the dimensions of the proposed configuration, not a product image, for this comparison. If the house has a sloping roof, show both the eave and the roof profile.
Check the relationship from the places that matter: inside the adjoining room looking out, at the patio door and farther back in the garden. The roof edge may line up differently with the eaves from each viewpoint, and a deep beam can look heavier than its top height alone suggests. Use a scaled elevation or a safe temporary visual marker for the proposed top and underside; do not treat a marker as structural set-out. Compare the same viewpoints rather than relying on wide-angle product photography, which can distort apparent scale. A side elevation helps with alignment, while a perspective sketch can show whether the structure competes with an existing verandah or roofline.
Treat attached and freestanding heights differently
An attached pergola is judged against a fixed point on the house, while a freestanding one has its own roof line and post line in the garden. For an attached option, draw the wall, eaves, gutter, proposed connection zone and openings below it in one section; record the height where the system meets the facade. For a freestanding frame, show the roof top and underside separately and locate the posts against the finished paving level. In either case, an overall height alone says little about headroom unless its measurement point is identified. Also note any change in height across the roof if the design includes one, rather than assuming the whole plane sits at a single level.
Do not decide an attachment detail from a model name or photograph. The Bloomcabin Wall-Mounted Pergola is an option to assess against the actual wall and roof geometry; the supplier's configuration drawing and an appropriately qualified building professional need to confirm the proposed connection and any site-specific support requirements. If an attached layout is not suitable for the measured house, a freestanding layout may create a different visual and clearance relationship, but its posts and foundations also require project-specific checking. Treat these as different drawings, not as the same roof shifted along the plan. Show both alternatives against the same finished floor datum if you are comparing them.
Test the height where people use the space
Physical clearance is only one part of height; the other is how the space feels in use. Mark the roof underside over the route from the house door, beside the table and where people stand to prepare or serve food. Those points can sit beneath different beams, so measure the lowest overhead part at each rather than assuming the centre of the patio represents all of it. Consider both a standing and seated view: a beam may clear a walking route yet still dominate the view from an indoor living area. Furniture can move, but fixed routes and door approaches deserve particular attention. Include lights or a fan only if they are part of the proposed setup, and confirm their mounting space.
For a roof that changes position, compare the positions you expect to use, not only the one that looks best in a brochure. If considering the bioclimatic pergola option, use the selected configuration's section or clear diagram to judge the height from inside and outside. Look at whether a beam feels low on a regular route, whether the roof edge interrupts a familiar view, and how the view changes when the roof opens. Keep the furniture layout and viewpoints consistent during the comparison so you can judge the effect of roof position. Different occupants may notice different sightlines, so discuss these before committing.
Coordinate levels, drainage and support details
Height is tied to the ground and water details, not just the roof. Show paving build-up, finished levels, any fall across the patio and proposed post bases on the same section. Identify how surface water is meant to move around the posts and where roof-water components, if included, sit. A change in finished level can alter clearance and the apparent post height at once; a note saying only height above ground leaves this unresolved. The builder, paving contractor and pergola supplier should work to the same level information before dimensions are locked in. If the surface slopes in more than one direction, add the missing level information in a plan or site survey rather than forcing it into one cross-section.
Changes to frame height, attachment or support arrangement can affect more than appearance, so do not adapt a supplier's standard drawing by scaling it yourself. Ask the supplier and a suitably qualified professional to confirm the selected configuration against the site and its support requirements; verify any approval requirements through the relevant local process rather than assuming they are the same everywhere. If assessing the wall-mounted Bloomcabin model, include measured facade and finished paving levels in that check. The coordinated drawing should make clear which dimensions remain preliminary and who is responsible for resolving them before paving or fixing work begins.

Ask suppliers to quote against the same section
To compare quotes fairly, give every supplier the same cross-section and request the same reference measurements: finished walking level to the lowest overhead part, finished level to the underside of the primary beam, and finished level to the top of the frame. These are buyer-requested comparison points, not universal terms; the drawing must name each endpoint. Ask suppliers to annotate roof movement, wall and eaves clearances, and any height-dependent components on their version. If a dimension is excluded, provisional or subject to a site measure, record that too. A quote stating one number without showing its endpoints cannot be compared reliably with one that measures another part of the assembly.
Send a brief note of what is fixed and what may still change: paving thickness, thresholds, door and window details, roof type and nearby services. Ask for a revised section if any of those inputs change, and match its revision identifier to the quote and order documents. When seeking a quote for the Bloomcabin pergola model, provide the same marked-up section you send elsewhere and ask the supplier to identify height references and configuration inclusions in writing. This stops different terminology being mistaken for different clearance, and makes later revisions easier to trace. Keep unanswered assumptions visible rather than letting them disappear into an email thread.
Confirm the set-out before installation
Before installation, compare the agreed section with the actual site: measure the door threshold, wall height, eaves and proposed post positions, then check them against planned paving levels. If paving is not installed, use the agreed finished level rather than the current ground surface. Pay particular attention to any measurements that were provisional when the order was placed. Mark discrepancies for resolution rather than treating an estimate as an agreed height. Keep the current dimensioned drawing with the project records so the installer, builder and paving contractor all set out from the same reference. Assign responsibility and a confirmation date to any outstanding measurement.
Do not rely on an installer to resolve a clash by shifting the frame on site. For a Bloomcabin Bioclimatic Pergola configuration, check that the installation drawing identifies the selected setup's lowest and moving parts and relates their heights to finished paving and the house. Compare this with the roof configuration actually ordered, not an earlier option. If the site check reveals a difference, have the supplier resolve it in the drawing before fixing work begins. A shared, dimensioned record makes the intended height clear; a last-minute verbal adjustment leaves the relationship between the frame, roof and paving uncertain.
Frequently asked questions
Is there a standard height for a pergola?
There is no single height that suits every house and roof. Establish the clear distance from finished paving to the lowest overhead component, then account for beam depth, any roof movement and nearby openings. The right relationship to the house eaves also depends on the measured facade. Use a site-specific section and the selected configuration drawing rather than copying a generic figure.
Should I measure from the slab or the finished paving?
Use the surface people will actually walk on. If pavers, tiles or another finish are planned, show their build-up and proposed finished level; measuring from the slab alone can overstate the available headroom. Record the level at the doorway and proposed post locations, especially if the patio falls.
How much extra clearance does an adjustable louvre roof need?
There is no safe generic allowance to add. Ask the supplier for a drawing of the exact configuration that shows the roof parts through their relevant positions and identifies the lowest point. Check how the mechanism relates to beams, eaves and nearby openings rather than estimating from a product image.
How can I judge whether a pergola looks too tall?
Compare a measured elevation with the house's eaves, fascia, window heads and other strong horizontal lines. Then review the proposed top and underside from the adjoining room, patio door and garden. A temporary visual marker can help you picture the line, but the final height should come from the dimensioned site drawing.
What should a pergola height drawing show before I confirm it?
Check that it identifies the finished paving level, the endpoints of each height dimension, the lowest overhead part, beams and roof movement where relevant. It should also show nearby doors, windows, eaves and the proposed connection or post positions. Match the drawing revision to the quote or order documents, and resolve any provisional levels.
A suitable pergola height provides clear headroom above the finished walking surface, accommodates roof movement and sits comfortably against the house. A measured cross-section brings those relationships into focus: paving levels, the lowest overhead point, frame depth, moving parts, openings and eaves. The aim is not to copy a height from another patio, but to choose one that works both overhead and in the view from your home.
