
Electric infrared heater under a pergola: planning checks
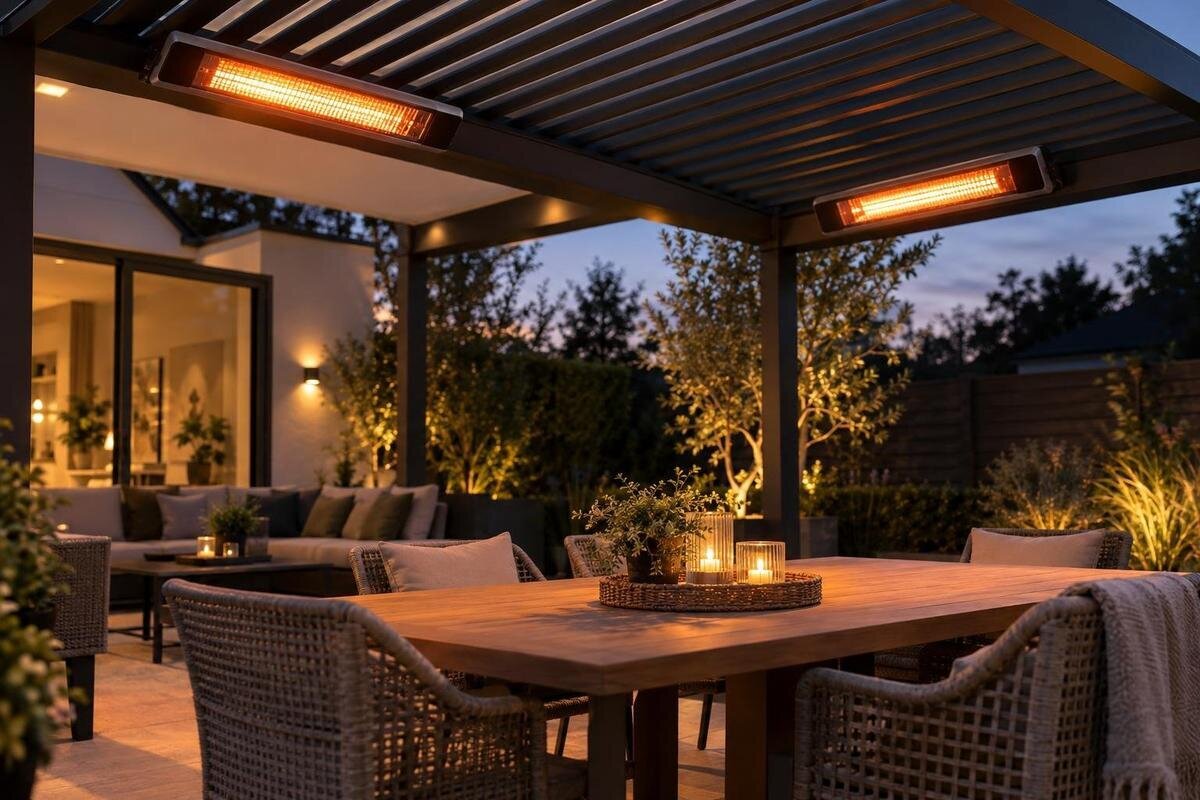
Pergola heating planning
An electric infrared heater under a pergola is not simply a matter of choosing a power rating and fixing it overhead. The heater has specific instructions for mounting, clearances and weather exposure; the pergola has its own limits on what may be attached and where. Those requirements need to align, and the electrical supply needs a separate professional assessment. Plan around the exact model numbers, the seating layout and any moving roof components—not a generic pergola image. This guide sets out what to check before buying or requesting installation, and which questions need an answer from a manufacturer or qualified electrician.

How infrared heating behaves under an open pergola
Electric infrared heating is directional: many units are designed to warm people and surfaces within the manufacturer's stated field rather than evenly heating all the air in a space. A pergola is generally open-sided, so it does not behave like an enclosed room. One seat can feel warmer than another because people sit at different angles and distances from the heater. If the manufacturer supplies a coverage diagram, read it for the exact model, mounting height and orientation being considered. Carry any stated assumptions into your layout; the diagram is planning guidance, not a promise that every part of the pergola will feel the same in all conditions.
Wind and gaps between screens affect comfort, as do seat direction, furniture height and how long people remain in one spot. A roof alone does not seal the area or guarantee even warmth, and pergola floor area is not a substitute for the heater's coverage information. Keep comfort and mounting permission separate: a position that feels effective is not automatically an approved mounting point, and an approved point may not serve every seat as expected.
Read the heater and pergola instructions together
Collect current instructions for both the exact heater and the exact pergola model and configuration before comparing brackets. Check the model code, any suffix, the supplied bracket, permitted orientation, clearance requirements and location limits. A retailer summary may omit restrictions, while instructions for a similar heater or another pergola variant may not apply. If your plan includes optional screens, roof components or other accessories, make sure the documents cover that configuration rather than only a basic frame. Note any references to approved accessories, modifications, service access or prohibited mounting methods; these details can affect the layout before anything is ordered.
Use product pages to identify the structure, not to infer compatibility. The Bloomcabin Wall-Mounted Pergola listing names the model, but a catalogue name does not show a heater-approved fixing location. Save the manuals and note which model references or revisions they cover, so the supplier and installer are discussing the same products. If either guide is silent on a key point, or the instructions appear to conflict, ask the relevant manufacturers or suppliers for a written answer before buying a bracket. Include the exact model codes in your question. A missing warning is not approval, and advice for a similar model is not enough.
Confirm that the pergola permits the mounting point
Confirm the proposed mounting point with both sides of the installation: the heater maker must permit the orientation and bracket, while the pergola maker must permit attachment to that exact part of its frame. A heater supplied with a ceiling bracket is not automatically suitable for every pergola beam or post. Nor does a substantial-looking member prove that the proposed fixing is approved. The instructions or written confirmation should identify the fitting method, any required accessory and the permitted fixing zone. Do not treat decorative trim, drainage channels, shade slats or movable panels as supports based on appearance.
The Bloomcabin Pergola page can help identify the structure under consideration, but it does not establish which frame elements may carry a heater. For an aftermarket bracket, clamp or modified fixing, ask whether that exact arrangement is accepted for the chosen pergola and heater, and whether it affects maintenance or warranty conditions. If the answer depends on structural capacity rather than a documented accessory, refer the question to the manufacturer or an appropriately qualified building professional. Keep the response tied to the model and configuration you will buy; do not improvise an attachment or choose a fixing point by judging the frame visually.
Use the heater's own clearance measurements
Clearance is specific to the heater, its orientation and sometimes its mounting position. The manual may set distances above, below, behind or beside the unit, and may identify separate clearances to combustible materials or nearby objects. Follow the stated measurement reference: it might be the heater surface, casing, bracket or another marked point. Do not estimate from a product photograph or use a generic number from another model. If the heater permits more than one orientation, check the requirements for each, including whether changing the angle or fitting a different bracket changes the required space. Ask the manufacturer to clarify any term or diagram that leaves the measurement point uncertain.
Map the nearest surfaces and objects around the proposed point: roof underside, beams, side screens, curtains, blinds, furniture, cushions and any other material that could sit within a specified zone. Include items that move or are added seasonally, not only the empty frame. A plan view alone can hide a low clearance, so check the manual's measurement points in both plan and elevation, with the intended bracket included. If your shortlist includes the Bloomcabin Bioclimatic Pergola, match the proposed position to its exact configuration; the product name does not supply the heater's clearance values. Resolve ambiguous measurement points before finalising the layout.

Check roof movement and maintenance access
If the pergola has an opening, adjustable or retractable roof, check the heater against every roof position the manufacturer permits. A position that clears a fixed roof may be too close to a moving component when it shifts, or may interfere with operation, drainage or access for cleaning and servicing. Confirm whether the heater may be used while the roof is open, closed or moving; do not assume a still image represents the full operating range. Include any curtains, screens or blinds that change the enclosure if their use affects the heater's clearances or exposure. Restrictions on operation should be clear before the heater position is agreed.
If you are considering the Bloomcabin bioclimatic model, confirm what actually moves on the selected version and which areas are approved for attachments; the category name alone does not answer either question. Check the pergola instructions for operating and maintenance zones, then compare them with the heater manual's required distances and orientation. If the documents differ, do not choose the more convenient limit or assume the roof can simply be left in one position. Obtain clarification for the exact combination and record any restrictions on when the heater may operate. The arrangement should remain workable for ordinary roof operation and planned maintenance.
Assess weather exposure at the actual position
Outdoor exposure needs its own check; being under a pergola does not necessarily mean a heater is sheltered from rain or other weather. Wind can drive rain in from the sides, and the roof may expose a fixture differently in its various positions. Check the exact heater's stated suitability for its intended setting, including any limits on direct rain, splash, dust or other environmental conditions. Look beyond the heating element: controls, connections and required accessories may have separate limitations. Do not assume a general outdoor description covers every component or every point beneath the structure.
Identify exposure at the actual mounting point, not simply the broad setting. The Bloomcabin Pergola model page identifies the structure; its name or gallery image does not establish the heater's weather rating or the site's level of shelter. If the location is coastal or otherwise exposed to corrosive conditions, check the heater maker's stated restrictions for that environment rather than guessing from its finish. Ask the manufacturer or electrician to interpret any rating against the proposed position and normal roof operation. Do not add a cover, shield or enclosure to make an unsuitable unit appear protected unless the heater manufacturer expressly permits that arrangement.
Have the electrical supply assessed separately
Arrange an electrical assessment around the heater's actual rated input, connection method and control system. A qualified electrician can determine whether the existing supply and circuit are suitable and whether new work is needed; an available outlet or a feed used for pergola lighting does not answer that question. Check the exact heater manual for its supply requirements and whether its controls are compatible with the planned switching or automation. Keep this at planning level: do not choose cable sizes, protective devices or circuit changes from a web article or by adding up labels yourself. Ask about any site-specific requirements before agreeing to a heater.
Give the electrician the heater model and manual, plus the exact structure being planned, such as the wall-mounted pergola model, so the supply route can be considered alongside approved mounting and roof movement. Ask where electrical access and controls can be accommodated without obstructing operation or future maintenance, and who will confirm compatibility if the heater uses a separate controller. Requirements depend on the product and existing installation, so get a site-specific assessment before committing to the installation or concealing any cabling. Keep electrical approval separate from the pergola supplier's mounting approval; one does not establish the other.
Match the heated zone to the seating layout
Draw the intended seating arrangement before settling on a heater position. Mark dining chairs, lounge seats, circulation paths and places where people stand, then compare those positions with the heater manufacturer's coverage guidance and permitted orientation. Tall furniture or a changed chair direction can alter the line between the unit and an occupant; a position that works for one chair may not suit a table used by several people. Treat coverage diagrams as model-specific, and avoid selecting a heater solely because its advertised area resembles the pergola's floor area. Consider how the layout changes between everyday uses, not only the largest gathering.
The Bloomcabin Pergola product page lists configurations from 9 to 24 m²; that describes pergola area, not the seating zone an infrared heater will cover. For the exact heater, check how its manufacturer defines coverage and whether the indicated mounting height and direction match your proposed arrangement. Consider ordinary variations such as pulling chairs out, moving a table or using the space for more than one activity. Also check how occupants will operate the controls from their usual positions, without changing the approved heater angle or placing objects inside specified clearances. A practical layout should work for the everyday setup, not just a bare plan.

Get model-specific answers before ordering
Before buying, assemble a brief that names the pergola model and configuration, the exact heater and bracket, the proposed position and orientation, the roof state during use, the manual clearances and the exposure at that point. Mark the position on a simple plan or elevation, but do not treat a sketch as structural approval. This gives the supplier and electrician specific questions to answer instead of a general request about a pergola heater. Include accessory codes and any relevant model suffix; small differences can change which instructions apply. Keep the manual pages with the brief so each response can be checked against the same documents.
Ask the pergola supplier to confirm the permitted attachment point and any required accessory for that model. Ask the heater manufacturer to confirm its permitted orientation, clearances and location limits; ask the electrician to assess the electrical supply and controls. Attach the wall-mounted model page only as an identifier, alongside the exact manuals, and request written responses that refer to the selected variants. A rendering or verbal assurance that a similar installation is common does not answer these separate questions. If a specification changes, update the brief and confirm the combination again before installation.
Pause when a requirement cannot be verified
Pause the plan if the manuals do not identify a permitted mount, if a required clearance cannot be maintained, if the weather exposure falls outside stated limits, or if a roof mechanism and heater occupy the same space. An unresolved question from the electrical assessment is also a reason not to proceed on an assumption. These are design constraints, not details to solve with an improvised plate, added shield or last-minute change of angle. Do not buy or install the heater until the relevant manufacturer or qualified professional has resolved the specific question. A revised layout also needs to be checked; changing the plan does not establish approval.
Depending on what is unresolved, the answer may be a different documented mounting point, a different heater whose instructions suit the location, a pergola configuration that allows the approved arrangement, or no fixed heater. Check any revised combination against both sets of instructions: approval for one bracket, roof position or electrical arrangement does not automatically carry across. Record the final model codes, approved position and operating restrictions for the installer and future owner. If the heater, mount or pergola configuration changes later, revisit the checks rather than relying on the earlier confirmation. A clear 'not suitable here' is more useful than an uncertain workaround.
Frequently asked questions
Can I fit any outdoor infrared heater under a pergola?
No. Outdoor suitability and pergola mounting approval are separate checks. The exact heater instructions must allow the proposed exposure and mounting orientation, and the pergola documentation must confirm that the chosen fixing point is permitted. A general outdoor label does not establish either one.
What clearance should I allow above the heater?
There is no single distance that applies to every model. Use the heater manual for the exact unit, orientation and measurement reference, and include the nearest roof parts and other objects. If the instructions are unclear or conflict with the pergola documentation, get model-specific clarification rather than borrowing a figure from another heater.
Does a pergola roof protect the heater from rain?
Not necessarily. A roof does not establish the heater's weather rating, and rain can reach a fixture from the sides or when a roof position changes. Check the heater's stated exposure limits at its actual mounting point, including any separate control or connection components.
Can I attach a heater to a beam or roof louvre?
Only if the pergola manufacturer permits that exact attachment point and the heater manufacturer permits the proposed bracket and orientation. Appearance is not proof that a frame member is approved for the fitting. Never assume a movable roof part is a mounting point.
Can an existing pergola lighting circuit supply the heater?
Do not assume so. The heater's rated input, connection method, controls and the existing installation all matter. Ask a qualified electrician to assess the proposed heater and supply before committing to the setup; a nearby outlet or lighting feed is not confirmation of suitability.
A suitable heater plan depends on more than an outdoor label or an available space beneath the roof. Confirm a permitted mounting point, apply the exact heater clearances, assess exposure at the installed position and have a qualified electrician review the supply and controls. Keep the answers tied to the selected pergola and heater models. When a detail cannot be verified, pause and resolve it before committing; that gives the final layout a clear basis instead of relying on assumptions.
