
Planning a Wildlife-Friendly Garden with a Pergola
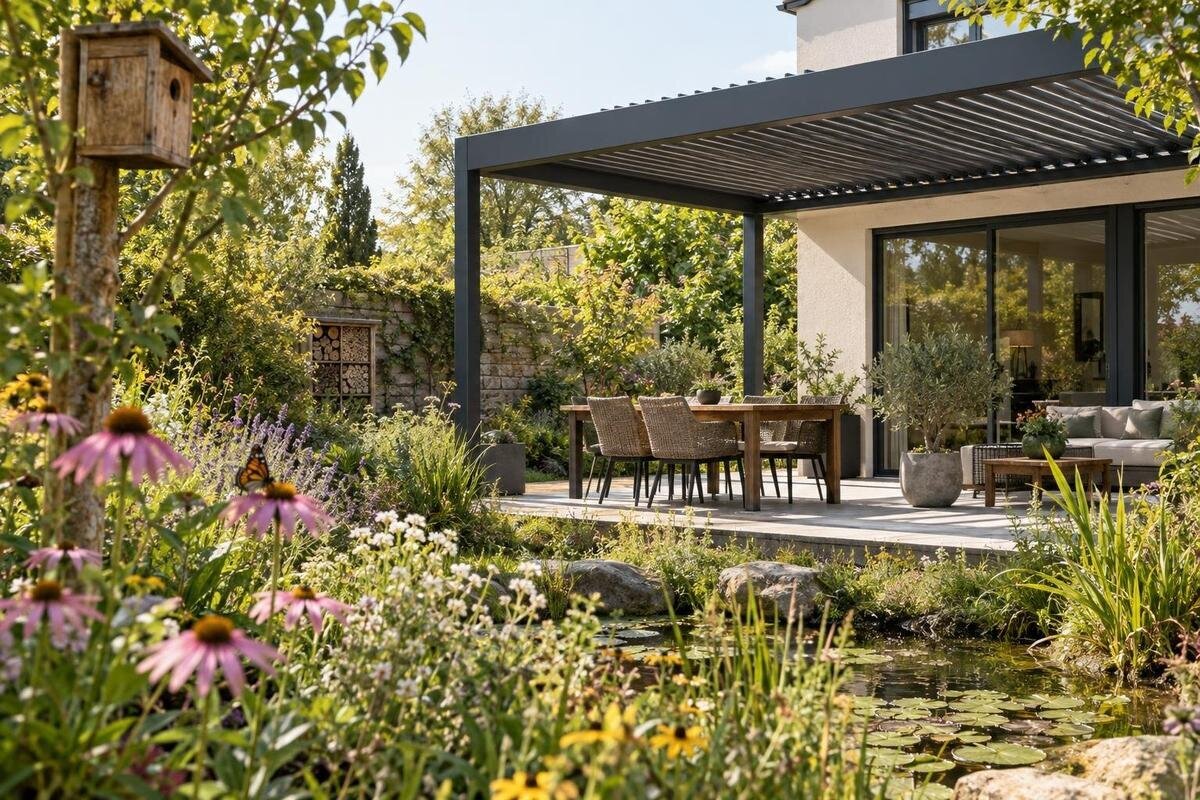
Garden planning
A pergola can provide a defined place to sit without deciding, by itself, whether a garden is wildlife-friendly. The useful planning work happens around it: protecting existing planting, choosing locally appropriate species, keeping paths and maintenance access clear, and directing light where it is needed. Start with a drawing of the whole garden, then test the structure’s footprint against those priorities. That creates a practical brief without treating a style or product image as an ecological guarantee.

01
Map the garden before choosing a pergola
Begin with a measured sketch of the whole garden, rather than a close crop around the proposed seating area. Mark the house, boundaries, gates, existing trees and shrubs, planted beds, lawn or open ground, sheds, taps, drains and the routes people already use. Add known service locations and areas that must remain accessible, using current records or professional advice where needed. Note where sun and shade fall at different times; one visit will not represent every season. Record existing lights and any habitat features you hope to retain. Also mark uneven areas and places where water collects after rain, without assuming a drainage fix. The point is to see what the pergola plan might disturb, divide or make harder to care for.
Write down what 'wildlife-friendly' means for this particular garden. Choose one or two aims you can influence, such as retaining a mature plant, keeping a planted connection between two beds, or reducing light on a boundary; each is more useful than a broad promise to attract wildlife. If you have a specific local species or habitat in mind, check the aim with a knowledgeable local ecologist or plant adviser rather than guessing from a general planting list. Put the brief beside the map and note which decisions are fixed and which can move. If a wall-mounted layout is being considered, compare the wall-mounted pergola option only after marking doors, wall access and planting you intend to keep.
Set the pergola within a clear circulation plan
Place the pergola where it gives the garden a useful destination without turning the space between the house, gate and planted areas into a corridor around obstacles. Draw its full outer footprint and each post location, plus door swings and furniture in use, not just the area covered by a table. Trace routes from the house to everyday destinations such as a shed, clothesline, tap or back gate. Keep passing and turning space where people need it, including when chairs are occupied. Include a route for a wheelbarrow or a pot being carried. If that path clips a bed, adjust the layout before settling the structure’s position.
A freestanding arrangement can sit away from the house, while a wall-mounted arrangement has a different relationship to doors, the façade and wall maintenance; neither is automatically better for wildlife. Choose by drawing the routes and planting you want to protect, then ask for the selected model’s exact dimensions and fixing requirements. The Bloomcabin Pergola product page is one model listing to compare with the plan, not a substitute for measuring the site. Show the remaining clear area after posts, seats and circulation are included. If that leaves too little room to reach or care for a bed, move the structure before refining finishes. Note whether the proposed location blocks a view into the garden or separates planted areas you want to retain.
02
Use planting layers with local conditions in mind
Layered planting can be planned as a change in height and form: retain larger established plants where possible, then consider mid-height shrubs or grasses and lower planting where they fit. This is a composition tool, not a guarantee that a particular mix provides habitat. List candidate plants by mature height and spread, seasonal form, maintenance and water needs, then check whether each suits the local area and the actual site. A local native-plant adviser or ecologist can help match species to a stated habitat aim. Avoid selecting by appearance alone, or assuming a plant labelled native is suitable everywhere. Make the plan reflect the conditions you have, not an idealised catalogue scene.
On the drawing, separate planting zones from the pergola footprint and show how each bed edge can be reached for pruning, watering and replacement. A tree or shrub that looks small in a nursery pot may occupy much more space at maturity; use documented mature dimensions rather than current container size. Note any irrigation access or hose route so it does not cross a main path. When comparing the Bioclimatic Pergola listing, show its proposed arrangement beside the mature planting outlines and confirm the required clearances. This lets you assess taller planting in relation to the structure, rather than choosing plants to fill gaps left on the drawing. Record their care requirements alongside their allocated space.
Allow room for mature plants and pergola access
Treat climbing plants as a separate design decision, not a default way to soften a pergola. Check whether the chosen structure is intended to carry plants or accept attachments; don’t assume posts, overhead components or a wall connection can take extra weight, moisture or contact with foliage. Ask the supplier or designer for written guidance on plant support, clearances and access before choosing a climber. If no suitable support is confirmed, use a separate trellis or another planting form and include its footprint in the plan. This prevents a planting sketch from quietly becoming a structural assumption and keeps the proposed support method visible to everyone working on the garden.
Show mature plant spread around each post and along the wall, including space to inspect, clean and reach adjacent surfaces. Avoid covering a wall junction or hiding a post base behind dense growth, because the garden still needs ordinary access for care and checks. A wall-mounted option deserves particular attention where planting approaches the façade; review the wall-mounted model details and verify the required clear zone for the exact configuration. Don’t let a generic photograph set that distance. Mark nearby doors, windows and external equipment too, so growth and pruning do not make access awkward or block a route.

03
Plan seating alongside garden work areas
Draw the seating arrangement at the same time as the surrounding beds and paths. Include chairs pulled out for use, rather than showing them tucked neatly under a table, and check that someone can pass while others are seated. Position the main seat away from places where routine pruning or watering needs to happen. Consider the people using the space and the equipment they carry; there is no universal path width for every site, so discuss individual access needs with the designer. If everyday movement would take people through planting you intend to preserve, revise the relationship between the seats, bed edges and path before work begins.
Use the regular pergola model as a reference when checking how the proposed seating fits within the structure’s footprint. Leave room to carry a pot, move garden tools or collect cuttings without having to shift the furniture each time. Check sightlines from both the seats and the house: can you enjoy the planting from the seating area, and is the route to it easy to identify? Show any surrounding planting at its expected mature size so the drawing does not suggest views or access that depend on plants staying small. This makes the seating area part of the wider garden layout without treating it as a way to influence wildlife activity.
Reduce unnecessary garden-light spill
Outdoor lighting can spill beyond its intended target, so plan it on the same drawing as beds, trees, paths and neighbouring windows. List which tasks need light—such as finding a path or using the seating area—and locate each fitting so its beam is directed at that task rather than across foliage or into the sky. A shielded fitting, careful aiming and controls that limit when it is on can help confine light to useful areas. Specify whether each fitting is essential or optional. The right choice depends on the fitting and site; don’t assume a particular colour or decorative style makes lighting wildlife-safe. Keep the boundary of each intended lit zone clear on the plan.
Mark the beam direction and operating period, not merely a decorative symbol. Review the scheme from accessible viewpoints around the garden and along its boundaries, because a light that seems contained from the seat may travel beyond it. When comparing the bioclimatic model details, confirm what equipment or lighting is included and account for it in the lighting plan. Keep electrical installation and changes to existing wiring with a qualified professional. If a wildlife objective depends on darkness in a particular area, get local advice and review the lighting after dark before settling on the final arrangement. Record who will manage the controls and check that each fitting still serves its intended purpose once the garden is in use.
04
Make routine garden maintenance possible
A wildlife-aware garden still needs a care plan. Note who will prune, water, remove weeds, clear leaves, clean surfaces and reach the outer edges of each bed, and how often those tasks are likely to arise for the chosen plants. Keep paths to post bases and wall junctions open, and avoid placing dense planting where it makes routine checks impractical. Include space to carry tools, collect cuttings and move a hose without trampling the beds. The aim is a garden that can be looked after consistently, not a scheme that depends on perfect timing or specialist effort every week. A simple seasonal calendar can expose an unrealistic workload before planting.
Coordinate planting care with the pergola’s maintenance instructions. Keep foliage clear of places that need inspection and leave access to components that require attention. For a wall-mounted arrangement, include the façade behind and around the structure in the care plan. When considering the wall-mounted product page, identify the clearances and maintenance requirements to confirm for the selected configuration, then show the necessary access on the garden drawing. Compare the combined workload with the time you have available, rather than considering each plant or surface in isolation. If preferred plants need more watering, pruning or replacement than you can reliably manage, choose a simpler plant selection suited to the site.
Use drawings to test product dimensions
Before buying or finalising a layout, bring the structure and planting information together in a dimensioned landscape plan. Show the house, boundary features, pergola outline, post locations, paths, seats, mature planting extents and light direction. Include elevations or door swings where they affect the fit. Record plant species, mature sizes, intended purpose and care requirements alongside maintenance access and known site constraints. These details allow the proposed structure and garden to be assessed together; a product image cannot establish how they will fit. Where a wall connection, levels, drainage or existing services raise site-specific questions, have the appropriate designer or qualified trade assess them. Keep unresolved details clearly marked rather than allowing assumptions to become part of the final layout.
Product dimensions need to match the exact option under consideration. The Bloomcabin Pergola configuration page lists a range from 9 to 24 m²; confirm the selected configuration’s plan dimensions and post positions before allocating beds or path space. Area alone does not show where the structure fits, whether a route stays clear or which planting remains accessible. Compare wall-mounted, freestanding or other named formats against the same measured site plan, and record any assumptions that still need confirmation. A design consultation is most useful when everyone can review the same footprint and planting requirements rather than relying on impressions.

05
Set wildlife goals you can assess
Keep a clear distinction between what the design can control and what it cannot promise. You can document which existing plants will stay, which locally appropriate species will be planted, how much hard surface the pergola introduces, where lights point and how care will be carried out. You cannot infer from a product style or planting appearance alone that a particular animal will visit or remain. If the project has a specific conservation objective, ask a local ecologist or qualified landscape professional to assess the site and recommend measurable priorities. That advice is particularly useful before removing established vegetation or changing a feature whose ecological role you do not know.
After planting, keep a simple record of what was installed, when it was established and how well it is being maintained. Note wildlife sightings with dates as observations, not evidence that the pergola caused a change; weather, neighbouring gardens and other factors may also matter. Check whether planned screening still leaves paths usable, lights remain aimed as intended and plants are reaching their allocated space. If something is not working, adjust the layout or care plan in response to the observed problem, and seek local guidance where a habitat target is involved. That turns 'wildlife-friendly' into a brief you can review honestly over time.
Coordinate planting and structure before work begins
Plan the sequence of work so the structure, paving, planting and lighting do not compete for the same access or space. Mark vegetation to retain, areas that need to remain reachable and intended plant-bed edges before work begins. Coordinate the site plan with the people responsible for the structure, landscape and electrical work, so drawings agree on post locations, routes and lighting aims. If a proposal involves excavation near established roots, changes to drainage or attachments to a building, get site-specific advice from the relevant qualified professional. This is design coordination, not a detail to resolve by moving a plant after the structure is in place. Confirm who will protect retained plants during the work.
Set a few decision checks before committing: does the pergola fit its actual footprint, can people reach the garden without crossing beds you intend to preserve, can every planting zone be maintained, and is unnecessary light kept off areas you intend to leave darker? If an answer depends on an unverified dimension or product capability, pause that part of the design until the drawing or documentation resolves it. A consultation is most useful when it includes measured site information and a written planting brief. The finished garden can then be judged by its usability and the choices it records, not by a claim that the pergola alone creates habitat.
Frequently asked questions
Can a pergola make a garden wildlife-friendly?
Not by itself. A pergola can organise an outdoor area, but wildlife outcomes depend on existing conditions, planting choices, lighting and ongoing care. Treat the structure as one part of a site-specific plan, and seek local ecological advice for goals involving particular species or habitats.
Should I grow climbers over a pergola?
Only after checking the chosen structure’s documentation and getting clear advice about plant support, weight, moisture and access. Don’t assume a pergola is designed for climbing plants. If support isn’t confirmed, plan a separate trellis or another planting arrangement.
How can I reduce light spill in the garden?
Map where light is needed, aim each fitting at that task and consider shielding and controls that limit when it operates. Review the layout from the garden boundary after dark. Have electrical work assessed and carried out by a qualified professional.
What should a planting plan include?
Show existing plants to retain, proposed plant names, mature sizes, care requirements and the purpose of each planting area. Include the pergola footprint, paths, light direction and access for watering and pruning. Use locally informed advice for species-specific wildlife aims.
Does a pergola model name tell me whether it suits my garden?
No. A catalogue name identifies a model type; it does not establish the exact dimensions, site fit, plant compatibility or ecological outcome. Check the selected configuration and its documented requirements against a measured garden plan.
A pergola belongs in a wildlife-friendly garden as one part of a deliberate layout. Protect what is already growing, make planting choices with local advice, control where light falls and leave room for people to care for the site. When those details share a measured plan, the structure can provide a usable outdoor place without overstating what it does for wildlife.
