
How to Plan a Pergola Around an Extendable Dining Table
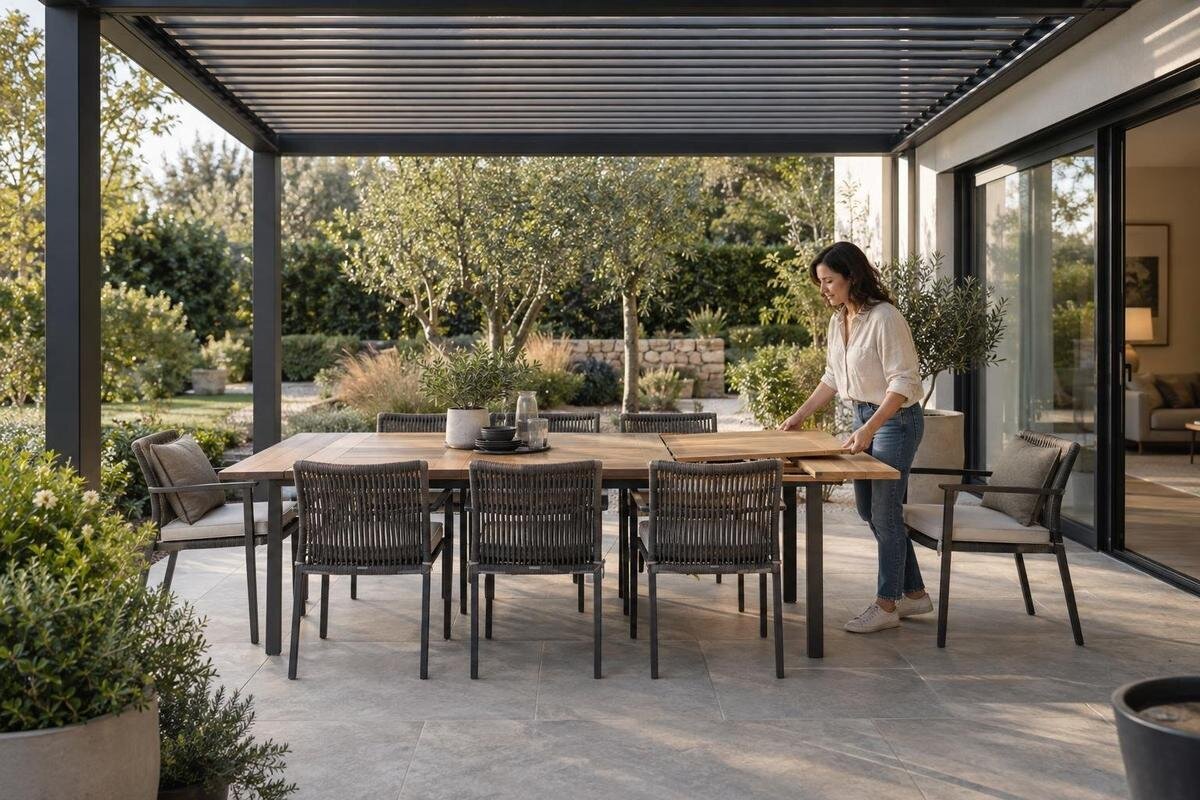
Outdoor dining layout guide
An extendable dining table can make a pergola work for an ordinary weeknight and a larger gathering, but its closed dimensions tell only part of the story. When the table opens, extra chairs, chair movement and serving paths all compete for floor space. Planning both arrangements before choosing a pergola helps you compare the furniture layout with the usable footprint, rather than with the tabletop rectangle alone.

Measure the table in both positions
Measure the table in its normal closed position, then open it exactly as you would for the largest gathering you expect to host. Record the outside length and width in both states, including each extension leaf and any overhang beyond the everyday tabletop. If the top is oval or has rounded corners, mark its outline as well as its widest points; this helps you judge the space beside a nearby chair more accurately than a rectangle alone. Record the leg or pedestal position too, because it can influence where people can sit. Use the actual table you own or intend to buy, rather than a generic dining-table size.
Note how the extension works. The table may lengthen from one end or from the centre, and it may need to be pulled apart or shifted before a leaf is fitted. Measure the space needed during that process as well as the finished open footprint. Mark which end or sides grow, and whether the table returns to the same position once it is extended. This reveals where clear floor is needed when guests arrive, which may differ from the space required once dinner is under way. Keep the closed and fully extended measurements together; neither one alone describes the table’s full use.
Allow for chair movement and seated space
A chair’s footprint is more than the space it occupies when pushed under the table. Put each actual chair in its intended place, sit down and stand up, and note how far it moves in the process. The chair back may travel into a walkway, or an armrest may stop it sliding neatly beneath the table. Include the space a seated person needs, rather than treating the chair as an empty object on a floor plan. Repeat the check with the chairs you will use at the largest gathering; a wider chair can change the layout even when the tabletop dimensions stay the same.
Draw the chair positions for the closed and extended table separately. Count every place you expect to set, including any extra seats added for guests, and note where benches or different chair styles change the movement. A chair’s pull-out area and a walking path may overlap on paper, but that does not mean they work at the same time. Decide whether people need to pass while someone is taking a seat, or whether that part of the route can wait. Mapping these everyday actions makes the required space more realistic than adding the same allowance around every table edge.
Map serving and walking routes
Trace the route from the house or the place where food is prepared to the table, then add the paths people take to reach their seats. Include door swings, steps, fixed planters and other objects that can narrow a route. Draw the route as a strip with the width you find practical, not as a thin line on a plan. A person carrying a tray needs room to move and turn; a direct route that passes through a chair’s pull-out area may be awkward when the table is full.
Check each path in both table positions. The route used for an everyday meal may be clear with the table closed but blocked by an end chair when the extension is open. Consider serving, clearing plates and moving between the table and the house, not just walking past an empty setting. If the Bloomcabin Pergola catalogue entry is on your shortlist, compare the configuration dimensions with these marked routes. Identify where you would approach the table with a serving dish and where you would turn back towards the house. Test those movements with people seated, so the plan accounts for serving a full table rather than simply reaching it.
Draw the closed and extended table layouts
Make a simple plan of the site using one consistent scale. Start with the pergola’s intended outer footprint, then draw the table in its closed position and again in its fully extended position. Add the chair-use areas, doors and routes to each drawing, and label the measurements. Using two colours or tracing paper makes it easier to see what changes when the table opens and what remains in the same place. Keep the drawing readable: a table outline without chairs or paths can make a tight arrangement look more spacious than it will be.
Compare the two plans rather than adding their areas together. The table occupies different positions at different times, so the aim is to make each arrangement work within the same pergola footprint. Mark where the two layouts use the same floor area and where the open table or extra seats extend beyond it. If you share a sample sketch, label it as a concept plan so it is not mistaken for a measured product or installation drawing. The Bloomcabin Wall-Mounted Pergola listing gives a range of configurations from 9 to 24 m²; use that as an initial area reference, then confirm the exact width, depth and support positions for any option you are considering.

Choose an orientation that leaves the extension clear
Place the table on your plan with its extension direction in mind. If the table grows from one end, that end needs room for the extension action and for the end chair once the meal begins. If it opens around the centre or expands at both ends, allow for the movement and seating at both ends. Rotating the table may solve a clash with a post or doorway, but it can also redirect the serving route or leave less room beside the long edges. Test each plausible orientation instead of assuming the table should sit parallel to the house or centred beneath the pergola.
Consider where the table is easiest to reach from the house, and whether chairs can be drawn out without meeting a doorway, wall or another seat. Compare the preferred orientation with the exact dimensions of a candidate pergola. When assessing the Bloomcabin Pergola configurations, keep both table layouts facing the same way on your drawings so you can see which seats and routes change. If rotating the table improves access at one end but restricts the other, record that trade-off. If no orientation leaves the extension, chairs and main route usable, revisit the furniture arrangement before settling on a pergola size.
Compare clear width and depth, not just area
A pergola’s stated area does not, by itself, tell you how much uninterrupted floor is available for dining. Check the width and depth of the exact configuration, and identify where its supports sit in relation to the table, chairs and routes. A post or support can be outside the tabletop outline but still obstruct a chair or pinch the path to a seat. Distinguish the overall pergola footprint from the clear area your plan actually uses, and work from dimensioned information for the configuration being considered rather than assuming every version has the same proportions.
The Bloomcabin Bioclimatic Pergola page lists configurations from 9 to 24 m². Treat that as an area range, not as evidence that a particular width, depth or clear floor will suit your arrangement. Two layouts with a similar area can have different proportions, and the narrower dimension may be the one that limits chair movement or the route alongside the table. Compare both dimensions with the largest required dining layout, then check the support positions before deciding that the area is enough.
Check posts, walls and access points
Place the actual support positions on your plan before finalising the furniture layout. Use the dimensioned drawing for the exact pergola configuration, and include any support bases or other parts shown at floor level. Check whether a post falls inside a chair-use area, narrows the way to a seat or blocks the end where the table opens. If it does, try another table orientation or position; relying on people to squeeze between a chair and a post can make the intended seating arrangement impractical.
Also mark house doors, gates, steps, wall features and fixed outdoor items. A chair can fit in the open area yet prevent a door from swinging freely or make the route from the house awkward. If you are considering the wall-mounted pergola product page, confirm the support and connection details for the exact configuration instead of assuming where supports will be from the model name. Where a wall connection, footing or site condition needs assessment, ask a suitably qualified installer to review it. The goal here is a reliable floor plan, not a guess about how the pergola will be supported.
Test the layout at full scale
A scaled drawing is useful, but a full-size mock-up can reveal awkward movement that is easy to miss on paper. On a suitable clear surface, mark the table edges in both positions with removable tape or another temporary marker. Add the chair positions and the serving route, then mark the proposed pergola boundary and support points using the exact configuration dimensions. If the structure is not in place yet, these marks let you test the furniture plan before committing to a particular footprint. Keep the two table states distinct so you can reset the layout and compare them accurately.
Run through a meal rather than looking only at the static arrangement. Extend the table, place the extra chairs, pull seats out, sit down and stand up, carry a tray along the route and move around someone who is seated. Include the changeover itself: where will extra chairs wait, and where will you stand while fitting a separate extension leaf? If the regular Bloomcabin Pergola listing is a candidate, mark the outline and supports of the specific configuration during this test. Check whether opening the table requires furniture to be moved into a doorway or the main path, then repeat the test with your intended number of diners.

Decide what the roof must cover in each setup
Set expectations for the everyday and extended arrangements before you decide between candidate footprints. If you want every dining place to sit beneath the pergola, trace the roof boundary against the chairs as well as the tabletop in both positions. An extended table may fit on the paving while an end chair sits beyond that boundary. Decide whether that is acceptable for your intended layout, rather than assuming that a tabletop contained within the outline means the whole dining area is covered.
If the plan does not work, change one element at a time: rotate or shift the table, adjust the route, or consider different furniture dimensions. A larger area may not solve the problem if its width still leaves a chair or passage squeezed. Use the Bioclimatic Pergola catalogue entry as one option to compare only after you have recorded the clear width and depth your plan needs. Keep the priorities visible: a usable everyday setup, a workable fully extended arrangement and a route people can follow without having to move a chair every time they pass.
Confirm the exact configuration before ordering
Bring one annotated plan to the final comparison. It should show the table dimensions closed and open, the extension direction, chairs in both arrangements, pull-out space, serving and walking routes, the proposed pergola boundary and any supports or fixed obstacles. Compare this drawing with the dimensioned information for the exact configuration, not just its overall area or a general product image. If the wall-mounted Bloomcabin Pergola model is on your shortlist, record the configuration you have compared on the plan so there is no confusion between options. Keep the measurements legible and distinguish confirmed dimensions from anything still to be measured. This makes outstanding questions easier to resolve before ordering.
Review the plan against the way you will actually dine: the number of places set for an ordinary meal, the extra chairs used when the table is extended, and the route from the house while people are seated. Note any measurements or site details that still need confirmation, especially around supports or a wall connection, and have a qualified installer assess those where appropriate. Do not solve a conflict by quietly reducing a route or chair space on paper; change the layout or the candidate configuration and test it again. The final drawing should describe both table positions, not just the one that is easiest to fit.
Frequently asked questions
Should I plan the pergola for the table open or closed?
Plan for both. The closed position needs to work for everyday meals, while the fully extended position must leave room for its extra length, any additional chairs and the routes people use. Check each arrangement separately against the pergola’s usable floor area.
How much room should I leave behind dining chairs?
There is no single clearance that suits every chair and household. Measure how far your own chairs need to move for someone to sit down and stand up, then check whether a person can pass without interrupting that movement. Test the arrangement with the furniture you plan to use.
Is measuring the table enough to choose a pergola?
No. Include chair-use space, serving routes, walking paths and the location of any pergola supports. A tabletop may fit while a pulled-out chair or a route from the house does not. Draw both table positions and compare each one with the exact configuration dimensions.
Can I place an extendable table close to a wall?
Only if the table can be opened and used there without blocking the extension movement, end chairs, door swings or a route people need. Check the table in both positions and confirm the pergola’s actual support layout; don’t assume a product name tells you where supports sit.
Does a pergola’s area in square metres tell me whether my table will fit?
It is useful for an initial comparison, but area alone does not tell you the configuration’s width, depth or clear floor space. Compare the exact dimensions and support positions with your drawn table layouts and routes before choosing.
A practical pergola layout starts with the real table, its extension movement and the chairs people will use. When both table positions have been drawn and tested with serving and walking routes, you can compare a candidate’s actual clear dimensions with the way you dine. The best fit is the one that works for an everyday meal and a full gathering without turning chair access or the trip to the table into an obstacle course.
