
Reducing glare from pergola lights: shielding and placement
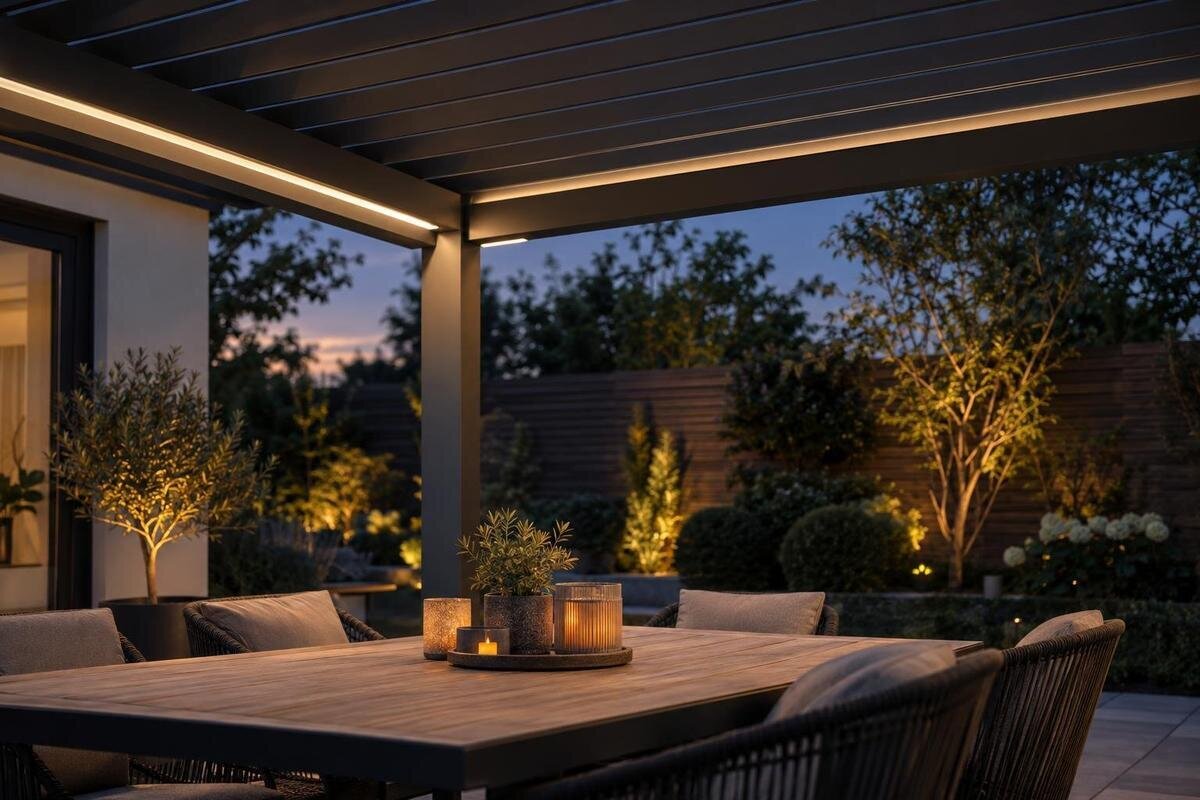
Pergola lighting
Pergola lighting can seem comfortable while no one is seated, then become distracting when a bright source sits directly in a diner’s line of sight. The useful question is not simply how bright the light is; it is where the source appears from the seats people use, what it illuminates and whether that light bounces off a nearby surface. A simple plan drawing, checked from real seated positions, can distinguish direct glare from reflections and point to changes worth discussing with the installer. This guide focuses on placement and shielding, not electrical preparation.

What causes glare from pergola lights?
Glare is a bright source or patch that stands out enough to make it uncomfortable to look towards the table, another person or the garden. Under a pergola, a light fitting can seem unobtrusive from the yard and become distracting from a chair because the lamp sits in a normal line of sight. That does not necessarily mean the whole area is over-lit. The source’s apparent brightness, its angle to the eye, the contrast with darker surroundings and what someone is looking at all contribute. A fitting can feel harsh from one seat and acceptable from another, even when its output has not changed.
Separate three issues before changing a plan: a visible lamp (direct glare), a reflection of it in glass or another glossy surface, and an area that is simply brighter than needed. They call for different responses. Note which fitting is on and what appears bright; if ordinary controls allow it, switch one light off at a time and compare from the same seat. Do not judge only by standing underneath, deliberately facing a fixture or looking at a catalogue image. Those views miss the angles people use while eating or talking. A note of the source and viewpoint is more useful than a general verdict that the pergola is too bright.
Draw a simple lighting and seating plan
Start with a plain plan view, not a wiring diagram. Draw the pergola outline, its supports, each proposed fitting, furniture, access route and nearby wall, glazing or reflective table. Mark places people use rather than only the centre of a table: end seats, a corner seat and any chair that is often pulled back. If the arrangement is not fixed, sketch the usual alternatives. The plan does not need engineering precision; it needs enough detail to show whether a fitting sits in front of the view from a real seat. Note the direction people usually face and where the main activity takes place, so the drawing records more than a roof and a few dots.
Add a simple side view of the roof and furniture. For each likely seat, mark roughly where a person’s eyes are when sitting naturally, then draw a straight line towards the proposed light position. This is a visual screening tool, not an installation measurement. Include a standing point where someone commonly looks across the area or enters it, and note whether the fixture is above, beside or behind that view. If you do not know the proposed mounting height, mark it as unknown rather than guessing. For new furniture or lighting, repeat the sketch with the likely layout in place: a small change to a chair or fitting can alter which sources are visible.
Check sightlines from seated positions
Check after dark with the lights in the state you expect to use, and sit in each regular place. Look naturally towards the person opposite, the food, a book or the path; do not deliberately stare into a lamp. Record which source is visible during that ordinary view and whether it sits in front of you or just catches the corner of your eye. A problem can appear in one chair and disappear in another, so “the table” is not a single viewpoint. Check seats at both ends as well as along the sides, particularly if people face different directions.
Repeat the observation with chairs in their everyday positions and with one likely adjustment, such as a chair pulled out for access. Note whether the glare persists when you lean back or turn to talk, and whether it occurs only when someone looks in a particular direction. Keep the observations separate for each seat so the drawing shows which views need attention. For a layout enquiry about the Bloomcabin Wall-Mounted Pergola, include these marked viewpoints alongside the proposed furniture arrangement. This gives the installer a specific question to assess: which light sources would be visible during ordinary use, rather than only when someone deliberately looks up?
Compare fixture positions with direct sightlines
Use the drawing to compare possible positions before choosing a fitting. A position that puts a light behind a seated viewer may take it out of the forward view, while a fitting above the table can remain visible whenever someone looks up. Neither is a universal rule: roof layout, seating and the area that needs light all matter. Check the plan and side view together. Do not decide from the pergola’s midpoint alone; a source may be hidden from one chair but line up with another, or become visible to someone standing nearby.
Moving a source away from a direct sightline may also change where the light falls. If the table or faces are then poorly lit, raising the output is not automatically the answer. Compare another documented position, a fitting with a suitable distribution or a compatible shield. When discussing a lighting layout for the Bloomcabin Pergola, show both the proposed position and the area that needs illumination. Keep alternative positions on separate copies of the sketch so their effects are easy to compare. A useful comparison considers the whole seating group: removing a bright source from one person's view should not simply put it in another's.

Check beam direction and light output
Look beyond a general brightness figure or the fitting’s wattage. Ask for information about the exact light’s distribution, where available, and consider whether its beam is intended to spread across a seating area or concentrate in one spot. A narrow, directed beam can create a sharp bright patch; a broader beam may put more light into the view or onto a reflective surface. Fittings of a similar type do not necessarily behave alike. If technical details are unclear, ask a lighting professional to interpret the product information against the seats and viewing angles marked on your drawing.
An adjustable fitting may help direct light away from a viewer, but aiming it is not a guarantee: the source may remain visible, light may spill beyond the seating area, or a reflection may appear elsewhere. A dimmer can lower output only if that exact fitting and control support it, and it may not remove the lamp from the sightline. For a proposed Bloomcabin Bioclimatic Pergola configuration, ask which light fittings and controls are available before comparing their output or adjustment options. Keep source visibility and useful illumination as separate questions; a lower setting may look less bright without resolving the position that caused the distraction.
Choose shielding made for the fitting
A shield is useful only when it is documented as compatible with the specific fitting and suitable for its proposed position. A louvre or baffle can block a view of the source from some angles, while a diffuser spreads light across a larger surface; neither automatically reduces brightness from every seat. Ask which viewing angles the accessory addresses and whether it is approved for the exact fitting and pergola configuration. If a sample or demonstration is available, assess it from the seated sightlines on your plan, not only from directly underneath the light.
Do not add a homemade cap, wrap, paint finish or other modification to a fitting. An improvised cover may affect heat dissipation or weather protection and can conflict with the maker’s instructions. Check the exact manual for permitted accessories, outdoor rating, mounting position and any access or cleaning requirements; a general description such as “outdoor light” does not confirm every use. When comparing lighting options for the wall-mounted pergola model, assess the fitting and its proposed shield together. Record both whether the shield hides the source from the affected seat and whether enough light still reaches the table, rather than judging the accessory in isolation.
Look for reflections from nearby surfaces
A light can stop being visible directly and still appear as a bright reflection. From each seat, check glass doors, glossy tabletops, polished metal, glazed tiles and other shiny surfaces, especially when they sit between the fitting and the usual view. A reflected lamp may appear somewhere quite different from the fitting itself, so mark both on the plan. Outdoor surfaces can look different when wet; if that is a normal condition for the area, repeat the observation when it is safe and practical rather than assuming a dry-night result covers every use.
Use ordinary controls to isolate a source, then compare the reflection from the same seat. A change in position or beam direction may shift it, but the result depends on the surface and viewing angle. Do not treat a diffuser as a guaranteed fix: it may soften a point source while leaving a luminous shape reflected in a window. For a layout based on the regular pergola model, include the nearby glazing and reflective furniture in the drawing you discuss with the installer. Mark where the reflected light appears as well as the fitting responsible, so a proposed change can be assessed against that particular view.
Check fixture positions against the pergola design
Check proposed lights against the exact pergola drawings and instructions before treating a frame, roof panel or beam as a mounting point. A product category, appearance or photograph does not establish an approved fixing location. Ask for documented mounting approval for the specific fixture and pergola configuration, along with the relevant product instructions. Where the proposed design includes moving roof or side components, check the light’s position through the operating positions permitted by the manufacturer. Confirm that the fitting will not obstruct movement or access for maintenance; do not assume the same allowances apply across different models.
Product identity alone cannot confirm that a light or shield will fit. For the bioclimatic pergola model, request the current configuration details and exact fixture manual, then have the installer confirm the proposed mounting position in writing. Establish whether lighting is available for the chosen setup and which fittings are compatible; the model name does not establish either point. Keep the confirmed mounting position on the same drawing as the sightlines so the approved arrangement can be compared with the glare assessment. If there is no documented lighting point in the desired location, ask the supplier and a qualified professional what alternatives the design permits.

Check glare beyond the main seating area
Glare can affect people outside the main seating group, too. Check the view from a doorway, the approach path and any regular standing place, then look from the edge of the property towards nearby windows and outdoor areas. The aim is to notice visible bright sources and unintended spill, not to assume what other people prefer or what local rules require. A shield that works for diners may redirect light towards a boundary, while moving a fitting inwards may bring it back into a seated sightline. Record both effects before settling on a position.
Allow for ordinary changes to the setting: chairs shift, the table is arranged differently and someone may walk past while looking towards the house. When planning around the wall-mounted model, include the view through the adjoining doorway as well as the view from the table. Mark any direct source or reflection seen from the approach and adjacent areas, keeping these observations separate from the seated checks. Compare them with the same proposed light positions and shielding. This makes competing requirements visible on one plan, rather than treating a comfortable dining view as proof that the lighting also works for everyone entering or passing the space.
What to include in an installation brief
Give the installer a short, usable brief: a plan and side view; marked seated and standing positions; the exact fitting make and model; the proposed mounting point; and the shield or accessory being considered. Include reflective glazing or surfaces, and distinguish direct glare from a reflection or an area that is generally too bright. Ask which locations and accessories are approved for that pergola and fitting together, whether a control is compatible if dimming is proposed, and which outdoor rating and manual apply. This keeps the discussion tied to the people using the space and to the actual product information.
Leave electrical design and connection work to a qualified electrical professional; this guide is about recognising and describing glare, not planning wiring or installation. Use the Bloomcabin Pergola product page to identify the model in your enquiry, and keep the agreed configuration with your lighting brief. The seating plan records what people see, while the relevant manuals and documented mounting approval establish what can be fitted. Before work begins, compare the agreed positions with the marked problem views. If an approved location differs from the one assessed, revisit those sightlines rather than assuming the earlier glare check still describes the revised arrangement.
Frequently asked questions
How can I tell whether glare is direct or reflected?
From the same seat, note whether you can see the light itself or a bright patch on glass, a table or another surface. If you can use the ordinary controls, switch off one light at a time and compare. Recording the source and the bright patch as separate observations helps identify what needs attention.
Does a diffuser always stop glare?
No. A diffuser spreads the light across a larger surface, which may soften a small bright point, but the illuminated surface can still appear bright from a seat. Check the actual fitting and diffuser from the sightlines that matter, and confirm that the accessory is compatible.
Can I add a shield to an existing pergola light?
Only consider a shield documented as compatible with the exact fitting and approved for its position. Avoid homemade covers or modifications, which may conflict with the fitting’s instructions or affect its weather protection. Ask the installer and a qualified electrical professional to verify the proposed accessory.
Where should pergola lights go to avoid glare?
There is no single position that works for every pergola and seating plan. Map the lights against the views from the seats, then check how each possible position affects useful illumination, reflections and spill. Have any proposed mounting position confirmed for the specific pergola and fitting.
Will dimming fix a glaring light?
It may reduce overall output if the exact fitting and control are compatible, but it will not necessarily take a visible lamp out of a seated sightline. Treat dimming as one possibility to verify, not a substitute for checking placement, beam direction and suitable shielding.
Good glare control begins with observation, not a guess at brightness. Draw the pergola and furniture, check each fitting from the seats people use, and mark whether the problem is a visible source, a reflection or misplaced light. Then discuss a suitable position or manufacturer-approved shield with the installer, using the documents for the exact fitting and pergola. The aim is a layout that keeps bright sources out of ordinary views while still lighting the table and surrounding space—not simply a fitting that looks appealing in a product image.
