
Installing a Pergola on Composite or Timber Decking
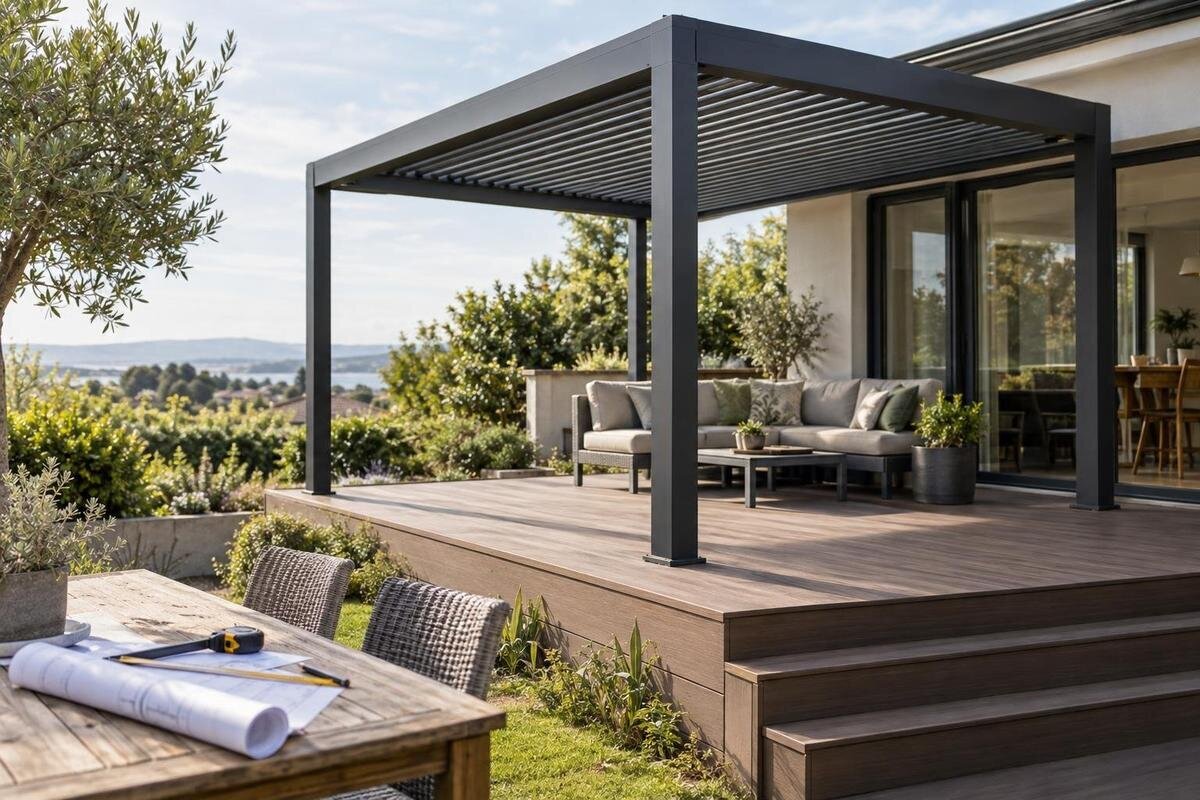
Pergola site planning
Planning a pergola over timber or composite decking starts below the surface. The boards provide the finished walking area, but the hidden frame and its supports must be assessed for the proposed connection. A pergola’s approved anchor pattern may not line up with the deck’s joists or bearers, and cutting boards to expose a fixing does not prove the structure can carry it. This guide explains what to establish before choosing fixing locations, altering the deck or arranging installation.

How pergola loads reach the supporting structure
Timber and composite boards are the finished surface of a deck system. Their feel underfoot, thickness or visible fasteners cannot by themselves show that the system can carry a pergola. Posts and any wall connection introduce forces that need to reach suitable supporting structure through an approved detail. A screw or bolt that grips only a board, or a clip designed to retain decking, is not automatically a structural anchor. That distinction applies to either surface material: the board label does not reveal what lies beneath or how the deck was built.
Trace the load path rather than judging the surface. In a framed deck, boards sit on joists, which transfer loads to bearers, posts and footings; other decks use different arrangements or connect to a building. The pergola’s support points must match its approved fixing design, and the full route needs verification. A deck that feels firm, looks new or already holds outdoor furniture is not automatically suitable for added pergola loads. The assessment needs to consider the actual structure, its condition and the exact model’s fixing details, not a universal rule for composite or timber decking.
Find out how the deck is supported
Collect any deck plans, building records, renovation photographs and information from the original builder or installer. Useful details include the direction of the joists and bearers, support and footing positions, how the deck joins the house, its height and whether the underside is open. Mark areas that have been repaired or extended, as the current structure may differ from the original plan. Do not infer joist positions from the board pattern: decking can run across the framing, and surface fasteners may not identify the whole layout. If records are missing, arrange an inspection by a suitably qualified building professional rather than cutting openings to guess.
Record the deck’s age and any repairs, movement, loose connections, water damage, split or soft timber, or corroded connectors. These are reasons to have the frame inspected, not a diagnosis of its capacity; a tidy surface can conceal issues below. For composite decking, identify the board brand and system, then find the maker’s installation guidance. Support and permitted fixing or penetration details may be specific to that system. Keep the records and photographs with the pergola plan so the assessor can compare what is documented with what is actually on site.
Map the pergola footprint against the deck frame
Use the current drawing for the chosen pergola to mark its full footprint and each proposed support location on a plan of the deck. Include distances to the deck edge, stairs, balustrades, doors, windows, drains and access panels; note where people need to walk and where furniture or a gate must still operate. Use a consistent reference point for measurements so the pergola drawing and deck plan can be compared without confusing distances from the house with distances from the deck edge. Label dimensions as measured or still to be confirmed, and distinguish the proposed post positions from the known framing positions. Then compare each support point with the frame layout. A board seam or decking screw is not reliable proof of the joist or bearer position. Have a building professional verify the support locations before any holes are made.
Do not shift a post simply to land on a convenient board or avoid an obstruction unless the model’s approved design permits that change. Altering the footprint can affect connections, clearances or the overall arrangement. Mark any support proposed near a deck edge, opening, step or overhanging section for assessment; the drawing and structure need to be considered together. When comparing the Bloomcabin Pergola product page with your deck plan, use the exact configuration under consideration. Keep alternative layouts clearly labelled so a convenient position on one sketch is not mistaken for an assessed fixing point on another.
Request model-specific anchoring details
Request current, model-specific installation instructions and approved anchoring drawings before planning changes to the deck. Ask what the drawings specify for base position, fixing interface, permitted substrate, post layout and any connection to a wall. Confirm that the documents match the exact model and configuration rather than a similar catalogue image or another product. Ask explicitly whether the proposed detail is intended for a raised deck and what supporting structure it requires. Note the drawing revision so the supplier, assessor and installer are working from the same information; a product photograph or general brochure is not a fixing design.
Have the proposed anchor locations reviewed against the verified deck framing and product requirements by the relevant qualified professional. Do not choose generic screws or bolts because they fit a base plate, or drill extra holes or trim a plate unless that change is documented and approved. The Bloomcabin Wall-Mounted Pergola page names a wall-mounted model; its name alone does not establish an approved wall or deck fixing. Request matching drawings and confirm every connection in the proposed arrangement. If the site condition and the documented detail do not agree, resolve the difference before work begins.

Have the supporting frame assessed
A site assessment needs to look beyond the deck boards. The professional should establish the condition and arrangement of joists, bearers, posts, footings and connections, as relevant to the actual construction, then compare that information with the pergola’s approved support locations. The way the deck is attached to the dwelling can matter as much as the surface material. A deck ledger, balustrade or existing post should not be treated as a usable pergola anchor just because it is nearby; its role and suitability for the proposed arrangement need to be verified.
The outcome may be that the existing structure suits the specified arrangement, that a change or separate support is needed, or that the layout must be reconsidered. Those are site-specific design decisions, not a choice between universal footing sizes. A joist that appears substantial can still depend on connections or supports that are not visible from above. Identify the model using the Bloomcabin Pergola listing, then supply its matching fixing drawings and the deck records for assessment. Ask for the outcome to distinguish between parts of the existing structure that can be used and any work needed before installation. This makes it clearer which deck alterations belong in the project, rather than leaving the installer to interpret a general statement that the deck is suitable.
Account for decking materials and site exposure
Timber and composite decking can have different movement and fastening requirements, so identify the exact surface system and follow its maker’s guidance. A detail that is acceptable for one board or subframe must not be assumed to suit another. Ask how the proposed connection relates to board joints, gaps and the supporting frame, and whether the manufacturer permits any required penetration or cut-out. Before altering boards, check how the maker says cut edges should be supported and finished. Do not clamp, glue or fasten through a board as a workaround for a point that misses the verified structure.
The pergola model and site exposure also belong in the assessment. Its size, roof arrangement and exposure can influence the design forces, so the model-specific drawings and a qualified site assessment need to be considered together; the decking material alone cannot establish capacity. If you are considering the Bloomcabin Bioclimatic Pergola page, request drawings for the exact configuration rather than relying on the model name. Describe the site as well as the deck: identify exposed edges and nearby buildings, and show their positions on the plan or in photographs. Keep these observations separate from structural conclusions so the assessor can decide how the surrounding conditions affect the proposed installation.
Assess the wall connection separately
A wall-mounted pergola adds a separate connection to the building; it does not make the deck framing irrelevant if any posts or supports still bear on the deck. Identify the wall’s structural substrate rather than assuming that cladding, lining or trim is an approved fixing point. The current model details need to show the intended connection, while a qualified professional checks the actual wall construction and how forces transfer into it. Do not assume a fixing can be placed at a convenient height independently of the model details, particularly where cladding hides framing or a deck meets the wall.
Coordinate any wall penetrations with weatherproofing, flashing, the roof edge and drainage, and identify concealed services before drilling. The junction should not trap water or rely on a surface patch where a designed detail is required. When discussing the wall-mounted pergola listing, have the installer and building professional review the same drawings and site details, including where the front supports land and how the completed junction can be inspected. Agree who will handle the wall junction and who will reinstate any disturbed decking or cladding. These responsibilities should be clear before work starts, particularly where the deck and wall need attention from different trades.
Plan access beneath the deck
Access below the deck is part of the fixing plan. Depending on the approved detail, an installer may need to reach a connection from below, inspect the framing or confirm that a fixing engages the intended member. Note whether the underside is open or enclosed, and whether storage, landscaping, a ceiling or services limit working room. Ask which locations need access, what needs to remain clear and whether a connection will need to be inspected later. A drawing that places an anchor at a suitable point is of limited use if the actual connection cannot be reached and checked.
On an existing deck, do not lift or cut boards until the deck professional and pergola installer agree where an opening can be made, how the frame will be protected and how the surface will be reinstated. Board systems differ in how they are supported and fixed, so a cut-out must not leave unsupported edges or conceal an unverified connection. Use the Bloomcabin Pergola model page to identify the product in an enquiry, then ask the installer to explain the access route for its approved detail, not just where the post will appear above the deck. Include any skirting, enclosure or stored items that would need to be removed for access. Agree who will remove and replace them, and whether access must remain available after installation. This separates temporary working access from any opening needed for later inspection.

Coordinate drainage, levels and deck features
Check how the pergola footprint sits with deck levels and everyday features. Mark surface falls, drains, door thresholds, steps, balustrades, gates and access panels; keep routes for opening doors and using stairs clear. A support base should not block an inspection point or cover a drain without an approved solution. If boards need trimming, coordinate the cut with the deck system and frame rather than treating a gap as a way to hide a misaligned anchor. Record finished levels and any waterproofed areas for the installer and relevant specialist to review.
Roof water also needs a planned path. Ask how the exact model is intended to manage rainwater and where it will discharge, then check that route against the house, deck fall and existing drainage. Do not assume that water can safely run against a wall or that a drain will remain accessible once supports are in place. For the model on the Wall-Mounted Pergola product listing, show the proposed discharge location alongside the support positions on the site plan. This allows the wall junction, deck openings and drainage access to be considered together rather than in separate sketches. Where a membrane or drainage layer is present, have its installer or a suitable specialist approve any proposed penetration.
Agree the installation sequence before altering the deck
Agree the sequence before any irreversible work. Identify the exact pergola model and obtain current drawings; then have the deck and proposed support points inspected. Settle any structural design, access requirements and board alterations with the relevant professionals before the installer marks the deck for cuts or anchors. If the drawings, site measurements and visible framing do not agree, pause and resolve the discrepancy instead of improvising on the day. This helps keep the deck alterations, fixing plan and pergola installation tied to the same assessed arrangement.
Keep a compact record: the model and drawing revision, a plan with proposed support points, known deck framing, board-system information, photographs from above and below, repairs, services, drainage and access constraints. Write down who is responsible for assessing the structure, approving the anchoring and restoring any altered surface. Give the same drawing version to the supplier, assessor and installer, and clearly mark superseded sketches so they are not used on site. Record unresolved questions beside the relevant location on the plan, rather than leaving them scattered across messages. If the Bioclimatic Pergola listing is the product being discussed, use its exact name when requesting model-specific documentation. Before work begins, confirm that the agreed sequence covers inspection, any required structural work, access, installation and reinstatement, with responsibility assigned for each part.
Frequently asked questions
Can I anchor pergola posts directly to deck boards?
Not on the strength of the boards alone. The fixing detail needs to transfer loads into a verified supporting structure or a separately designed support. A board screw or decking clip is not automatically a structural anchor. Have the proposed arrangement checked against the pergola’s model-specific drawings and the deck’s construction.
Can the existing joists support a pergola?
Possibly, but their position, condition, connections and supports need to be assessed for the proposed fixing arrangement. A joist that looks substantial from below is not proof of suitability. Ask a structural engineer or another suitably qualified building professional to assess the actual deck and approved fixing details.
Is composite decking unsuitable for a pergola?
The material alone does not determine whether an installation is suitable. The board system, frame beneath it, condition, access and approved fixing detail all matter. Identify the exact decking product and follow its maker’s guidance on penetrations or alterations, alongside a structural assessment.
Will I need to lift or cut deck boards?
That depends on the approved fixing detail and whether the connection can be reached and checked from above or below. Do not cut or lift boards in anticipation. First have the pergola installer and deck professional agree where access is needed and how any altered surface will be properly supported and reinstated.
Does attaching a pergola to the house mean I can ignore the deck structure?
No. The wall connection needs its own assessment, and any posts or supports that bear on the deck still need a verified load path. The actual wall construction, fixing details and weatherproofing also need to be considered. A wall-mounted layout does not, by itself, confirm that either connection is suitable.
On a timber or composite deck, the key question is whether the approved connection transfers pergola loads into suitable supporting structure—not simply whether a fixing can pass through the boards. The deck frame, model-specific fixing locations and access arrangements need to work together. Resolve any mismatch before cutting boards or placing anchors, and include drainage and surface reinstatement in the plan. A well-planned installation accounts for both the structure beneath the deck and the finished outdoor space you will use afterwards.
