
Pergola Privacy From Upstairs Neighbours: Plan Sightlines
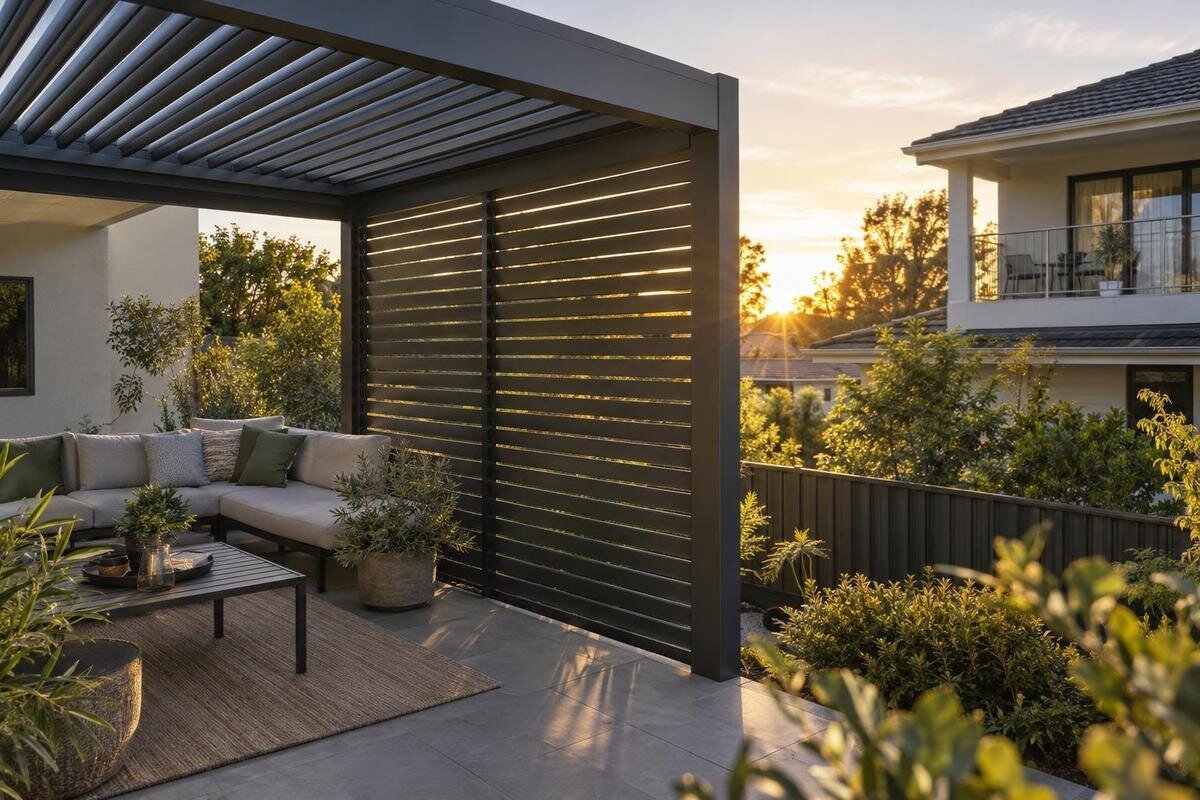
Pergola privacy planning
A fence-height screen may protect a patio from a neighbour looking across the boundary, yet do little when the view starts at an upstairs window. The useful question is not whether a pergola is private in general. It is where the observer's viewpoint is, which parts of your outdoor area are exposed, and whether a proposed roof or side treatment actually crosses the line of sight. A plan view and a simple side elevation can distinguish overhead privacy from eye-level screening before you compare models or ask about accessories. This guide focuses on that geometry and the everyday trade-offs around it.

Why an upstairs view differs from a fence-line view
A fence or hedge is usually judged against a view from someone standing at patio level. An upstairs observer looks down, so the view may pass over a low boundary screen and reach an open pergola side or gaps in its roof. The angle depends on height and distance: a nearby upper-floor window may look steeply down, while one further away can send a shallower line across the space. Windows at different ends of the same building can expose different spots. Do not treat every elevated view as vertical or assume a screen that works across a fence will also work from a bedroom, balcony or landing above.
Separate two questions that are often bundled together: can someone see down into the roofed area, and can they see through an open side? An overhead element can interrupt the first view only if its actual surface crosses the line and prevents a view through it; a side panel matters only where it intersects the line from the observer to the part you want screened. Openings, edges and diagonal views can leave other routes. Define the priority zone—perhaps the dining setting rather than the whole patio—before considering an enclosure. Privacy from one viewpoint does not automatically resolve another.
Map the viewing points and private areas
Draw the site from above before choosing a screen height. Include the house, boundary, proposed pergola footprint, doors, fixed obstructions, main seating and the routes people use. Mark each relevant upper-floor window, balcony or other elevated viewpoint, then note the positions where an observer could stand. Include the ends of a wide window or balcony, not just its centre; the observer can move, and different positions may look into different parts of the space. Add other buildings only where there is a plausible view to your area. Check an old site plan against today's layout so distances and openings are not assumed from an outdated drawing.
Record the relative levels in a side elevation: ground, the window or balcony opening, any roof edge and the places where people sit or stand. The balcony's usable standing area may be set back from its outer edge, so mark a plausible eye position rather than the facade alone. If measurements are approximate, label them as such; an honest rough sketch is more useful than a falsely precise one. Make more than one side view if each window faces a different part of the patio. Use the Bloomcabin Pergola product page as a model reference alongside your site sketch, keeping the proposed structure and the surrounding buildings clearly labelled.
Draw the line from each window to each seat
On the side elevation, mark a plausible eye point at the upstairs window or balcony and a point at the place you want to protect. Draw a straight line between them, then repeat it for each viewing position and target. Use more than one target point: someone sitting at the table, standing beside it or moving through the area can occupy a different part of the view. The exercise does not need a universal angle or standard height; use your own site's relative positions and label estimates. A line that meets a proposed roof surface differs from one that passes above it or through an opening. A simple scale can help you compare alternatives, but label any unmeasured heights.
Add a plan view as well, because the side elevation cannot show whether a diagonal view slips around an open end. Draw lines from both ends of a balcony or window towards the key seats, and mark roof edges, posts and any intended screen. If a line reaches the target without crossing the planned barrier, that barrier does not solve that particular view. When considering Bloomcabin Wall-Mounted Pergola, compare its proposed position against both drawings rather than judging the view from the house wall alone. Keep separate viewpoints separate rather than averaging them into one convenient angle.
When overhead cover can interrupt a view
An overhead treatment is relevant when the line from the upper-floor viewpoint to a protected spot crosses the proposed roof surface. Check the approach to its edges as well as the area directly above the seat: a diagonal line may pass under an edge or between open elements instead of through the part you expected to screen. The drawing should represent the configuration as it would actually be used when privacy matters. Broad descriptions such as covered do not tell you whether a particular surface blocks a particular view; the angle, gaps and position all matter. Test points near the perimeter as well as the centre.
If a proposed roof changes position or has openings, do not assume that a privacy assessment for one setting applies to every other setting. Check the lines to each important target in the configurations you would use, and note whether blocking a view would also reduce daylight or obscure the view of the sky from the adjoining room or seating area. For Bloomcabin Bioclimatic Pergola, request drawings of the exact configuration being considered. Mark which roof setting each drawing represents so you can see whether your preferred arrangement for everyday use also provides the privacy you want.

Where side screening helps—and where it stops
A side screen can help when the view reaches the patio from an oblique direction through an open side, but its position and top edge determine whether the line is stopped. From a higher viewpoint, someone may see over a panel to the table or lounge area; a screen that looks tall from the ground can still miss that line. Mark the proposed panel on both the elevation and plan before choosing its location. Check the open end and the nearest side separately, because a single panel may block one approach while leaving a clearer view from another. This is why copying a neighbour's fence height is rarely a useful test.
Screen only the edge that corresponds to a mapped view if a partial treatment meets the brief. Enclosing every side can affect airflow, daylight, garden outlook and access, while doing nothing to block a line that passes above the top. Ask whether a proposed panel is documented as compatible with the specific pergola and what is actually supplied; do not assume an accessory is included from a product photograph. Use the Bloomcabin Pergola listing to identify the model in an enquiry, then confirm separately whether any side option is approved for it. Keep doors and everyday routes clear on the drawing.
Check different viewpoints and times of day
One upstairs window is not necessarily the only useful viewpoint. Check windows on different storeys, balconies, stair landings and positions along a long opening if they actually overlook the space. A person standing near one end may look past a screen that hides the view from the centre, and another building may create a separate diagonal route. Rank the views by importance instead of trying to block every theoretical angle: perhaps privacy at the table matters most, while the entry path can remain open. That priority makes it easier to compare options without turning the patio into a closed room. Record why each viewing position matters.
Time of use matters too. Note when the space is occupied and when daylight or sun falls on the relevant seats and nearby indoor rooms; the sun's path and shadows change through the day and year. A roof or screen chosen for one view can cast shade where it is not wanted, so compare the privacy sketch with a simple sun-path note rather than relying on one sunny photograph. Include those times of use in an enquiry about the bioclimatic pergola model. Distinguish the periods when privacy is important from those when you would prefer a more open outlook, so both needs are clear in the brief.
Balance privacy with light, airflow and access
Privacy is only one part of comfort. An overhead barrier may reduce an open view to the sky; a side screen may interrupt a breeze or daylight, depending on its position and construction. Those effects vary with the site, so draw the outcome you want rather than assuming that more enclosure is better. Mark the windows that need daylight, the openings used for access and the direction from which you value a garden view. Then compare a smaller protected zone with a full perimeter on paper. A modest adjustment to the seating position can sometimes avoid adding a screen, provided it still leaves a usable route through the patio.
Compare the least extensive arrangement that blocks the important sightline with one that blocks several views, and be clear about what each gives up. On a proposal for the wall-mounted pergola model, mark the entrance, nearby house windows and the garden outlook you want to retain. Compare how each proposed screen position affects those features, not just how it looks from outside. Keep light, airflow and access on the same drawing as the sightlines so the trade-offs stay visible. If moving the protected seating area leaves a clearer entrance, compare that layout before extending the screen across another side.
Verify the exact pergola and accessory configuration
Prepare a short brief for a supplier or designer: identify the viewing point, the exact target zone, where people sit or stand, and the views you do not want to block. Include the plan and side elevation, measured distances or estimated levels, access routes, and the daylight or airflow you want to preserve. Ask for drawings of the exact proposed configuration and written confirmation of any compatible, approved side components. Separate the pergola itself from optional additions so the scope is clear before you compare proposals. If an illustration is used, ask how it relates to your proposed layout.
Treat product pages as model identification, not proof of how a pergola will work on your site. For the listed bioclimatic model, ask for model-specific drawings that show the relevant roof positions and any verified accessory compatibility; do not infer a screening feature from the name or a gallery image. Confirm what is included, separately supplied or unavailable for that exact model. If a privacy treatment needs attachments or structural changes beyond the documented system, have a suitably qualified professional advise on the design. A sightline sketch explains the goal, but it is not an engineering or installation plan.

Test the layout before committing
Before committing, test the furniture positions and screen outline on the drawing. Move a table or chair to see whether a modest shift changes the sightline, but keep doors and the route through the patio workable. A scale plan lets you compare a roof edge or panel without installing anything; a safe temporary visual marker on your own property may help, provided it is stable and does not obstruct a path. A photo taken from the patio is useful for the eye-level view, but it cannot stand in for an upstairs angle.
Review the sketch from each listed viewpoint, checking the places where people will sit, stand and walk to the door. If you can check from a similar elevated position on your own property, treat it as a rough visual aid, not an exact substitute for the neighbour's height and distance. When assessing Bloomcabin's pergola model, use the same marked-up plan for each layout so changes in exposure are easy to compare. Record which sightline remains unobstructed after each adjustment rather than deciding by appearance alone. Repeat the review with furniture in place; a layout that screens one chair may still leave the next seat exposed.
Allow for changing views and routines
Views and routines can change after the plan is drawn. Furniture moves and new seating gets added. If planting is part of the privacy plan, consider how growth, pruning and seasonal foliage may change the view; it may not provide the same screen year-round. Neighbouring windows may also be used differently over time. Build in some tolerance around the exact chair position and avoid relying on a temporary condition, such as curtains being closed, as the only source of privacy. A review after the space is furnished can show whether daily use matches the drawing. No plan accounts for every future change, but a clear priority area is easier to revisit.
Finish with a concise statement of the result you want, such as blocking a direct view from one upper-floor window to the dining seats while preserving a clear entrance and daylight to the house. That is more useful than asking for complete privacy without saying where. If no overhead or side arrangement meets the important sightline without an unacceptable loss of light or access, reconsider the seating position or pergola footprint before adding more screening. A small layout change can address a specific exposure more neatly than closing every side.
Frequently asked questions
Can an overhead cover block an upstairs view?
It can if the proposed roof surface crosses the sightline and prevents a view through it in the configuration you use. Edges, gaps or an open side may still leave a route. Check each target and roof position on a site-specific drawing; the word covered does not guarantee privacy.
Are side screens enough for an upstairs neighbour?
Not necessarily. A side panel only interrupts a view where its position and top edge cross the sightline; an elevated observer may see over it or around an end. Draw the line from the actual window to the place you want screened before deciding.
How do I draw a pergola sightline?
Mark an upper-floor viewpoint and the area you want to protect on a side elevation, then join them with a straight line. Repeat for different observer positions and seated or standing targets. Add a plan view to check whether the view comes around an open end.
Do I need to screen the whole pergola?
No. Identify which seats or paths are exposed, then compare a partial side treatment, an overhead barrier or a small furniture adjustment. A full enclosure may affect light, airflow and access without blocking every elevated sightline.
How can I verify accessory compatibility?
Ask the supplier to confirm which components are approved for the exact model, what is included and whether the drawings match your proposed layout. Product names and gallery images do not establish compatibility or show whether a particular view is blocked.
Upstairs privacy is a geometry question before it is a product choice. Map the actual windows and the parts of the patio you use, then test each sightline in both elevation and plan. An overhead surface may address a view from above; side screening matters when the line enters across an open edge. Where the angle, openings or compatibility are unclear, ask for model-specific drawings rather than relying on a gallery image or a general description. The result should protect the places that matter without closing more of the outdoor area than you need.
