
How to Shade Pergola Seating and Keep the Garden View
Pergola planning
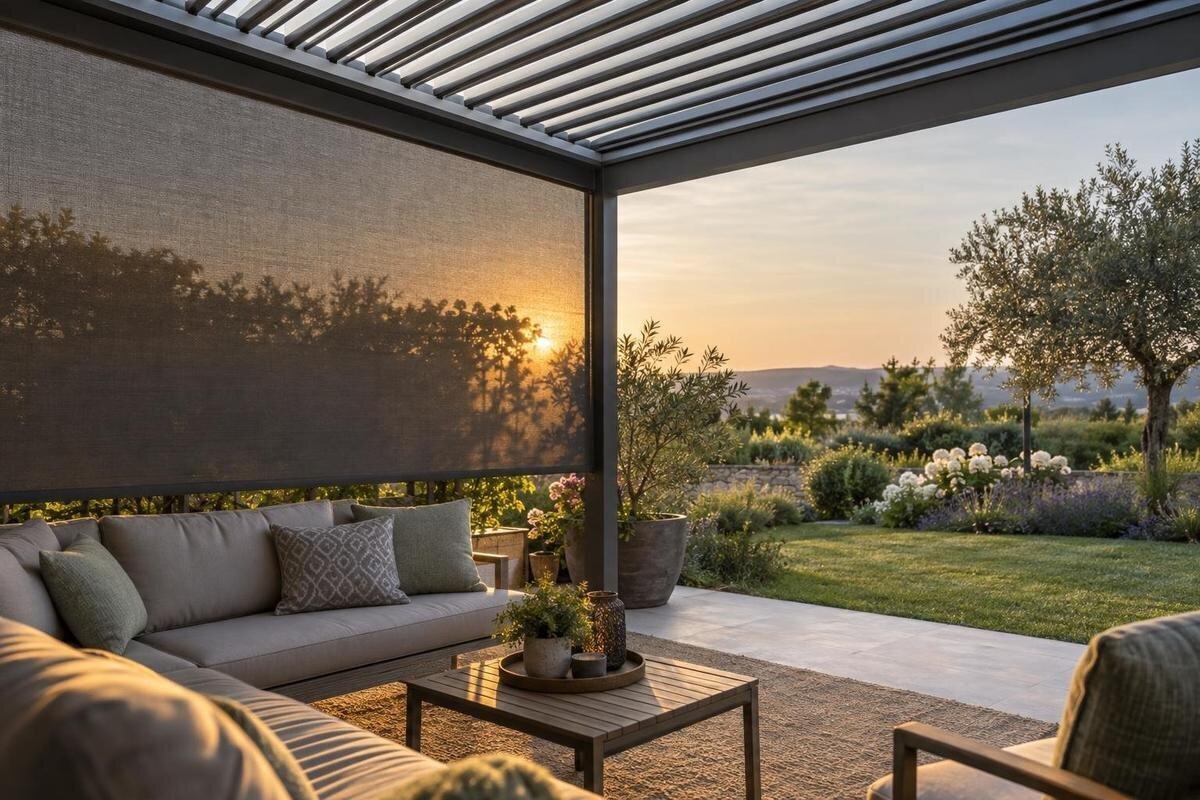
Pergola shade and a garden outlook can compete when low sun reaches the seating from the side: the simplest way to block it may also cut across the view from a dining chair or lounge. Plan those two lines separately. First record where sun reaches people and surfaces during the hours you actually use the area; then sketch the view from seated eye level to the garden feature you most want to keep in sight. With both drawn on one plan, you can compare overhead cover, a side configuration or a partial screen without assuming an accessory comes with the pergola. The aim is not to shade every edge, but to deal with the rays that cause a real problem while keeping a chosen outlook open.

01
Choose the view you want to keep
Before deciding where shade belongs, name the garden view that matters most from the seating area. It might be a specimen tree, a lawn edge, a distant outlook or an opening between planted beds. Sit in the main chair or at the dining place rather than judging from the patio edge while standing. Perspective changes with posture: a low garden feature may disappear from standing height but fill a seated view, while a post that seems minor on a plan can line up with the focal point. Choose one primary viewpoint and one or two secondary ones. Trying to preserve every angle equally can leave no clear target for deciding where side shade should stop.
Mark the chair positions, table and point each viewer wants to see on a simple plan. Draw a line from each chosen seat to its focal point to show a rough open-view corridor. Note whether the seats are used for meals, reading or lounging, and whether a chair can turn slightly without disrupting circulation. The sketch is not a construction drawing; it is a way to make the trade-offs visible before choosing a configuration. If only one end of the setting needs the full outlook, a screen elsewhere may be acceptable. If the best view is shared across a broad table, a narrow panel intruding in the middle can feel more obstructive than its size suggests.
Map the view from seated eye level
Use the real chairs, or a stand-in at their usual height, and note the seated eye level of the people who use them most. A floor plan alone cannot show whether an opaque edge cuts across a face, a garden feature or the horizon. Take a photo from the seat at eye level, looking straight ahead and to each side; hold the frame consistently so the images can be compared. Repeat from the ends of a dining table and from the lounge’s usual reclined position. The aim is not to find a universal measurement, but to record the actual view from your furniture and normal posture.
If you are comparing the Bloomcabin Wall-Mounted Pergola with another layout, mark its proposed footprint and support positions on the same sketch before judging the view. Ask for the layout of the exact configuration you are considering, then compare it with the seat-level photos. Pay attention to where posts and frame edges would appear against the garden, rather than judging only the overall footprint. If the full garden view matters from one favourite chair but a narrower view is acceptable from secondary seats, label those priorities separately rather than reducing them to a vague requirement for an open outlook.
02
Record when the sun reaches the seating
Record when direct sun or glare becomes uncomfortable, not just when the patio looks brightest. On several clear days, note the date and time, where the light enters, and which seat or surface it affects. A compass direction or sun-path app can be a useful starting reference, but buildings, fences, eaves, trees and changes in the ground can alter what reaches the seating. A spot that is shaded at lunch may be exposed later, while a narrow strip of sun can fall across a chair or table. These observations help distinguish a problem caused by overhead exposure from one caused by light entering under a side edge.
Include different seasons if you use the area throughout the year. The sun’s height and timing change, and deciduous foliage can alter both the shade and the garden backdrop. You do not need to make a technical sun chart: take a few dated photos from the same seat and add an arrow showing where the light comes from. Compare the hours when you actually want to sit outside, such as breakfast or an evening meal. A screen planned around one photograph could obstruct the view for much longer than the sun problem lasts, or fail to address the period when the seats are exposed.
Separate overhead shade from low-angle sun
Overhead cover and side shade address different parts of the sun problem. When the sun is high, shade over the seating footprint may be the main need. When it is low, rays can travel beneath a roof edge and reach faces or the table. In that situation, a larger roof area does not automatically solve side glare, and a screen across the full opening may sacrifice more of the outlook than necessary. Identify where the light enters and what it hits. A bright tabletop may be uncomfortable, but that alone does not show that the person seated beside it needs a full-height barrier.
Check the roof arrangement for the model you are considering rather than inferring its effect from the general word pergola. When comparing the Bloomcabin Pergola model, ask for the roof configuration details that apply to your proposed arrangement. Sketch the roof footprint, seat positions and low-sun direction on the same plan. This can show whether furniture orientation or shade over a smaller zone might help. It also keeps the focus on the source of the problem: overhead cover cannot block rays that enter under its side edge.

03
Place side shade outside the main view corridor
Plot the outgoing sightline and incoming sun direction as separate arrows. If they approach from noticeably different angles, shade may be able to sit on an adjacent edge or near the sun-facing end while leaving the central view open. If the two directions coincide, a solid screen that blocks the ray will also block at least part of the view. There is no placement trick that removes that trade-off. Consider whether the main chair can turn, whether shading only a section of the opening is enough, or whether protection is needed for just a short period. Checking the angles first helps avoid screening an entire side when the affected area is much smaller.
On the plan, mark posts, walls, doors, garden paths and planting that limit possible screen positions. If you are considering the Bloomcabin Bioclimatic Pergola, compare its available side configurations with these constraints before deciding where shade should go. Keep a clear route into and out of the seating area, and check whether a panel would interrupt that route or place a post in the main view. The aim is to identify a specific shaded zone and a specific outlook to preserve, rather than automatically enclosing the side that seems sunniest.
Set screen height and width around the sun path
A screen’s height and width affect both the rays it intercepts and the view it occupies. A high, narrow band may shade a limited upper area while preserving a lower garden view, but it may miss sun that reaches seated faces or enters at a different angle. A low panel can interrupt the view even if it is modest in size. Instead of choosing a height on appearance alone, mark the sun’s direction at the affected time and compare it with the line from the seated eye to the garden feature. Where those lines overlap, a fixed opaque panel will obscure at least some of the view through that area.
Draw two or three possible screen boundaries on the sketch: the full opening, a partial-width section, and an offset or higher section if a compatible option exists. Use the plan to compare widths and a seated-eye photo to compare heights. If you are considering a wall-mounted pergola, confirm the actual clear opening and supported accessory position before assuming a proposed screen will fit. Mark the garden landmarks you want to retain, not just the amount of sky. This gives you specific boundaries to test on site, because the view through and below a frame can be hard to judge from a drawing alone.
04
Compare screen materials in the garden light
A solid surface gives a clear visual stop to low sun but also creates the strongest interruption to a garden outlook. An open-weave or spaced treatment leaves some detail visible through its openings, yet the shade it casts depends on the sun angle, pattern, gaps and distance. Do not assume that see-through means effective glare control. Transparent glazing may preserve a view in one sense but can still show reflections or bright spots at particular angles. Compare samples in the actual light if they are available, using the seat position and garden background that matter to you. A catalogue image cannot reproduce the contrast outdoors.
Consider how each option looks when the sun is not the problem. A pattern that seems discreet against a pale sky can appear as a strong band against leafy planting; a dark mesh may make the garden look less bright, while a reflective surface may draw attention. Treat these as effects to test, not guaranteed results: colour, spacing, light and viewing distance all matter. When comparing screen options for the regular pergola model, distinguish between the appearance you prefer and the materials actually available for that configuration. Do not assume a screen shown in an image, or a third-party product, is included or approved.
Test a proposed screen before choosing accessories
Make a quick physical mock-up before committing to a screen position. Use a freestanding piece of cardboard, a temporary fabric panel held by a helper, or another safe marker that does not load the structure. Do not fix improvised material to the pergola. Test from the most important chairs at the times when your notes show a sun problem. Look at both the visible garden and the patches of direct sun on people, furniture and floor. A plan shows angles; a mock-up shows how much of the garden is visually framed and whether a gap at the edge still lets light through. Compare more than one width or height before settling on a boundary.
Repeat the test while seated upright and in the posture used most often, then move to the next seat and the entry path. A screen may seem unobtrusive from one chair yet cut across the view for someone at the other end of the table. If an adjustable solution is under consideration, compare the view with the proposed screen area covered and uncovered. Record the preferred position and extent of coverage so you can discuss them alongside the bioclimatic pergola model details. The mock-up establishes what you want the shade to do; it does not establish that the pergola accepts a particular attachment.

05
Check seats, access and garden changes
Retest the layout with the furniture in its normal arrangement, not pulled aside for a photograph. Allow for chair backs, a recliner in both upright and reclined positions, table settings and the small turns people make when getting in and out. A screen may preserve a straight sightline but make a seat awkward to reach, or narrow the passage beside a garden path. Check the view from places used every day, including the end of a bench if someone sits there. When reviewing the Bloomcabin Pergola page, compare the proposed footprint, posts and side arrangement with the space occupied by the furniture in use, not just its position when neatly tucked away.
Look beyond the current season, too. A young tree may become a more prominent part of the view, while a mature canopy or nearby structure can change the hours when the seating is shaded. Avoid assuming today’s sun pattern will stay fixed. If planting is part of the design, leave it the space it needs and decide whether a screen is intended as a permanent backdrop or to address a particular period of low sun. Recheck the intended viewing axis with likely growth and maintenance access in mind. This matters if the screen could hide the garden feature the seating area was planned around.
Confirm product configurations against the sketch
Use the annotated plan, seated photos, sun observations and mock-up notes when making product enquiries. Ask for the exact footprint and support positions for the configuration under consideration, which sides can take approved shading accessories, and whether those accessories are included or sold separately. Request confirmation for the named model rather than assuming an option shown for another pergola applies. If you are enquiring about the wall-mounted pergola model, describe the panel position and coverage you need, with reference to the sketch. This gives the enquiry a clear purpose: finding out whether the available configuration can accommodate the shade arrangement you have tested.
Shortlist by the solution you need: overhead shade for high sun, a compatible side treatment for low rays, a furniture rotation, or some combination. Compare the available arrangements with the primary viewpoint rather than relying on a product photograph. If no supported option can shade the relevant zone without crossing the view corridor, recognise that trade-off and consider a smaller shaded seating zone or a different orientation. You may choose to protect the seats from a narrow period of sun while keeping the rest of the garden visually open.
Frequently asked questions
Can I shade one side without losing the garden view?
Sometimes. It works best when the sun approaches from an angle outside the main viewing corridor, so shade can sit on a side or end without crossing the focal view. If the directions overlap, a solid screen that blocks the sun will also obscure part of the view. Try a partial-width treatment, a different seat orientation or shade for a limited period before enclosing the whole edge.
What eye height should I use for a sightline sketch?
Use the actual chairs and the normal seated posture rather than a standard height. Check upright and relaxed positions, then repeat at each seat that matters; dining and lounge eye lines differ. Note which garden feature should remain visible from each place. There is no single eye height that suits every setting.
Will a pergola roof block low afternoon sun?
Not always. A roof may provide shade from above while low-angle rays pass beneath a side edge. The result depends on the sun’s direction, the roof arrangement and nearby surroundings. Track the rays at the uncomfortable time and ask for the exact model’s documented roof details before assuming overhead cover will solve side glare.
Is an open screen always better for keeping a view?
No. Openness, pattern, colour, distance and sun angle affect both how much light is stopped and how much detail remains visible. A see-through material can still alter contrast or allow glare. If possible, view a sample against the actual garden from seated positions and in the relevant light.
Are side screens included with every pergola?
Not necessarily. Ask whether the exact model supports the proposed side treatment, which positions are approved and whether it is included or sold separately. A screen from another supplier is not automatically an approved accessory, and a product image does not prove that a screen is part of the package.
Shade a pergola seating area by matching a specific sun problem to a specific part of the space, rather than screening an entire side by default. Seated-eye sketches, timed sun notes and a simple mock-up show where shade and the garden view can coexist—and where their paths overlap. Keep the main outlook as a fixed test, confirm side options for the exact model, and choose a partial compromise when low sun and the valued view come from the same direction.
