
Pergola Splashback: Keeping Rain Off Seating
Pergola planning guide
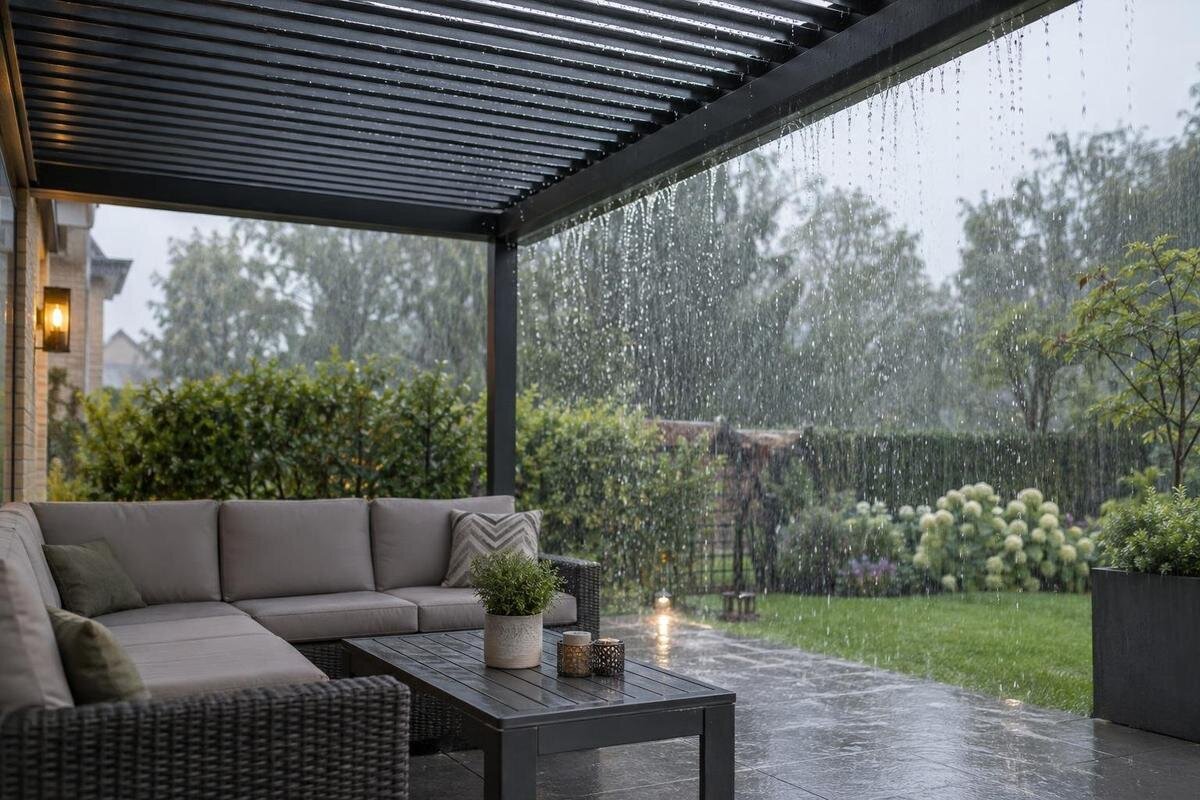
An overhead pergola can leave an outdoor dining area exposed to rain bouncing off the ground. Water may hit paving just beyond the covered footprint, run across a path or arrive from a garden edge, then spray onto feet, chair legs and lower cushions. The useful fix depends on tracing that floor-level route: where rain first lands, how the surface carries it and what separates it from seating. Paving levels, landscape transitions, furniture placement and a suitable side enclosure all matter, but none is a universal cure. This guide focuses on splash around the floor rather than explaining roof drainage.

How to recognise floor-level rain splash
Water on the seats does not automatically mean the pergola roof is leaking. At floor level, several routes can look similar: rain can blow through an open side, run off another surface onto paving, or hit the paving and flick upwards. A low spray on chair legs, the lower edge of a cushion or a nearby wall may point to ground splash, while a wet patch starting directly below a roof edge suggests a different source. These are clues rather than proof, and more than one route can operate in the same shower.
During ordinary rain, observe from a sheltered, safe position and look for the first wet point rather than the wettest chair. Note whether water arrives from above, moves across the ground or clusters beside a paving edge or runoff channel. Wind direction and rainfall can change the pattern, so a single observation does not define every condition. If the first wet area appears overhead, investigate that separately; tracing roof performance is different from tracing water that rebounds from the floor.
Trace runoff from beyond the covered area
Start outside the pergola outline, especially on the side where water is seen. A higher paved strip, driveway, path, downpipe outlet, garden bed or compacted patch of soil can feed runoff towards the seating area. The source may be far enough away that the wettest spot beside a chair is only the end of the route. Follow visible flow back to where rain first lands, noting any joint, edge or narrow gap that gathers it. A broad surface can funnel water into a small low point, so inspect adjoining surfaces, not just the nearest paving slab.
Sketch the route from the source to the seating area, including changes in surface and the open ground around the proposed structure. The listed Bloomcabin Pergola range spans 9 to 24 m², but that area alone does not show which paving will remain exposed or where runoff will cross it. Once you know the selected model’s footprint, place it on the site plan and mark the water route alongside it. Include adjoining paths and garden edges rather than cropping the sketch at the pergola posts. Label the point where water enters the covered area separately from the place where droplets reach a chair. If the route disappears from view, mark that stretch as uncertain instead of joining the points by assumption. This helps distinguish water entering from outside the covered area from splash generated close to the chairs.
Why paving can splash water towards seating
Rain striking hard paving can break into droplets that travel sideways or upwards. How much reaches a chair depends on where the impact occurs, the surface profile, joints and small level changes, as well as the direction of the rain. A stream of water can also be diverted by an edge or a change in material. A dry patch beneath the roof therefore does not rule out splash from the exposed perimeter. Watch the point of impact and the direction of the droplets rather than assuming every wet mark has the same source; one shower can produce different patterns across the same paved area.
Avoid choosing a replacement surface based only on descriptions such as smooth, textured or porous. Those labels do not tell you how the finished surface, its joints and its local levels will behave together at your home. Look for where droplets land, whether water follows a joint and where marks collect after rain. A change in surface may alter the pattern, but it will not necessarily address runoff arriving from another area. If a material change is being considered, assess it alongside the water route and drainage rather than treating the paving finish as the only factor.
How paving levels direct water towards seating
Local surface levels and the continuity between them help determine where rainwater travels. Water may cross a threshold, follow a slight depression or collect at a low point before moving on. A narrow channel at the edge of paving can carry water towards furniture even when most of the patio looks dry. Look along the whole path and note whether water crosses an entry route, leaves the paved area or runs back towards a building. Check what happens where paving meets soil, a wall, a doorway or another surface; the transition can matter as much as the centre of the seating area.
For a layout such as a Bloomcabin Wall-Mounted Pergola, include the paving beside the building in your site assessment; the model name does not show whether local ground falls towards or away from the seating. Avoid changing levels, adding an edge or altering a drain based on a guess, as each could redirect water in a different way. A qualified drainage or landscape professional can assess the existing surface and advise on suitable options. Give them the observed route and the spots where water collects, not only a description of wet chairs.

Garden edges can send water onto paving
Rain can splash from exposed soil or loose material at a garden edge, then carry water and fine debris onto paving. Mulch, gravel and bare ground each behave differently, and their position relative to the seating matters. A planted strip may intercept some raindrops, but it does not establish where water will flow during a shower. Look for muddy marks, displaced material or a wet trail crossing from a bed or lawn. These signs can help distinguish splash from a landscape edge from droplets created by rain hitting the paving itself.
Check whether water passes over a border, through a gap or along the boundary between the garden and paved area. Do not assume that adding a raised edge will keep the seating dry: it may change the route or leave water collecting somewhere else. Distinguish material scattered onto the patio from a continuous wet trail leading out of the bed. Note whether the affected stretch is beside a chair or farther along the boundary, and whether the marks stop at a joint or continue across it. These details help identify which part of the transition needs attention, rather than treating the whole garden edge as the source. If a model from the Bloomcabin Pergola range is being considered beside a garden bed, map the bed-to-paving transition against the selected footprint. That gives you a clearer view of what the roof covers and what ground remains exposed, without treating the roof edge as the boundary of the water problem.
Keep seating out of the observed splash path
Where chairs sit can determine whether a splash reaches people, cushions or table settings. Consider the normal position of the table and chairs, but also where a chair sits when pulled out or turned. A seat close to an exposed paving edge may catch droplets even if its legs are partly beneath the roof. Pay attention to the lower parts of cushions and furniture, and keep the usual path between the seating and the house in mind. On a dry day, arrange the furniture as it would be used during a meal, with chairs pulled back enough for people to sit down and get up. Compare those positions with the splash marks you recorded, not just with the line of the pergola posts. Check each seat rather than assuming the table’s position represents the whole dining area. A layout that avoids one wet spot should not make everyday access awkward or place another chair in the same route.
Use the observed splash pattern to compare possible furniture positions rather than relying on the full roof outline as a dry-zone boundary. The Bloomcabin Bioclimatic Pergola listing gives a range from 9 to 24 m²; the listed area is not, by itself, a measure of dry seating space. Confirm the chosen footprint from the product information, then consider how the seats relate to exposed paving and the water route. If furniture needs to move for different conditions, allow for that in the layout rather than assuming every position will be equally sheltered.
What side screens can and cannot do
A side screen may intercept some rain coming through an opening, provided it is designed for use with the selected pergola configuration. It does not remove runoff from paving or prevent every droplet from rebounding off the floor. Water can still reach the seating from below a screen or around an exposed edge, depending on the layout and weather. Consider which side is affected and whether the observed route is wind-driven rain through an opening or splash rising from the ground. Those are different problems and may need different responses.
For a wall-mounted pergola model, confirm whether the enclosure configuration you are considering is suitable for that exact model. Ask how the screen meets the floor and wall, where water may still enter and whether the arrangement changes access to the seating area. Do not assume a screen shown in an image is part of the model or that it will solve a ground-level drainage problem. If water already runs towards a doorway or gathers against a boundary, address that route as well as considering a side barrier.
What to check in pergola weather documents
Roof performance and floor-level splash are related, but they are not the same question. If a Bloomcabin Pergola is on your shortlist, request the model-specific weather-performance information and drainage diagrams. Check whether the documents describe the exact model and enclosure configuration you are considering, and what conditions they cover. A drainage diagram may help show where roof water is directed; that information is useful when comparing an outlet with nearby paving, but it does not automatically describe droplets rebounding from the ground.
Ask whether any controlled observations relate to the selected configuration and the conditions you are trying to manage. Look for clear limits rather than relying on a broad claim that a structure is weatherproof. Compare the diagram with the actual position of the seats, openings and surrounding paving. If the documents do not answer how water reaches the floor-level seating zone, treat that as a separate site question. The aim is not to expect a product document to diagnose every patio, but to understand what the model information does and does not establish.

Observe the site in ordinary rain
A simple record can make the water route easier to explain. From a sheltered place, note where rain first hits, which direction water travels and which surfaces become wet before the seating does. Record the wind direction if you know it, the side that is exposed and whether the pattern changes as the shower continues. Photos taken from the same safe spot can help you compare the route at different times. Keep a brief caption with each photo so that a wet chair is not mistaken for the first point of entry. State whether the furniture was in its usual position and whether you saw droplets arrive or only noticed the wet surface afterwards. Separate direct observations from possible explanations; “water crossed this joint” is more useful than an unsupported diagnosis. Keep the focus on the first impact point, any narrow stream, the paving edge and the affected chairs.
Compare observations from more than one natural shower if the pattern varies; a hose test should not be treated as equivalent to rain because it can send water along a different route. When comparing the bioclimatic pergola model with your site, keep your own observations separate from any supplied controlled test information. For each, be clear about the configuration and conditions involved. Your notes describe what happened at your property, while a controlled observation describes the setup used for that observation. Neither should be presented as covering conditions that were not observed. If two showers leave different wet areas, keep both records rather than combining them into a single assumed splash boundary. Do not use a brief test or one light shower to assume how every exposed edge will behave in different weather.
Match the pergola configuration to the site
Put the pergola footprint, openings, observed water route and normal furniture positions on one plan. Mark the first point where rain hits, the paving or landscape it crosses and where the splash reaches the seats. Then separate the issues: direct rain through an opening, runoff flowing across the ground and droplets rebounding from paving may call for different considerations. Compare possible layouts on copies of the same plan so the trade-offs remain visible. For example, show a revised seating position on one copy and a proposed side enclosure on another, without assuming either resolves every water route. Leave any proposed drainage or level changes clearly labelled for professional assessment. This makes it easier to see whether the main concern is furniture placement, a landscape transition, surface drainage or an exposed side, instead of treating every wet chair as a roof problem.
When assessing Bloomcabin’s bioclimatic option, or any other model, match the exact selected size and enclosure configuration to the product information rather than relying on the category name or a picture. Use the site observations to decide which questions remain unanswered. If an effective response would involve changing paving levels or drainage, have a qualified professional assess the site before work is planned. A useful decision is one that addresses the route you observed while recognising the limits of the chosen configuration.
Frequently asked questions
Can a pergola roof prevent splash from paving?
It can shelter the area beneath it from some direct rain, but it does not stop water hitting exposed paving, travelling across the ground or blowing in from the side. Trace those routes separately from rain falling through or off the roof.
Why are the chair legs wet when the paving looks mostly dry?
A small stream or rain striking a small patch of paving can send droplets towards the chairs without leaving a large puddle. Check where the water first lands and look for a narrow wet track or splash marks low on furniture and nearby surfaces.
Will a side screen stop rain splash?
A screen may intercept some rain coming through a particular opening, if it is suitable for the pergola configuration. It will not remove a runoff route or guarantee protection from water rebounding off the floor. Check the model-specific documentation.
Should I replace smooth paving to reduce splash?
Not automatically. Surface profile, joints and local levels all affect how water moves, and a material label alone does not predict the result on your site. Observe the paving in rain before considering a change.
What should I ask about before buying a pergola?
Ask for the selected model’s weather-performance information, drainage diagrams and details of any suitable enclosure configuration. Check what conditions the information covers, then compare the footprint and openings with your observed runoff and seating positions.
Good splash control starts below the roofline. Following water from its first impact to the seating reveals whether the important change is furniture placement, a landscape transition, drainage or a suitable side enclosure. Keep conclusions tied to observed conditions and the exact model configuration: overhead coverage alone does not promise dry paving or seats. When the route is clear, the response can address the cause instead of simply moving cushions after every shower.
