
Planning Pergola Clearance Under Eaves and Overhangs
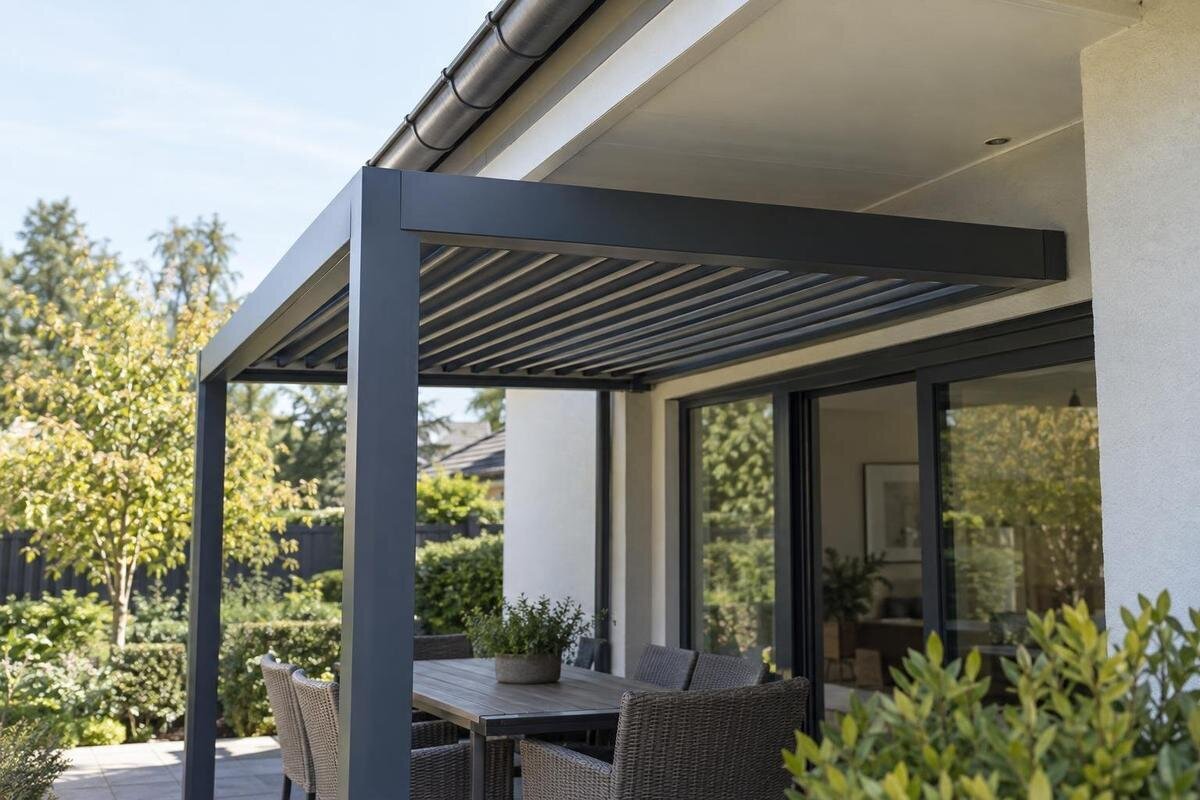
Pergola planning
Low eaves do not automatically rule out a pergola, but a simple height measurement is not enough. The full frame needs to clear the building’s lowest projections, any moving parts need their operating space, and gutters must remain accessible. The useful question is not only whether the pergola fits on paper, but whether it can be positioned, installed and maintained in the space you have measured.

01
Survey the eaves across the full footprint
Start by marking the pergola footprint at full size on the ground or on a scaled plan. Include the roof perimeter as well as the post centres shown on the model drawing; the roof may extend beyond its supports. Then map every part of the building’s overhang against that footprint: soffit, fascia, gutter, brackets, downpipes and uneven trim. A plan view shows where the structures overlap, while an elevation shows their vertical relationship. Looking only at the gap between the house wall and a post can miss a low point closer to the outer edge. Mark fixed references such as the wall line and paving edge so each measurement relates to the same position.
Do not treat the eave as one flat, continuous line. A gutter may change depth at an outlet, a downpipe can project farther than the fascia, and decorative trim may sit lower than the soffit. Draw each obstruction where it actually occurs and note whether it crosses the roof area, a post position or only the space between posts. That distinction can show whether a small shift might resolve a clash, or whether the planned roof itself overlaps the house. Take photos square-on and from below to help identify locations, but use recorded dimensions rather than perspective to judge the fit.
Measure the clearance to the lowest projection
Measure vertically from the finished surface the pergola will stand on to the underside of the lowest obstruction above it. Depending on the location, that could be a gutter, fascia return, soffit corner or downpipe elbow rather than the main roof edge. Measure at the wall, at the outer edge of the proposed roof and at intermediate points where the building line changes direction. If paving or another surface is not yet finished, record the planned final level and confirm it with the person coordinating the work. A measurement taken from bare ground could overstate the clearance that will remain.
Check more than the four corners. Sloping ground, uneven paving, a step or a change in the building’s level can alter the available height across the footprint. Record each measurement in millimetres beside its exact location; a number without a position is difficult to compare with a drawing. Use the lowest confirmed point in each area rather than an average that hides a local dip. If the eave is difficult to reach or irregular in shape, arrange for the measurement to be checked instead of estimating from a photograph or the apparent roof pitch.
02
Compare site measurements with the model drawing
Compare your site survey with a dimensioned drawing for the exact pergola model and configuration. Check the overall height, roof-edge position, post centres and any projections against the same reference points used on site. Use the drawings for the exact Bloomcabin Pergola option as your reference, rather than treating a model name or area label as evidence of fit. Confirm what each height dimension measures from and to. If a key dimension is missing, ask for it rather than scaling a product photograph, which can distort proportions and hide offsets.
Allow for the final set-out and any installation tolerances, not just the nominal numbers. A drawing may state an overall height while the site question concerns the lowest eave point above one corner; those measurements are not automatically comparable. Check which configuration the drawing covers and whether it shows all relevant roof components and projections. If the reference point is unclear, ask the manufacturer or installer to confirm it. Record the drawing or configuration you used, so a later change to the selected model does not leave you relying on dimensions from a different version.
Check moving components through their full travel
Some pergola designs have components that move, open, fold or need access during operation. If the model you are considering includes them, check clearance through their full movement, not only in the position shown in a product image or at rest. Ask whether a mechanism, control or removable component needs extra room to reach it. An overhang may clear the fixed frame but restrict a moving part or make maintenance awkward. Do not assume which direction components travel or how much space they need; the model’s operating information should describe the actual envelope and any stated clearance requirements.
When reviewing the Bloomcabin Bioclimatic Pergola, use its model-specific information to establish the selected configuration’s dimensions and any movement or service envelope. The category name alone does not confirm its operating range or suitability beneath your roof. If a drawing shows only one position, ask how other operating and maintenance positions affect the space required. On your site sketch, distinguish the fixed frame outline from the space needed by moving components, and identify the nearby obstruction for each. Note overhead clearance separately from headroom below the frame: an unobstructed walking area does not answer whether a component clears the gutter above. If the eave intersects a component at any point in its travel, compare alternative documented layouts rather than assuming the component can simply remain in one position.

03
Preserve gutter access and drainage paths
Treat the house gutter as a working part of the site, not just an obstacle to fit around. A pergola below an eave may make the gutter harder to inspect or clean, particularly where its outer edge sits close to the gutter line. Check that the gutter can still be reached using the maintenance method normally used at the property, and that posts or roof components do not block an outlet or downpipe. Include the whole route from the gutter to ground-level drainage in your plan, including elbows and pipe runs that project from the wall.
Consider what could happen if water leaves the house roof or gutter during heavy rain or an overflow. Inspect the actual outlets and ask how the pergola’s own drainage works, if relevant to the selected model; do not assume a flow direction from a sketch. When assessing the Bloomcabin Pergola listing, identify which drainage details you still need to compare with the house roof and gutter arrangement. Mark the house downpipes separately from any drainage components shown for the pergola, so the two routes are not confused. Keep access to downpipes clear for inspection and maintenance, rather than checking only that they remain visible. If a proposed post or roof edge obstructs that access, include the obstruction in your layout comparison instead of leaving it to be resolved during installation.
Verify wall connection points and substrate
A pergola close to a wall is not automatically a wall-mounted installation. The eave, fascia, soffit and gutter are not interchangeable with a verified connection point, and their proximity does not show what the wall can support. If the layout depends on wall fixings, identify the intended connection locations and the substrate behind the visible finish. Cladding, render or lining can conceal the building structure, so a site assessment may be needed before deciding that a connection is suitable. Do not treat an eave board or trim as a fixing point unless the applicable drawings and a qualified assessment support that arrangement.
For the Bloomcabin Wall-Mounted Pergola, compare the connection positions in the applicable anchoring drawings with the actual wall, window openings, services and eave geometry. The model name does not establish whether a particular house wall is suitable. Mark the proposed connection height as well as its position along the wall; a clear stretch of wall at ground level does not show whether the intended fixing location is unobstructed above. If a fixing point falls behind a downpipe, across a joint or where the wall build-up is unknown, flag that exact location for professional review. A freestanding layout may avoid relying on the wall, but it still needs suitable anchoring details and workable post positions. Compare those support requirements before treating it as an alternative, rather than simply removing wall connections from the plan.
04
Allow for installation access around the frame
A pergola may clear the eaves when finished but still be difficult to install in that position. A low overhang can obstruct the route for bringing components into place or restrict room to join parts, work around the top of posts or reach a fixing point. Check the installation sequence and access route before setting out posts permanently. Include gates, steps and side passages, and ask whether components will be assembled in place or brought onto the site already assembled. The installer can confirm the working space and access method needed for the selected model.
Use the regular pergola model page to identify the product, then compare its installation information with the proposed position and approach to the site. Discuss two separate questions with the installer: whether the components can reach the location, and whether there is room to assemble them beneath the overhang. A clear access path does not resolve a restricted working area at the top of the frame. Allow room for future tasks too, such as inspecting visible fixings, cleaning the frame or reaching a control if the selected model has one. Mark where that access would be available after installation, not just while the site is clear. This distinguishes a frame that fits in its final position from a layout that also allows installation and servicing without blocking access to the house.
Compare alternative pergola positions
If your measurements show a clash, test a few alternative positions before ruling out the site. Shift the footprint forward, sideways or away from a low corner on the plan, then check the roof perimeter, post centres, gutter access and connection points again. Moving the unit outward could improve overhead clearance but place posts on a different surface or in a walkway. A sideways shift may change its relationship with a downpipe or wall opening. Treat each adjustment as a new layout, rather than assuming a small move will resolve every constraint.
Compare the same criteria for each option: lowest clearance, moving-part space where relevant, gutter access, wall connections, installation route and support positions. If you are considering the bioclimatic model listing, keep the selected configuration consistent across these comparisons so that a change in position is not confused with a change in product dimensions. Give each layout a simple reference on the plan and note both the clash it resolves and any new constraint it introduces. For example, record whether improved clearance leaves a post closer to a walkway or changes access to a downpipe. If none of the positions appears workable, ask an installer or structural professional whether another location or model is viable. Keeping the alternatives together makes the trade-offs easier to discuss without relying on memory or a verbal description.

05
Assess support surfaces and anchor locations
Adequate height does not guarantee that the pergola supports can be positioned on a suitable surface. Note changes in paving level, retaining edges, garden beds, drainage grates and door thresholds under or near the proposed posts. A shift to clear a downpipe or low eave may move a post onto another surface, across a joint or into a place where fixing or excavation is constrained. Check the support layout against the available ground and the model drawing; do not move a post informally if the drawing specifies its position or spacing.
Before drilling or excavation is planned, establish what the support surface is and whether the applicable anchoring detail suits it. Structural assessment, substrate evidence and model-specific anchoring drawings are relevant; a general illustration or a footing size borrowed from another site is not a substitute. For an option identified through the wall-mounted model listing, distinguish connections to the building from any other support locations shown in the selected layout. Record uncertainty at each location rather than describing the whole site as suitable because one surface appears sound. Have uncertain substrates or load paths reviewed by a qualified professional, and establish service locations before fixing work is set out. If a post position changes to avoid the eaves, carry that change through to the support assessment rather than retaining the earlier location in the installation plan.
Record the proposed layout and unresolved questions
Before confirming a position, make a simple record that pairs each measured obstruction with its location and height, then notes the corresponding model dimension and any operating position that matters. Include the gutter and downpipe access route, installation approach, proposed connection points and anything uncertain about the supporting surface. This is not a structural calculation; it is a way to show where the site measurements and product information do or do not align. Photos can help identify locations, while a marked plan and elevations make the dimensions clear to an installer.
Use the bioclimatic pergola product page to identify the model in your record, alongside the selected configuration and the drawing used for comparison. Separate confirmed dimensions from questions that still need an answer, such as an unclear height reference, a restricted maintenance route or an uncertain connection point. This makes it easier to discuss a specific problem without reopening every part of the layout. Before ordering or scheduling installation, resolve those questions with the relevant supplier, installer or qualified professional, including the anchoring details and substrate assessment where needed. Record the agreed position and any resulting changes on the same plan. If a later adjustment moves the roof or posts, revisit the affected measurements so the final arrangement is assessed, rather than an earlier version that no longer matches the proposal.
Frequently asked questions
Can a pergola be attached to the fascia or soffit?
Do not assume those parts can support a pergola. Identify the intended connection points and the structure behind the visible finish, then check them against model-specific anchoring drawings and a site assessment. The fascia, soffit and nearby wall may have different functions and construction.
Is there a standard clearance beneath an eave?
There is no single figure that suits every pergola and site. Compare the actual lowest point above the proposed footprint with the selected model’s dimensions, any moving components and installation requirements. Use the model’s documentation for its stated clearances rather than relying on a general rule.
Can a pergola sit beneath a house gutter?
It may be possible, but check more than the vertical gap. The gutter still needs to be inspected and maintained, and outlets, downpipes and drainage routes must remain accessible. Consider where water could go if the gutter overflows, and ask for model-specific drainage information where it is relevant.
Will a wall-mounted pergola solve a low-eave clearance problem?
Not necessarily. A wall-mounted layout still has to clear the eaves and fit the site’s connection points. Its model name does not confirm that your wall or visible cladding is suitable for anchoring. Check the required fixing positions against the building and obtain a site assessment where the substrate is uncertain.
Is an overall-height figure enough to choose a pergola?
No. You also need to know where that height is measured from and which part of the pergola it describes. Compare the drawing with the finished ground level, the lowest eave projection, the roof perimeter and any operating or service space required for the chosen configuration.
A workable position beneath low eaves depends on the whole site, not one convenient measurement. Map the roof and gutter projections, measure from the finished surface, and compare those figures with drawings for the exact pergola configuration. Then check movement, installation access, connection points and support surfaces as part of the same layout. When those details agree, the clearance decision is much more reliable; when they do not, a revised position or a site assessment can prevent a difficult installation.
