
Planning an Outdoor Exercise Area Under a Pergola
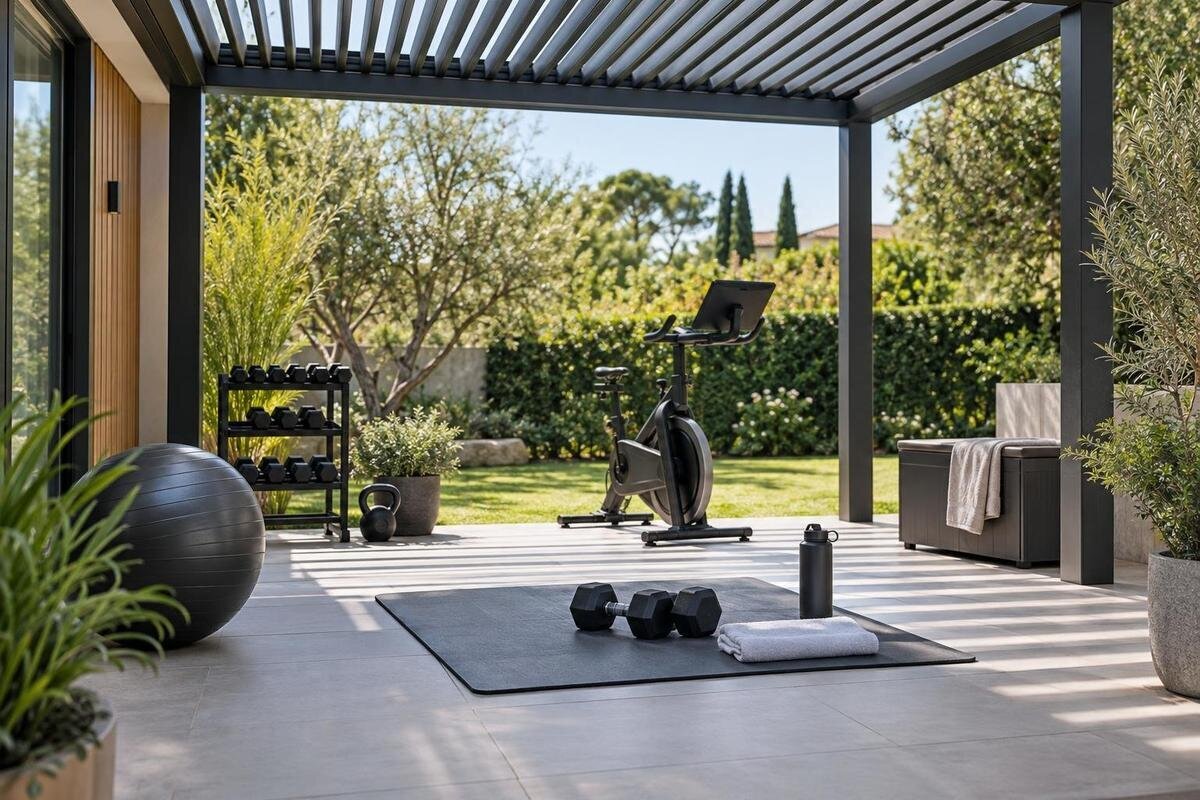
Outdoor exercise planning
Planning an outdoor exercise area under a pergola starts with the clear floor space your routine needs, not the nominal area of a mat or machine. Reaching, stepping, turning and changing exercises all take room, while supports, furniture, doors and stored equipment can reduce the useful zone. The surface underfoot, sun angle, wind-driven rain and somewhere to put loose gear all affect whether the area is practical for regular use. Use this guide to map your activity, check the floor and weather exposure, and compare layouts. Do not hang straps, rings or other suspension equipment from a pergola unless the exact structure and attachment have been approved for that use.

List the activities before sizing the pergola
Write down the activities you actually expect to do in the space: perhaps mat-based stretching, standing mobility, bodyweight exercises, or sessions using portable weights or a compact machine. Note the largest movement in each activity, the equipment that stays on the ground and whether you switch exercises without moving gear. One person using a mat needs a different arrangement from two people rotating between stations. Also note what you carry outside each time and what you want permanently available. This inventory keeps the plan about actual use rather than a vague “home gym” idea, and shows whether the area must stay clear between sessions. If your routine varies, plan around its largest regular activity rather than its most compact one.
Measure the usable part of the patio or garden, noting boundaries and fixed obstacles before comparing pergola areas. Mark furniture, existing paths, steps and any other use that needs to remain, so they do not get counted as exercise space. The Bloomcabin Pergola model page lists a range from 9 to 24 m²; that gives an area range to compare, not a guarantee that a particular configuration leaves enough room for your routine. Check the dimensions and support positions for the selected configuration against your measurements. A quick outline on the ground can reveal whether a promising area leaves space for both movement and access.
Allow room for the full movement
Measure the whole movement envelope around the largest action, rather than treating a mat’s outline as the boundary. Arms reaching overhead, a wide stance, a lunge, a step to either side or a turn can extend beyond the equipment. Use the movements you intend to do and mark their furthest points on the ground with chalk or tape. Keep that area clear of posts, walls, furniture, garden edges and objects with hard corners. There is no universal clearance figure that suits every routine; people, movement patterns and equipment vary. A marked outline makes the difference visible before you commit to a footprint.
Include transitions as well as the exercise itself. If you move between a mat and weights, check that you can put equipment down without blocking the next movement or the route out. Where a routine travels across the area, mark the start, finish and turning points rather than planning only for a stationary exercise. When reviewing a Bloomcabin Bioclimatic Pergola listing, compare the exact configuration and support positions with this outline. A listed area is not necessarily one uninterrupted rectangle, so use the plan for the chosen size to check how much clear floor remains inside it.
Plan equipment positions and access
Lay out equipment in the order you use it. A mat, a pair of weights and a compact machine each occupy floor space, but their position can also affect where you step, turn or rest between movements. Keep frequently used items within easy reach without placing them at the edge of a movement zone. If a machine remains set up, include its full footprint and the space needed to get on, off or reposition it, using its own instructions. For portable equipment, decide where it will sit during use and where it will go afterwards. This gives you a more realistic plan than adding up equipment dimensions alone.
For an attached layout, compare the wall-mounted Bloomcabin Pergola option with your equipment plan. Include the supports, fixed edges and access points shown in the selected configuration, rather than assuming the entire area beside the wall will be available. Position each item on the drawing and check whether you can approach it, use it and move away without stepping into another exercise station. If equipment needs to be moved between exercises, show where it will go during that transition. Keep the assessment of the building surface and proposed connection separate: those details need confirmation from the relevant supplier or a qualified professional.
Keep access and circulation clear
Plan the route from the house, side gate or garden path to the exercise area. A clear workout zone is less useful if the way in is blocked by stored weights, a chair or equipment left beside the entrance. Mark doorways, steps and changes in level on your sketch, and consider whether a door or gate needs room to open without crossing the area where you move. Keep water bottles, towels and shoes in a place that is easy to reach but outside the active zone. If you carry equipment in and out, allow space to do so without weaving around obstacles.
Show existing trees, garden beds, drains, furniture and other fixed features on the plan, even when they sit just beyond the pergola. These can affect the route you use and the amount of room available for turning or carrying gear. Where other people share the outdoor area, decide which parts need to remain passable while you exercise. Do not rely on moving a large object every session if that is likely to disrupt the routine or leave a trip hazard behind. A practical layout separates the movement area, the access route and any shared outdoor use before the pergola position is settled.

Check the floor for grip and evenness
Assess the surface you will actually stand on, not just how it looks from a distance. Paving, decking and other outdoor finishes can vary in texture, joints and condition. Check for loose or raised sections, gaps, grit, leaves and places where water collects. Consider the footwear you normally use: a surface that feels secure under bare feet may feel different in shoes, and the reverse can also be true. Inspect how the floor feels when dry and damp, but do not try a workout on a surface that feels slippery. If the finish is uneven or unreliable, resolve that issue before treating the area as ready for exercise.
A mat can define a workout space, but it will not make an uneven or slick floor dependable. Check that it lies flat, does not shift during ordinary use and has edges that will not catch your feet. Follow the mat maker’s guidance about outdoor use, moisture and storage, and bring it in or dry it when needed. When comparing the Bloomcabin Pergola product details with your patio layout, show the mat’s position as well as the equipment. Assess the paving or decking separately from the overhead structure, including the floor you cross when stepping off the mat or moving to another exercise.
Assess shade and weather at your site
Observe the area at the times you are most likely to exercise. The sun’s position changes, and shade beneath a pergola may not cover the same floor area throughout the day. Note direct sun at the sides as well as overhead, and consider whether the planned movement zone will still be shaded at the relevant time. If the roof can be adjusted, check the details for the exact configuration rather than assuming how it will behave. Shade and weather exposure are separate questions: an overhead structure does not, by itself, confirm a particular level of sun protection or shelter.
Consider what happens during passing showers and wind, including whether the floor becomes wet and where portable equipment can be stored. When comparing the bioclimatic pergola option, check the roof and side details for the selected configuration rather than treating the space as a sealed indoor room. Relate those details to the exposure you have observed at your site: which side receives rain, which part of the floor gets wet and where your equipment would stand. Plan to bring weather-sensitive items inside when appropriate. Keep another space available for your routine if conditions make the outdoor floor unsuitable, rather than relying on the pergola to make every session possible.
Plan storage outside the active zone
Decide where loose equipment will go before and after each session. Weights, bands, mats and small accessories can gradually take over the floor if their storage has not been considered. A low, stable storage spot outside the movement zone helps keep access clear and makes it easier to reset the area after use. Check the maker’s guidance for any equipment that should be kept dry or stored indoors. Avoid leaving loose items beside the mat or in a passage where they may be stepped on. If storage needs to sit within the pergola footprint, include its full size in the layout.
A storage box or rack also occupies space, so draw it on the plan rather than treating it as an afterthought. When considering the regular Bloomcabin Pergola, compare layouts with storage in place, not just with an empty floor. Check that you can retrieve and put away equipment without blocking the entrance or moving other items first. Keep heavier items where they can be reached without leaning over other gear. Freestanding storage keeps this part of the layout separate from the pergola frame. If you want attached hooks or racks instead, confirm the proposed fixing and location with the manufacturer or a qualified professional before including them in the plan.
Get approval before suspending equipment
Do not hang resistance straps, rings, a suspension trainer or similar equipment from a beam or post just because it looks solid. Exercise can put changing forces through an attachment, and the suitability of a structure depends on the exact pergola, connection point, fixing and intended use. The appearance or name of a product is not structural approval. Before planning a suspended exercise, obtain specific confirmation for the complete setup from the pergola manufacturer or a qualified structural professional. If that approval is not available, leave the frame out of the exercise plan rather than improvising an attachment.
A floor-based routine avoids making the pergola frame part of the exercise equipment, but it still needs a layout that leaves room for movement and keeps the floor clear. If you use a freestanding exercise frame, check its maker’s instructions for placement and use, and include its footprint and movement zone on the sketch. Do not assume that a portable frame is suitable for every outdoor surface or that a mat solves an unstable base. Keeping the structure, exercise equipment and flooring as separate planning decisions makes it easier to identify what needs professional confirmation.

Match the pergola configuration to the site
Compare the measured layout with the site before choosing a pergola type. Note where supports, walls, doors, paths and existing outdoor features sit relative to the movement zone. A wall-mounted option needs an assessment of the particular wall and connection; a freestanding plan needs its supports included in the drawing. Check the exact dimensions and installation requirements for the configuration being considered, and confirm any site-specific questions with the supplier or a qualified professional. Do not assume that a model’s name establishes its suitability for a particular surface, attachment or exercise setup.
Compare each option against the same drawing and routine, rather than considering its listed area in isolation. Use the Bloomcabin Bioclimatic Pergola page as one option in that comparison, checking the selected size and configuration against the space you have measured. Record where the supports would sit, how the entrance would line up with your path and whether storage would reduce the exercise area. This makes the differences between proposed layouts easier to see. If a detail is missing, identify the specific question it leaves unanswered, such as whether a support conflicts with a turning point, and ask for the information needed to resolve it.
Draw a concept plan before choosing a size
Make a simple plan that shows the site boundary, pergola outline, supports, entrances, existing furniture, equipment and storage. Draw the full movement envelope around your largest regular activity, then add the route in and out. Mark where you have noticed sun and where water reaches the floor, so the plan reflects the site rather than an idealised rectangle. Label the drawing as a concept, not as a structural or installation plan. Its purpose is to reveal spatial conflicts and support a useful comparison of sizes; it cannot confirm that a structure, footing or attachment is suitable.
Before buying, compare the concept with the exact product drawings and check what is included in the configuration being offered. If you are considering the Bloomcabin Wall-Mounted Pergola, use the selected layout to check how the proposed attachment, supports and usable floor area relate to your drawing. Mark any conflict between an exercise, the access route and storage, then revise the concept rather than leaving it to be resolved after purchase. Keep unresolved mounting, flooring or attachment questions clearly noted for the supplier or qualified professional. The finished concept should show where each activity fits and which details still need confirmation before you commit to a size.
Frequently asked questions
How much space do I need for an outdoor workout under a pergola?
There is no single footprint that suits every routine. Measure the largest movements you plan to do, then allow for equipment, transitions between exercises and a clear route in and out. Mark the layout on the ground and compare it with the usable space in the exact pergola configuration.
Is my existing patio floor suitable for exercise?
Not necessarily. Check that it is even and that it feels secure underfoot in the footwear you plan to use, including when conditions are damp. Look for loose or raised sections, debris and mat edges that could move. Avoid exercising on a surface that feels slick.
Can I hang resistance straps or rings from a pergola?
Only if the exact pergola, attachment point and proposed use have specific structural approval. A beam or post that looks sturdy is not proof it is suitable for exercise equipment. Ask the manufacturer or a qualified structural professional to assess the proposed setup.
Will a pergola keep my exercise area dry and shaded?
That depends on the selected design, its roof and sides, the sun’s position and the weather at your site. Do not assume a pergola is fully enclosed or weatherproof. Check the specifications for the exact configuration and observe where sun and rain reach the floor.
Should I choose a wall-mounted or freestanding pergola?
Base the choice on the site, the measured movement area and the requirements of the exact configuration. A wall-mounted model needs assessment of the particular wall and connection; a freestanding layout needs its supports included in the plan. Neither type should be assumed to suit a site without checking.
A useful exercise area is one that leaves your routine room to move and the rest of the outdoor space easy to use. Draw the largest movement zone, access route and storage alongside the supports, then check the actual floor and weather exposure. Keep loose equipment out of the active area and treat any suspended load as a separate structural approval question. With these details visible on a concept plan, choosing a pergola size and configuration becomes a measured comparison rather than a guess.
