
Planning Raised Planters Around a Pergola
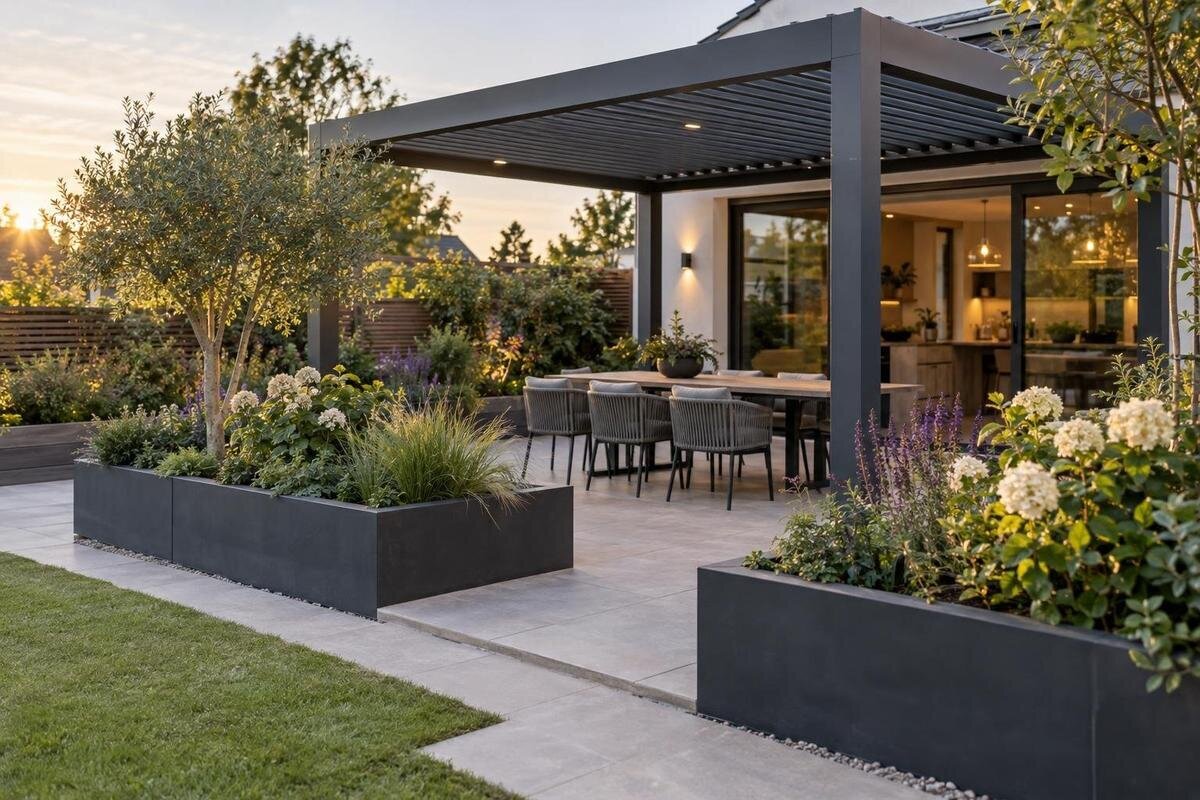
Pergola garden planning
Raised planters can bring foliage close to a pergola, but they also take up floor space, hold growing medium that becomes heavier when wet, and need access for watering, drainage and upkeep. Plan each planter’s footprint, root volume and maintenance access separately from the pergola frame, then bring them together on a measured site plan. This keeps seating and walking areas usable, gives plants the space they need and makes it easier to clean around posts and paving. Choose plants and map water routes before fixing planter positions, rather than treating the containers as a decorative afterthought.

01
Draw the whole layout before placing planters
Begin with a measured site plan rather than placing boxes by eye. Record the garden or terrace boundaries, house walls, doors, gates, steps, existing paths, taps, drains and any change in level. Add the proposed pergola outline and post positions from a dimensioned drawing, then show each planter at its full outside size. Include a rim, cap, feet or edging if it projects beyond the body. Note the finished paving level as well as the boundary, and use the same units throughout. When considering Bloomcabin Pergola, use a dimensioned drawing of the selected configuration to place it accurately on the site plan.
Overlay the furniture and the routes people use every day, rather than treating the area under the pergola as empty floor. Draw a dining chair pulled back, a door at its full swing, the passage from house to garden and room to carry soil or a watering can. These movements can compete with planter corners in ways a simple outline may hide. Before ordering, mark the proposed edges with removable pots or tape and walk the routes with furniture in place. Check them from both directions, including where paths meet. If a turn feels tight now, mature foliage and everyday use will not make it easier.
Measure the planter’s full footprint
Use a planter’s outside dimensions for layout and its internal dimensions for planting; they answer different questions. Measure the full rim, wall thickness, liner, feet, edging and any outlet or fitting that projects. Note the clear width and depth inside the box separately, because these determine the space available for growing medium. A long trough, separate boxes and an L-shaped unit may occupy similar areas while leaving quite different gaps at a corner. For modular units, show the gaps between sections rather than assuming their edges will meet. Draw the exact form you are considering, not just a shaded rectangle with a nominal width.
Decide whether planters sit inside or outside the pergola outline, then check what each position does to the route and access at every post. A container may line up visually with the frame without touching it; do not let it occupy an intended post position or block access to a surface that needs inspection. A very narrow gap is not useful if a hand, broom or tool cannot reach it. If the planter’s back will be inaccessible, allow a practical gap or plan to reach it from another side. Record the intended clearance on the drawing so it is not left to guesswork during installation.
02
Size root space for the plants
Choose planting requirements before settling the planter depth or grouping. For each candidate plant, confirm its expected mature spread and root-space needs with a reliable horticultural reference or nursery professional. A small plant at purchase can outgrow a narrow box, while a shallow container may not suit a plant that needs greater rooting depth. Consider the whole planting: plants sharing a trough need compatible root space and care, and their mature foliage should not be used as a reason to crowd more plants into the same volume. Allow room to tend the growing medium without standing on neighbouring plants or leaning awkwardly across a corner.
Work from the planter’s usable internal volume, allowing for walls, liners and any fittings that take up space; the outside footprint is not the root volume. A wide shallow bed and a narrow deep box can occupy similar floor area yet suit different planting requirements. If you are considering Bloomcabin Bioclimatic Pergola, mark its area separately from the containers so the plan distinguishes space for planting from the pergola footprint. Size the container from documented requirements for the plants you select. If those requirements differ too much for one shared planter, consider separate containers rather than forcing incompatible needs into the same box.
Give excess water a clear route
Plan where excess water goes before filling a planter. Identify the outlet or drainage point, the route water will follow and what happens if an outlet is blocked or more water arrives than expected. Drainage holes alone do not show whether discharge will reach a suitable area, a drain or the walking surface. Draw the outlet and any collection or connection detail alongside paving levels and existing drains. Keep outlets visible enough to inspect and clear; avoid burying them behind another planter or placing them where soil can wash across a frequently used path. Note any overflow route as well as the usual discharge point.
Check the route at ground level as well as on paper. Water that pools by a doorway, runs across paving or collects beside a wall can create a maintenance problem even if the planter itself drains. Do not direct it towards pergola bases or adjoining surfaces without a confirmed design. If the arrangement is on an elevated deck, or the drainage route is uncertain, ask a qualified building or drainage professional to confirm the appropriate support and discharge details before installation. Do not assume an existing surface drain can accept a new outlet without checking whether its location and capacity suit the proposal.

03
Keep planters separate from the pergola frame
Keep the planter and pergola as separate elements unless the project designer has specifically approved a connection. A planter is not a substitute base for a post, and a pergola post is not a ready-made support for a container. Keep soil, rims and planter walls clear of the frame, post positions and access points; do not use a box to conceal a base that needs to be reached or inspected. This separation also makes it clearer which part should move if the planting arrangement changes. Confirm any required gaps and support details against the product drawing and site plan rather than improvising them on site.
A layout beside the house also needs to allow access to the wall and its fittings. Keep doors, windows, downpipes and wall surfaces accessible, with room for cleaning or future maintenance. Show these features on the drawing rather than treating the wall as an uninterrupted boundary for planting. A container pressed against the wall can make both the back of the planter and the wall difficult to reach. If you are considering Bloomcabin Wall-Mounted Pergola, use the drawing for the selected configuration to mark the connection area and clearances before locating a planter. Do not infer those positions from a product image.
Protect walking routes and seating space
Draw the route people will actually use, from the house to the garden, through the seating area and on to the rest of the outdoor space. A continuous path is more useful than a theoretically wide area interrupted by box corners. Check door swings, gate access, chair pull-back, the route around a table and the approach to each seat. If the pergola is part of a narrow passage, protect that through-route first and put planting to one side or at an end, rather than making people squeeze between two fixed edges. Consider how the space works when several people are using it, not only when it is empty.
Use the selected pergola’s actual plan dimensions when checking how much room remains. Bloomcabin’s regular pergola is listed in areas from 9 to 24 m², but area alone does not show the clear route after posts, furniture and planters are included. Mark chair and table outlines at their real sizes and show doors fully open. If you share the space, check whether someone can pass while another person is seated, and whether any pinch point falls between a doorway and the main seating area. There is no single clearance number for every layout, so test the route against the furniture and the people who will use it.
04
Plan watering and plant access
Plan irrigation around a route you can use, not a hose you expect to drag across the finished space. Mark the tap or water source, where a hose will run and where it can be stored when not in use. Avoid routing it across a doorway, the main walking line or an area where chairs are pulled out. If fixed irrigation is planned, leave access to its controls and connections, and keep the route visible enough to check. When arranging planters around the bioclimatic pergola option, show the water route alongside the pergola footprint and planter positions so you can see where they overlap.
Make sure each planter can be watered and tended without climbing over a wall or reaching across a crowded corner. Decide which sides are accessible and position the box accordingly; where access is from one side only, its width and the arrangement of the plants matter. Keep room to refill a watering can, adjust a hose, remove dead foliage and replace growing medium without blocking the route. Group plants with similar care needs where it suits the planting plan, but do not use convenient grouping as a reason to ignore each plant’s root-space requirements. Check that the watering method works from the finished path, not just from the empty site.
Leave room to clean and maintain the layout
Cleaning access is easiest to preserve on the drawing. Leaves, spilled growing medium and other garden debris can collect around planter bases and posts, so leave a gap that can actually be swept or reached with the tool you use. A slim line on a plan does not guarantee access: check the space between the box, post and boundary, and consider whether the edge can be reached from the opposite side. A clear route beside the planter also makes it easier to check the paving and remove debris without disturbing roots or dragging furniture across the planting. Plan this access before the containers are filled and difficult to shift.
Consider less frequent maintenance as well as regular sweeping. You may need to inspect outlets, prune growth, replace plants, refresh the growing medium or reach the back of the pergola. Avoid placing a fixed planter where it seals off a component or makes the paving beneath it impossible to access. Use the dimensions of the selected Bloomcabin Pergola model alongside the planter measurements to mark gaps for maintenance access on the project drawing. Check what can be reached through each gap and from which side. If a container cannot be moved easily, plan access from the start rather than assuming it can be shifted later.

05
Adapt the planter layout to the pergola type
Planting positions change with the pergola arrangement. With a freestanding structure, mark the full frame outline and each post position, then keep planters clear of those locations and the route needed to reach them. A wall-mounted arrangement instead needs the wall, openings and external fittings shown on the plan; test its footprint from the building outwards. Neither arrangement automatically leaves more planting room: the actual dimensions, access requirements and circulation determine what fits. Keep the selected pergola’s dimensions on each version of the plan, whether you are considering Bloomcabin’s bioclimatic pergola or another option, so you compare layouts on the same basis.
Try more than one planter pattern before settling on a perimeter. A continuous row can make the edge easy to read but may turn the pergola into a narrow corridor; two separate beds may preserve an open entrance and leave access to a post. An end planter can mark the boundary without taking up both sides, while an L-shape needs a careful check at its inside corner. Compare each version for root volume, access to the plants, path continuity and cleaning room, not just the amount of planting shown on plan. Where one approach is the main route, keep it clear.
Put dimensions and planting needs on one drawing
Before work is priced or installed, turn the sketch into a coordinated drawing. Show the pergola model and dimensions, exact post positions, planter outside and inside dimensions, and the locations of doors, furniture, paths and drains. Add the chosen plants, their documented mature size and root-space requirements, the intended growing-medium volume, irrigation route, discharge point and spaces kept clear for cleaning. Include paving levels and how water is intended to leave each planter. Showing both planted and intentionally empty areas makes the plan easier to assess. If the selected model changes, update the positions rather than relying on a sketch based on a different footprint.
Ask the pergola supplier or designer for a dimensioned drawing of the exact option under consideration, and ask a planting designer or nursery professional to document root and spacing needs. If you select the wall-mounted pergola option, show the relevant wall and openings alongside its dimensions; for a freestanding design, show the post positions and surrounding access. For drainage or structural questions that the landscape plan cannot resolve, seek advice from a qualified building or drainage professional. Keep the pergola and planting information together so any changes can be assessed against the same layout. This gives each specialist a specific question rather than a general request to make everything fit.
Frequently asked questions
How much space should I leave between a planter and a pergola post?
There is no universal gap. Leave enough room to reach the post and nearby paving for cleaning and inspection, while keeping the planter clear of the planned post position. Check the selected pergola’s drawings and confirm any product-specific clearances before fixing the planter location.
How do I choose the right planter depth?
Choose plants first, then check their root-space requirements and mature size with a reliable horticultural reference or nursery professional. Use the planter’s internal dimensions, not its outside measurements, to judge whether it provides suitable depth and volume.
Are drainage holes enough for a raised planter?
Holes provide an outlet, but you still need to know where excess water will go. Plan the discharge route, keep outlets accessible and avoid directing water across a path or towards a doorway, wall or pergola base without confirming the design.
Can I place a planter against a house wall?
Only if the position leaves suitable access to the wall, doors, drainage and any external fittings that need to be reached. A planter that is hard to move can make cleaning and future maintenance difficult, so show the wall and access gaps on the plan.
Can raised planters go around all four sides of a pergola?
Possibly, but a continuous border may reduce circulation and make plants or posts harder to reach. Compare a four-sided arrangement with layouts that leave one side or an end open. Check the walking routes, furniture positions, root volume and cleaning access in each version before deciding how much of the perimeter to plant.
A successful combination is not simply a pergola with greenery around it. It is a measured arrangement in which the frame has its own clear footprint, plants have documented root space, and every container has a workable route for water, tending and cleaning. Draw the furniture and circulation as carefully as the planting, then confirm site-specific dimensions and drainage before positions are fixed. The empty areas on the plan are part of the design: they are what let the garden remain usable after everything is in place.
