
Relocating an Aluminium Pergola: Dismantling and Reinstallation
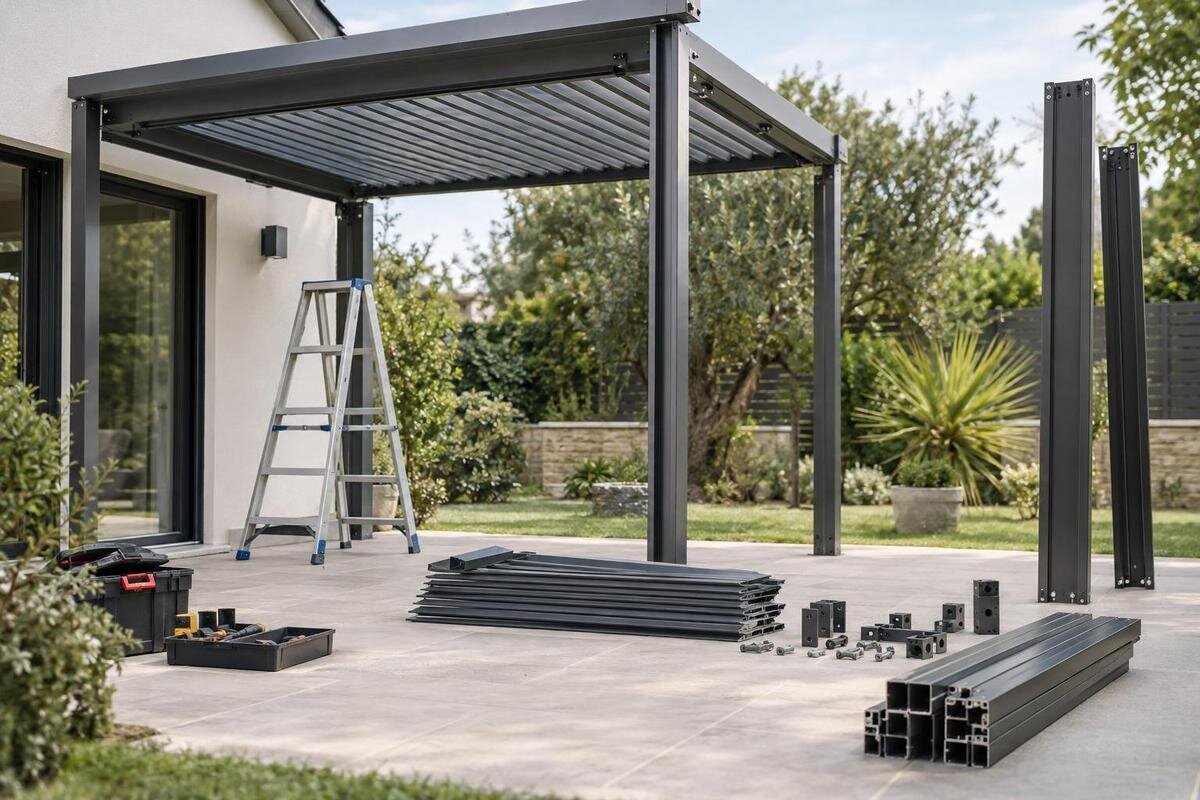
Pergola relocation
Relocating an aluminium pergola may be feasible, but the answer depends on the exact model, its condition and the support available at the new site. Dismantling is only one part of the job: old fixings may not suit a different base, and components that look alike may not be interchangeable. Start with the original manual and an inventory, then arrange a new-site assessment before anything is removed. If the pergola has powered elements or a wall connection, include the relevant qualified trades in the plan.

01
Can an aluminium pergola be dismantled and reinstalled?
Yes, an aluminium pergola can sometimes be dismantled and installed at another address, but it depends on the exact system and the condition of its connections. Some frames are assembled from parts intended to be separated; others may be difficult to dismantle without harming a joint, finish, seal or attached component. Moving a complete assembled frame is a different operation from taking it apart, and it is not automatically the safer or simpler choice. Aluminium by itself does not show whether a particular structure can tolerate a second assembly. Connections may have seized, and previous repairs or alterations can change the method described in the original manual.
Before arranging removal, decide whether you want to reuse the whole structure, keep selected components or replace it. Full reuse needs a documented dismantling method, serviceable parts and a confirmed way to install the frame at the destination; partial reuse still depends on exact component compatibility. A Bloomcabin Pergola product listing can be considered when comparing a separate replacement, but its name does not identify an older pergola or confirm that parts will fit. Treat the existing structure and any new purchase as separate until a supplier confirms compatibility. Write down what must be established before setting a removal date, including who will assess the new site and source replacement parts.
Identify the exact model and collect its records
Start by identifying the exact pergola rather than relying on a broad description such as ‘aluminium pergola’. Gather the product name, model or serial details, order records, installation date if known, and the original manual, assembly drawings and parts list. Keep records of changes made since installation, including replaced posts, roof sections, controls or non-original fixings. These details let an installer compare the actual structure with its documented configuration. If a label is hard to reach, photograph what is visible; do not remove a component just to uncover it. Record who installed or modified the pergola if you know, as that person may have useful notes.
Compare the paperwork with what is on site: note the overall shape, number and position of bays, wall connections, extensions and fitted accessories. Photograph the whole pergola and close-ups of each type of joint, base, wall attachment and part label. Send the images with the model details to the supplier or manufacturer and ask whether the manual applies to this exact version, which parts are intended to come apart, and whether any fixings should be replaced. Ask about parts support and restrictions on reuse before agreeing to a removal date. A similar model or size can use different components, so visual resemblance is not a compatibility check. If the manual is missing, ask for the correct version rather than relying on an online document for a lookalike.
02
Assess which components can be reused
A component audit should include the frame, not just its outer finish. Before dismantling, note visible bending or twisting, cracked or crushed ends, damaged holes, loose joints, corrosion around connections and evidence of drilling or other alteration. Pay particular attention to places where members meet or attach to the base, since alignment and connection condition matter at reassembly. A scratch or patchy coating alone does not prove a part is unusable, while an attractive surface does not establish that a joint is sound. Have a suitable installer assess anything distorted, loose or uncertain; do not try to straighten or reshape a member so it can be reused. Note whether damage appears limited to one part or affects several connections.
Inventory other components separately: roof panels or slats, seals, drainage pieces, end caps, brackets, screens, controls and accessories, where fitted. Record quantities, location and condition, and check whether the exact manual identifies them as removable or replaceable parts. If you are also considering replacement, keep information from the Bloomcabin Bioclimatic Pergola listing separate from the inventory of your existing structure. Match replacement components by exact model and part information rather than appearance. Photograph each item and flag uncertain, missing or damaged pieces for the supplier to review. This gives you a clearer picture of what can be retained and what needs replacing before packing begins.
Plan dismantling and service disconnections
Removal should follow instructions for the exact model and any later modifications, not an improvised reverse of the original build. The installer should plan how components will be supported before a connection is released, which parts come off in sequence and where removed items can be placed without damage. Keep people clear of the work area, and do not stand or climb on the frame to reach a joint. If a fastener will not release or a part starts to bind, forcing it can damage the connection or make reassembly harder. Stop and have the method checked rather than applying more force. Agree in advance who is responsible for access equipment, removal and safe storage.
Check for moving or powered elements before work starts. If the pergola has a motor, lighting, sensors, a control unit or other electrical equipment, arrange disconnection and reconnection through a suitably qualified electrician or service professional. The original assembly manual is not necessarily wiring or isolation guidance, so use the relevant model documentation and applicable trade requirements. Include any fitted screens, gutters or connected accessories in the removal plan, and state who is responsible for each. Photograph visible product labels for identification without opening equipment or disconnecting wiring yourself. A quote should make clear whether electrical or service work is included, rather than pricing a frame-only move as a complete job.

03
Review fixings separately from the frame
Assess old fixings separately from the frame. Depending on the installation, the pergola may have removable bolts or brackets, anchors set into a slab, or a connection to a wall or deck. A fixing that comes out intact may still be unsuitable at the destination, and an embedded anchor may remain in the old base. Record the type and location of visible fixings, then ask the installer to assess them. If the structure is wall-mounted, document both the frame-side bracket and the wall connection. If comparing replacement options such as the Bloomcabin Wall-Mounted Pergola, include the proposed wall connection in the assessment rather than assuming the existing fasteners can be retained.
The receiving surface is another question: its material, condition, level and fixing pattern may differ from the former site. Do not assume old holes will line up, that paving or decking can take the same attachment, or that a generic bolt of similar size is acceptable. Use only replacement fixings confirmed for the exact pergola and approved by the responsible professional. Ask how abandoned holes or projecting anchors will be handled at the old location, and whether the new base needs separate preparation. The relocation scope should say whether work on the old surface is included. Avoid cutting, filling or altering structural elements without advice from the installer responsible for the work.
Survey the new site before the move
Survey the proposed layout from the pergola’s actual drawing and measurements, not a guess based on the old installation. Record the footprint, post positions, clearance for doors and windows, eaves, fences and branches, plus overhead services and the route for people and equipment. Consider where water will drain, surface falls and nearby drains; note sun exposure and likely changes such as future planting. The Bloomcabin Pergola range listed from 9 to 24 m² gives an area reference for that product only. An area figure does not give the older unit’s exact dimensions, post centres or required clearances, so confirm these from the specific drawing.
Check the destination before dismantling the existing pergola. Confirm there is a place to store components, an unobstructed route to the final position and an appropriate base or support for the proposed design. Pavers, a concrete slab, a deck and garden soil are not interchangeable assumptions; the site needs assessment for the actual fixing method. Measure access through gates and around corners as well as the final footprint, since a delivery route can affect how components are moved. Locate services before any ground work and consider drainage or electrical access where relevant. Paperwork from the old site does not describe a different one. Ask the local council or a qualified building professional which approvals or site checks may apply, rather than relying on a previous approval or a neighbour’s structure.
04
Match the mounting arrangement to the new support
The mounting arrangement needs a fresh review even if the frame itself is unchanged. A freestanding pergola and one connected to a wall have different support details; a wall-mounted design depends on both the frame connection and the condition and construction of that wall. The assessment needs to account for the wall's construction, not just its visible finish, when determining whether the specified connection is suitable. If the move changes from wall-mounted to freestanding, or the reverse, do not assume the same members and brackets can simply be rearranged. Ask for the proposed layout to be compared against the exact product drawings and the actual support at the new site.
An installer or appropriately qualified building professional should confirm that the destination can accept the intended arrangement and that any changed layout is covered by the manufacturer’s instructions. Where a site-specific design assessment is needed, leave it to the relevant professional rather than deriving fixing sizes or loads from a brochure. If you are weighing relocation against a new Bloomcabin Bioclimatic Pergola, compare each option’s proposed support arrangement with the destination. Keep the existing frame’s assessment separate from the new product enquiry, particularly where either option would connect to the building. That distinction helps keep the installation scope clear.
Protect and track parts in transit
Plan packing and transport as part of disassembly, not as an afterthought. Label each member by position and orientation using the manual or a clear sketch, photograph the layout and bag fixings by location. Protect finished surfaces and edges from rubbing or impact, and separate parts so similar-looking sections are not mixed. Agree where components will be stored and how long they may be there; keep the plan consistent with the product instructions and the moving contractor’s advice. Confirm handling arrangements for long or awkward sections before removal day instead of deciding on the spot. Use removable labels or inventory tags rather than marking visible surfaces. Good records also make it easier to report damage during transport and to tell whether a piece is missing.
At loading and arrival, check the parts against the inventory and record missing, damaged or unidentifiable items before reinstallation begins. This helps avoid substituting a screw, seal or bracket simply because it looks close. For a parts enquiry, provide the exact model details, part label, manual reference and clear photos. A current product page, such as the Bloomcabin Wall-Mounted Pergola listing, cannot establish a match with an older system. Keep original parts until compatibility is confirmed, and update the inventory when replacements arrive so the installer can distinguish them from the items removed at the old site.

05
Reinstallation checks and handover records
Reinstallation is not automatically the reverse of dismantling. The new site may require a different support arrangement, replacement parts or adjustments allowed by the exact manual. The installer should work from documents for the identified model, check the inventory and confirm that the base, brackets and joints match the specified configuration before proceeding. At handover, ask for the assembly to be checked for secure connections, alignment, the normal movement of any moving parts, clearances and intended drainage. Request a record of parts replaced and any restrictions or follow-up work. A neat-looking finish is not, by itself, evidence that the system has been reassembled correctly. If the model-specific method cannot be confirmed, pause before accepting the job as complete.
If electrical equipment was removed, the qualified trade responsible for that work should reconnect and check it. Ask the supplier or manufacturer how relocation affects product support, warranty terms and future parts enquiries, and keep the response with the handover records. If relocation cannot proceed and you choose a replacement through the Bloomcabin Bioclimatic Pergola product page, retain its documentation separately from the old pergola’s records. Keep model details, installation records, photographs and receipts together for later service requests, including a clear record of which components were reused or replaced.
Compare relocation with replacement
Compare the whole relocation project with replacement, not transport alone against a catalogue price. Request separate scopes for removal, packing, transport, storage, replacement parts, new-site preparation, reinstallation, electrical work and any professional assessment or approval checks. Clarify exclusions: a dismantling quote may not include lifting, disposal, work on old anchors, base changes or reconnection of accessories. If the new layout needs another support arrangement, the scope may expand. Written, itemised estimates make the options easier to compare, especially when one quote assumes parts will be reused and another includes replacements. Set a decision point after the component audit and site survey, before committing to transport or storage costs.
Relocation is more promising when the exact model is known, reusable components are confirmed, instructions are available and the destination can accommodate the original design. A distorted frame, missing essential pieces or an uncertain configuration can leave the scope and cost unresolved. Use the component audit and site survey to identify those uncertainties before choosing between the two options. For a replacement comparison, assess the Bloomcabin Pergola option for a new installation against its own published specifications and the proposed site. Compare complete installation scopes, rather than treating a new product price as directly equivalent to the cost of moving the existing pergola.
Frequently asked questions
Can any aluminium pergola be moved?
No. It depends on the product’s connection method, condition, previous modifications and whether its parts can be separated and reused. Check the manual for the exact model and have uncertain components assessed before arranging removal.
Can I reuse the original bolts and anchors?
Not automatically. They may be damaged during removal, intended for the original base or unsuitable for the new site. Ask the installer and supplier to confirm which fixings can be reused and what replacements are specified.
Do I need the original installer to dismantle it?
Not necessarily, but whoever does the work needs the exact model information, instructions and a clear understanding of any modifications. The original installer may have useful records; otherwise, ask the supplier to help identify the correct documentation.
Can I move the pergola without taking it apart?
That depends on the design, access and handling method. Do not assume moving the assembled frame is simpler or safer. Check the product instructions and have a suitable installer confirm the approach before arranging lifting or transport.
Could relocating the pergola affect its warranty?
It may depend on the product’s written terms and the work carried out. Ask the supplier or manufacturer before removal, and keep the response, installation records and details of any replacement parts with the pergola documents.
A successful move depends on more than getting the frame to a new address. Identify the exact pergola, confirm which components and fixings can be reused, and assess the destination before removal begins. When those checks leave major unknowns, pause and resolve them with the supplier and installer. That gives you a sound basis for choosing between reinstallation and a separately planned replacement.
