
Pergolas for Sports Clubs and Spectator Areas
Sports club planning
A pergola beside a sports ground may serve spectators, players, officials and everyday club users, but those groups do not occupy space in the same way. A useful brief starts with the club’s real pattern of use: where people watch, which routes must stay clear, how team activity moves through the site, and who manages the shared area. Map those activities on an actual plan and walk the site before selecting a footprint or model. A layout that looks spacious when empty may interrupt a key view, conflict with a team route or leave too little room for people to pass during a fixture.

Club planning checks 1
Put the club’s actual activities in the brief
Begin with the club’s activities rather than a preferred roof form. List the uses the area needs to support: watching competition, waiting between games, team or officials’ briefings, volunteer duties and ordinary club gatherings. Record which activities happen together, which need separation and which are only occasional. Identify the intended users at each time, including people passing through who are not spectators. A small viewing area for a few seated people creates a different planning problem from a shared space used by changing groups, even when both sit beside the same field. This first list helps distinguish essential functions from attractive extras and gives the committee a basis for resolving competing requests.
Walk the site with the people who run those activities: the facility owner or manager, grounds staff, committee representatives, team contacts and event volunteers. Ask where congestion already occurs, what equipment is carried through, when the area must stay available, and who can approve changes. Mark the answers on an existing site plan, then add a simple schedule for training, fixtures and quieter periods. Be clear about responsibilities that sit with another organisation, such as control of nearby paths or gates. A documented pattern of use gives a designer more to work with than a broad request for ‘more shelter’ and helps prevent the brief from overlooking how the club operates.
Map spectator sightlines before fixing the footprint
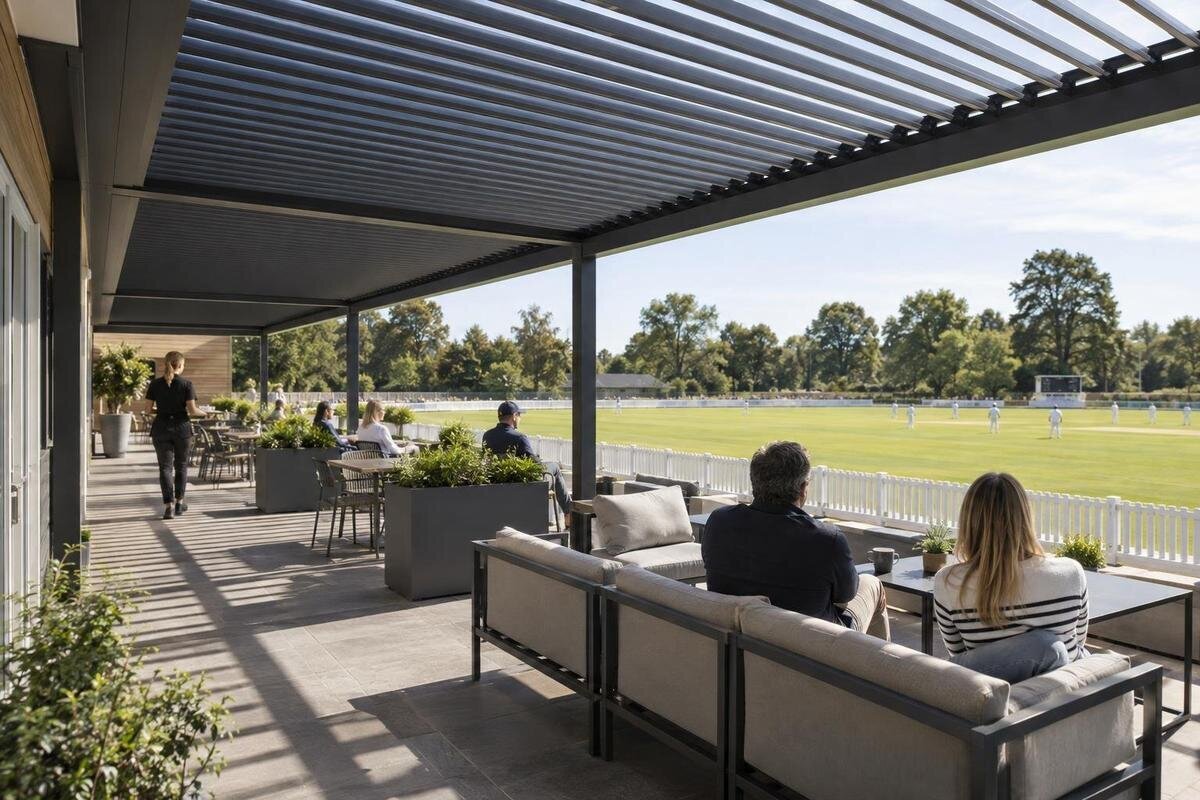
Map what spectators need to see before choosing the footprint. On a site plan, mark the playing area, scoring ends where relevant, scoreboard, officials’ positions and the viewing points people actually use. Walk those points during a fixture if possible; test seated and standing views from the front, rear and edges of the proposed zone. A sightline that works for one position may be blocked for another by people, a post, a fence or existing equipment. Note which views are essential and which are preferences, rather than promising that every place will offer an identical outlook. Record the obstructions that already exist, too.
Then place the proposed frame, roof edge and any screens on the drawing, and compare them with the view corridors. Check sightlines from accessible viewing positions as well as the main spectator cluster; include an operator’s view of gates or the field if that matters to the club. For a catalogue reference, the Bloomcabin Pergola listing states an area range from 9 to 24 m², but that figure does not show where supports sit or whether key views remain clear. Request a project layout for the selected configuration and check it against the actual site before committing; a product image is not a substitute for this comparison.
Club planning checks 2
Separate team movements from spectator activity
Spectators, players, coaches, officials and grounds staff may all need to cross the edge of the field, but their movements have different priorities. Draw each regular team route from its current access point to the playing area, showing where people carry equipment, wait, gather or leave after a match. Mark staff-only, service or field-maintenance spaces separately, using the club’s actual arrangement rather than an assumed standard layout. If the proposed viewing area sits beside a team route, note whether both uses overlap at the same time. This tells the designer where a clear line of travel, a managed crossing or separation needs further consideration.
At the busiest changeover, check where players and spectators meet: perhaps near a gate, a bench, a path to amenities or a shared clubroom door. Write down what happens if someone stops to talk, a group waits, or an official needs to pass with equipment. Do not treat a route as clear simply because it is visible on paper; compare it with actual activity and movable items used on match day. If separation depends on staff direction, nominate who is responsible and whether the arrangement still works during ordinary training, when fewer people may be present and supervision can be different.
Keep pedestrian routes clear on busy days
Draw routes from the arrival points, entrances, amenities and playing areas that serve this particular site. Show spectators arriving, moving to a viewing position, leaving during play and departing at the end; include staff, prams, mobility devices and equipment trolleys where they are part of normal use. Mark doors, gates and path junctions so it is clear where opposing flows meet. The purpose is not to claim a capacity from a sketch, but to reveal conflicts early: a queue that hides a sign, a group that narrows a through-route, or a doorway that opens into a waiting area. Note the location of existing signs and access controls, too.
Use the busiest fixture period as a stress test, then check a quieter training day so routes are not designed only for peaks. Keep the distinction between spectator space and through-movement visible in the plan, and identify places where loose chairs, bins or temporary displays could encroach on circulation. If comparing the wall-mounted pergola option, show its proposed position on the same plan as nearby doorways and paths. Have route clearances, turning space and any applicable access or fire issues reviewed against the site and local requirements by qualified professionals. Assign someone to return temporary items to their designated positions if they obstruct a route.

Club planning checks 3
Specify shade, rain and wind requirements
Outdoor conditions change across a fixture and through the year. Note when the viewing zone is used, where direct sun or glare falls at those times, and whether rain or wind alters how people occupy it. Observe the site at relevant times where practical; a single midday visit may not represent an early start or evening game. Record which outcomes matter most, such as shade in a particular viewing area, a clear view of play or a place for people to wait, and distinguish those goals from weather protection that the club has not established. Check how neighbouring buildings or trees affect those conditions without assuming they will stay unchanged.
Describe cover and drainage needs as project requirements to verify: which areas should be covered, what happens at the edges, and where water must go without affecting paths or playing surfaces. A pergola label is not proof of all-weather shelter or a particular wind capability. If comparing Bloomcabin Bioclimatic Pergola, check the documentation for the exact configuration and ask what operating conditions, drainage details and limitations apply. Have site exposure and structural questions assessed by a suitably qualified professional; do not rely on a product name or an illustrative photograph. Include any plan for bad-weather closures separately from the pergola brief.
Plan for everyday use as well as fixtures
Fixture day is only one pattern of use. A club may also use the area for training breaks, junior presentations, committee meetings or casual waiting, but include only activities it actually plans to host. Note the likely furniture, temporary equipment, storage and staff tasks for each pattern. A layout that is easy to use when empty can become cluttered once chairs, drink containers or kit are brought in. Decide whether furniture stays in place or is set out for particular sessions, and mark its storage location so it does not spill into a route, reduce a viewing position or obstruct a doorway. Record which items are club-owned and who moves them.
Compare the everyday arrangement with the busiest fixture layout by overlaying both on the same drawing. Show where spectators sit or stand, how people enter and leave, and what must be moved between uses. If evaluating Bloomcabin’s regular pergola option, request the selected configuration’s footprint and include it in both layouts so the committee can compare furniture positions and routes around the structure. Decide which arrangement is the baseline, who resets it and where moved items will go. Record any time constraints between uses, particularly when one group arrives before another has finished packing up. Otherwise, a space described as flexible may be difficult for volunteers to manage in practice.
Club planning checks 4
Include accessible viewing and circulation
Plan access as a continuous journey, not an isolated viewing position under cover. Trace the route from arrival points and club amenities to the spectator area, including gates, surface changes, turns and places where people wait. Identify how someone using a mobility device can reach a viewing position, keep a clear view and remain with companions, and how that route stays open when the area is busy. Ask people who use the facility, including club members or visitors with disability, to review the sketch. An on-site walk can reveal uneven surfaces, temporary obstacles or sightline problems that a plan alone may miss.
List the access outcomes for a qualified access professional to assess against the actual site and applicable requirements. For any option under consideration, including Bloomcabin Wall-Mounted Pergola, have the reviewer assess the proposed siting rather than the product in isolation. Include space for companions and mobility devices, clear sightlines and a safe approach, as well as temporary arrangements for busy fixtures. Record any changes needed to the surrounding area alongside the pergola layout. If changes to paths or gates are outside the club’s control, identify who can authorise them before the club commits to a layout.
Check the site before selecting a structure
Take the plan beyond the visible playing surface. Record boundaries, existing buildings, paved areas, drainage paths, service locations known to the club, trees or other overhead constraints, and nearby structures that may affect the proposed position. Do not assume that a wall, slab or hardstanding is suitable to support a pergola; the site condition and proposed connection need project-specific assessment. Have the supplier and relevant qualified building or engineering professionals check suitability, foundations or attachment requirements and effects on the existing facility. The club should also identify who owns the ground or building and who is authorised to approve work there.
Compare product categories only after these site constraints are visible. Include the bioclimatic pergola listing in the comparison if it is an option the club wants to explore, then obtain the full specification for the exact product and configuration. Have the project team assess its dimensions, materials and structural capacity against the site plan, exposure, drainage and operational brief. If the arrangement relies on a connection to an existing building, verify that connection separately rather than inferring suitability from the product name. Keep assumed conditions and exclusions in writing so they are not mistaken for confirmed project details, and identify who will resolve each outstanding site question.

Club planning checks 5
Assign responsibility for operation and maintenance
Shared areas need named owners for decisions as well as daily tasks. Agree who can open or close the area, set out furniture, supervise use, report damage, arrange cleaning and decide when a problem means it should not be used. Include the facility owner, grounds team and event organiser where their roles differ; a club may not control every part of a site. Write down who handles routine inspections and who contacts the installer or supplier when a fault arises. Clarify how a handover works between training, a fixture and any other use, so responsibility does not disappear when one group leaves.
Ask for the selected product’s operation, cleaning and maintenance instructions before approval, and make sure the people assigned those tasks can follow them. When reviewing Bloomcabin’s bioclimatic pergola listing, request instructions for the exact configuration covered by the quotation, including its controls, upkeep and checks. Agree where records are kept and how temporary furniture or event equipment is stored. Do not assume a supplier’s scope includes ongoing care, staff training or inspection; list each responsibility explicitly in the project documents and confirm it with the relevant provider. Revisit the arrangement after use begins, recording operational issues for the club’s manager.
Prepare a project brief that providers can assess
Turn the brief into comparable project information. Send each prospective provider the same measured plan, photos of relevant approaches, activity schedule, sightline priorities, route constraints and list of shared responsibilities. Ask them to show the proposed footprint and supports, how the structure relates to the field and routes, assumptions they have made, and exclusions. Request specifications and evidence for the performance requirements the club has set, rather than relying on broad terms such as ‘commercial’ or ‘all-weather’. Record what is not included, such as surrounding works or changes to paths, so proposals can be compared on scope rather than headline wording. Note who coordinates external reviews and approvals.
Before ordering, coordinate the design with the facility owner and the professionals responsible for access, fire, planning and site suitability, as applicable to the project. If the regular Bloomcabin Pergola is included in a proposal, identify the exact product configuration in the final brief alongside the installation scope, documentation and maintenance arrangements agreed with the supplier. Retain a final plan the club can use to manage the shared area, including the viewing positions and routes that must remain clear. For a project enquiry, provide the actual site requirements and ask which aspects still need verification, rather than treating a model name as a finished specification.
Frequently asked questions
How can we check whether a pergola will block spectators’ views?
Show the proposed posts, roof edge and any screens on a plan, then compare them with views from representative seated and standing positions. Walk the same locations on site and identify the views that matter most. Ask for a project drawing of the selected configuration; a catalogue image cannot confirm clear sightlines.
Should a club plan only for match day?
Plan for everyday use as well as the busiest fixture periods. Record where furniture, queues, team movements and through-routes differ. A layout designed only for a peak may be awkward to manage on ordinary days, while a quiet-day arrangement may not leave enough room when people arrive together.
Does a pergola automatically provide weather protection?
No. The weather performance depends on the specified product and configuration; a name or image does not establish full rain or wind protection. Set out the club’s shelter requirements and ask for verified information about the exact option, including relevant limitations and how water is managed.
Can we use a product’s listed area to decide where it fits?
Not on its own. An area range does not show support positions, route clearances or the usable space around furniture. Request the details for the exact configuration and compare its footprint with a measured plan, then have site and installation suitability confirmed for the project.
Who should confirm access and site suitability?
The facility owner should coordinate reviews with qualified professionals who can assess applicable access, fire, planning and site issues for the actual project. Involve facility managers and people who rely on accessible routes, too. A product listing alone cannot confirm compliance or suitability.
Once the club has mapped viewing positions, team movements, routes and responsibilities, the pergola can be assessed as part of a working sports site rather than as an isolated structure. A useful brief distinguishes everyday use from fixture peaks, makes priorities visible on a real plan and assigns responsibility for ongoing operation. Product information then has a clear purpose: to confirm whether a specified option can meet those project requirements, subject to site and professional review. Keeping sightlines, access and shared use central makes the decision more grounded in how the club actually operates.
