
Designing Pergola Dining for Easier Access
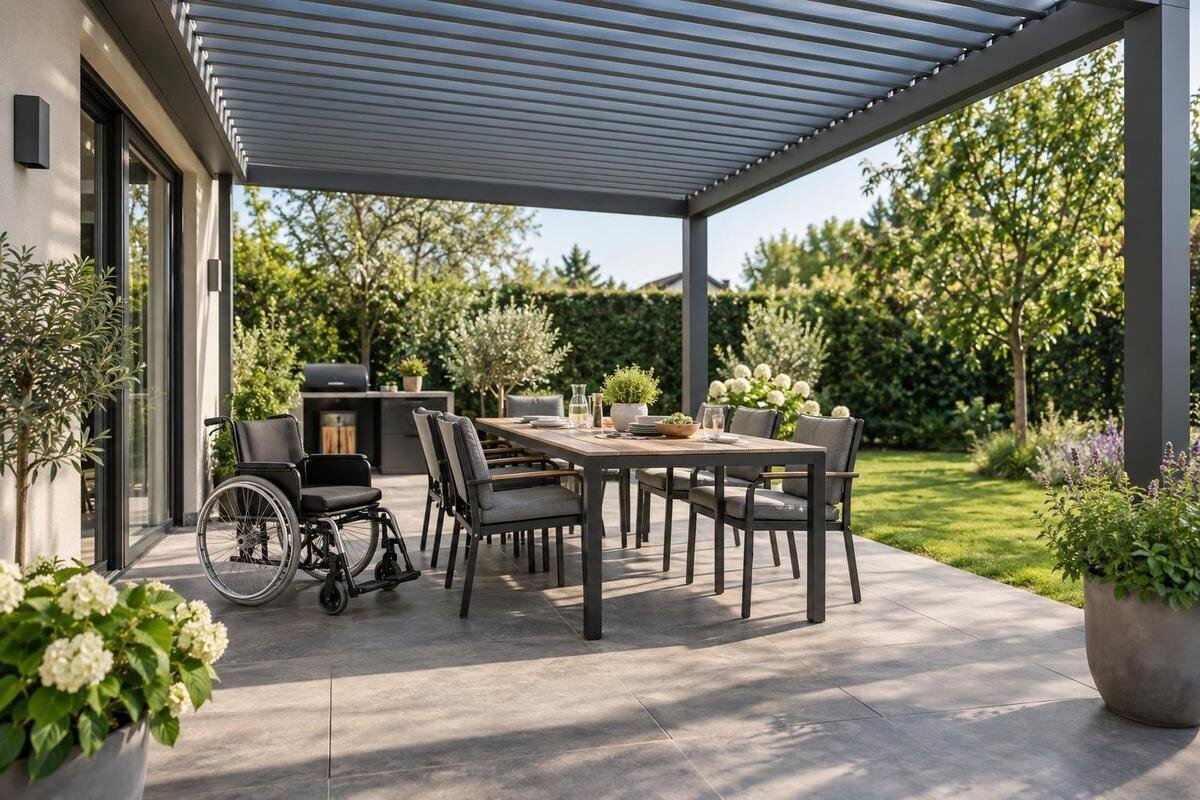
Pergola dining
Outdoor dining is easier when the whole trip works: leaving the house or garden path, reaching the table, moving into a seat and leaving again without negotiating furniture or a step. Plan the route and occupied dining area together, rather than choosing a pergola footprint first and trying to squeeze access around it later. Use measurements from the actual table, chairs and mobility equipment, and ask the people who will use the space what feels workable. This guide covers practical layout choices; it is not a claim that a particular design meets an accessibility standard.

Map the whole route to the table
Begin at the door people will actually use and trace the whole route to the table, not just the patch of ground beneath the pergola. Include doorways, gates, corners, changes in paving and the final approach to each intended seat. A direct line on a plan may still feel cramped if an open door takes up part of the landing, a turn follows immediately, or the route ends at dining chairs. Draw the route at scale and mark fixed elements as well as furniture. Note the narrowest points rather than describing the path by its average width. This makes pinch points visible before you settle the pergola position, pave a path or order a dining set. Include the return journey, not only arrival.
Ask the people who will use the space how they arrive and what usually comes with them: mobility equipment, a tray, a walking frame, or another person alongside. Their route may differ from the one a designer imagines, and carrying food can change how a turn feels. Check both directions, including leaving the table after others have moved their chairs. Avoid relying on a pot or spare seat being shifted each time; a route that only works after furniture is rearranged becomes an extra task during a meal. If dining is planned beside the house, include Bloomcabin Wall-Mounted Pergola in the measured drawing as one option, rather than assuming a catalogue image shows a workable route.
Plan step-free access and a continuous surface
Mark every change in level between indoor access, the terrace and the garden path. A small sill, uneven join, raised threshold or loose mat can interrupt a route that appears step-free on a broad site plan. Note gates and doors as well: their open position uses space, and a latch or handle may be difficult to reach from the approach. A continuous transition must work for the people using it, not just look flat on a drawing. If existing levels or thresholds need altering, discuss the design with a suitably qualified local building or access professional rather than guessing at a fix. Check that proposed changes do not create a new pinch point at the doorway or obstruct drainage.
Show the surface along the full route, not only beneath the table. A firm, even surface is generally easier to negotiate than loose stones or material that shifts under wheels; gaps, abrupt edges and garden borders also deserve attention. Think about what happens after rain or when leaves, hoses and outdoor mats appear. Include surface changes and drainage in the review of the step-free connection, so the transition remains usable from the entry to the table.
Give wheelchair users a practical table approach
Choose the table position by testing a real approach, not by centring it beneath the pergola. Identify one or more sides from which a wheelchair user can come alongside, then check that the approach is not boxed in by a wall, post, planter or another diner. The person using a wheelchair should be able to sit with the group rather than being assigned a separate end by default. If more than one diner has a mobility requirement, the table may need several usable positions. Include the serving side too: reaching the table and staying part of the meal are different questions. Ask diners what arrangement they prefer, and mark where shared dishes or drinks will sit. Check the approach while companions occupy their usual seats, since an empty-table arrangement can be misleading.
A tabletop's overall height does not show whether someone can move close enough. Check the underside, apron, legs and base against the actual chair or wheelchair, including footplates and armrests. Leave room for knees and feet without a front leg blocking the position you intend to use. Test the table with the usual dining chairs in place, not as an empty outline. If you are comparing pergola options, put Bloomcabin Pergola into the same draft drawing as the table and occupied seating; a listed floor area is not a measure of clear access around furniture. Include other diners' pulled-out chairs and any table leaves used for larger gatherings. Measure the furniture you own rather than relying on a general outline.
Allow room to turn and pass
Turning space is different from a straight path. Mark the points where a wheelchair user may need to change direction: beyond the doorway, before reaching a seat, or when leaving the table. Consider each turn with doors, chairs and the dining group in their usual positions. An empty patch on a plan can disappear when a chair is pulled out or someone stands to serve. Rather than relying on a universal turning measurement, test the layout with the actual mobility device and the user's preferred manoeuvre. Do not count the same patch of floor twice as both turning room and a place for a serving trolley.
Consider passing as well as turning. A route may need to accommodate someone walking alongside a wheelchair, a host carrying dishes, or another person moving in the opposite direction. Aim to avoid forcing anyone to reverse towards the table, a post or a garden edge just to let another person through. The open area inside a pergola is not automatically free circulation space once supports, chairs and serving movements are included. When comparing configurations, plot Bloomcabin Bioclimatic Pergola as a model option on the same site plan, then assess the actual clear route against that layout rather than its name. Check whether someone can wait out of the way while another person passes.

Keep supports and table bases clear of movement
Posts, walls and edges of the paved area can create narrow points even when the overall footprint looks generous. Mark the location of each support shown for the selected pergola configuration, then draw the route around it. Keep the table approach and turning area clear of posts instead of treating them as harmless boundaries. Check the route at every pinch point, including where the entrance meets the structure and where someone pulls a chair back. The plan should distinguish the total covered area from the part that remains usable for movement. If support positions are not yet confirmed, mark them as provisional rather than presenting the sketch as a finished layout. A fixed support cannot be moved aside when the table is in use.
Table bases also matter. A central pedestal may clear the perimeter but still conflict with footplates; legs near the corners may obstruct an approach from a particular side. Neither form is automatically better. Compare the base with the position people will use and include intended seating, not just a rectangle for the tabletop. If the wall-mounted option is among your choices, confirm its documented dimensions and support arrangement before settling the dining position; do not infer clear floor space from the product name or image. Draw the actual house frontage too, since doors and other features can affect where the table and route fit.
Plan seating around real chair movement
Seats take up more room in use than their parked footprint suggests. Draw chairs pulled out for someone to sit down and stand up, and make sure this movement does not cut across the main route. A fixed bench may suit one side of a table but make a flexible approach harder; separate chairs are easier to move, yet they still need a place to go between meals. Match the choice to the people using it, including whether armrests, seat height or back support affect comfort and independence. If someone brings a mobility aid close to the table, leave an agreed space for it without blocking another seat. Check the arrangement with the number of diners you usually host.
Leave a clear place for a chair that has been moved temporarily, rather than letting it land in a doorway or turning area. Ask whether the wheelchair user prefers to remain in their chair at the table, transfer to a dining chair, or have the option of either; don't assume one arrangement. Then measure the chosen set-up and keep any unused seats out of the route. If the regular Bloomcabin pergola is on your shortlist, show both occupied seating and a chair pulled back on your draft layout so the covered area isn't mistaken for extra circulation. The people dining there should be able to adjust the arrangement without losing the clear path.
Fit the dining layout within the pergola footprint
Use the pergola's confirmed configuration as the frame for the plan, then fit dining and access inside it. A headline area figure describes area, not where supports sit or how much room remains once doors, chairs and a clear route are included. The listed area range for Bloomcabin's wall-mounted pergola is 9 to 24 m²; treat that as an area range only and confirm the selected configuration's actual dimensions before placing furniture. Apply the same caution to any alternative model: similar area totals can still leave different routes on a particular site. Keep confirmed measurements distinct from estimates while comparing layouts.
Draw the existing terrace and intended dining set at the same scale. Include chair pull-back space, a wheelchair approach, turning and a clear link to the house or garden path. If one feature cannot fit without narrowing another, try changing the table's orientation or location on the drawing before assuming a larger pergola alone will solve it; surrounding paving and paths remain part of the route. A concept sketch is useful for comparing ideas, but label it as a concept until the selected model configuration and site conditions have been checked.
Keep everyday items out of the route
Plan where meals and everyday outdoor items will go, so access does not depend on a perfectly empty terrace. A serving trolley, pot plant, barbecue tools, folded umbrella, cushions or rubbish bin can drift into the easiest route if there is no agreed place for it. Identify a landing point for dishes and storage that does not require carrying items across the turning area. Keep the table route separate from a routine path to a barbecue, clothesline or garden tap if those uses happen at the same time. Consider who will put things away after dining, since an access route that clears only when a particular person tidies up is not dependable.
Test the arrangement at a busy meal, not only when the area is empty. Ask one person to sit down while another carries a plate past; check where coats, bags, walking aids and spare chairs go. If Bloomcabin's regular pergola is a model you are comparing, show these everyday items on the same layout as the table instead of counting all the floor area as circulation. The aim is not to leave the space bare, but to keep a clear route through a dining area in everyday use. Also consider whether a guest can reach their seat without asking someone to move an obstruction.

Check visibility and changing conditions
Access needs to remain clear as light and weather change. Look at the route from the entrance in the morning, at mealtimes and after dusk: shadows, glare or a dark step can make edges harder to read for some people. Ask household members what helps them see the path, level changes and table edge. Mark lighting locations on the plan, but leave fitting and electrical decisions to the relevant professional; do not let a lamp base, extension lead or decorative cable become an obstruction. If the route is used after dark, think about visibility before deciding where seats, planters and other movable items will stand.
Outdoor surfaces can also change with rain, fallen leaves and windblown items. Include a practical clearing routine and keep hose storage, loose mats and cleaning gear away from the route. If water pools or a surface becomes slippery where someone needs to cross, raise that with a qualified professional as part of the site design rather than trying to solve it through furniture placement. When reviewing the bioclimatic pergola option, use confirmed drawings for the selected configuration; don't infer a particular route, lighting or weather performance from the model label. Make sure any temporary equipment can be kept out of the way.
Test the layout before committing
Before purchase or construction, mock up the layout with tape, cardboard or the actual table and chairs, keeping any drawing clearly labelled as a concept. Include pergola supports only where their positions are confirmed; otherwise mark them as provisional. Have the people who will use the space try the route and table approach in both directions. A paper plan can miss the awkward moment when a door opens, a chair moves or someone needs to pass with a tray. Record the changes that make the layout work, rather than expecting users to adapt to a fixed arrangement. Repeat the check with all usual seats in place and the table set for a meal.
If the project needs to meet a formal access requirement, ask a qualified local access consultant or building professional to assess the full design against requirements that apply to the site. This is separate from practical testing: a layout can feel convenient to one household and still need formal review, while a formal assessment does not replace feedback from the people dining there. Keep final drawings, product configuration details and furniture measurements together, so decisions about the pergola, surface and table remain linked rather than being made in isolation.
Frequently asked questions
What should I measure for a pergola dining layout?
Measure the route from the house or garden path to the table, then note door swings, the table, occupied and pulled-out chairs, pergola supports and the mobility equipment used. An area figure alone cannot show the clear space between them.
How much turning space should I allow for a wheelchair?
The practical space depends on the wheelchair, the user's preferred manoeuvre and the furniture arrangement. Test the layout with the actual equipment and furniture. If you need to meet a formal requirement, ask a qualified local access professional to assess it.
How can I plan a step-free route across an existing threshold?
Show the threshold and the full transition on your plan, including nearby doors, surface changes and drainage. If levels need to change, discuss the design with a suitably qualified local building or access professional rather than relying on a temporary fix.
How do I check whether a wheelchair can approach the dining table?
Test the approach from the side the user intends to use, with the table base, footplates, armrests and other diners' chairs in place. Ask the person using the wheelchair what arrangement works for them; table height alone does not answer the question.
Does a pergola's stated area show whether the dining layout is accessible?
No. An area figure does not show support positions, chair movement or a clear route. Draw the selected configuration and measured furniture together, and arrange a professional review if formal access requirements apply.
A pergola dining area needs more than enough ground to fit a table. The route must remain usable once chairs are occupied and people are serving and leaving. Put those activities on a measured plan, then try the arrangement with the people who will use it. This gives you a practical basis for choosing the structure and furniture, with a layout shaped around everyday use rather than an empty, idealised sketch.
