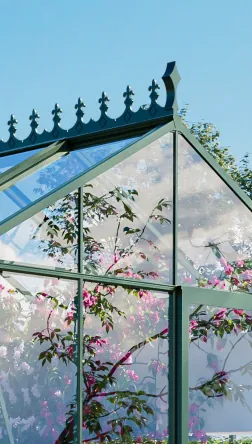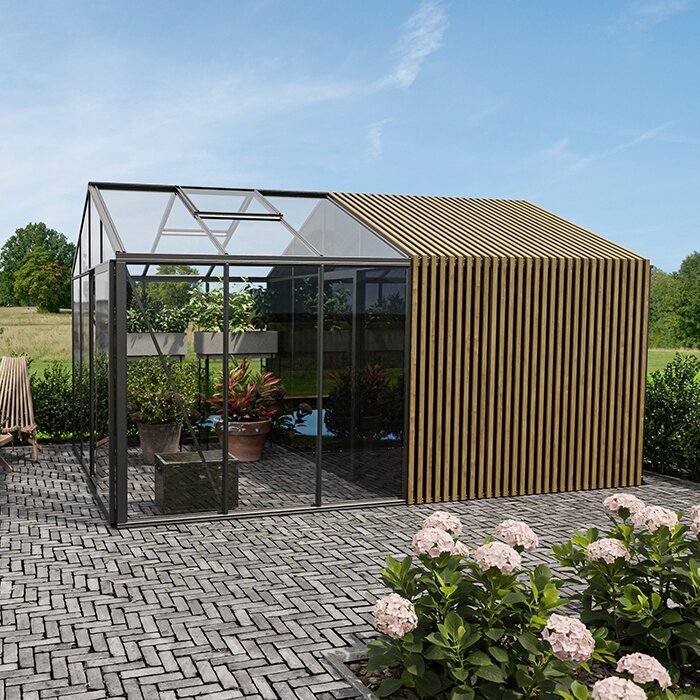






Greenhouse with built-in storage and exposed Accoya timber details
Classic aluminium growing house for plants, tools and supplies
A greenhouse incorporating its own storeroom brings a sunlit cultivation zone and an enclosed storage space together with exposed, natural Accoya® timber. Sharing one roof removes the need to find another site for a tool shed and keeps gardening equipment close by. The functions remain separate: plants occupy the bright zone, while pots, tools and supplies have their own room.
Available in a broad choice of sizes this Accoya timber design offers toughened safety glass or polycarbonate glazing. Work out how much room your crops and stored equipment each require. Before configuring it, list the plants, existing equipment and preferred interior layout. For a broader introduction to this arrangement, read Aluminium greenhouses incorporating storage.
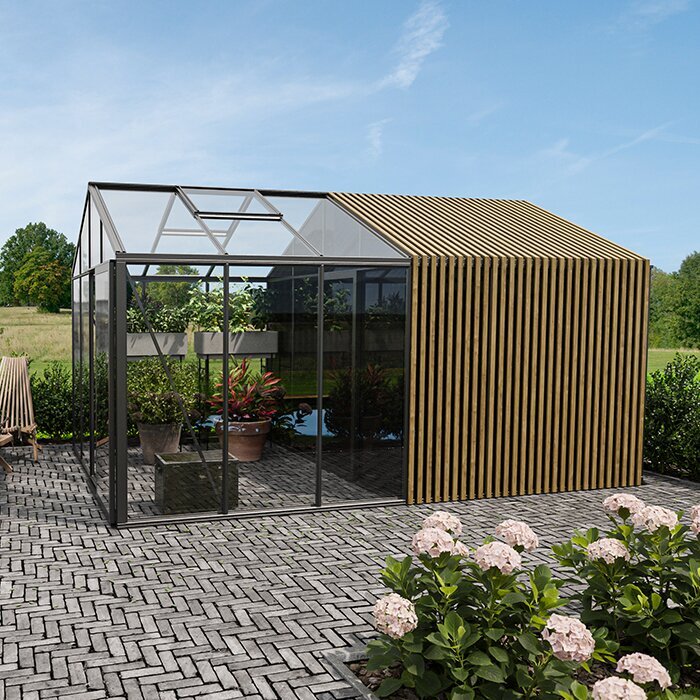
Cultivation and storage under one roof
A bright plant zone beside dedicated room for equipment and supplies
Having storage within the greenhouse streamlines routine jobs. Pots, hand tools, growing media and watering gear stay beside the place where they are needed. Sowing, pricking out, repotting and regular plant care no longer require journeys to the house or another shed. Gather materials before starting, then return them to storage when the task is complete.
This leaves a continuous plant area for beds, containers and benches, with unobstructed routes for maintenance and cleaning. Keep items that require neither sunlight nor greenhouse conditions in the storeroom. If heat or humidity could affect a product, consult its specific storage directions to confirm that the room is suitable.
See the full range of aluminium structures on our aluminium greenhouse page.
Distinctive features of this design
Cultivate, organise garden gear and maintain a unified setting
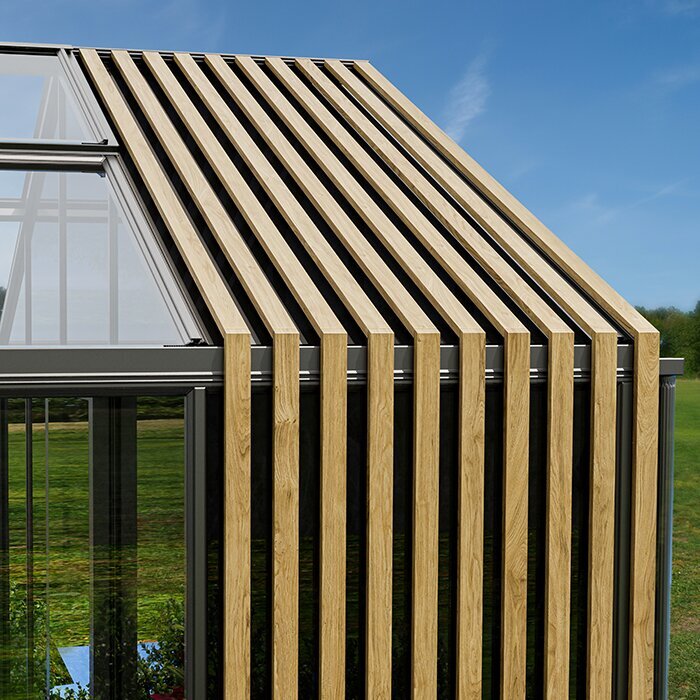
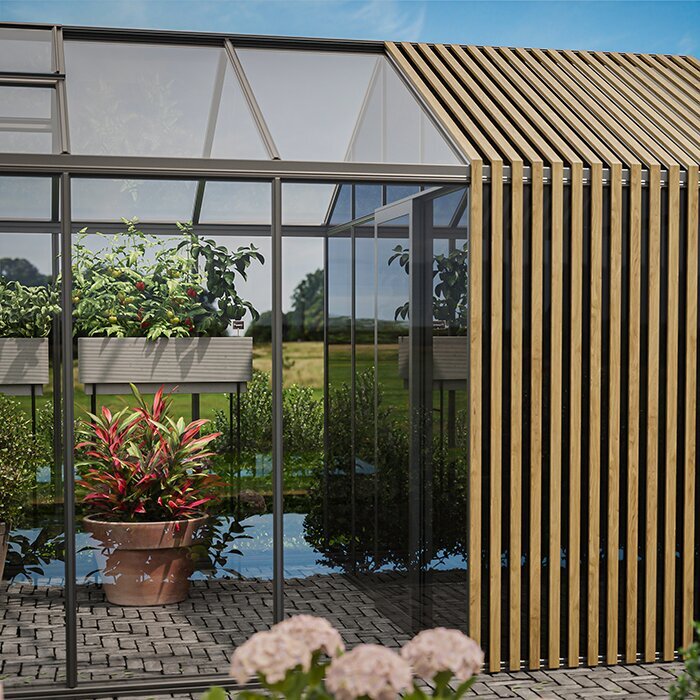
Because the storeroom forms part of the original structure, it does not resemble a cupboard attached afterwards. Exposed Accoya timber and aluminium framing carry the same design across both zones. Natural grain and varied timber tones soften the crisp, linear character of the metal frame.
Storage within the structure
The enclosed section can accommodate purpose-planned shelving, brackets and floor positions for garden gear. Stored objects stay away from the cultivation glazing, yet consumables and tools remain conveniently nearby.
Allocate room according to your needs
Different sizes permit different balances between cultivation and storage. Measure each function's footprint separately, then map both onto the usable plan. Allow enough clearance beside shelving and benches to collect equipment, repot plants and move through comfortably.
A natural contrast from Accoya timber
Timber introduces a deliberate counterpoint to the smooth glazing and aluminium framework. When choosing the RAL finish, consider the house and surrounding garden as well as the untreated Accoya timber's original colour and visible grain.
Clear access around the exterior
Maintain open ground around the structure so its glazing, gutters and outer surfaces can be reached for care and cleaning. Entrances should also remain usable without stored items obstructing them.
Understanding the Accoya timber
Modified solid timber for exposed outdoor applications
Radiata pine is acetylated through to the core to produce Accoya. Acetylation greatly limits how much moisture the timber can absorb without taking away its genuine grain or individual colour tones. Set beside precisely formed aluminium profiles, this visible organic texture gives the building more warmth than a purely functional metal structure.
Reduced moisture absorption supports dimensional stability and decay resistance. Accoya is rated durability class 1.
Bloomcabin uses Accoya without a surface treatment, preserving its grain and natural tonal variation. Outdoor exposure progressively alters the initial colour and may produce a silvery-grey finish. Consider that weathering when selecting the aluminium frame colour. Remove dirt regularly using gentle methods, avoid contact points that remain wet, and apply only cleaners, care products or coatings identified as suitable in the relevant Accoya instructions.
More guidance is available in the aluminium greenhouse questions and answers.
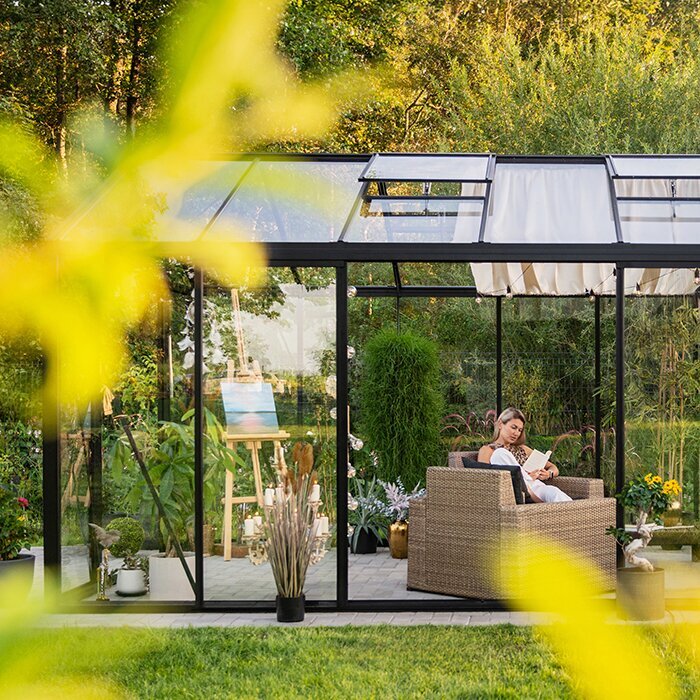
Design the cultivation and storage zones together
Base the two zones on everyday gardening tasks
Treat the layout as a pair of connected rooms, each with a defined purpose. Plan the sequence of work before deciding where benches or shelves belong: enter, collect supplies, care for crops, remove waste and return tools. Keep every route open. Equipment must not interfere with doors, while irrigation hoses, pots and floor edges should never block safe access to work surfaces.
Cultivation zone
Reserve this section for crops and work that depend on daylight and greenhouse conditions. Arrange taller plants where they will cast minimal shade over shorter ones. Benches must leave doors and roof vents free to operate. Base the layout on mature plant dimensions, not only the much smaller growth visible early in the season.
✓ Vegetable beds and planted containers
✓ Propagation benches and work surfaces
✓ Climbing crops, cucumbers and tomatoes
✓ Repotting and watering tasks
Storeroom
Use this room for belongings that do not rely on daylight. Decide beforehand which heavy items need floor positions and which objects can be secured on appropriate shelving or brackets. Provide firm, stable support for liquids. Store food, combustible materials or other sensitive goods only when their individual directions confirm that the conditions are acceptable.
✓ Long-handled and hand-held tools
✓ Labels, trays and pots
✓ Fertiliser, growing media and gardening consumables
✓ Seasonal items and cushions
Technical details
An overview of construction, glazing, heights and sizes
Two model families make up the range. Door clearance and ridge height deserve attention alongside the external measurements because they influence entry, spaciousness and the placement of tall crops, long tools and interior fittings.
01. Available size layouts
Twenty size configurations are offered. Assess their usable plans and how each can be apportioned between plants and storage, rather than considering only the vacant garden footprint.
02. Available widths
The model families measure either 235 cm or 310 cm across. Beyond that structural width, retain adequate clearance on every relevant side for installation, maintenance and cleaning.
03. Models measuring 235 cm wide
Across the 235 cm models, the ridge reaches 232 cm and the doorway is 165 cm high. Before selecting one, measure any tall fitting or piece of equipment that must travel through this opening.
04. Models measuring 310 cm wide
For the 310 cm family, ridge height is 267 cm and door height is 185 cm. Account for its greater enclosed volume when laying out tall plants and managing ventilation routinely.
05. Glazing choices
Glazing options are 4 mm toughened safety glass and polycarbonate. Glass preserves a clear view of the crops and interior. Polycarbonate provides greater visual screening and alters how light appears inside. Select the transparency and light character appropriate to both rooms and to the greenhouse's position in the garden.
06. Structural features
Aluminium profiles, roof vents, an aluminium base and integrated gutters form part of the structure. The chosen version has either one sliding door or a double sliding door. Its design ratings are 30 m/s for wind speed and 210 kg/m² for snow load. Correct assembly, secure anchoring and intended use are required. A 12-year commercial warranty applies to the greenhouse under the relevant warranty conditions.
Across the growing year
An organised workplace from spring through the season
Propagation trays, growing media and pots tend to lead the work in spring. Watering and plant-care equipment becomes prominent in summer, followed later by harvest containers and cleaning supplies. Adapt the timing to local Australian growing conditions. Flexible storage areas are better than permanently assigning every surface to seldom-used gear. Clear labels simplify restocking consumables and removing damaged tools.
Roof vents promote air movement, allowing surplus heat and humidity to escape from the crop zone. Keep them accessible and operate them in response to current conditions, watching particularly for moisture that persists after watering. The built-in gutters take rainwater away from the roof. Provide onward drainage that prevents pooling beside the base, erosion of paths and prolonged wetting of nearby building components.
The applicable terms are set out in our warranty details; practical advice is also available under Useful information.
Organising the storeroom
Divide space effectively among tools, pots and seasonal gear
Let weight, cleaning requirements and frequency of use guide the arrangement. Set aside an unobstructed floor area for bulky gear before installing shelves. Narrow racks can stabilise tools that would otherwise topple. Closed, clearly marked boxes make small components easier to manage, but everything inside must tolerate the storeroom's temperature conditions.
Place tools where they are easy to reach
Position gloves, secateurs and small maintenance tools near the entrance to the crop zone for convenient access. Restrain long-handled implements in dependable racks so they cannot topple, with blades and points facing away from paths. Brush away soil after each job and, whenever practical, let wet equipment dry before returning it to storage.
Managing pots, media and small supplies
Keep pot stacks low enough for individual pots to be removed safely. Retain fertiliser and growing media in appropriate, unmistakably labelled containers or original packaging, observing the maker's storage directions. Give tags, ties and seed-handling accessories a separate wipeable shelf or tray, away from bulk supplies.
Gear used seasonally
The storage zone can hold seasonal gardening gear that is compatible with its environment. Clean non-textile items first and ensure fabrics are entirely dry. Because the room offers no climate control or frost protection, move vulnerable products to another location that meets their own stated storage requirements.
Preserve an uncluttered crop zone
Keeping equipment elsewhere makes plant care, inspection and cleaning more straightforward. Fallen leaves, crop waste and loose growing media are quicker to clear from an unobstructed floor. Reaching plants from several directions also makes irrigation faults, pest activity or signs of disease easier to notice early.
Create a practical, easy-to-read layout
Everyday items within reach and weighty gear kept low
Assign a dependable, accessible location to every tool and accessory used regularly. A quick look will then reveal what is clean and ready and what needs attention or replacement. Keep the passage strictly for movement; leaving objects there disrupts tasks and creates avoidable tripping hazards.
Place frequently used equipment close to the crop area, ideally from knee to shoulder level. Lightweight gear needed only occasionally may occupy higher positions. Keep heavy equipment and bags low to avoid lifting overhead. Maintain retrieval room in front of shelves and ensure no sharp hardware projects into circulation routes.
Wall brackets and shelving can exploit vertical space, but attach them solely to parts designed to accept fixings. Identify approved mounting locations before drilling. Any freestanding unit must be stable and positioned clear of the sliding door, base, glazing, joints and all areas requiring inspection.
Choose the right size
Match dimensions to plants, fittings and movement space
Prepare separate requirement lists for the two rooms. Record beds, containers, worktables and mature crop heights for the cultivation zone. For storage, measure large equipment, supplies and the necessary shelf runs. Draw both sets to scale on the plans for suitable variants. A layout may fit the site yet still produce cramped passages or corners that are awkward to reach.
Lower height dimensions and a compact footprint characterise the narrower family. The wider models provide additional room to move and may include a double sliding door, depending on the version. Review the garden approach too: extra door width is useful only when equipment can reach it along a sufficiently broad, level path.
Test the plan as it will operate, with doors open, benches occupied and crops fully grown. No shelf should conceal a handle or hinder use of a roof vent. Include an unoccupied work spot for briefly placing a pot or opening a bag without closing off the main route.
For purchasing and delivery guidance, see Shopping and delivery page.
Foundations and installation
Careful preparation of the site, drainage and foundation
One structure supports both the cultivation room and storeroom. Across its entire footprint, the foundation must match the specified dimensions and be stable, level and square. Minor inaccuracies can prevent correct alignment of the sliding doors, glazing and profiles. Before work starts, assess drainage, ground conditions and underground services. Where the correct foundation method is uncertain, seek a qualified professional's site-specific assessment.
Work out how every component will move from the unloading point to the build site. Check the widths of gates and passages as well as bends, steps and other restrictions. Prepare an orderly, clean staging area for glazing, timber components and profiles, protecting vulnerable pieces from foot traffic, dirt and wind.
Although the aluminium base helps establish the structure, a suitable foundation and dependable anchoring remain essential. Follow the specified assembly instructions. Before installing any glazing, verify that the frame is level and upright and that both diagonals agree. Altering bracing or load-bearing components may compromise the entire greenhouse. Obtain skilled help for any stage you cannot carry out safely.
The process for placing an order is explained on the Ordering page.
Finding the right garden arrangement
Situations where one combined building works better than two
Choose a Classic greenhouse without storage when plants need almost the entire floor area and a suitable place for equipment already exists. The practical trade-off is having to bring tools and supplies from that separate location whenever greenhouse work is undertaken.
A freestanding tool shed may be located independently and sized without reference to the greenhouse. In return, it occupies another part of the garden, needs a separate base and lengthens the route between supplies and crops. Both structures must also be positioned and styled successfully together. Full separation may suit very large machinery or entirely distinct activities.
A storage-equipped Accoya greenhouse favours gardeners who value short task routes and a coordinated appearance over maximising cultivation floor area. Common greenhouse equipment remains beside the crops, avoiding the need for another structure. Even so, compare the room with everything you already own before ordering. Undersized storage will eventually push tools and supplies back into the plant zone.
Questions about greenhouses incorporating storage
Planning and use: frequently asked questions
How should the two areas be apportioned?
Mark beds, benches, shelving, equipment and unobstructed paths on the plan. Select a configuration in which both rooms remain practical and doors, roof vents and circulation routes can operate freely.
Which belongings suit the integrated storeroom?
Its purpose is to separate appropriate tools, pots, cultivation accessories and gardening consumables from the sunlit plant zone. Always consult the instructions for the individual item before deciding whether the storeroom provides acceptable conditions.
What is the reason for choosing Accoya?
Accoya retains the grain of genuine timber while offering strong dimensional stability. Acetylation lowers the Radiata pine's moisture uptake, helping it withstand decay associated with damp conditions.
What care does untreated Accoya require?
Clean off dirt regularly using gentle methods approved for Accoya, and prevent points of contact from staying damp. Follow the relevant care instructions before adding any coating. Untreated timber may naturally develop a silvery-grey tone as it weathers.
What distinguishes glass from polycarbonate?
Plants and the room remain plainly visible through toughened safety glass. Polycarbonate screens the interior more and produces a different quality of light. Base your selection on the degree of transparency wanted across the cultivation and storage zones.
How are the roof vents operated effectively?
Adjust the roof vents as sunlight, humidity and greenhouse temperature change, making sure access to them stays unobstructed. Check conditions inside regularly because the amount of ventilation required varies over the course of the growing season.
May shelves or brackets be attached to the frame?
Use only structural parts approved for attachments and establish the permitted mounting points before making holes. Independent shelving must stand securely without covering the sliding doors, glazing, aluminium base, joints or connections.
Where are the care and ordering instructions?
Advice covering gentle cleaning and inspection of glazing, profiles, sliding doors, roof vents, gutters and visible joints appears under Useful information ; the purchasing procedure is described under Ordering page explains the ordering process.
Bloomcabin
Combine cultivation and gardening equipment within one structure
Bloomcabin offers this Classic greenhouse with Accoya timber and incorporated storage for gardeners who want crops and readily available equipment together. Choose among the variants by considering the available footprint, intended plants, volume of stored gear and the way you prefer to work.
Apply those planning decisions in the configurator, then test the selection against the real site once more. Follow the full route from the proposed delivery point to the assembly area, and consider whether the completed layout will remain convenient during regular use. The Useful information guide page.
Review these points before configuration
✓ Compare each size's plan with the available footprint
✓ Reserve movement room around mature plants, benches and equipment
✓ Select polycarbonate or toughened safety glass for the preferred light and view
✓ Provide stable floor positions and appropriate storage racks or shelving
✓ Relate the RAL finish to both garden surroundings and Accoya weathering
✓ Ready the foundation, anchors, drainage and installation access
Configure your greenhouse with incorporated storage