









Clean thermowood and glass architecture for the garden
Elma L outdoor sauna – broad glass front and three bench options
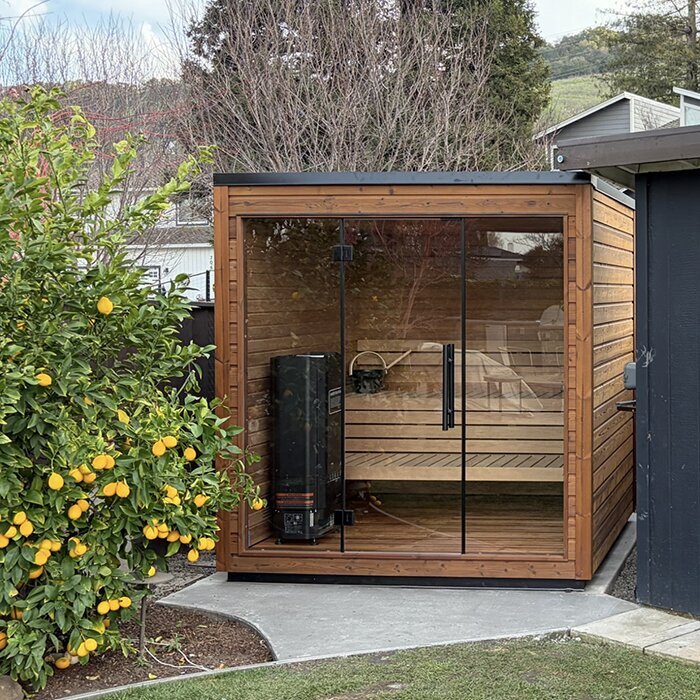
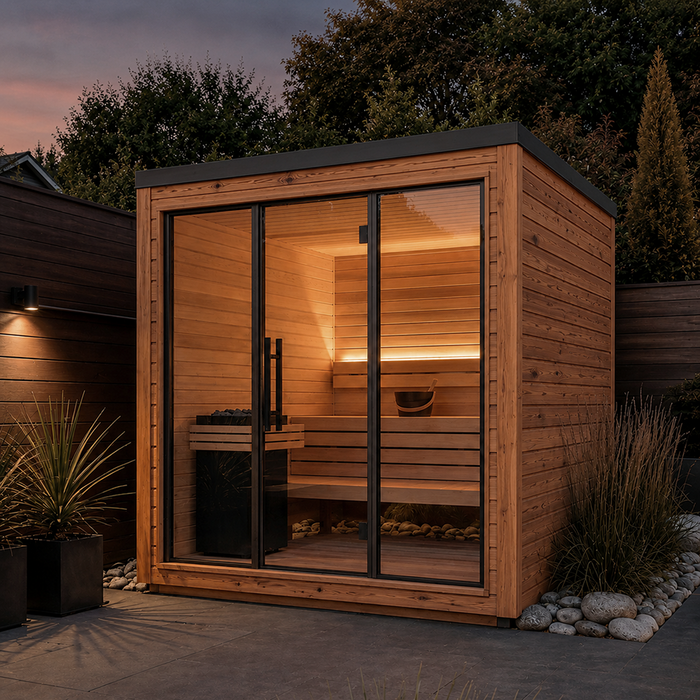
The Bloomcabin Elma L A generous glazed frontage opens the Bloomcabin Elma L onto a bright thermo-aspen interior with capacity for up to four people. Its approximate external dimensions are 222 cm wide, 218 cm deep and 242 cm high, placing it between small one-to-two-person models and a larger sauna cabin. It suits regular group use as well as couples who value extra room to move. Three bench configurations offer different orientations and reclining possibilities.
Use this guide to align the sauna’s dimensions and specification with its location and technical preparation. Other shapes and sizes are available in the Bloomcabin sauna range.
Everyday use
Generous interior with manageable external dimensions
Draw the sauna’s external footprint to scale at the intended location before placing an order. Include the door position, the view through the glazed frontage and connections with existing walkways. Seeing these elements together helps confirm whether the structure works with the available ground and the way you use the garden.
A wide glazed façade makes the garden part of the sauna room. Views to planting, a protected courtyard or a quietly arranged terrace can add substantially to the experience. Light needs consideration too: indoor and outdoor lighting, together with reflections, change the outlook in the evening. Confirm the intended direction before the foundation, access and electrical supply are prepared.
Base your choice on the number of people expected most often, not simply the stated maximum. Consider whether everyday sessions usually involve a couple, the family or visitors, and evaluate each bench layout accordingly. This provides practical space for routine use without letting occasional full occupancy dictate the entire decision.
Key points at a glance
What defines the Elma L
The Elma L's main features are capacity, external dimensions, bench design and material construction.
Up to four people
Read the capacity figure alongside the chosen bench arrangement, as orientation and sitting or reclining preferences affect how comfortable the available space feels.
Approx. 222 × 218 × 242 cm
The footprint provides a roomy interior, but additional clear space is still required around the cabin for entry, construction and ongoing care.
3 bench options
Each straight, corner or ergonomic arrangement creates a different balance between orientation and comfort.
60 mm CLT construction and 8 mm clear glass
The solid timber construction is complemented by a large transparent front.
Materials and construction
Thermo aspen inside, thermo spruce outside and clear front glass
Light-toned thermo aspen creates a composed interior in the Elma L. LED strips positioned behind the backrest cast indirect illumination while preserving the room’s uncluttered appearance. Daylight entering through the glass makes the cabin feel spacious. After dark, the concealed lighting defines the timber and assists movement without dominating the setting.
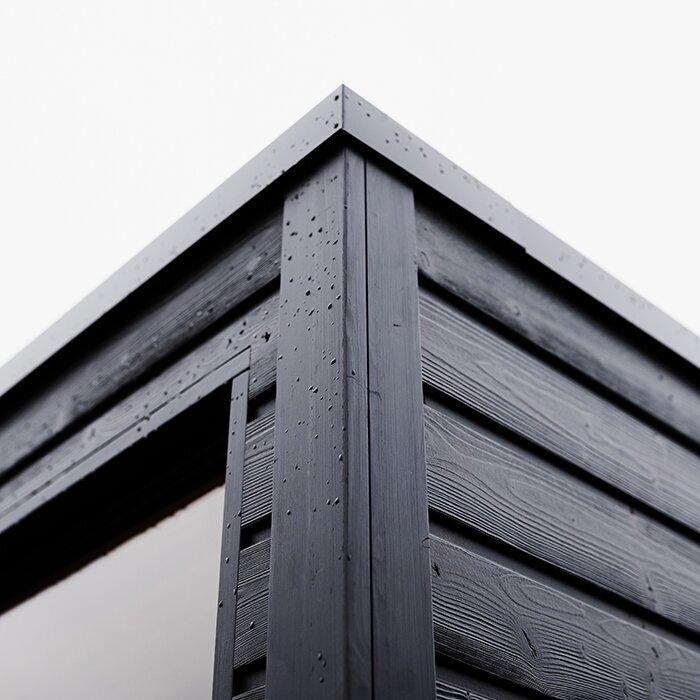
Thermo spruce forms the exterior cladding of the Elma L. Choose the offered finish in relation to the home, deck and broader landscape: natural timber can sit quietly within planting, while a darker treatment may provide deliberate contrast. Review the finish across the whole visible shell and under the light conditions found on site. Nearby paving, decking, masonry and other materials will also shape the final appearance.
A rectangular shell is formed from 60 mm CLT. The doors and windows use 8 mm clear glass, edged by black anodised profiles that define the glazed areas.
Before assembly and commissioning
Confirm foundation, weight and power connection before construction
Without the heater, the Elma L weighs approximately 1,265 kg. Its base therefore needs to support that load continuously and distribute it evenly. An area that appears flat may still lack sufficient capacity, particularly where there is an existing deck, filled ground or a raised platform. If suitability is uncertain, have the structure, sub-base and load path assessed. The foundation must also be level and correctly dimensioned so settlement does not distort the cabin.
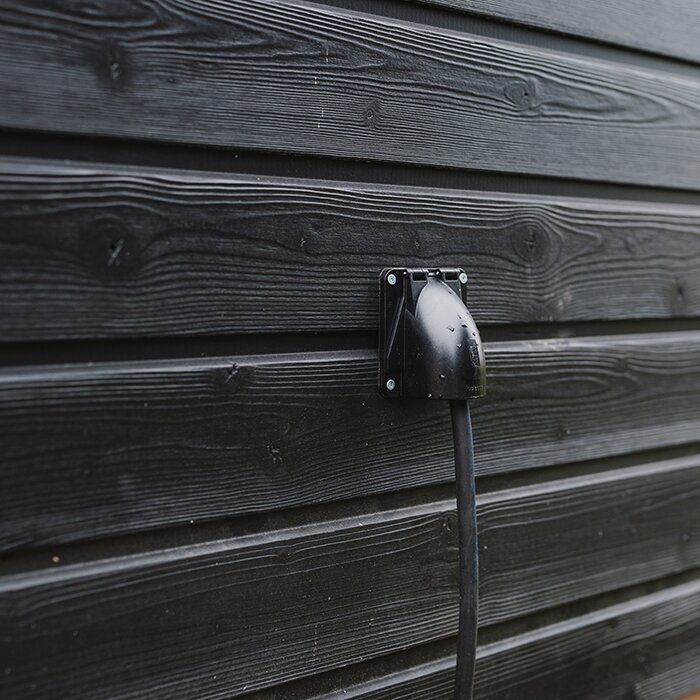
The technical specification calls for three-phase power at 400 V and 50 Hz. Resolve the supply route and connection location before foundation work so cables do not later cross walking areas or exposed surfaces. Check the licensing and certification requirements for your state or territory, and use an electrician authorised for the installation location to select protection, connect and test the system. The chosen equipment, manufacturer instructions and site conditions remain decisive.
Treat the surrounding area as part of the layout. Space near the door is useful for arriving, setting down towels or robes and cooling off. If a shower, plunge pool, resting zone or pergola may follow, show its services, drainage and circulation on the initial plan. Early coordination makes future additions less likely to interfere with entry or maintenance.
Before work starts, identify the planning, setback, electrical and any fire-safety controls relevant to the property. Requirements and approval pathways depend on the state or territory, local council, site and proposed configuration. Further practical information appears in planning guidance for your Bloomcabin sauna.
Typical use
Who is the Elma L designed for?
Match the Elma L to its expected number of users, their normal posture and the way the cabin will connect with the surrounding outdoor space.
Families
A family layout should reflect the normal seating order while making it straightforward for each person to sit down and rise.
Couples wanting more space
For predominantly two-person sessions, comfort and preferred posture can guide the bench choice more strongly than maximising the number of seats.
Contemporary outdoor spaces
The broad glazing, timber surfaces and simple rectangular volume complement orderly decks, paved areas and other contemporary garden settings.
Holiday properties
Holiday accommodation benefits from simple user instructions, an established cleaning process and dependable oversight of the sauna.
Model comparison
Elma L or Elma S – compare actual space requirements
The Elma S The Elma S is well suited to regular use by one or two people where minimising the footprint is a priority. It is especially practical when a larger cabin would compromise walkways or other parts of the garden.
Consider the Elma L when the smaller Elma S cannot comfortably accommodate the normal group or preferred seating pattern. The site still needs a suitable foundation, workable delivery access and enough space for the larger cabin.
The two models share a design family, so the decision largely comes down to everyday occupancy, available ground and bench preference. Outline each footprint on site rather than judging from drawings alone. The comparison will reveal how much usable room remains for access, installation and nearby landscape features.
Planned for year-round use
Plan access, cooling space and use in every season
Make the route from the house part of the overall plan. It should be direct, illuminated and safe to walk in wet conditions, without loose surfaces, avoidable steps or narrow pinch points. Place the cooling zone clear of the doorway. In cooler regions, allow for clearing leaves, grime and occasional ice; through warmer seasons or tropical growth periods, keep furniture and planting from encroaching on access.
Once a session ends, take out fabrics and remove visible soiling before leaving the cabin to air and dry thoroughly. Confirm that the door and glazed elements operate without obstruction, and inspect the timber, seals and fixings for anything unusual. Brief checks after use make gradual changes easier to detect.
For ventilation, drying and maintenance, follow the guidance for your selected version . Keep it readily available for regular care.
Choosing the right bench layout
Straight, corner or ergonomic bench?
The straight layout strengthens the interior’s simple, ordered character. Occupants share one principal viewing direction, while the remaining floor is easy to read. It is a practical choice for a small number seated side by side or where a linear appearance matters most. Review the drawing for the exact option before ordering to verify the bench’s position and extent.
A corner bench places occupants along two walls, creating a more conversational arrangement for shared sessions. Its geometry also changes the ease of taking a seat, standing and moving past someone else. Look beyond capacity and consider the regular group, including children, adults of varied heights and anyone whose seating preferences differ.
An ergonomic bench is shaped for a supported and restful position, making it relevant when reclining comfort takes priority over a flat, neutral seat. Suitability still varies with the user’s height, normal posture and time spent in the sauna. Inspect the depiction and inclusions for the exact configuration so the option’s name alone does not determine your choice.
Select the bench configuration before finalising the purchase. Where preferences conflict, give priority to the usual session and the posture favoured by the people who will use the cabin most often.
Using the sauna with several people
Organising shared sauna sessions
For group sessions, maintain a clear area immediately beyond the Elma L door. Provide a designated place nearby for footwear, towels and other belongings without narrowing the entrance. Planters, outdoor furniture and sauna accessories also need to remain clear of the opening arc and pedestrian route. In daily use, an uncluttered approach is more functional than dense decoration.
Store everyone’s belongings away from the circulation zone and preserve an unobstructed route to the exit. Choose places so anyone finishing first can leave without requiring the whole group to move. The selected bench geometry and operating instructions will determine the practical arrangement.
Where the site permits, distinguish between arrival, cool-down and relaxation areas. Keeping these functions apart prevents belongings and splashed water from crowding the entrance route. For a nearby pool or shower, provide drainage that stops moisture lingering around either the doorway or foundation.
Orientation and privacy
Coordinate the view and privacy screening around the glass front
Because the frontage is transparent, assess privacy from inside and outside before fixing the location. At the proposed position, compare the intended outlook with sightlines from paths, neighbouring spaces and windows. Make the same assessment from roughly seated height; screening that seems effective to a standing person may leave the lower interior unexpectedly exposed.
Side-on views may be softened by planting or purpose-designed screens, provided they leave room for entry and exterior care. Account for mature plant dimensions and seasonal leaf drop rather than judging only the current growth. Revisit the position after dark, when interior lighting can increase visibility. Path lights should aid safe movement without casting troublesome reflections across the glazing.
Resolve the viewing direction, screen positions and approach side ahead of foundation work. Setting out the four corners and the frontage line on the ground gives a more convincing impression of the finished orientation than a plan alone.
Keep access available long term
Retain working room for construction, checks and ongoing care
The stated measurements cover the cabin itself, not its complete spatial requirement. During construction, every component must reach the location and be manoeuvred into place. Once installed, the cladding, connections and junction with the base should remain approachable. Avoid squeezing the sauna between walls, fences, buildings or established plants where access to its sides would be impractical.
A usable service margin allows closer checks of the outer timber, glazing, seals, fasteners and drainage behaviour. Keep those elements visible rather than hiding them permanently behind stored objects, ornaments or thick vegetation. Anticipate how far nearby plants will spread and choose a position where damp leaves are unlikely to accumulate against the cabin.
Protect this route for people and servicing over the long term; do not let bins, bikes, tools or seasonal furnishings turn it into storage.
Prepare for delivery and assembly
Check the delivery route and assembly area before ordering
Trace the proposed delivery journey from the street-side entrance through to the foundation. Record gates, bends, gradients, stairs, restricted heights, projecting branches and surfaces vulnerable to damage. Even a generous driveway is insufficient if access finishes at a tight passage or weak lawn. Photographs and accurate measurements will help the delivery or assembly provider assess the route.
Have the foundation and power arrangements ready by the agreed construction date. Clear furniture, stored materials and vegetation from the working zone, including the space around the final position. Soft soil and makeshift protective sheets may hinder assembly even when the footprint itself is prepared. Agree beforehand who will verify the finished foundation’s level.
Set out in writing who is responsible for bringing the delivery onto the property, building the cabin and making the electrical connection. The same record should identify every preparatory task due from you and when it must be complete. Confirm whether transport equipment or packaging will occupy the site temporarily. Sequencing these responsibilities reduces the risk of gaps between foundation preparation, construction and electrical work.
Confirm the specification before ordering
Document the chosen version and supplied contents clearly
Cross-check the nominated bench configuration and exterior finish against the site design before sending the order. Use precise option names and retain the confirmation. If several contractors or household members are involved, issue one current plan to everyone so an outdated drawing or earlier preference is not followed by mistake.
Review the ordered configuration item by item, separating included components and services from anything excluded or requiring another arrangement. Pay particular attention to coordination between the cabin, heater, power connection and proposed outdoor features. Construction decisions should follow the documents for the exact configuration, not assumptions drawn from general product photography.
Keep the order confirmation, site drawing, foundation details, electrical information and contractor contacts in one project file. This gives everyone a consistent reference when questions arise. Store the assembly, operation and care instructions where they remain accessible after completion.
Outdoor drainage
Manage rainfall and splashes away from the sauna
Shape the base and surrounding ground so moisture cannot remain beneath the sauna or pool beside it. The design must account not only for rainfall but also runoff arriving from roofs, adjacent paving or higher parts of the block. A dry-looking foundation can still border a low point that traps water. Match the drainage response to the site’s soil, fall and broader ground conditions.
After the work is complete, observe where water actually travels. It must not flow towards the doorway, cross the principal path or collect where freezing is possible in colder districts. Clear soil, foliage and other debris before open drainage paths become blocked. A shower requires dedicated water disposal because its discharge is more concentrated and frequent than rain.
Avoid raising soil, gravel or decorative material against the cabin’s lower edge later. Following landscape work, verify that the planned ground height and underfloor airflow remain intact. Investigate any subsidence, erosion or pooled water promptly, before either the foundation or sauna is damaged.
Regular inspection
Organise routine care by component
Structure inspections around five areas: cabin interior, glazing, outer shell, access and ground. Indoors, note cleanliness and any visible timber change; at the glass, examine soiling and the adjoining seals. Outside, watch for impact damage, deposits or patches that retain moisture unusually long. Include paths, the supporting surface and drainage, and date your notes so gradual developments can be compared.
Choose cleaners and treatments specifically approved for the material being handled. Keep unsuitable chemicals and coatings away from the timber, glazing and seals. Electrical equipment falls outside ordinary cleaning and should only be handled by an appropriately authorised professional. Follow the selected configuration’s assembly, operating and maintenance documents for both procedures and intervals.
Frequently asked questions
FAQ – Bloomcabin Elma L
When is the Elma L more suitable than a compact sauna?
The Elma L suits regular shared sauna use or two users wanting more freedom of movement and greater bench choice. The site must also provide enough space for the structure, access, assembly and maintenance.
What space is needed in addition to the external dimensions?
Beyond the roughly 222 cm width and 218 cm depth of the cabin, reserve usable room for the doorway, approach, assembly and later maintenance. Where branches, roofs or structures overhang the position, also check clearance above the approximate 242 cm overall height.
Can the Elma L be installed on an existing terrace?
Suitability depends on the deck’s frame and sub-base rather than appearance alone. Excluding the heater, the sauna weighs about 1,265 kg, and that load must be carried uniformly over time. Arrange a professional capacity assessment whenever the existing construction is uncertain.
Which bench option suits which use?
Choose a straight bench for side-by-side linear seating, a corner option for a more inward-facing group, or the ergonomic design for supported relaxation. The normal number of occupants, their posture and the preferred social arrangement should settle the choice before ordering.
How are thermo aspen and clear glass cleaned?
Thermo aspen in STP 15 × 90 mm forms the internal lining, while the transparent sections are clear glass. Lift loose debris from the timber carefully and use non-abrasive equipment suited to glazing. Any cleaning product must be approved by the care instructions for the surface concerned, including seals beside the glass.
How should privacy screening for the glass front be planned?
Check sightlines from nearby paths, windows and neighbouring areas at about seated height, repeating the test with the cabin illuminated. Position planting or screens to reduce lateral views while preserving access, the outlook and room for maintenance.
Who may complete the electrical connection?
The proposed three-phase 400 V, 50 Hz supply requires competent planning, connection and testing to the manufacturer’s documents and site rules. Confirm local licensing and certification requirements, then appoint an electrician authorised to perform the work at the installation address.
What should be completed before the assembly date?
Complete the foundation and power planning, verify the delivery route and clear the work zone before assembly. Allocate responsibility for delivery, construction, foundation inspection and electrical work, including every preparation the customer must finish in advance.
Bloomcabin Elma L
Does the Elma L suit your property and sauna use?
To complete the plan for the Bloomcabin Elma L document the selected bench arrangement and finish. Coordinate its footprint, supporting base, delivery access and electrical supply with the relevant contractors before work proceeds.
Where the block is better suited to a smaller footprint, another form or a different interior concept, consider other outdoor and barrel saunas from Bloomcabin.
Pre-order checklist
✓ Mark the structure, door area and assembly space on the site plan
✓ Confirm usual user numbers and the appropriate bench option
✓ Verify the base’s capacity, level and drainage performance
✓ Arrange three-phase power with an electrician authorised locally
✓ Compare selected version, supplied contents and separate services
✓ Clarify local requirements before work begins
✓ Keep delivery access, maintenance access and drainage available
Explore the Elma L specifications