


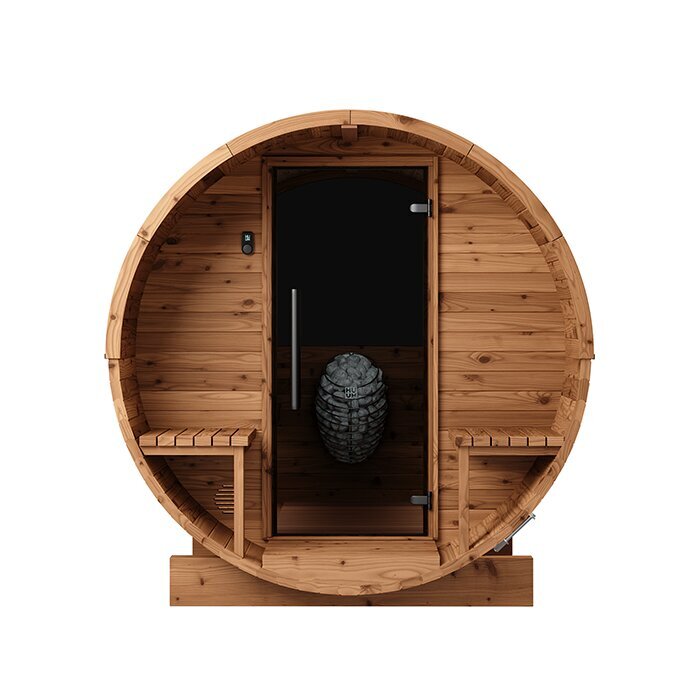
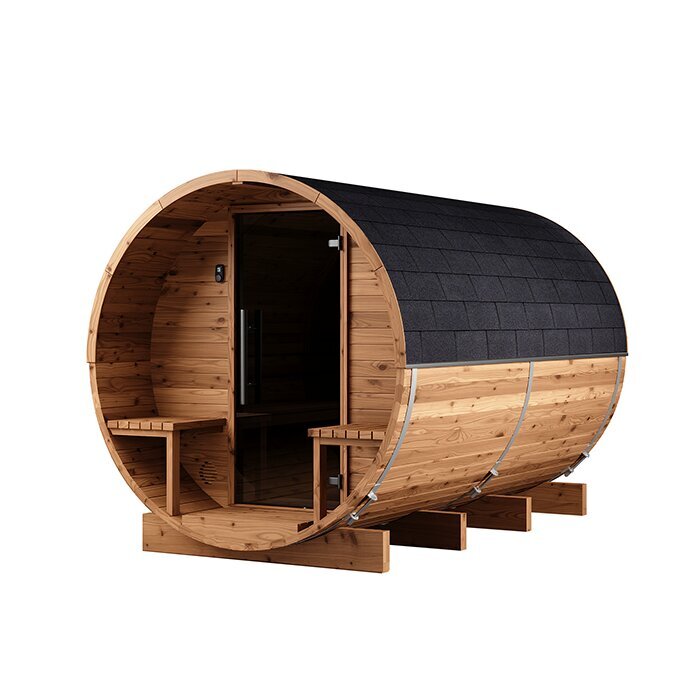


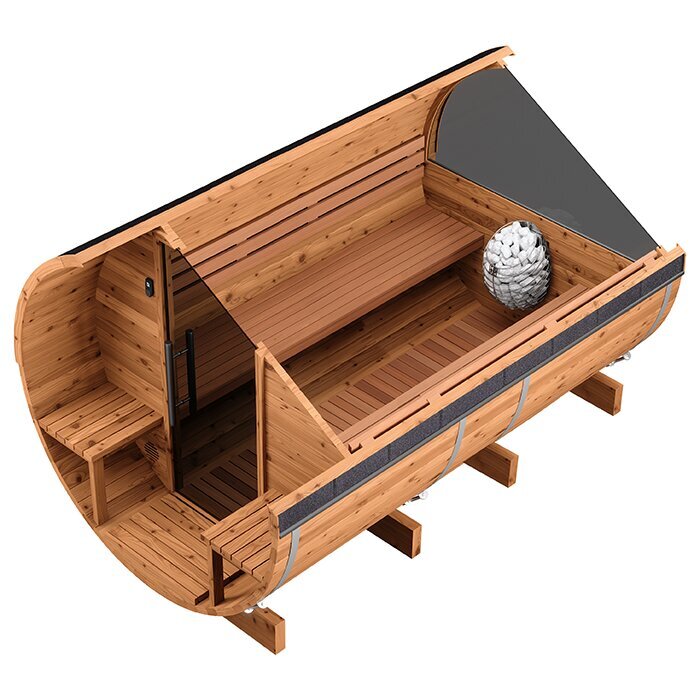

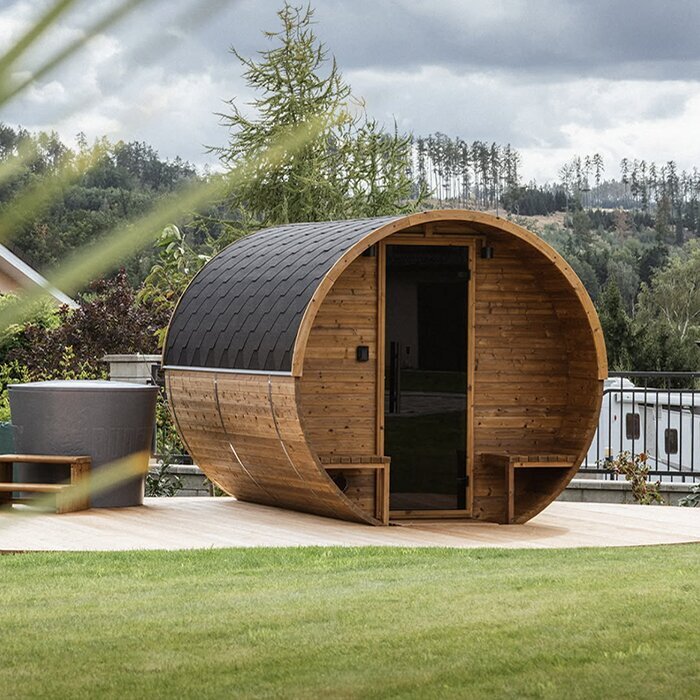


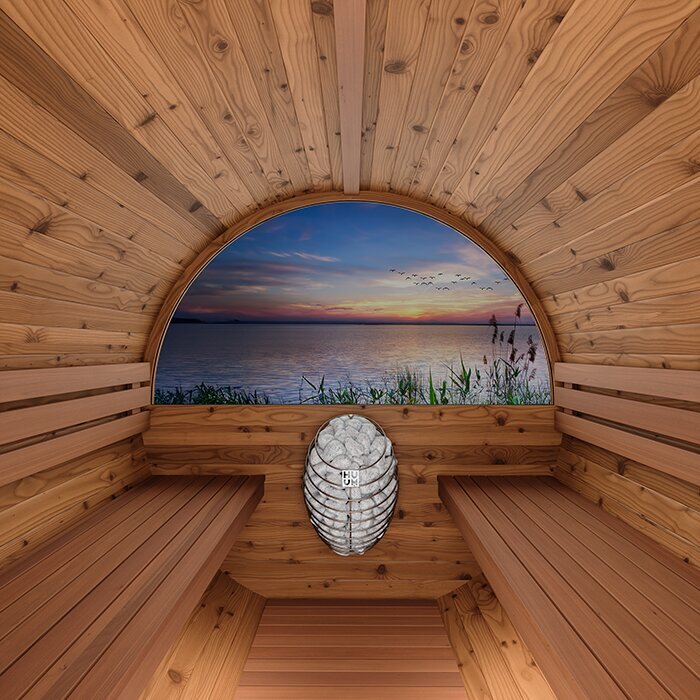
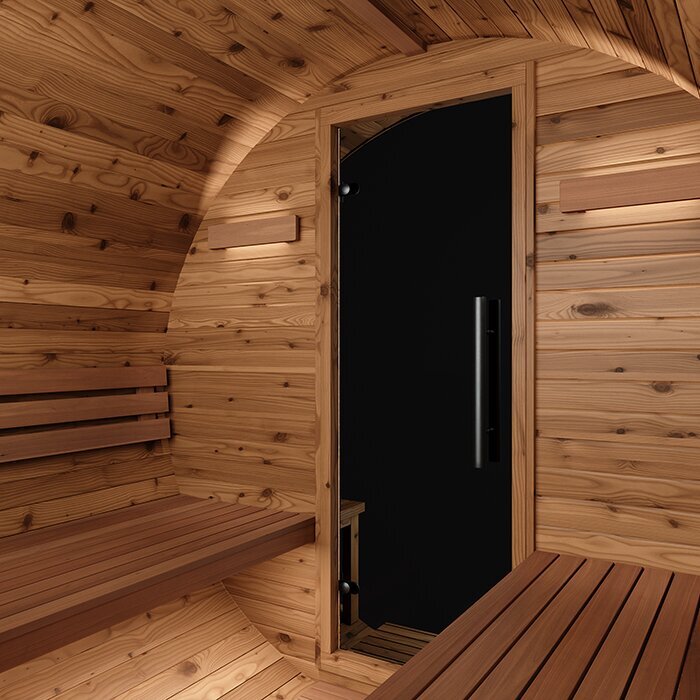





Roomy barrel sauna with extended benches seating up to six adults
Bloomcabin LC 300 – roomy thermowood barrel sauna
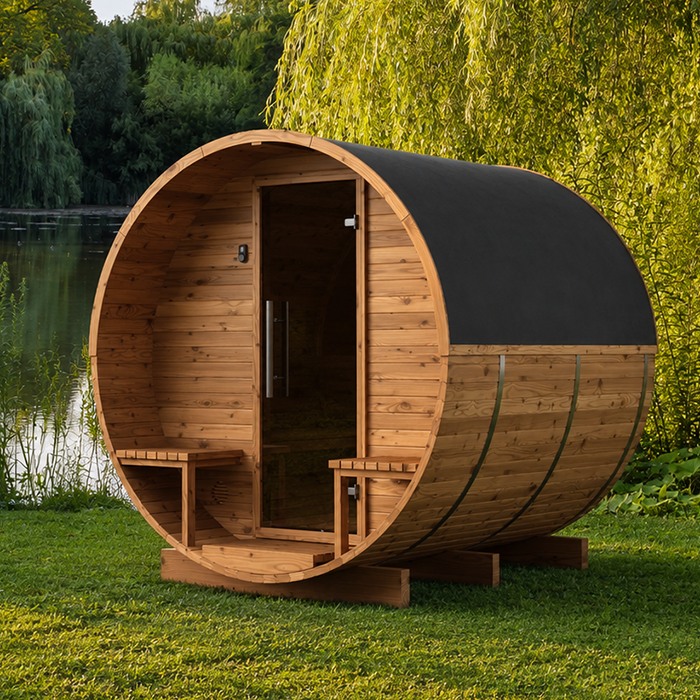
The Bloomcabin LC 300 Designed for households, guests and frequent sauna use, the Bloomcabin LC 300 provides generous outdoor space. Its body is about 301 cm long and roughly 194 cm wide, with approximately 229 cm interior benches for up to six adults. It best suits buyers who will use that length often while retaining practical access and working room around the site. Before ordering, establish the normal group size, preferred sitting or reclining arrangement, and feasible heating system. Configurations may use either an electric or wood-fired heater. Power and flue installations demand different preparation, so make the heating decision during location planning.
Find more models in the Bloomcabin sauna range.
Product profile
What sets the LC 300 apart
Space for up to six adults
Maximum capacity assumes all seating positions are taken. For day-to-day comfort, allow fewer occupants if your group wants extra separation, spreads out large towels or moves between sitting positions during the session. Comparing those habits with the bench area gives a more useful indication of whether the LC 300 fits your regular sauna group.
About 301 cm overall length
Allow for more than the cabin footprint when mapping the garden. People still need clear access, room for assembly and space to inspect the sauna later. With a rounded body roughly 194 cm wide, the LC 300 may work in a narrower section, provided walls, planting and nearby structures do not crowd the doorway, paths or working zone.
Interior benches around 229 cm long
The extended benches distinguish this model from more compact barrels and give occupants greater freedom to arrange themselves. Reclining may also be possible, depending on a person’s height. Recreate the bench length with a tape measure before purchase; that simple check shows whether the usable interior will accommodate the way you prefer to sit or lie.
Choose electric or wood-fired heating
Heating is chosen as part of the ordered specification, not as an afterthought. First establish which system can be competently installed at your site. Electric and wood-fired options involve different controls, connections or flues, safeguards and maintenance routines. Base the decision on the requirements attached to the exact LC 300 configuration.
Timber and build
FSC®-certified thermowood forms the barrel shell
Thermal modification means the LC 300 timber absorbs less moisture and holds its shape better than untreated wood. Those qualities help outdoors, but they do not remove the need for sound site preparation and periodic inspection. Natural variations in grain and colour should be expected, as should a gradual shift in tone. Inside, the wood cycles through heat, cooling and changing humidity; outside, it also faces the weather. Prevent water from lingering around the base or collecting against surfaces. Air must be able to move around the barrel so it can dry. Covers, stored belongings and dense vegetation should sit clear of the wall rather than trapping dampness beside it.
Inspect structural joints and the hoops around the barrel routinely, and again after sharp weather changes. Compare tension around the structure and note looseness or new visible movement. Adjust only as directed by the assembly and maintenance documents: unnecessary tightening can cause problems, while a loose joint should not be ignored. Check supports, door travel and each junction between timber pieces. A door that begins binding may indicate uneven support. If distortion, persistent wet patches or abnormal gaps appear, investigate the source, including the base, before attempting a remedy. Engage a competent tradesperson for load-bearing parts or zones exposed to intense heat; never improvise replacement components there.
Selecting the heater
Deciding between electric and wood-fired heating
Electric heating provides convenient and predictable temperature control, provided the site has an appropriate electricity supply. Ask a locally licensed electrician before ordering to assess the proposed connection and whether the cable route is workable. Both heater and controller must be compatible with the selected LC 300 specification; another appliance cannot be substituted at random. Allow for component positions, protected cable runs and clear future access for servicing and inspection. Temporary outdoor connections and extension leads are inappropriate for ongoing sauna operation. The electric option often appeals when simple control is preferred and storing fuel is undesirable. Installation and use must follow the documents supplied with the selected equipment and the electrical requirements confirmed for the property.
A wood-fired heater relies on a manually tended fire. Routine use therefore includes keeping dry fuel, lighting and watching the burn, then dealing with ash afterwards. Account for the correct chimney assembly and required separation from hot parts before fixing the sauna location. Fuel storage also needs a safe, dry approach during winter, wet-season or other adverse local conditions. Do not let stacked wood intrude into the entry route, maintenance zones or necessary clearances. Follow the heater maker’s directions when checking the firebox and airflow before lighting. Wait until ash is completely cold before removing it and place it in an appropriate container. Choose this heating style only if its extra operating and upkeep tasks suit the way you intend to use the sauna.
Fit only equipment approved for the LC 300 specification that was ordered. Never remove a safeguard or replace it with something chosen merely for a similar appearance. During heating, leave the area around the appliance clear of towels, accessories and anything combustible. Children and people who cannot operate the heater safely require suitable supervision. The manuals for the delivered heater and controller govern commissioning, warming up, adding water to the stones, shutting down and maintenance. Before the inaugural session, make sure the documents correspond to the installed equipment and that everyone responsible for operation understands them.
Preparing the location
Coordinate support, water runoff and approach access
The LC 300 must stand level on a durable base, with each bearing point supported safely and to the same degree. Visual flatness is not enough: loading, water and frost can make a surface settle, shift or deteriorate. Do not assume an existing deck will cope; have its structure and carrying capacity assessed for the project. The calculation should cover the entire sauna, the selected heating equipment and the occupants who will use it. Loose timber offcuts and improvised packers are not suitable remedies for uneven ground. Preparing the support correctly simplifies construction, helps the door move as intended and prevents the barrel from carrying uneven forces. Select the foundation method for the actual soil, available surface and site conditions, and complete that decision before delivery.
Reserve working room on every side for construction, future inspections and upkeep. In particular, access must remain available to the barrel hoops, lower boards and technical equipment. Crowding the sauna against a fence, wall or thick planting complicates assembly and limits airflow around wet exterior timber. Keep the approach to the entrance stable in damp weather, without stored belongings or firewood narrowing it. Consider how workers will carry tools and components to the base while leaving the rest of the garden usable. Review the route in every season and after dark as well; rain, fallen leaves and poor visibility can turn an otherwise convenient path into an unsafe one.
Good water management keeps rainfall and cleaning water from sitting beneath the wooden shell. Grade or arrange the base so runoff leaves the supports, doorway and adjoining paths rather than gathering there. Observe the wider block too, especially the direction water takes during heavy rain. A low corner that appears sheltered may instead become a damp pocket. Downpipes and garden drainage should not empty onto the sauna. Any proposed solution still needs to suit the soil and requirements confirmed for the location. Once installation is finished, inspect the area while it is raining. Puddles and repeated splash marks will reveal where timber remains exposed to moisture. Correct the surrounding ground or drainage before those recurring wet areas produce visible damage.
Choosing a model
LC 300 or LC 260 – which length suits?
The LC 260 offers the same multi-person purpose in a shorter format. Lay out the outside dimensions of both models where the sauna may stand, while reserving the entrance, access path and room needed for assembly and care. This practical outline reveals whether the extra length of the LC 300 interferes with planting, walls or another garden feature. Compare interior use only if either footprint works properly. A confined block may benefit from the movement space left by the LC 260; a larger site can make use of the LC 300’s extended bench area. The aim is not to squeeze a sauna into the last available gap, but to choose one that remains straightforward to approach and maintain.
Base the LC 300 decision on your normal group, rather than the rare occasion when every seat is occupied. Approximately 229 cm of interior bench length gives regular users more choice in how they spread out, sit down, stand or shift position. Map the seating arrangement you actually prefer instead of considering headcount alone. Extra length has little practical value when substantial portions would stay unused each time. Conversely, if your household or guests often need that freedom, the added bench room becomes the clearest reason to select this model over its shorter counterpart.
Sometimes the available location settles the comparison because only one model leaves adequate clearance. Where either footprint is practical, consider the bench area your group will genuinely occupy. The LC 260 reduces the required overall length; the LC 300 earns its larger footprint when additional seating or reclining room is used often. Treat the stated maximum occupancy as guidance rather than the sole deciding factor. A suitable choice accommodates normal sessions without consuming garden space that brings no regular benefit.
Care and operation
Maintaining benches, interior and outer timber
After each session, give the cabin enough time and airflow to dry thoroughly. Follow both the sauna and heater documentation when operating the intended vents so residual moisture can leave. Remove bathers, damp towels and seat covers immediately; textiles left across the benches slow evaporation and may mark the wood. During use, place a sufficiently large towel between each person and the seating surface. Once everything has cooled, collect loose material with a suitable cloth or soft brush. Look carefully under benches, into corners and near floor level, where damp patches are easily missed. Do not close the cabin for extended storage while any surface remains wet. Persistent smells or moisture that repeatedly returns should prompt an examination of cleaning practices, ventilation and water runoff, rather than being disguised with fragrance.
Sunlight will gradually alter thermowood’s colour, often producing a naturally grey appearance. If that change is acceptable, outdoor maintenance can centre on keeping the material clean, dry and regularly inspected. To preserve more of the original warm tone, choose only a finish intended for thermally modified exterior wood. Read its preparation guidance and anticipated colour result first, then test a discreet patch. Do not let a treatment obstruct vents or affect seals, hardware or technical equipment. Apply it only when the surface is cool and dry, never while heating the sauna. Conditions inside the cabin differ from those on its weather-exposed face, so do not bring an exterior coating indoors without confirming its suitability. Proper care supports the timber rather than attempting to hide every natural sign of ageing.
Routine cleaning should protect the grain and avoid leaving unwanted substances that could remain when the cabin heats. Do not use a pressure washer: its concentrated jet can force water between joints and harm the surface. Strongly scented, abrasive or aggressive cleaners should also be avoided. Attend to dirt promptly, but wait until both the cabin and heater are completely cool. Use a small amount of a product specifically suited to sauna timber or the component concerned, following its directions. Hardware, metalwork, doors and technical systems may each have separate instructions. Nothing should be reheated until treated areas are dry and no cleaner remains. Frequent visual inspection of the seating, floor zone, door, hoops and supports makes developing changes easier to spot.
Before you order
Settle the configuration, access route and local checks
Start with the itemised contents for the LC 300 specification you intend to buy. Depending on the option, the package may differ in its heater, controller, sauna stones, flue pieces and protective parts, so photographs alone are not a packing list. Reconcile the order summary with the technical details and identify both supplied components and separately arranged work before purchase. The electric model needs its connection professionally prepared and completed; the wood-fired model needs the entire exhaust route and protective provisions planned. Accessories should be selected for confirmed compatibility, not simply because their connection size appears to fit. Have the foundation finished and organise tools and enough assembly help in advance, avoiding delays caused by absent or unsuitable parts.
Trace the delivery path beyond the front boundary, beginning at the accessible unloading position and continuing to the completed base. Check driveway width and strength as well as gates, turns, gradients, steps, overhanging roofs, low branches and other restrictions. Measure any doubtful section instead of relying on appearance. The intended handling method needs a clear and suitable route. Nominate a temporary area for packages and components that will not obstruct circulation or leave timber resting on wet soil. Finish, inspect and open access to the installation area before the shipment arrives. If lifting or transport machinery will be used, include enough space for it to turn and operate. Consult the delivery details to establish who handles unloading and movement across the property, and which equipment or assistance must be present that day.
Before committing to the position, identify the planning, setback and installation checks relevant to that Australian state or territory, local council and property. The site and heater type determine what needs confirmation. For an electric unit, speak with a locally licensed electrician early so the supply route and installation approach are resolved before assembly. For wood heating, ask the council and suitable specialists about the proposed heater, flue, fire precautions, smoke considerations and clearances, including any bushfire-related site constraints. Account for neighbouring buildings, boundaries and existing services. Once construction is complete, store the assembly records, heater manual and supplied-component details together; they support safe operation, maintenance and correct replacement-part selection. Further preparation and operating information appears under the outdoor-sauna planning and operation guide.
Buying and operating queries
Bloomcabin LC 300 answers
Do the extended benches allow reclining?
They can, subject to the user’s height. Each interior bench measures approximately 229 cm. Reproduce that distance at home and test whether your intended position leaves room for your head, feet and sauna towel. This gives a better answer than comparing stature with the measurement alone. A reclining person occupies space that would otherwise provide several seated places, so simultaneous capacity falls. The description “up to six adults” applies when the cabin is arranged entirely for sitting; any session combining seated and reclining occupants should be planned for a smaller group.
What needs checking ahead of the inaugural session?
Do not use the sauna until assembly and every technical task are complete. Work through the supplied documentation to verify that specified parts are fitted, joints and connections have been examined, and protective pieces sit correctly. Confirm free door movement, then clear all tools, wrapping and installation debris from the cabin. For the electric configuration, the supply must be properly installed and tested before commissioning. With wood heating, complete the heater, chimney and fire-safety arrangements to the manufacturer’s instructions and requirements for the location. Read the directions for ventilation, sauna stones and controls before creating heat. Stay attentive throughout the initial run. Stop immediately if the door binds or you notice abnormal noises, unexpected smoke or any electrical concern, and arrange competent investigation before trying again.
Bloomcabin LC 300
Verify your chosen LC 300 specification before purchase
Return to the product view for a final check of the selected LC 300 specification. Make sure the heater option and listed parts align with the professional work arranged for the site. Settle unresolved questions about the power supply or flue, along with unloading, movement across the property and assembly, before purchasing. Retain the completed order summary with the site plans afterwards. Installers and delivery helpers can then see precisely which equipment is arriving and which preparatory tasks must already be finished.
If the LC 300 exceeds the available footprint or a different interior arrangement would suit routine sessions better, explore further models under Bloomcabin outdoor and barrel saunas.
