
Can You Add a Second Pergola Module Later?
Pergola planning guide
A pergola can sometimes be extended with a second module, but spare patio space does not make a design expandable. The first module must be compatible with an approved connection, the finished layout needs a workable drainage route, and the foundations must suit the complete arrangement. It is also important to separate two questions: can the structure be physically extended, and can each roof area be operated as its own zone? Ask the supplier to answer both questions for the exact model and configuration before purchase. If future availability matters, record compatibility assumptions and any required parts with the first order.

An extension must be an approved connection
Sometimes, but “same style” is not the same as “approved to connect.” A pergola system can be extended only when the supplier has a documented way to join the exact model and configuration, with the required supports and connection parts. A second unit set beside the first may be two independent structures; it is not automatically one larger assembly. Decide whether you want a continuous roof outline, a shared support arrangement or simply two neighbouring covered areas. A side extension and an end extension may need different approved details. The answer depends on the model, orientation and site—not just on having enough patio space.
At the first quote stage, ask whether the manufacturer permits a second module to connect to the first, rather than merely sit nearby. Have the reply identify the model, selected size and orientation, and whether the first module needs a particular configuration to allow a later connection. The Bloomcabin Wall-Mounted Pergola page can help name a product under consideration, but a product name or image does not confirm an add-on option. Ask the supplier to distinguish a structural connection from a visually aligned pair. If an extension is possible, request the drawing and parts list that define it; if the units must remain independent, plan for two separate structures.
Map the full footprint before ordering
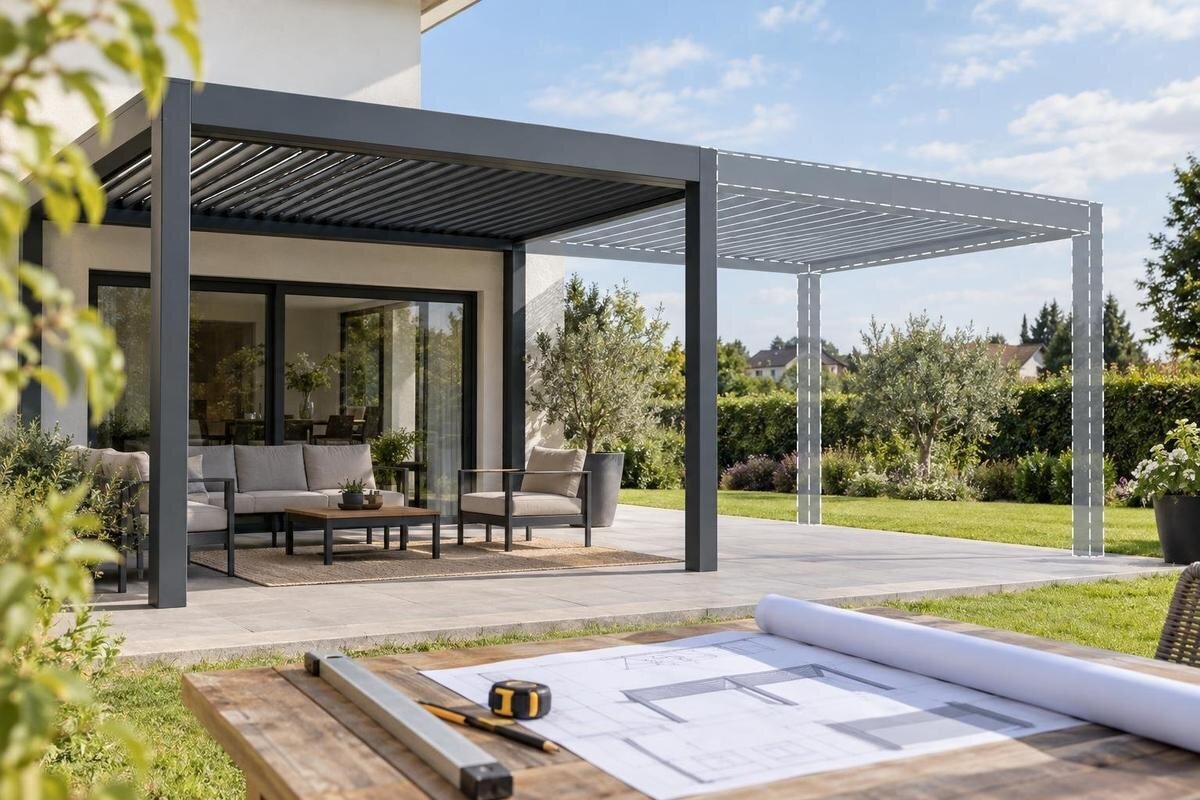
Draw both stages on a measured site plan before choosing the first size. Show the roof outline and proposed post locations, then add doors, windows, steps, paths, furniture, planting and fixed services that could limit how you use the space. Include how people will move between the house and seating area, and whether the later module could block an opening or narrow a route. Measure the intended final footprint, not just the area covered by the first order. A marked-up plan can reveal misaligned posts or awkward circulation before paving and landscaping make changes more difficult. For a wall-adjacent design, show the relevant façade and nearby doors or downspouts as well.
The Bloomcabin Pergola listing presents configurations from 9 to 24 m². That stated area range helps identify the options under consideration, but it does not say which sizes may be joined or where their supports must sit. Ask for dimensioned drawings of the first-stage and finished layouts, then compare the roof edges, post positions and usable space. Include existing paving, walls and fixed drainage points on the plan. If the final footprint has to shift to clear a door or path, confirm that the supplier still approves the revised connection; do not treat moving posts on site as a harmless adjustment.
Get a drawing for the connection
Request drawings that show both the first-stage installation and the completed two-module arrangement. A plan view can clarify the overall footprint, while elevations or sections can show how the roofs meet and how the supports align. Ask the supplier to identify the approved joint, required connection components, affected posts or beams, and any parts that differ from a stand-alone unit. The drawing should name the model, selected configuration and orientation. A sketch showing two rectangles touching does not explain whether the frames are designed to connect or must remain structurally separate. Ask for a revision date so you can tell which plan applies to the quote.
Ask what must be decided or supplied with the first order: perhaps a particular end configuration, matched parts, an attachment location or a reserved opening. These are questions, not assumptions; the approved solution may use none of them. Request the installation sequence and ask whether any existing frame or roof would need to be altered when the second module arrives. If the project uses the model on the wall-mounted model page, include that exact product reference in the request. Attach measured site information or current photos, then have the written answer refer to the configuration shown on the drawing. Confirm who is responsible for checking that the approved connection matches the site.
Design drainage for both roof areas
Rainwater needs a route for the finished roof, not just the original one. Request a drawing that follows water from each roof area to its collection point and final discharge, and shows what happens where the modules meet. A second roof may change which edge receives runoff or where an outlet can sit; do not assume that a seam, flashing or gutter makes the combined arrangement watertight. Confirm that the drawing applies to the exact roof type and orientation you plan to buy, rather than relying on a general product illustration. Ask whether the first-stage outlet needs to stay clear or be relocated later. Settle the route before paving, planting or connecting a drain.
Walk the intended discharge route on site with the supplier or installer. Check that an outlet will not empty onto an entrance, a frequently used path or a wall, and that it remains accessible for inspection and maintenance. Consider both stages: a post, beam, screen or later landscaping could obstruct access or alter where water travels. If the Bloomcabin Bioclimatic Pergola is the model in your plan, request drainage information for that exact configuration; the product name alone does not confirm how a joined roof drains. Have site-specific drainage design reviewed by the appropriate professional, particularly if the final discharge location differs from the current one.

Coordinate foundations with the final layout
Foundations are easiest to plan against the final post layout, even if the project is built in stages. A second module can change the number or location of supports, and a joined system may not use the same post arrangement as two independent units. Do not assume that spare concrete, an existing slab or unused pads can support the eventual configuration. The first-stage design should identify whether any supports are deliberately intended for future use and whether they can remain exposed until then. Note the current surface and site conditions so a qualified designer or installer can assess the actual layout rather than relying on a broad estimate.
Ask the pergola supplier and the qualified professional responsible for the base to coordinate the final drawing, site conditions and exact model. Keep the regular pergola page as a model reference so everyone is discussing the same product, but do not treat a product page as foundation guidance. The review should address proposed support locations and the condition of the patio or ground; dimensions alone are not enough. Ask whether the slab, grade, drainage or known buried services affect the work. Avoid placing future footings from an approximate sketch or adding anchors yourself. Have site-specific design questions answered professionally rather than guessing at a footing size or position.
Separate roof controls from physical expandability
If you want independently operated roof zones, specify that as a separate requirement. A physical connection between modules does not create independent controls, and two controls do not prove that the frames can be joined. Ask whether each roof area can be operated separately, whether a command affects one area or both, and how the arrangement is meant to work once the second module is added. These details should be shown or described for the exact proposal, not inferred from the word “bioclimatic” or from a product image. Keep the questions about the mechanical connection and the control arrangement distinct, even if both matter to how you plan to use the finished pergola.
Request a control layout that identifies what is included in the first order and what would be needed for the later stage. Ask whether control hardware, wiring routes or commissioning need to be planned now, and who will integrate and test the completed system. Do not improvise electrical connections or assume that a future installer can make unmatched equipment work; have electrical design and installation handled by a qualified professional. The bioclimatic model listing identifies the model but does not establish how separate roof zones would be controlled. Put any requirement for independent operation in the quote and final drawings, including whether you want the two areas to operate separately or together.
Confirm future compatibility and availability
Future supply is uncertain, even when a suitable module is currently offered. Product ranges, colours, components, control options and connection details can change, and a later matching unit may not be available. Before ordering, ask which model revision, configuration, finish and interface parts are needed for a compatible extension, and whether the supplier can confirm compatibility for your first-stage order. A broad assurance that the same style will probably remain available is not a written compatibility statement. If the project depends on an exact match, make that dependency visible in the order record and ask what alternatives would require a new design.
Keep the quotation, order confirmation, drawings, model and configuration names, finish selection, parts schedule, manuals and supplier replies together. Note drawing revisions and record any changes made during installation, since the built arrangement may differ from the original plan. For a project based on the Bloomcabin wall-mounted model listing, save the product reference with the order documents; a current listing is not a promise of future stock or compatibility. Before buying a second module, ask the supplier to compare your saved records with its current offer and confirm whether a redesign or different connection parts are needed.
Compare the cost and scope of both stages
Treat the second stage as a separate scope when comparing quotes. It may need to account for the module, approved connection parts, design work, delivery, installation labour, changes to the existing structure, foundation work, controls and drainage. These are items to ask about, not a prediction that each will be charged; the answer depends on the design and what the first contract includes. Request a written comparison between ordering the complete arrangement now and buying the first module with a later extension. Ask for inclusions and exclusions in both versions, including whether design or project coordination for the future stage is included in the initial order.
Also ask what must be ready for a return visit: access for materials, room to work around the existing pergola, and whether furniture, screens or finished surfaces need to be moved or protected. Clarify who coordinates the supplier, installer and any separate foundation or electrical professional if the work is staged. Identify the product using the regular Bloomcabin Pergola listing, then ask for scopes tied to the same layout and configuration. Do not estimate the later stage by doubling the first module’s area or price; connection work and site conditions can make the two scopes different.

Recheck local and property requirements
A larger final footprint can raise questions that were not part of the first-stage review. Before proceeding, check with the appropriate local authority and any property owner, condominium board or association involved about the planned final layout and whether another review is needed. The answer depends on the property and location, so do not assume that a decision about the first module also covers a later extension. If insurance coverage or a shared-property agreement is relevant, ask the insurer or responsible decision-maker directly and keep the response with the drawings. This matters particularly if the second stage changes the footprint or arrangement originally presented.
Check practical site constraints at the same time: the delivery and installation route, access to exterior doors and service equipment, boundaries, overhead obstructions and known underground services. Ask the contractor what site information or utility locating is required before work; do not rely on an old sketch if paving or planting has changed the site. If the finished arrangement is near a neighbour or shared access, make its footprint and drainage direction clear during local review. These checks do not establish permission; they help you take an accurate final proposal to the people who can confirm what applies to your property.
Keep a record the next installer can use
Use the first contract and drawing set to preserve a clear record of what was bought. Keep the model, configuration, connection assumptions, approved first- and final-stage plans, drainage route, foundation coordination and control requirements together with the scope, inclusions and exclusions. Ask the supplier to record which parts are intended for the first installation and which, if any, are required for an approved future connection. A verbal description or general catalogue image is not a substitute for documents that define the project. If the order changes, request revised drawings and keep the current version clearly identifiable rather than retaining conflicting plans without notes.
At installation, record actual post locations and any changes from the approved drawing. If the installer can provide photographs of details that will be difficult to measure later, keep them with the project records. Note drain outlets and control equipment that may matter when adding another module, and ask for relevant information to be included in the handover documents. When you consider the second stage, give the file to the supplier or qualified installer and ask them to recheck compatibility, current availability, the site and the proposed connection. The original plan is useful project information, but conditions may have changed since the first module was installed.
Frequently asked questions
Can any pergola be extended later?
No. A second unit may be placed nearby, but joining it to the first needs approval for the exact model, orientation and configuration. Ask for the connection drawing and final layout; a similar appearance or shared product family is not enough.
Is it better to order both modules at once?
Not automatically. Ordering both together can make it easier to specify one final layout and compare a single installation scope, while phasing may suit a project with separate budgets or work periods. Compare written quotes and confirm what must be included in the first order.
Can each module have its own roof controls?
Possibly, but separate controls are a controls requirement, not proof that the modules can be joined. Ask for a plan naming each independently operated zone, and confirm the physical connection separately. Have electrical work planned and completed by a qualified professional.
Can I install footings now and add the pergola later?
Only if the supplier and a qualified designer confirm a foundation plan for the final configuration and site. Support locations may differ between a stand-alone first module and an approved joined arrangement. Do not place future footings from a rough sketch.
What if the model is no longer available?
Do not assume another model will connect to the installed one. Give the supplier your original model details and drawings, then request a current compatibility review and any revised design. A saved product page helps identify the original selection but does not guarantee future supply.
Adding a second pergola module later is realistic only when the first purchase is treated as part of a documented final design. Confirm an approved connection for the exact model, map the complete footprint, and resolve combined drainage, foundations and any separate roof controls before committing. Record compatibility and supply assumptions in writing, then preserve the drawings and installation details. Without those pieces, a later module may fit the patio, but that does not mean it can join the existing pergola as one approved system.
