





Bloomcabin Bioclimatic Pergola
Bioclimatic pergola with adjustable aluminum louvers for flexible sun, shade, airflow and rain cover
The Bloomcabin bioclimatic pergola is made for patios where a fixed roof would limit how the space can be used. Its adjustable aluminum louvers can open, tilt or close as the sun and weather change. The result is a patio that can feel open and airy, gain targeted shade, or offer greater cover during rain from breakfast through the evening.
The current range covers 9–24 m² and has an overall height of approximately 250 cm. Quality aluminum profiles, integrated rainwater drainage and a choice of RAL colours define the design. Optional automation and side solutions let you tailor operation, privacy, sun screening and wind protection.
Before configuring your pergola, assess the patio carefully. Consider the path of the sun, prevailing weather, doors and windows, existing drainage and the room needed for furniture. If you want a motor and LED lighting, plan the electrical connection and cable route before finishing the patio surface or nearby areas. Bloomcabin Denmark.
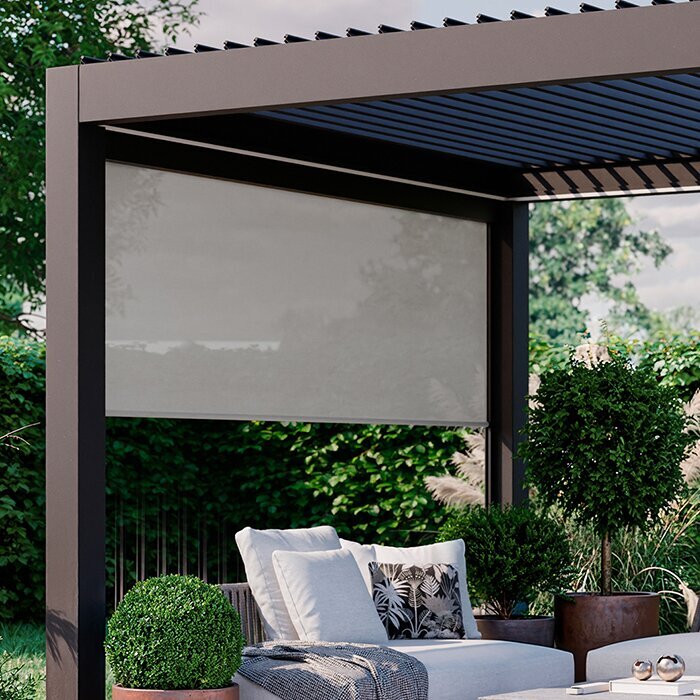
Manage light and airflow from above
Adjustable louvers help the patio respond to the time of day and weather
Unlike a fixed pergola roof, the aluminum louvers can be opened, tilted or closed. An open setting admits light and preserves an upward view. Tilting reduces direct sun without sealing the roof, while closed louvers create a more sheltered area. The comfortable setting depends on the sun angle, temperature, time of day and how the patio is being used.
Partly open louvers cast shade while allowing warm air to rise away, which can make seating and dining areas feel less enclosed on warm days. Closed louvers give more protection from direct sun and rain. This remains an outdoor structure, so sensitive items should still be stored appropriately for the weather.
Optional motorization makes regular roof adjustments easier. Depending on the configuration, selected side elements can also be motorized.
Adjustable louvered roof
Set sun, shade, airflow and rain cover to suit the moment
9–24 m²
Several configurations for patios of different sizes
Optional automation
Motorized operation for the louvered roof and selected side elements
Outdoor options
LED lighting, screens, side panels and glass walls
Quality aluminum construction
Robust aluminum profiles, integrated drainage and a clean-lined design
The pergola uses quality aluminum profiles for a crisp architectural look and manageable upkeep. It is not maintenance-free: inspect surfaces, connections and moving components regularly, and remove dirt promptly. Good site planning also keeps gutters, louvers and side elements accessible later.
Rainwater is channelled within the structure, avoiding gutters that interrupt its clean appearance. That integrated route does not replace site drainage planning. Decide where water will exit and how it will be directed away from the façade, foundations, patio and regularly used walkways.
RAL colours allow the frame to relate to windows, doors, cladding, a pool area or patio materials. Matching existing metalwork can create a calm architectural effect, while contrast makes the pergola a deliberate focal point. Consider more than a small colour sample: light, shade, adjacent finishes and the pergola’s scale all affect how a colour reads outdoors.
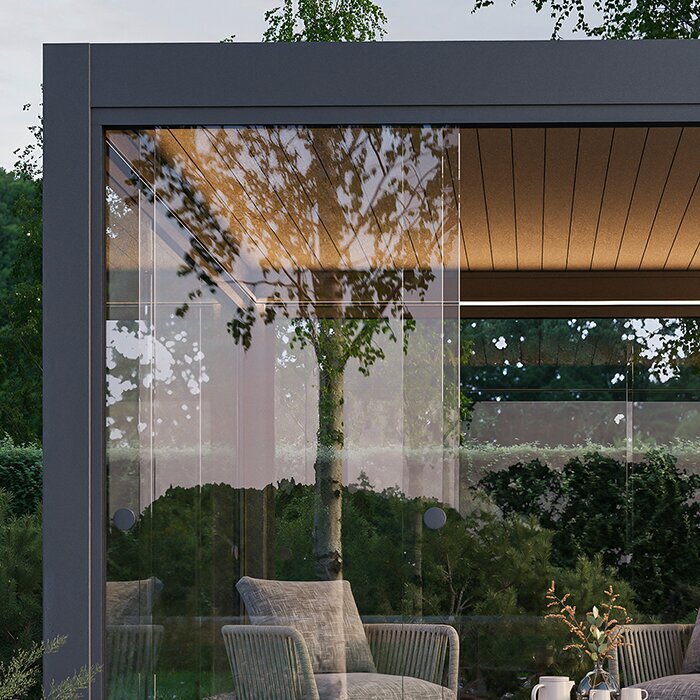
Louvered roof and side options
Plan the roof first, then select the side protection that serves the space
Adjustable louvered roof
The adjustable roof controls overhead light and how readily warm air can escape. First consider how the patio is used and when shade is most valuable. You can then choose the sides where extra sun, privacy or wind protection offers a real benefit.
Outdoor options
Optional screens, side panels and glass walls each serve different purposes. Screens provide flexible sun and privacy control; glass walls retain views while reducing lateral wind; panels make a more enclosed area. Review every side individually, since each choice affects light, views, air movement and circulation around the pergola.
Product details
Key technical details for the Bloomcabin bioclimatic pergola
Area
9–24 m²
Available configurations
Overall height
approx. 250 cm
Height information for site planning
Construction
Quality aluminum profiles
Clean-lined outdoor construction with manageable upkeep
Roof
Adjustable aluminum louvers
Open, tilt or close
Drainage
Integrated gutter system
Plan the connection to local site drainage
Warranty
12-year warranty
Subject to the applicable warranty terms
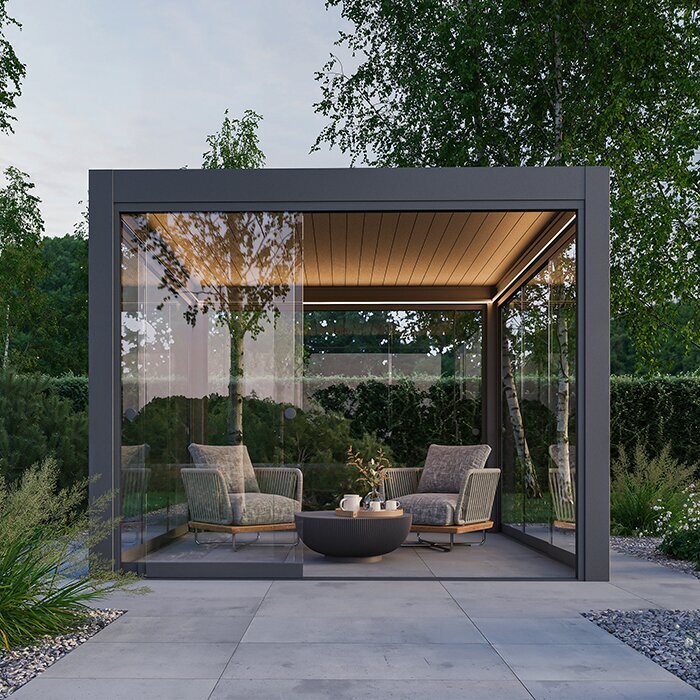
Adjusting louvers day to day
Choose a roof setting for each use
Open the louvers wide for daylight and an unobstructed view upward. When the sun moves onto the seating area, a tilted position can cut direct rays while still allowing air to rise through the roof.
Close the louvers during a rain shower. Carefully placed side elements can help with low sun, overlooking or side wind without closing off every side.
The pergola makes outdoor space more usable, but even with closed louvers and side elements it remains an uninsulated outdoor area.
Ideas for use
Four ways to shape a flexible patio area
01
Dining area
Create a dedicated dining spot with adjustable shade and optional LED lighting.
02
Garden lounge
Arrange a lounge with low seating and adjust the louvered roof for changing light and weather.
03
Wellness area
Pair a hot tub or quiet retreat with screens or side elements.
04
Patio for entertaining
Set up a flexibly shaded dining and seating area for shared meals and relaxed evenings.
Site, weather and orientation
Set the louvers, side elements and orientation according to the actual patio. Notice when direct sun reaches the seating, where rain and wind usually arrive, and which views you want to keep. Reflections from pale cladding or large glazed areas can also change perceived brightness. This site review is more useful than choosing a configuration by compass direction alone.
Changeable weather
Spring and fall conditions can shift quickly, but timing and exposure vary across Canada. Use the weather at your own site—not a fixed seasonal assumption—to decide when the adjustable roof or a targeted side screen is useful. On a consistently exposed side, focused protection is often more practical than enclosing the entire pergola.
Also account for doors, full-height windows, roof overhangs and the usual routes between the home, garden and patio. Posts and side elements should not constrict an important passage or unnecessarily interrupt interior views. Near the home, check that windows and doors still operate fully and that the façade remains accessible for maintenance.
Place side elements where they solve a clear problem: weather-side protection, privacy towards neighbours, or screening from low sun. Leaving selected sides open preserves garden connections, circulation and natural airflow.
South- and west-facing patios
On south- and west-facing patios, let the preferred time of use guide the configuration. Check how light reaches seating and adjacent glazing in the morning, afternoon and evening. This shows which louver setting shades the occupied area from above and where side screening may help.
Assess shade beyond the pergola’s centre. A table, individual seats and circulation routes can be affected differently as the sun angle changes. What matters is shade over the areas you actually use, not only the position of louvers across the roof.
Include adjoining rooms in your assessment. Light may still reach full-height windows or cause reflections even when the seating area is shaded. Compare the effect from the patio and from regularly used indoor rooms before finalizing orientation and side options.
Electrical connection and LED lighting
Choose the connection point and cable route early for motorization and integrated lighting. Cables should suit the selected equipment and final post layout so they do not need to cross a completed patio visibly later.
Connection and transition points must remain accessible for inspection and service, even when cabling is discreet. Coordinate them with foundations, drainage, side elements and planned furniture before completing the patio or façade.
Engage a locally qualified electrical contractor for the outdoor connection. Before work begins, confirm that the motor, controls and LED equipment are accepted at the destination, and ask the relevant provincial or territorial authority and municipality about approval, notification or inspection steps. Place everyday controls where they can be reached safely and conveniently.
Drainage and base
When the roof is closed, rainwater is directed through the structure. Consider the full route, from the louvered roof and integrated channels to the point where water joins patio drainage, infiltration or another planned site solution.
At the proposed outlet, check slope, patio edges, planting beds and potential obstructions. Water should not pond, run back to the façade or cross a frequently used path. Establish the onward route before installation.
Installation requires a level fixing surface suited to the structure; a finished patio alone does not reveal what lies beneath. Since Canada’s National Model Codes do not by themselves establish one rule for every location, have a local designer assess the foundation and fixing points for site-specific snow and wind conditions and the requirements adopted in the province or territory. Locate existing services and drainage, and confirm levels, before setting the final drilling and installation positions.
Configuration and comfort
Plan size, furniture, side elements and technical equipment together. Even a generous area can feel cramped when chairs, doors, screens and routes compete for the same space. Consider usable space between posts, furniture and moving elements, not only the external dimensions.
Furniture at the right scale
A dining table needs space not only for itself but also for pulled-back chairs and people passing behind them. A lounge often uses more continuous floor area because of deep seating, while requiring different routes. Include serving routes from the home, garden access and operation of any side elements. Furniture should be comfortable to use without touching posts, glazing or screens.
A scaled plan reveals whether chairs can pull out fully, passages remain clear and doors or side elements can operate without conflict. Draw the furniture outlines along with the space needed to use them, so overlaps appear before choosing the pergola size.
Include planters, a grill and storage furniture alongside the table, chairs, lounge or hot tub if they will remain under or beside the pergola. Then identify the zones that must stay open for access to the home, garden and technical components.
Sun angle, not compass direction alone
Roof louvers mainly affect overhead light. Low morning or evening sun can still reach seating and nearby rooms below the roof edge. Consider seating positions, sightlines and the times when the patio is truly used, not only its orientation.
The louvered roof and screens do different jobs. The roof shades from above and can open for air exchange; a screen can reduce side light or overlooking. Combining them purposefully is better than keeping the roof closed to counter side glare.
Observe the sun at your usual times outdoors. Site photos in the morning, at midday and in the evening can record shadow lines, reflections and side light. They help identify where a screen is genuinely useful and which view should remain open.
Screens or glass walls?
Screens provide adjustable sun and privacy protection. Glass walls retain a view and can reduce side wind, but remain in place and need convenient access for cleaning. Balance protection, openness, maintenance and the desired connection between patio and garden.
Different sides need not receive the same treatment. More privacy may suit a street or neighbouring property, while a sheltered garden side may be better left open. Ensure side elements do not impede key routes, views or desired airflow.
For each side, note the problem to solve, when it occurs and whether the preferred answer is permanent, transparent or adjustable. This makes it easier to compare screens, glass walls and panels without specifying multiple elements for the same purpose.
Motorization and controls
A motorized roof should be controlled from a position where the louvers can be seen clearly. LED lighting should also reflect intended use: light above a dining table serves a different purpose than even illumination across the entire pergola.
Before ordering, decide which components will be motorized and which will be manual. The electrical supply can then be matched to the selected equipment. Treat the roof, lighting and automated side elements as one control plan.
Controls should be easy to reach from the usual seating area and clearly assigned. Open doors, chairs or side elements must not block access. Their final position is best chosen after furniture and circulation routes are planned.
Planning for the long term
Foundations, drainage and maintenance access are much harder to alter later than furniture or décor. Resolve these early, and keep gutters, louvers, surfaces and side elements accessible for inspection, cleaning and service.
Keep drainage inspectable
Leaves, blossom debris and other deposits can affect integrated water channels. Keep gutters and outlets accessible and inspect them regularly, especially near trees. Loose debris is easier to remove before it compacts and obstructs drainage.
Watch where water actually travels after it exits. Slope, paving joints, edges and low spots can alter the intended route. Arrange the drainage transition to avoid splashback on the façade and persistent moisture around posts or fixings.
After installation, check in suitable weather that the planned drainage works in practice. Later changes to paving, beds or edging can affect water movement and should be considered accordingly.
Maintenance access
Louvers, gutters, screens and glass surfaces should remain easy to inspect and clean. Use gentle cleaning methods suitable for aluminum and avoid tools that may damage the finish. Do not force blocked moving parts.
Large furniture and heavy planters should not permanently obstruct maintenance and service areas. Leave room in front of screens, around posts and beneath drainage points for occasional work, and account for this while planning furniture.
Regular visual checks help identify leaves and deposits in water channels or around the moving parts of louvers and side elements early. After long periods without use or unusual loading, inspect before operating moving components again.
Review the configuration before ordering
Compare the external dimensions, usable internal area and intended site. Add posts, furniture and necessary movement zones to the plan as well as the roof area. This shows whether the pergola covers the desired patio without narrowing entrances or garden routes.
Check the selected version against fixed site conditions: façade, doors, windows, roof overhangs, paving edges, drainage and electrical supply. Before ordering, ask the municipality whether zoning or permit review applies to the planned freestanding or attached pergola. Describe any wall attachment, side enclosure and electrical equipment, since those details can affect the review. Resolve differences before preparing the base.
Record the chosen RAL colour, roof operation, side elements, lighting and automation together. This overview helps coordinate design, technical preparation and future use rather than planning individual options in isolation.
Allow for future changes
Outdoor furniture and habits can change over time. A clearly organized area that is not overfurnished makes it easier to replace a dining table with a lounge or add seating later. Keep circulation and maintenance zones open regardless of the layout.
Where the selected equipment supports several furniture layouts, avoid aiming electrical connections and lighting at one item alone. A flexible floor area allows later changes between dining and seating zones without altering the pergola structure.
Permanent elements such as glass walls need more careful consideration than movable furniture. Consider their effect on views, cleaning, routes and airflow. Screens are more adaptable to changing sun or privacy needs, but serve a different purpose.
Continue planning with Bloomcabin
Guides to size, foundations, pergola comparisons and ordering
Frequently asked questions
FAQ – Bioclimatic pergola
What makes a pergola bioclimatic?
Its defining feature is an adjustable louvered roof. Different louver positions influence how much direct light reaches the patio and how open the roof remains for air exchange. When closed, it offers more cover from sun and rain. The term does not mean a fully climate-controlled room; it describes an outdoor structure with a roof that can adapt to different uses.
How do I choose the right pergola size?
Start with the actual patio dimensions and planned furniture. Add pulled-out chairs, routes, doors, posts and moving side elements to a scaled plan. The right size is the configuration where all of these areas remain comfortable to use without overlap.
What should I consider when placing it directly beside the home?
Check façade openings, roof overhangs, exterior lights and regular routes between the home and patio. Windows and doors must still operate fully. Include planned drainage, electrical supply and access for future maintenance in the site decision.
Can the roof be motorized?
Yes. Motorized control is available as an option for the louvered roof and selected side elements. Confirm the electrical supply, cable route and control location before patio surfaces or adjacent areas are completed.
Does every side need the same equipment?
No. Use screens, glass walls and panels only where they serve a specific purpose. Sun protection, privacy, views and reducing side wind may matter differently on each side. A deliberately open side can preserve circulation, views and airflow.
What site drainage planning is required?
The water route is integrated into the pergola but ends at an outlet on site. From there, water must be directed according to slope and existing drainage. It must not run toward the façade, fixing points or frequently used routes. Keep gutters and outlets accessible for inspection.
How are aluminum frames and louvers maintained?
Remove leaves and loose dirt regularly, using gentle methods suited to aluminum surfaces. Inspect gutters and movement paths at the same time. Do not force blocked louvers or side elements; first check for dirt, ice or another obstruction.
What information helps prepare for a consultation?
Useful details include patio dimensions, door and window positions, planned furniture, the sun path, prevailing weather and desired side elements. Add the intended water outlet, electrical supply and preferred RAL colour. Photos and a scaled plan help refine the configuration.
Bloomcabin Bioclimatic Pergola
Extend your patio with a flexibly adjustable louvered roof
The Bloomcabin bioclimatic pergola combines a clean-lined aluminum structure with adjustable louvers. Open, tilt or close the roof according to sun, desired airflow and rain.
Before ordering
✓ Choose the right size within 9–24 m²
✓ Plan furniture to scale
✓ Select screens or glass walls as needed
✓ Prepare a level, load-bearing installation surface
✓ Confirm the RAL colour and automation
✓ Plan LED lighting and electrical supply early
