
Assessing Scratches on a Powder-Coated Pergola
Pergola care
A scratch on a pergola’s powder-coated finish may be surface transfer, a scuff that changes the sheen, or a break in the coating. Those possibilities call for different responses, and a similar paint colour does not establish a match. Inspect gently, document the area before altering it, and ask the supplier or manufacturer to confirm an approved system for the exact model and finish. The aim is to give support enough information to distinguish a cosmetic mark from coating damage without making the original condition harder to assess.

01
Surface scuffs and coating damage
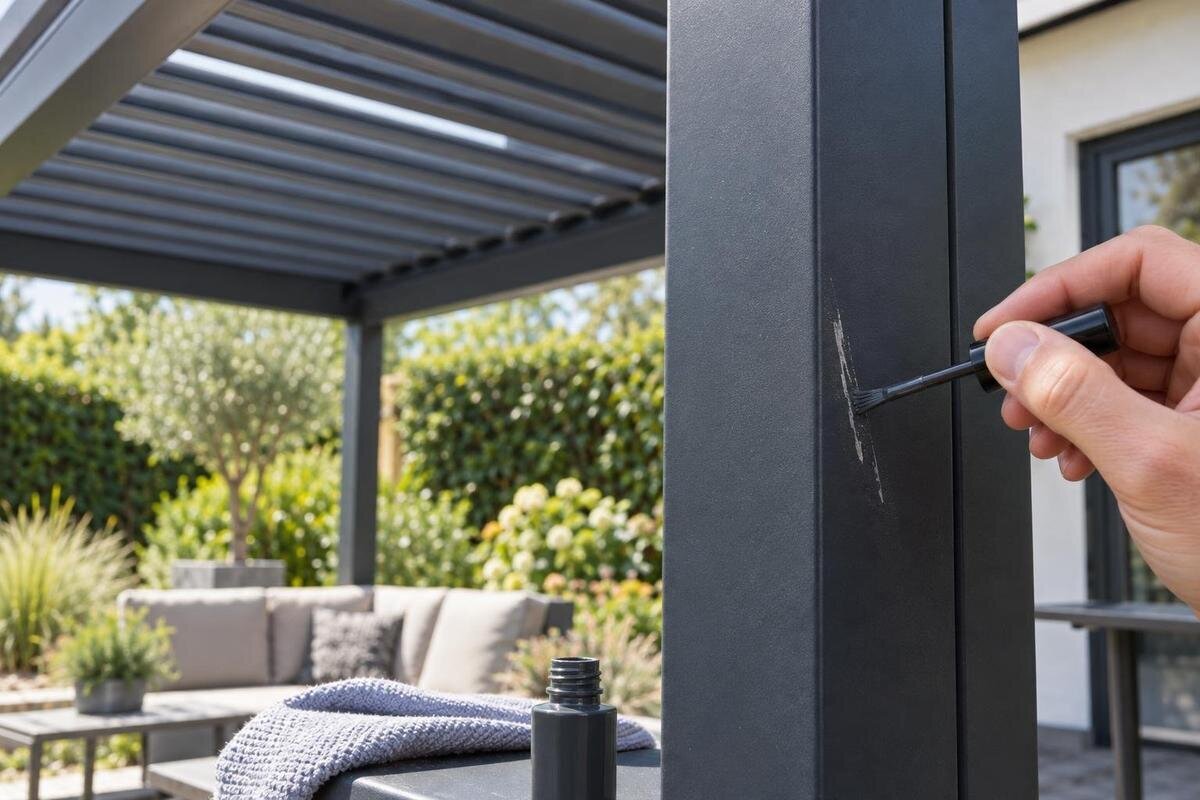
Powder coating is the visible finish, but a line on it does not automatically mean the coating has been cut. A pale streak may be material transferred onto the surface; a dull patch may be a change in sheen. A chip, raised edge or visibly different layer is more suggestive of a break. Dirt, water and reflected light can alter each clue, and the same mark may look different as you change angle. The word scratch describes an appearance, not its depth; a photograph alone cannot identify what lies beneath the finish.
Use that distinction to decide what to document, not to diagnose the exact depth or material underneath. A mark that may be transfer can be checked after using a cleaning method allowed by the care instructions; possible coating loss calls for a more cautious support request. Don’t test with a blade, key, coin, fingernail, abrasive pad or solvent. Scraping or repeated rubbing can enlarge the damage, and a chemical may change the finish. If you are unsure, say so rather than labelling the mark shallow or deep. Mention any dent, distortion or cracking separately from the surface mark.
Inspect gently before judging the finish
Check the pergola’s care instructions before wiping the spot. If the manual permits it, use only its stated cleaning method and a clean, soft cloth, then let the area dry before judging the surface. Don’t begin with polish, wax, scouring pads, erasers, metal cleaner, degreaser or solvent unless the product instructions specifically approve it. A cleaner may remove transferred material, but it may also affect the sheen or leave residue that makes comparison harder. If the manual is unavailable or unclear, take photos as found and ask before trying a cleaning product.
Keep the inspection controlled. One gentle pass may show whether loose surface soil changes; stop if the cloth catches, colour transfers to it, flakes appear or the surface seems to lift. Don’t work a stubborn mark back and forth, try to get a tool under an edge, or switch to a stronger cleaner when the first method does not help. Compare the dry area with undamaged finish on the same part, under similar light. Note whether the mark changed, stayed the same or revealed a visible break. That observation is more useful than repeatedly cleaning in pursuit of certainty.
02
Lighting and photos for scratch assessment
View the dry area in diffuse daylight and from more than one angle. A phone flash or direct sun can create a bright highlight that resembles a scrape, while a shadow can make a shallow scuff look like a deep line. Compare the mark with an undamaged area on the same pergola member, rather than another component that may look different under the light. If its appearance changes as you move, record that as a clue, not proof that the coating is intact. Avoid judging colour from a wet surface. For a useful comparison, photograph the marked and unmarked areas together where possible. If you take another view from a different angle, label it separately rather than presenting it as a change in the damage. This keeps differences in lighting distinct from changes you have actually observed.
Take an overview photo, an image showing which part is involved, and a sharp close-up. Include a ruler or familiar scale beside the mark if its size is difficult to judge, without laying it over or rubbing the surface. Keep the original files unedited, note the date and lighting, and avoid filters that shift colour. If your paperwork identifies the unit as a bioclimatic model, the Bioclimatic Pergola listing can help match the catalogue name in your photo notes; it does not identify the coating colour or a repair product.
Record the scratch’s exact location
Photos are more useful when the location is described precisely. Note which post, beam or other component is marked, which side faces out, and whether the scratch is near an edge, corner, fastener or connection. Give an approximate length and width, and mention whether there are several marks or a pattern. Describe left and right from a stated viewpoint, such as facing the pergola from the patio, so the location is unambiguous. If several parts are affected, give each location a simple label and use the same label for its photos. For an overhead area, use a safe ground-level view rather than leaning or climbing just to get a closer image. A reviewer should be able to understand where each close-up sits on the whole structure.
Also note when you first saw the mark, such as during delivery, assembly, later use or cleaning, if you know. Distinguish when you noticed it from when you think it happened; those may not be the same. If it followed an impact, describe that without guessing at the cause or force. Include any earlier photo that shows the same area, but explain whether the mark is visible in it rather than assuming the photo proves when damage occurred. Product family is useful context too: if your order says wall-mounted, the Bloomcabin Wall-Mounted Pergola product page can help you use that catalogue name consistently. Put the model name, location and date together in your report so support can connect the description with the right images.

03
Look for signs of coating damage
A crisp chip that shows a visibly different layer, a lifted or feathered edge, flaking, blistering or a mark that remains distinct after safe cleaning may indicate a break in the finish. Treat these as warning clues, not a definitive field test. A pale line or rust-like stain does not, by itself, identify the material underneath or explain how the mark occurred. Don’t pick at an edge or sand the area to find out. If the coating appears to be separating, document it and ask the supplier or manufacturer to assess the photos.
A single stable scuff without a visible chip may be less concerning than lifting or a mark that is changing, but appearance alone cannot confirm the repair needed. If flakes are coming away, a substrate appears exposed, or damage is spreading, pause cosmetic work. Bending or cracking in a member is a separate concern from finish damage and should be raised with a qualified service provider. The Bloomcabin Pergola catalogue entry can help confirm a product-family name from your paperwork, but it cannot diagnose the mark.
Identify the pergola and finish
Before requesting a repair system, gather the order confirmation or invoice, the product name as written there, the order reference, and the purchase date if known. Add any model or serial number that is already accessible, along with the exact member or part where the scratch appears. Don’t dismantle the pergola to find a label; if no identifier is visible without taking anything apart, say so. Include your overview and close-up photos. Accurate details can help prevent a support discussion from drifting towards a visually similar but incompatible model. Keep the order details and damage description together rather than sending disconnected messages. If you are reporting more than one mark, identify which photos belong to each affected part so a reply about one area is not mistaken for advice about all of them.
If your paperwork calls the unit bioclimatic, Bloomcabin’s bioclimatic model listing can help you check the catalogue wording. Record that model name separately from the finish information: identifying the pergola does not identify its coating. Copy a finish or colour code only from a document or label that actually provides it; don’t infer one from a product photo, a broad colour name or another pergola. If no code is available, state that clearly and ask support to identify the finish from your order details. If you bought through another seller, include the seller’s name and any relevant order details. Keep your description factual: what you see, where it is and when you noticed it. This gives support a clear distinction between confirmed identifiers and details that still need clarification.
04
Ask for an approved repair system
Ask the supplier or manufacturer explicitly whether an approved repair system exists for the exact finish and affected part. Include your identifiers and photos, and describe the mark as possible coating damage if that is what you see. Request the system’s name or item number and written instructions for the surface in question. Ask which preparation and application methods are permitted, and which environmental or curing limits apply. Those details should come from the instructions for the approved system, not a generic paint label or a tutorial for a different pergola. Make the request specific enough that the reply can address your proposed repair, rather than paint selection in general. For example, ask whether the named system is suitable for the photographed mark on the identified component. If support needs further information, clarify what is missing before choosing a product.
Ask support to confirm the finish or colour identifier it has matched, whether the product is intended for a small local repair, and whether there are limits based on the component or type of damage. If the reply gives only a colour name, follow up before buying or applying anything. If your paperwork names a wall-mounted model, the Wall-Mounted Pergola listing can help identify its catalogue family when making the enquiry. Keep that identification separate from the question of repair compatibility. Ask whether the work is suitable for you to carry out or needs qualified service. If the proposed method does not clearly cover your affected part, ask support to explain the appropriate repair route rather than adapting the method yourself.
Matching colour, sheen and texture
A close colour is only one part of a convincing repair. The finish may also differ in sheen or texture, and a broad colour name may not identify the exact coating used on a particular part. A screen image or product photo can look close while appearing different in person under another light. Age and weather exposure may also make the existing finish look different from a new repair product. Ask support which finish and colour identifiers are confirmed for your unit and whether it expects the match to be exact or approximate.
A catalogue page such as the Bioclimatic Pergola catalogue page confirms a product-family name, not a colour code, gloss level or texture. Treat product imagery as identification material, not a finish specification. When discussing the match, distinguish the finish identifier from the expected appearance of the completed repair. Ask whether any difference is expected in colour, sheen, texture or the repair edge, rather than asking only whether the paint is the same colour. If support offers a sample or test application, ask whether it is permitted and follow its written directions about where and how to use it. Clarify the expected result before proceeding, especially if the mark is prominent. Don’t mix paints or adjust a colour yourself to compensate for a difference.

05
Choose a repair route based on the damage
Scratch length alone does not determine the right response. A small chip at an edge may be harder to handle neatly than a longer superficial transfer mark; several marks or a section of lifting finish may need another kind of assessment. Location, access, coating condition, part geometry and the approved system’s stated scope all matter. Share measurements and photos, then ask whether the appropriate route is a local touch-up, a qualified service assessment or discussion of a replacement component. Don’t assume that a particular part or repair option is available.
For broad damage, repeated marks, a scratch near a connection or any accompanying deformation, ask for advice before attempting a cosmetic repair. Explain whether your concern is the appearance of one mark, lifting finish over a wider area, or damage to the component itself. That distinction helps keep a touch-up discussion separate from a service assessment. If replacement is discussed, ask whether the replacement finish will match the existing part; don’t assume colour compatibility from a product name. Bloomcabin’s wall-mounted model page can help identify the product family if that is what your paperwork names. Ask which affected component the proposed option addresses and whether any other reported marks need separate attention. Keep the enquiry focused on the damaged area rather than a general product purchase.
Repair instructions and records
Proceed only when the instructions identify a compatible product and explain the repair’s intended scope. Read them fully, including the stated preparation, application method, environmental conditions, curing time and safety requirements. Don’t substitute directions from a coating made for another surface, or sand, prime, thin or layer products unless the approved instructions say to. If the written guidance is vague about your finish or the damage is outside its stated scope, pause and ask for clarification. Don’t improvise if the location is difficult or unsafe to reach.
Keep the support reply confirming compatibility, any finish code, product label and instructions, along with the original photos and a dated image after the repair. Retain packaging or batch details if provided, and note what was applied and by whom. Use the same location labels in the before-and-after records so each repair can be traced to the original mark. If the result looks unexpected, don’t add another coat or sand it to hide the difference; photograph it and ask support what to do next. Describe the difference you see without assuming its cause. If your records name Bloomcabin Pergola, the Bloomcabin Pergola product page can help align the catalogue label with your file. Keep the repair correspondence with that record for any later follow-up.
Frequently asked questions
How can I tell whether a scratch has gone through the coating?
A chip, lifted edge, flaking or a visibly different layer may indicate coating damage, but a line or colour change alone is not conclusive. Clean only as the care instructions allow, then photograph what remains. Don’t scrape or use a solvent to test the surface. If the depth is unclear, describe it as uncertain and ask the supplier or manufacturer to review it.
Can I use automotive touch-up paint or generic metal paint?
Only if the supplier or manufacturer confirms that the specific product and method are suitable for your pergola’s exact finish. A similar colour name does not establish a match in sheen, texture, preparation or application. Ask for the approved repair system and written directions before buying or applying a coating.
What should I include in a scratch report?
Send an overview, a photo showing the affected part, and a clear close-up. Include the product name from your paperwork, any accessible model or serial details, the scratch’s location and approximate size, and when you first noticed it. Add an unedited image and say whether you have cleaned the area, and how.
Could repairing a scratch affect a warranty assessment?
Warranty terms depend on the product and circumstances, so don’t assume that a scratch is covered or excluded. Review the written terms and contact the seller or manufacturer before changing the surface, especially if the mark appeared during delivery or assembly. An unapproved repair may make the original condition harder to assess; keep your photos and any written reply.
How do I get the closest colour match?
Ask support to confirm the exact finish and colour identifier for your model and the affected part. A colour name or product photo is not a reliable specification for sheen or texture. If a sample or test application is offered, follow the written directions about whether and where to use it. Don’t mix or adjust paint yourself.
A useful assessment begins with what you can observe: whether the mark changes after approved cleaning, what it looks like in consistent light, and whether the coating seems to be lifting or chipped. Pair those observations with clear photos and accurate model details, then get written confirmation before applying a repair product. When the damage or colour match remains uncertain, preserving the original surface is more useful than experimenting with paint that only looks similar.
