
What Can Solar-Powered Pergola Lights Provide?
Pergola lighting guide
Solar-powered lights can make a pergola more welcoming after sunset, but their usefulness depends on more than the number of hours printed on a package. A panel has to collect enough energy, a battery has to store it, and the fixture has to deliver the kind of light your activity needs. In Canada, winter brings shorter days, a lower sun angle and the possibility of snow covering the panel. Compare the intended task with the charging conditions for the months you plan to use the space, rather than assuming a summer runtime will hold year-round.

What solar pergola lights can provide
Solar lights collect energy during daylight, store it in a battery and use it after dark. Their performance reflects a chain of conditions: the sun reaching the panel, the amount stored, the selected brightness and the number of hours the fixture stays on. A lamp can turn on and still fall short of the job; visible light is not necessarily enough to see a meal, read comfortably or make a whole walking route clear. A long runtime may also refer to a reduced-output mode. Treat solar as a limited energy supply that must serve a defined task, not as a guarantee of wired-lighting performance. Decide whether you need light on one object, one seating group or a larger area.
The easiest jobs to match are often gentle ambience, a decorative accent or a low-level route cue. These still require an outdoor-suitable product and adequate charging, but they do not demand uniform, bright coverage over a large area. Dining, reading, games or food preparation are more exacting: the light needs to reach the relevant surfaces and last for the activity. Separate the mood you want from the visibility you need, and note which evenings require reliable illumination rather than an occasional glow. If you need bright, consistent coverage whenever you switch it on, plan a verified wired option or a carefully selected combination instead of assuming a small solar kit will do every job.
Compare useful light, not just lumens
Start with where light needs to land. Lumens describe the amount of light a source emits; they do not, by themselves, show how much reaches a table or walkway. A narrow beam can make one spot bright and leave nearby seats in shadow, while a broad beam spreads light more widely and may appear less intense. Mounting height and angle change the result, too. Look for beam-pattern or coverage information that resembles your layout, not just a headline lumen figure. Illuminance, often reported in lux, describes light on a surface; no single value suits every pergola activity.
Sketch the table, chairs, access route and any steps, then ask whether each area will be visible without glare or deep shadows. When reviewing the Bloomcabin Pergola product page, keep the structure’s layout separate from the exact fixture’s output, beam and recommended placement. For meals or reading, consider light quality and colour rendering as well as brightness. Warm-looking light may suit a relaxed setting, but it should not be mistaken for enough task lighting. If coverage is unclear, ask for product-specific information rather than inferring it from the number of LEDs. With several fixtures, also check whether their settings and controls suit the way you plan to use them.
Plan panel and fixture positions separately
With solar, the best place for the lamp and the best place for the panel may not be the same. The fixture belongs near the activity; the panel needs daylight. If both are built into one unit, an overhang or roof can shade the panel even when the lamp is perfectly positioned. Some systems separate the panel from the fixture, but lead length, approved mounting and connection arrangements vary by product. Check those limits before planning around a panel that must sit away from the pergola. Sketch both components and any cable path on your layout, leaving access for routine cleaning and keeping routes clear of doors and moving parts.
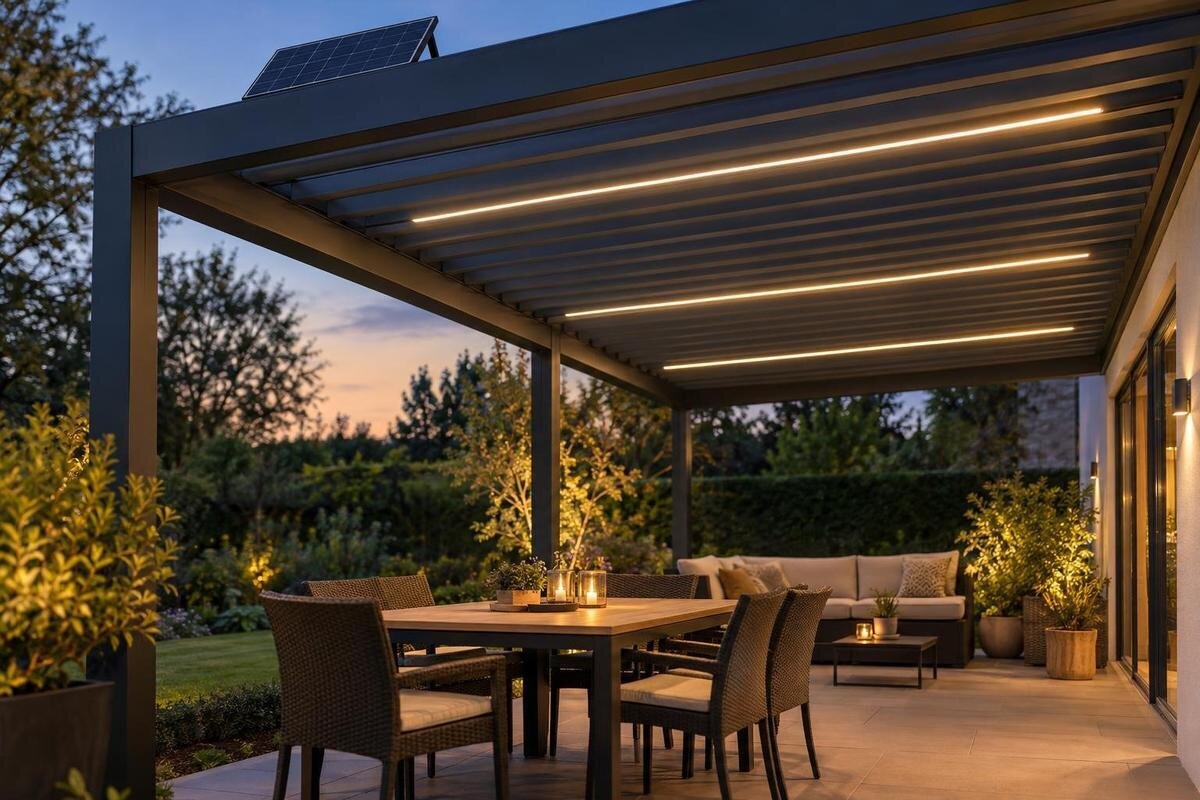
If you are considering the Bloomcabin Bioclimatic Pergola, mark proposed panel and light positions on your layout alongside trees, walls, roof edges and furniture. Distinguish anything that could shade the panel from anything that could block light from reaching the table or walking route. The two components may need different positions to do their jobs. If the chosen configuration has moving roof components, include their movement and service access in the plan. A photograph can help you visualize the structure, but it cannot establish whether a particular panel, light or cable attachment is suitable; confirm those details for the exact arrangement.
Read runtime claims with battery information
An advertised runtime is meaningful only with its test conditions. Check the hours claimed at each brightness setting, whether the estimate assumes a fully charged battery, and whether a sensor or dimming mode changes the figure. A phrase such as “up to” may describe favourable conditions or a lower-output setting, so it is not a promise of full-brightness operation every evening. A dusk-to-dawn estimate may include dimming rather than constant output throughout the night. If the manufacturer does not explain the charging and operating conditions behind the number, ask for clarification instead of building your schedule around the maximum.
Compare battery capacity, panel rating, stated charging time and light output as parts of one system. A larger battery can hold more energy, but cannot compensate indefinitely for a panel that receives too little sun; a higher panel rating does not show what it will collect in a shaded location. Capacity in watt-hours is easier to compare across products; a milliamp-hour figure alone does not compare batteries at different voltages. If you are planning around the Bloomcabin Wall-Mounted Pergola, use the selected fixture’s specifications for this comparison rather than treating the structure’s model name as evidence of lighting performance.

Check how much sun reaches the panel
Assess panel exposure at its intended position, not from the brightness of the patio as a whole. A roof, eaves, trees, fences, neighbouring buildings and seasonal foliage can cast shade; an open-looking seating area may still have a shaded panel. Observe the proposed spot at different times of day, and consider how shadows will change as the sun’s path changes through the year. A few brief shafts of sunlight are not the same as the manufacturer’s specified charging conditions. If a separate panel is allowed, locate it according to the product instructions rather than guessing at a direction or angle.
For a configuration such as the wall-mounted pergola shown in the catalogue, include the nearby building in your assessment of panel exposure. A noon snapshot may miss shadows that shift over the day or season, so compare observations from the same proposed panel position at different times. This helps distinguish a consistently exposed location from one that receives only brief sunlight. If the panel cannot be placed in an approved, adequately lit spot without blocking roof operation or creating an unsuitable cable route, solar may not fit the job. Do not compromise mounting requirements simply to reach a sunnier spot.
Plan for Canadian daylight and winter conditions
Winter is the harder season to plan for if the lights must be ready after dark. Days are shorter than in summer, the sun’s path is lower, and cloud, shade or snow on the panel can reduce the energy collected. A fixture that charges through long summer days may have less reserve after a dark winter day, especially if you use it for several hours. Outdoor marketing does not automatically mean the battery is designed to charge, operate or remain outside across every winter temperature; check the product’s precise operating limits.
If you use the pergola mainly in warmer months, judge the system for that schedule and expect occasional low-charge evenings. If winter use matters, look for the manufacturer’s charging and operating temperature ranges, storage directions and snow-care guidance. Some batteries must not be charged outside their specified temperature range, and snow or ice should be dealt with only as the instructions permit. Do not open, warm or modify a battery to restore performance. Decide what happens after several poor charging days: will the light still meet the task, or will you need another suitable source?
Estimate runtime from your actual evenings
Turn your intended use into a schedule before shopping. Note whether the lights need to cover a short visit, a full dinner or several evenings between good charging days. Consider habits that extend use, such as leaving a fixture on after guests have gone or running several lights at once; the switch-on time can differ from the time you actually need. Compare the maker’s runtime at the brightness you expect, not a minimum or dimmed setting. If a motion sensor, timer or dusk control is involved, confirm whether you can adjust it and how its operation affects the stated runtime.
Allow room for ordinary imperfect conditions: partial shade, cloudy weather, a battery that did not reach full charge or capacity that has declined with use. If several consecutive evenings need dependable light, ask how the system performs after weak charging and whether its battery can be replaced. When planning lighting for the pergola in the Bloomcabin catalogue, compare the proposed fixtures against your evening schedule rather than choosing by the structure’s area. Fixture output, the number of units, panel exposure and battery capacity all matter. Avoid selecting by the longest number on a box; look for a figure tied to your chosen brightness setting.
Aim light where people need it
Enough output can still feel uncomfortable if a fixture points into people’s eyes or creates sharp contrasts. Consider seated eye level, the direction people approach from and whether an open side leaves the light in their line of sight. Aim coverage at the task surface, then check the route between it and the door or steps. Do not assume that a fixture placed in the centre will light every edge evenly. With several lights, spacing and beam overlap affect the result; with one, shadows from beams and furniture may leave dark spots. Use the manufacturer’s layout or beam data where available.
Plan around actual furniture, not an empty footprint. A table against one side, tall planters or a privacy screen can cast shadows even when the fixture is centred overhead. If you are considering the Bioclimatic Pergola configuration, place your table, chairs and walking route on the layout before choosing fixture positions. Compare the selected light’s coverage with those occupied areas, including the approach to each seat. If you want both ambience and useful visibility, decide whether separate accent and task lights are needed, then confirm that each is suitable for its mounting position. A convenient fixture location must still work with the panel’s need for daylight.

Verify outdoor ratings and mounting approval
Outdoor placement can expose a light and panel to rain, wind-driven moisture, dust, temperature swings and, depending on the site, snow or ice. Check the exact fixture’s stated outdoor ingress-protection rating and operating-temperature range against where it will sit; a general phrase such as “weather-resistant” may not explain those limits. Ask whether the ratings apply to the complete unit, connectors and separate panel, and whether the product is intended for sheltered or exposed mounting. A product suitable under a protected overhang may not be appropriate in a more exposed spot. Follow the maker’s directions for cleaning, snow and seasonal storage.
Confirm that the pergola manufacturer or qualified installer approves the exact attachment point and fixture combination. For the Bloomcabin Bioclimatic Pergola model, that confirmation needs to cover the specific configuration and accessory, not merely a similar-looking installation. Do not assume a roof, beam, wall or moving part can accept an added panel or light because it looks solid, and do not use photographs as mounting documentation. Check both components if the panel and fixture are separate. If mains-powered lighting or permanent electrical work is part of the plan, ask a qualified electrician to assess it rather than adapting a solar product or improvising connections.
Choose solar, wired lighting or a combination
Solar is a reasonable candidate when the task is modest, the panel has a suitable charging location and a depleted battery on an occasional evening is acceptable. It is a weaker fit when you need bright, broad light on demand, use the pergola through short winter days, have persistent shade or cannot tolerate interruptions. Wired lighting follows a different planning path: its fixtures and supply must be verified for the setting, and electrical work belongs with a qualified professional. A combination can reserve solar for accents while a separately planned source serves a task that needs more consistency.
Before choosing a configuration from the Bloomcabin Wall-Mounted Pergola range, confirm which lighting options, if any, are documented for it and whether fixtures are included or separate. Then compare the options against four distinct requirements: the light your activity needs, its power source, suitable mounting positions and performance in the least favourable charging season. This keeps a decorative solar option from being mistaken for dependable task lighting. If solar meets your needs, choose the brightness and runtime that suit your actual evenings. If wired lighting is needed for part or all of the space, have its fixtures and supply planned with qualified guidance.
Frequently asked questions
Can a solar panel charge while it is under the pergola?
Only if it receives the daylight required by that particular product. A shaded panel can collect too little energy even when the seating area feels bright. Some systems allow the panel to be positioned separately from the light, but not all do; check the permitted mounting and cable arrangements before planning around a sunnier location elsewhere.
Will solar pergola lights work in winter?
They may, but charging can be less dependable because winter days are shorter and the sun is lower. Cloud, shade and snow over the panel can reduce available charge further. Check the product’s charging and operating temperature limits, as well as its winter-care instructions, and decide whether a low-charge evening would be acceptable.
Are solar lights bright enough for dining under a pergola?
It depends on the fixture’s output, beam spread, mounting position, panel exposure and the number of hours you need. Compare light on the table and nearby route, not lumens alone, and use the runtime for the brightness setting you expect. If steady, broad coverage is essential, consider a separately verified wired option or a combination.
Does a quoted runtime mean the light will last that long every night?
No. A runtime figure depends on its test conditions, brightness setting and state of charge. It may assume favourable charging or a dimmed mode. Ask how the figure was measured, then account for shade, cloudy days, battery condition and your actual schedule before relying on it.
Can the same solar setup power a pergola heater?
Do not assume a solar lighting kit is a suitable or verified power source for a heater. Heating is a separate energy requirement, and the exact heater manual and power supply need to guide that decision. Have a qualified professional assess any wired equipment rather than adapting a lighting system.
Solar pergola lights work best when a modest lighting task is matched with adequate charging: a defined accent, a gentle glow or a simple route cue, with the panel exposed as the manufacturer requires. For dependable lighting at a dining table or through low-light months, assess the product at the intended brightness and schedule, and consider a separately verified wired source if solar cannot meet the need. The useful comparison is not the highest runtime on a package; it is whether the chosen light can serve your actual evening activity in the season you care about.
