
How to Buy a Pergola for an L-Shaped Terrace
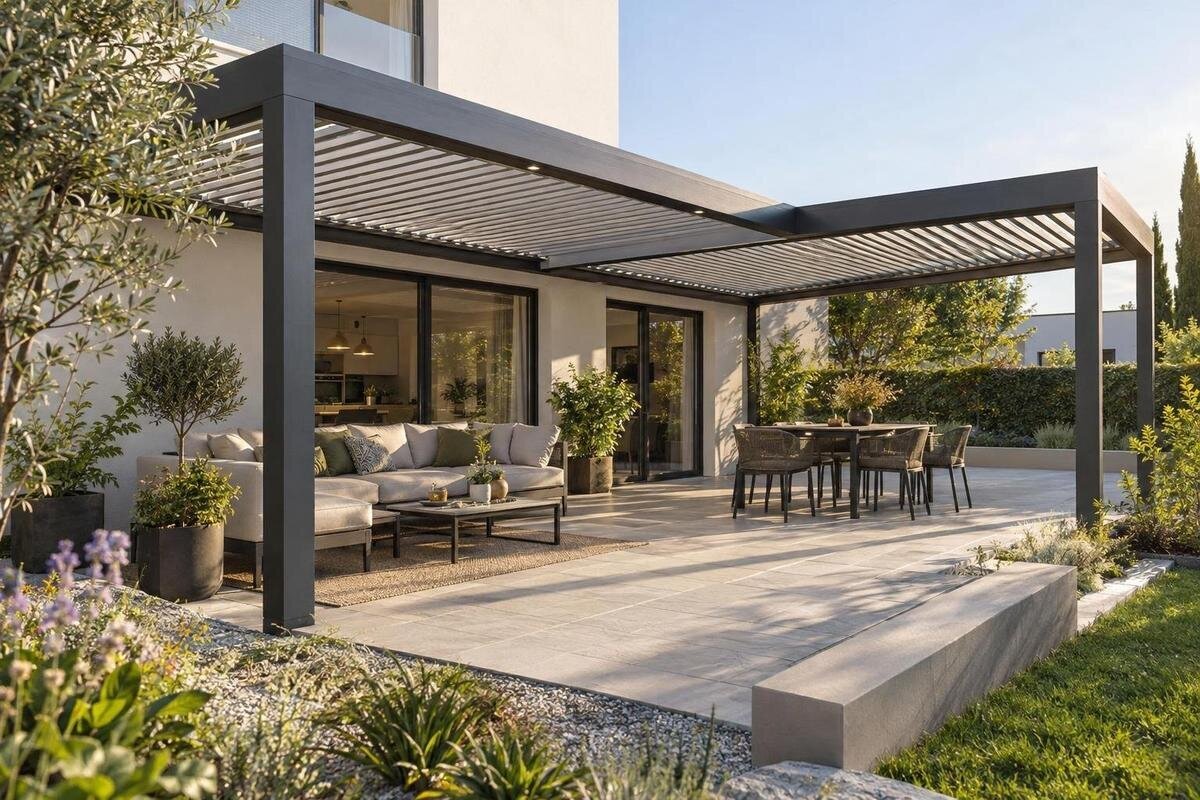
Pergola buying guide
Buying a pergola for an L-shaped terrace takes more than matching a product’s area to the terrace’s total square footage. The two arms may differ in width, and the inside corner might be a route between the house and yard rather than useful covered space. Measure each section, mark fixed features and decide whether both arms need shade at the same time. Then compare the intended footprint and support positions shown in product information with the actual plan. This helps rule out layouts that look plausible in a photo but do not fit the terrace’s shape or preserve its everyday use.

Treat the terrace as two connected footprints
Treat the terrace as two connected footprints, not one rectangle. An L-shaped outline has an inside corner and two arms; a single length-by-width figure can include area that is not part of the usable terrace. It may therefore overstate the space a pergola could occupy. On a sketch, trace the real outside boundary and the inside notch, then mark where the arms meet. Record the arms separately, even if you also estimate the total area. Where the corner is not square, sketch its measured angle instead of forcing it into a perfect right angle. The outline is what determines whether a footprint and its supports can sit where you intend.
Separate the terrace surface from the area available for placement. Mark permanent features such as walls, railings, stairs, fixed planters, drains and door openings. Note which features sit on the boundary and which project into the floor; an intrusion near the inside corner can affect a support position or the route through the terrace. Distinguish fixed obstacles from furniture you are willing to rearrange, and label both on the sketch. If furniture moves between seasons or uses, note its usual position too. A useful first drawing shows the whole L, not just the arm that seems easiest to cover. That helps you compare a product’s dimensions with the right part of the terrace.
Measure both arms and the inside corner
Measure the usable length of each arm from the inside corner to its outer end, and the clear width between its boundaries. If walls or paving edges are not parallel, take width measurements near the junction, through the middle and near the end rather than choosing one convenient number. Record recesses or projections that change the outline, as well as the inside angle if it is not square. Use consistent reference points and note whether a measurement runs from wall face to railing, edge to edge or between other fixed surfaces. A few careful readings are more useful than a single estimate of the terrace’s overall dimensions.
Write measurements beside the relevant lines on the sketch and label the units. Add windows, doors, downspouts, raised edges and any feature a support or attachment might conflict with. If the width changes along an arm, keep both readings instead of averaging them away. When comparing a product page such as the Bloomcabin pergola listing, look for a dimensioned drawing that clarifies what the listed measurements refer to; a lifestyle image cannot show the exact perimeter. If a key dimension or support location is missing, ask for it before treating the layout as a fit.
Decide which areas need shade at the same time
Make a shade map based on when you use the terrace, not just where the floor space lies. Note the usual times for meals, relaxing or working outside beside each arm. Sun moves during the day, so morning and afternoon shade can fall on different areas; nearby buildings, trees, screens and the home’s own shape can also affect exposure. Note the compass direction if you know it, but observations at the times that matter are more useful than assuming the whole L gets equal sun. If your use changes by season, record that too. A quick note or photo of the shade at typical use times can help you compare the layout with real conditions.
Then decide whether both arms need shade simultaneously. If you plan to dine on one arm while using seating on the other, consider those activities at the same time rather than treating them as separate areas. If only one arm is a priority, the footprint may be centred there instead of stretched across the whole outline. A listing such as the Bloomcabin bioclimatic pergola page is an item to assess against the same shade map; its name alone does not establish covered area, orientation or control. Use the product’s written feature details and documented dimensions to judge those points.
Test pergola layouts on the terrace plan
An L-shaped terrace does not automatically need an L-shaped pergola. A single footprint might sit within one arm and leave the other uncovered; a larger footprint might cross the inside corner, extend beyond the terrace edge or cover space you do not want shaded. A narrow arm may also limit how a structure can be oriented, even when the total area sounds ample. Whether a layout works depends on the terrace outline and the support positions, not on an area total alone. Think in plan view: place the proposed footprint on the drawing and see how much of each arm it actually reaches. Keep the rest of the terrace usable around it.
Compare different orientations on the same sketch. Mark the outside dimensions and support positions from the product information, then check them against the inner corner, outer edges and fixed features. Do not assume that supports can move, a frame can be shortened or two units can be connected at a right angle; those are configuration questions for the seller or manufacturer. For a candidate such as Bloomcabin’s pergola product page, seek the exact plan and permitted arrangement before relying on a visual image. If there is no documented configuration that matches the terrace, do not treat a custom fit as guaranteed.

Compare wall-mounted and freestanding layouts
If one arm runs beside the home, compare whether a wall-mounted layout or a freestanding one is compatible with the terrace. A wall-mounted design has an attachment line that must suit the building; it does not by itself solve the turn into the second arm. A freestanding structure may be positioned away from a wall, but its supports still use floor space. Neither arrangement is automatically better for a corner terrace. For reference, the Bloomcabin wall-mounted pergola listing is a product identity to investigate, not proof that a particular exterior wall can accommodate it. Compare the documented mounting requirements with the actual placement you have drawn.
On the sketch, mark windows, doors, exterior lights, vents, downspouts, eaves and projecting trim; these can interrupt a mounting location or the clearance above it. Identify what the wall is made of, and what lies behind its exterior finish, only if you can do so reliably. A photo or an outside measurement cannot establish whether a wall or deck is suitable for a proposed attachment. Before choosing a wall-mounted arrangement, have its written requirements compared with the actual building by a qualified installer or other appropriate professional. For a freestanding layout, check the specified support positions against the usable floor and any edge conditions.
Keep a clear route through the corner
Plan the route through the L before placing the pergola. Many terraces connect a doorway to the yard along one arm and turn at the inside corner; a support or furniture grouping at that bend can make an otherwise appealing plan awkward in daily use. Draw the natural path from the house to the far end, including any route to a stair, gate or garden area. Consider how the terrace is used, such as carrying food between the house and a table, rather than squeezing the route into whatever strip remains after choosing a footprint. Check that access to both arms still makes sense with the pergola in place.
Include moving doors and furniture in the drawing. Mark door and gate swings, and show chairs pulled back from a table rather than tucked neatly underneath it. If the route passes between two seating groups, plan for both groups to be occupied. This is particularly useful at the inside corner, where a narrow-looking notch may be the natural turning space. Check whether a chair would need to be moved every time someone passes; if so, adjust the furniture zone or pergola orientation on paper. A clear route is part of the layout, not spare space to fill after the buying decision.
Size the covered area around your furniture
Set the pergola footprint against the furniture you intend to keep on the terrace. A dining table’s top is not the full dining zone: chairs need room to be used, and people need access to them. Lounge chairs, benches and side tables also take more floor area than their top-down outlines suggest when in use. Draw the furniture to scale, or use measured rectangles, on each arm; then mark the supports and the area you want under overhead cover. This reveals whether a table fits only by placing a chair against a support or leaving some seats outside the intended shaded area.
Decide which activity gets priority if the arms cannot accommodate every arrangement. A dining area at the junction may need a different orientation from seating placed lengthwise along one arm, so keep the furniture plan consistent with the route through the corner. If both zones matter, assess their covered area together rather than adding their measurements independently. For another comparison point, the bioclimatic pergola product listing can be checked against the furniture drawing once its documented footprint is available. If privacy or protection from low-angle sun is also important, list those as separate requirements: overhead dimensions alone do not confirm side coverage.
Check the surface and support requirements
Confirm what the terrace is built on and what the product instructions require for supports. A paved surface, deck, concrete slab and wall are not interchangeable simply because each appears solid; a selected pergola may specify particular anchoring conditions. On an L-shaped terrace, one arm can also have a different surface or edge detail from the other. Note joints, changes in level and any support position near an edge on your plan, then compare them with the written requirements instead of assuming the structure can be fixed wherever the footprint fits. Do not make an engineering assessment from a photo or a simple sketch.
If the mounting surface, edge or wall is uncertain, ask a qualified installer or building professional to assess compatibility before ordering. Give them the terrace drawing, intended placement, surface information you have and the manufacturer’s stated support requirements; that is more useful than saying only that the space is L-shaped. If considering the wall-mounted Bloomcabin pergola page, request the applicable installation information and have the actual wall assessed, rather than treating the product label as confirmation. For questions about local approvals or site restrictions, check with the relevant local authority or a qualified professional; requirements depend on the situation.

Compare dimensioned plans, not product photos
Use dimensioned product information to compare the actual installation envelope, not just a headline width and depth. Find out what those figures measure: an outer edge, roof edge, post centres or another reference. Check the dimensions you need, including total height, support positions and required clearances, and distinguish the area physically occupied from the area the manufacturer says is covered. A terrace can have enough nominal floor area but still present a fit problem because a support lands in the inside corner, an arm is too narrow or an attachment needs room beyond the boundary. Mark missing information explicitly instead of estimating it from a photograph.
Keep a short comparison sheet for each option: footprint on each arm, corner clearance, overlap with furniture, support conditions, installation envelope and any feature you need for shade. Use the same units and measurement references for every candidate. On the Bloomcabin bioclimatic pergola listing, rely on the specifications and diagrams provided for the exact product, not assumptions based on the word bioclimatic, a model number or an image. If the documents do not answer a fit question, ask the retailer. That gives you a meaningful comparison without assuming that different products are interchangeable.
Confirm access, assembly and order terms
A correct footprint is only useful if the components can reach the terrace and be assembled there. Trace the delivery route from the drop-off point through gates, corridors or stairs, noting narrow turns and changes in level. If parts must pass through a house or shared entrance, ask about package dimensions and handling arrangements instead of relying on the assembled product dimensions. Confirm where materials can be staged and who is responsible for moving them to the installation area. These details matter if access to one arm is narrow or might be blocked during assembly, so settle the plan before choosing a delivery or assembly arrangement.
Before checkout, confirm the exact model or configuration, the drawings and dimensions used for your plan, the required support conditions, what is included and any separately selected options. Read the store’s delivery, assembly, change and return terms for that specific order; do not assume they are the same for every product or setup. If the fit depends on an unusual orientation, a wall attachment or a non-standard arrangement, obtain written confirmation that the intended configuration is supported. You can keep the Bloomcabin pergola product page in a shortlist, but decide only after its documented details match the measured terrace and your intended use.
Frequently asked questions
Can one pergola cover both arms of an L-shaped terrace?
Possibly, but the terrace shape alone cannot answer that. Plot the product’s documented footprint and support positions on a sketch of both arms. Check the inside corner, outer edges and walking route. If one footprint cannot reach both areas without blocking access, compare another layout rather than assuming two units can be joined.
Should I choose a pergola using the terrace’s total area?
Use total area only as background information. It does not show how wide either arm is, where the inside corner falls or how much space is usable for supports. Measure the two arms separately and compare the actual outline with the pergola’s documented dimensions.
What should I measure at the inside corner?
Record where the arms meet, the clear length and width of each arm, and the corner angle if it is not square. Note nearby walls, rails, steps, openings and other fixed features. If an arm changes width, take measurements at more than one point.
Is a wall-mounted pergola a good choice for a corner terrace?
It depends on the layout and on whether the building can accommodate the documented attachment requirements. Check the intended mounting line against windows, doors and exterior features, and have the actual wall assessed by a qualified professional if suitability is uncertain.
What should I confirm before placing an order?
Confirm the exact configuration, dimensioned plan, support positions, height and installation requirements. Also check that the parts can reach the terrace, what is included, and the delivery, assembly, change and return terms for that specific order.
A good pergola choice for an L-shaped terrace comes from fitting the measured outline, shade priorities and everyday movement together. Treat both arms and the inside corner as distinct parts of one plan, then test the product’s documented footprint, supports and installation needs against them. When those details line up with the furniture, access route and site conditions, you can compare options on how well they serve the terrace rather than on total area or appearance alone.
