
Converting an Old Awning Site for a Pergola
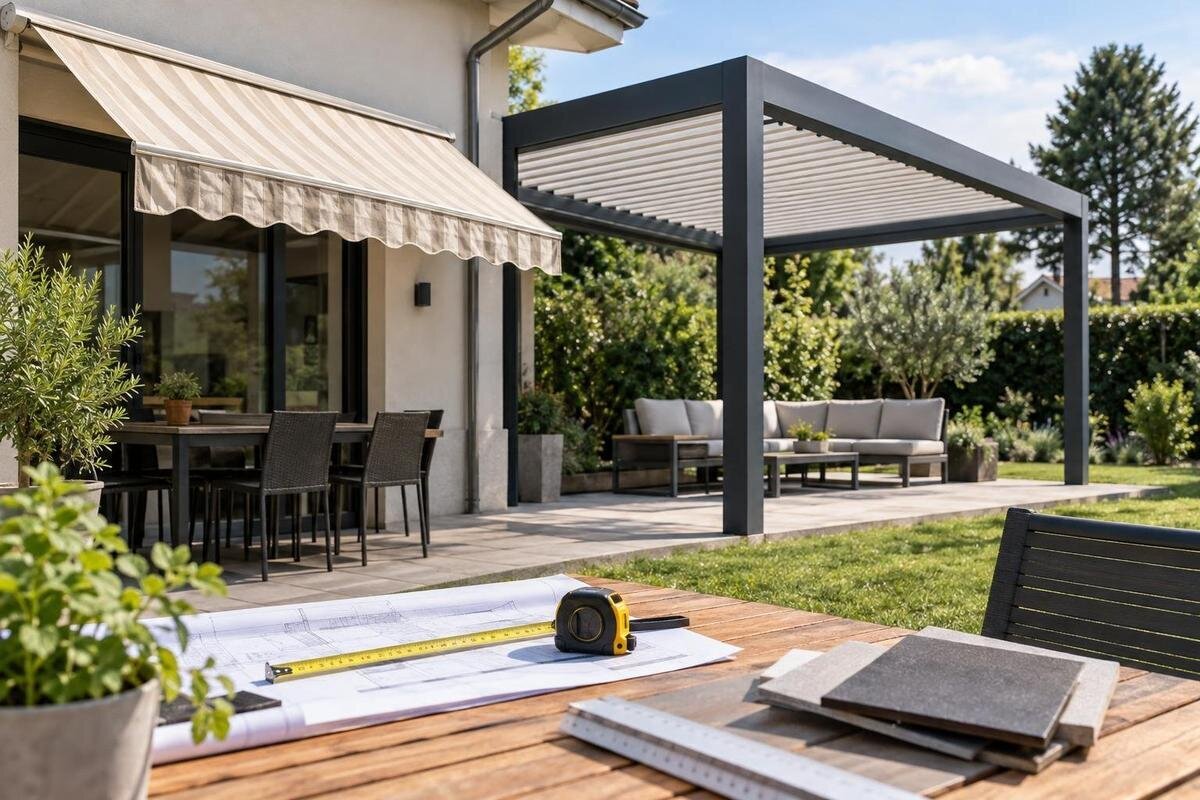
Pergola planning
An awning’s old mounting line can look like an obvious starting point for a pergola, but it records where the previous equipment was fixed—not whether those points are sound, correctly located or suitable for a different installation. A sound conversion plan separates removal, wall and patio repairs, the new support layout, drainage and the installation scope. Documenting those boundaries before you order helps prevent hidden damage or unclear exclusions from becoming last-minute work.

Document the awning and patio before removal
Before anything is dismantled, take dated, wide-angle photos of the awning, its wall brackets, the patio edge and the area being considered for the pergola. Add close-ups of each attachment point, visible cracks, staining, displaced trim, sealant and nearby lights or conduits. Sketch the wall and patio, noting the awning’s width and projection, its mounting height, nearby doors and windows, corners, eavestroughs, downspouts, steps and other fixed features. Use consistent reference points, such as a corner or door opening, so measurements and photos can be matched later. These are observations, not a survey of hidden structure, but they give everyone a shared record of the starting condition.
Record what you want the site to look like after removal: a repaired exterior wall, a cleared patio, retained equipment or a change to the covered area. Mark anything that must remain accessible, including door swings, service panels or drainage routes. If a landlord, condominium corporation, insurer or local authority may need to review the proposed exterior work, verify the process for this specific property before booking trades; an old awning’s history does not answer that question. Keep the photos, any original awning drawings and your sketch together, then send them with the initial pergola enquiry. That prevents removal and repair assumptions from being separated from the new layout.
Define removal and repair work in writing
Put awning removal in writing rather than assuming it is part of the pergola installation. Identify what is coming down—such as the fabric or cover, cassette, arms, brackets and accessory equipment—and who will take each item away. Include access arrangements and protection for nearby doors, finishes and patio surfaces, as well as disposal or storage of any parts you want to keep. If the awning has a motor, switch, lighting or visible wiring, state that electrical work is outside a general dismantling scope unless an appropriately qualified electrician is assigned to it. The aim is not to prescribe how it is removed, but to make clear who is responsible for each component and where the work stops.
Specify the repair boundary while comparing quotes. Removing brackets may leave holes, marks or damaged finishes, but the extent may not be visible until the unit is down. Ask whether the price includes only removal or also assessment and repair of the wall, cladding, sealant, paint and any affected patio finish. Say who decides how embedded anchors are handled and whether further work needs your approval before it proceeds. If the repair method depends on the wall assembly, make that a site-inspection item rather than accepting a vague promise to patch everything. A clear exclusion is useful too: it lets you arrange the appropriate trade instead of discovering later that no one is responsible for restoring the surface.
Assess the wall after the brackets come off
Old brackets show that an awning was attached at those points; they do not prove that the wall is suitable for a pergola attachment or that the same locations align with the new design. Exterior finishes can conceal different layers and backing, and the old fasteners reveal little about the condition of the material around them. Have a qualified installer or relevant building professional assess the exposed wall and identify what the proposed connection would bear on. If you are considering the Bloomcabin Wall-Mounted Pergola listing, ask what wall details and measurements are needed to assess the proposed attachment before finalizing the configuration.
Once the brackets are removed, photograph each opening and the nearby surface before another trade covers it. Note any staining, cracking, material that appears softened or displaced, corrosion, or previous patching, and ask the professional whether further investigation or repair is needed; these observations are not a diagnosis. Record the assessment and the agreed repair work, including who will complete it. Keep photos of exposed areas with the assessment so the repair trade can see the condition before the wall is closed or refinished. Do not let a pergola layout conceal an unresolved concern simply because a new support is nearby. The wall’s condition needs to be addressed separately from the visual choice of where the new frame will sit.
Set support positions from the new layout
Set support positions from the proposed pergola drawing, not from the awning’s bracket line. The old unit may have fixed only to the wall, while a new layout may place supports on the patio or use a different attachment arrangement; the exact requirements depend on the selected configuration. Mark candidate positions against the house, then check practical clearances around doors, windows, steps, walkways, eavestroughs, downspouts and access panels. A post that fits on paper can still interfere with a door, narrow a path or land where patio repairs are planned, so resolve these conflicts before choosing the final footprint. Do not take an old bracket’s height or spacing as a design dimension.
Decide whether the project is being assessed as a wall-mounted or another configuration, and ask the supplier or installer to show that arrangement on the site plan. When reviewing the Bloomcabin Pergola page, use the proposed configuration drawing to establish support positions, attachment details and clearances for your property. The drawing should show how the footprint relates to the building and patio, with dimensions tied to identifiable site features. If a post location has to move because of a door, drain or repair area, confirm the revised arrangement in writing before the work is priced or the order is confirmed. This keeps a familiar awning outline from standing in for the measurements needed to position the new structure.

Treatment of redundant fixings
Make a simple fixing register after removal: number each old bracket position on a photo or sketch, note whether the bracket came off, whether an anchor remains, and whether the finish needs attention. The register is not an instruction to remove, reuse or fill hardware; it gives the installer and repair trade a precise set of questions. Treat a fixing that once held an awning as redundant unless the pergola supplier and qualified installer confirm, for this exact layout and wall, that it has a valid role. Do not assume that matching the old spacing or choosing a larger fastener resolves a difference in structure.
Before drilling or closing surfaces, have the proposed new attachment points shown relative to clear site references and compared with the old-hole map. That makes overlaps visible and helps assign patching, sealing and finish repair to the right trade. If the wall-mounted pergola option is on your shortlist, ask for written confirmation of the actual project configuration and who assesses the wall; a model name does not specify which existing holes, if any, can be used. Record any anchors intentionally left in place and how they will be treated, rather than letting those decisions disappear once the brackets are gone. This matters even when the new fixings appear close to the old ones.
Assess the patio base and drainage
Awning removal may leave the patio looking unchanged, but pergola support positions can bring areas of paving, concrete or decking into the scope. Have a qualified professional assess the actual surface and what lies beneath wherever the proposed layout requires support; a finished surface alone does not demonstrate suitability. Mark cracks, movement, loose pavers, patched areas, deck edges and places where repairs or buried services may affect the plan. Do not ask a supplier to infer the site’s base from a photograph. If support zones cannot be confirmed before removal, identify an inspection point and a process for approving any additional groundwork.
Map water routes as well as supports. Note the eavestroughs, downspouts, patio drainage, thresholds and any spots where water currently gathers, then ask the pergola supplier or installer how the specific configuration is intended to direct water and where it will discharge. Confirm that the route will not create a new problem at a doorway, wall or adjoining area; product images cannot establish this for your site. The Bloomcabin Bioclimatic Pergola listing gives an area range of 9–24 m², but that figure does not identify site-specific support positions or water outlets. Ask for both to be addressed on the project drawing.
Confirm dimensions and clearances on a drawing
Ask for a dimensioned drawing that shows the proposed overall footprint, relevant heights, wall attachment line if applicable, and every support location. It should relate those dimensions to recognizable features such as a corner, door opening or patio edge, rather than relying on the old awning’s outline. Add doors and windows, stairs, paths, eavestroughs, visible services, drains, railings and planned repair areas so the drawing records real conflicts. If surfaces or walls vary along the proposed span, tell the person measuring and ask which reference dimensions they are using. A scaled product image is not a substitute for a project-specific plan.
The area shown in a catalogue is a useful screening detail, not proof that a particular outline fits. For example, the Bloomcabin Pergola listing states a range of 9–24 m²; the quote still needs to identify the actual dimensions and layout under consideration. Ask who supplies the final drawing, what information it is based on, and which version you must approve before production or installation is planned. Check that the marked old holes, proposed attachments, support locations, door clearances and drainage features match what was measured on site. If removal exposes a different condition, request a revised drawing rather than relying on a verbal adjustment.
Conversion quote inclusions and responsibilities
Request an itemized conversion quotation, not only a pergola product price. It should distinguish removal and disposal, site inspection, wall or patio repairs, supply, delivery, assembly, attachment work and any electrical or finish work that another trade must complete. Ask what is included in each task, what is excluded, and whether an uncertain repair is priced as an allowance or left for later approval. Clarify access, protection of existing finishes and responsibility for correcting damage during the work. A phrase such as installation included needs clarification: it does not, by itself, say whether taking down the awning or repairing its holes is part of the contract.
When requesting a quote for the Bloomcabin Wall-Mounted Pergola product page, include the site photos, measurements and fixing register. Ask the parties to name who assesses the existing wall, who treats redundant holes, who completes exterior repairs, and who approves any revised attachment layout. If a decision cannot be made until the awning is down, write the inspection point and change-approval process into the scope, including how added work will be authorized and priced. The quotation should also identify the drawing and configuration it covers. That gives you a useful basis for comparing offers without assuming that identical product names mean identical conversion work.

Sequence removal, repairs and installation
Plan the work so discoveries during removal do not automatically become unapproved changes. Preserve the existing-condition record and define who removes the awning, then arrange the wall inspection once the brackets are removed. Complete any agreed repairs before confirming measurements that depend on the repaired surface. Check the patio support areas and drainage route against the selected plan, then confirm the final drawing, scope and order details. If the work involves several trades, state who arranges the inspection and who authorizes the next stage to proceed. Make clear which tasks must wait for that decision so a repair is not covered by new work before it has been assessed. The order of tasks can vary, but responsibility for each hand-off should not.
If the Bloomcabin Bioclimatic Pergola option remains under consideration, provide the supplier with confirmed site dimensions and notes about the old attachment points when requesting configuration support. Ask which details can be confirmed before removal and which require a second measurement after the wall is exposed. Keep one dated file for photos, drawing revisions, quotation, written approvals and site changes; send the current version to each trade. Where patching or patio work must happen before assembly, agree who confirms completion and whether the installer needs to recheck the site. This avoids different contractors working from different assumptions about the finished footprint.
Verify approvals and keep closeout records
Check responsibilities for exterior changes before removal is booked. Depending on the property, that may mean speaking with a landlord, condominium corporation, property manager or local authority and checking any insurer requirements. The approval route varies with the property and location, so verify it with the relevant party rather than assuming an old awning approval carries over to a different structure. Share a drawing that shows the new footprint, attachment approach and affected finishes. Keep written decisions and conditions with the quote; if an approval requires a change, make sure it appears on the current plan before confirming the order. Do not rely on a contractor’s general assurance when a decision belongs to an owner or local reviewer.
At closeout, collect the final drawing and note any difference between the planned and installed positions, along with records of wall or patio repairs and the treatment of redundant fixings. Keep product and installation documents, care instructions and any written sign-off in the same project file. If the Bloomcabin Bioclimatic Pergola page was used for the enquiry, retain the specific configuration information supplied for the project, not only a general product page or early estimate. Photograph the repaired wall and cleared patio before furniture or screening obscures them. A clear handover records what was removed, what remained and where the new installation was placed.
Frequently asked questions
Can the old awning brackets or holes be reused?
Not by default. The old installation only shows where the awning was attached. The proposed pergola connection, wall assembly and condition around each opening need to be assessed for the specific layout. Mark the old fixing points on a drawing and ask the supplier or qualified installer to confirm in writing if any are intended to serve a new purpose. Otherwise, include their treatment in the repair scope.
Should I repair the wall before getting a pergola quote?
You can request an initial quote using photos, measurements and details of any known damage, but make uncertain conditions explicit. Ask how removal, inspection and repairs will be handled if the wall cannot be assessed until the brackets come off. The final attachment layout and quotation should reflect the exposed wall rather than treating a photo-based estimate as proof of site suitability.
Can the new pergola use the same footprint as the awning?
Possibly, but neither the old bracket line nor the area covered by the awning confirms that the layout will fit. Check the proposed drawing against door and window clearances, downspouts, walking routes, support positions and planned repair areas. If the footprint changes, ask for an updated drawing and quotation before confirming the order.
Does an existing concrete patio mean the supports are ready?
Not necessarily. The surface alone does not establish what lies beneath it or whether the proposed support locations are suitable. Have a qualified professional assess the planned locations and identify whether surface repairs or other groundwork belong in the project scope. Avoid relying on a general answer based only on a photo.
Who should remove and dispose of the old awning?
Name the responsible contractor in writing and list the components, brackets, accessories and disposal included in the scope. If the awning has a motor or wiring, specify who handles that work and use an appropriately qualified electrician in your area. Also state who will assess and repair the exposed holes and exterior finishes.
An old awning site is useful evidence, not a ready-made pergola layout. The conversion is clearest when the old attachments are documented, repairs are assigned, and the new support locations and drainage routes appear on a confirmed project drawing. With removal, site repairs, supply and installation responsibilities written down before the order, a condition discovered after the awning comes down can be addressed as site work rather than confused with what the pergola price includes.
