
Choosing a Pergola Before Your Patio Is Built
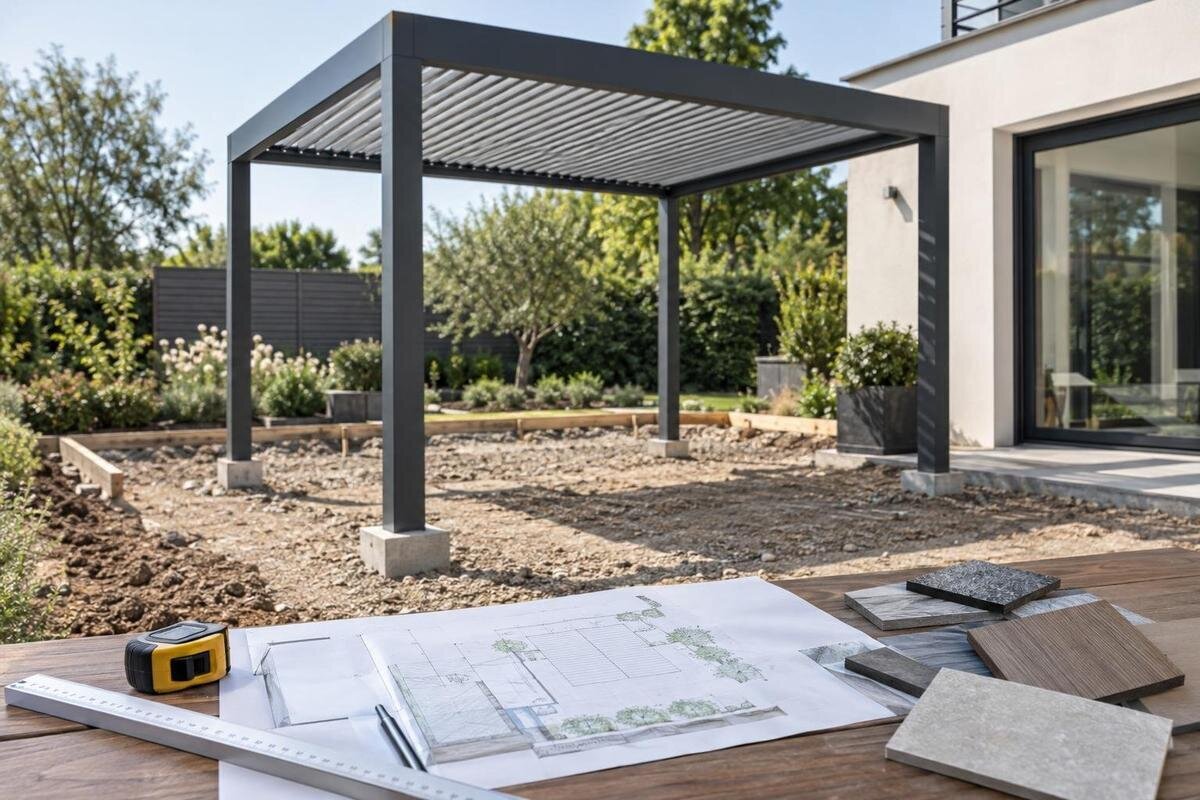
Pergola planning
Choosing a pergola while the patio is still on paper gives the landscape contractor, supplier and installer a chance to coordinate the parts that will soon be buried or covered. The key is not simply selecting an approximate size: the project needs an agreed footprint, support locations, finished elevations, drainage route, service plan and division of work. Settle the product and obtain current drawings early enough to inform groundworks, then recheck the site and final configuration before the patio is finished. That sequence reduces avoidable cutting, relocation and uncertainty without forcing an order before the site is ready.

Why choose the pergola before patio construction?
Treat the pergola as part of the patio plan, not as an accessory to fit after the last paver. Its posts or other support points, its relationship to the house if applicable, and its required clearances can influence where paving edges, steps and drains go. An early choice also lets a contractor price a complete scope rather than guess at later cuts, extra foundations or service changes. That matters especially when the patio has fixed thresholds, a narrow side passage or a retaining edge that cannot simply move. You do not need to settle every colour or accessory at the first conversation, but you do need enough product information to check the layout before groundworks are locked in.
Separate product selection from site confirmation. First narrow the product type and approximate coverage; then ask the supplier for the current configuration drawing, installation requirements and the plan details the installer needs. The landscape contractor can show where the proposed footprint meets the house, property edges and patio. Before the crew begins work that is hard to reverse, verify actual site measurements and agree who will approve changes if excavation or an existing feature shifts the layout. Ask whether a site visit or verified measurements are needed before the order is released. If a drawing is preliminary, label it that way rather than treating it as a construction set.
Measure the complete footprint, not just the seating area
Measure the outside footprint shown on the supplier’s drawing, not only the area you hope to shade. Record overall width and projection, support or post centre lines, and any specified clearances; ask for the exact drawing for the chosen model and configuration. Request a plan and elevation with measurement references labelled, and confirm whether each dimension refers to outside edges, centre lines or another datum. Product-area figures alone do not locate supports or tell a contractor how far a structure sits from an edge. For example, the Bloomcabin Pergola listing gives an area range from 9 to 24 m². Treat that as an initial selection reference, not a set-out measurement; confirm actual outside dimensions and support positions before patio work is set out.
Place that footprint over the proposed furniture and circulation plan. Test the table and chairs at the sizes you expect to use, allowing for pulled-out chairs and walking behind them. Include doors or gates that swing into the area. Mark routes from the house to steps, yard, barbecue or storage without sending people through a narrow gap between a post and wall. Leave room to carry food, and consider windows that open, vents and equipment that must be serviced. A scale plan is useful, but a temporary tape outline on site can expose awkward clearances that look harmless on screen. Show the pergola limits and usable sitting area separately.
Set support locations before groundworks
Support planning belongs in the groundworks drawing. Ask for support coordinates, base footprints, anchor restrictions and foundation or slab requirements for the selected configuration. These details must come from current supplier documents and a suitably qualified designer or contractor for the site; do not choose pad sizes or anchoring details from a generic online image. When comparing options, request applicable drawings for the Bloomcabin Bioclimatic Pergola model before anyone fixes support positions. Neither the model name nor its overall area establishes foundation requirements. Ask which base clearances and components must remain accessible after the patio is complete.
Give the groundworks contractor a fixed reference point and a drawing that distinguishes proposed support centres from outside dimensions. Ask who checks the set-out on site, how any required level adjustment is handled, and which party confirms the foundations are ready for the installer. Locate underground lines before excavation, including private irrigation or lighting that may not appear on a utility record; arrange a separate locate if private lines are not covered. If local frost conditions, fill, slope or soil affect the design, have the appropriate local professional resolve them. Keep the support plan coordinated with drainage and service routes so a late trench does not conflict with a footing.
Coordinate finished levels and drainage
Choose the patio’s finished elevation with the pergola plan beside it. Show the house threshold, any step, patio surface, support bases and nearby drain on one section or elevation drawing so contractors are not working from separate assumptions. A patio slope affects where water goes, but its direction and amount depend on the site and design; have the landscape or drainage professional specify it. Ask the supplier whether the selected configuration collects or directs water and, if so, where it is discharged and what outlets or clearances the patio plan must preserve. Show any outlets or downpipes that are part of the chosen design. For a wall-mounted Bloomcabin Pergola, include the wall and finished patio levels on that same drawing.
Map the complete route from the structure and paved area to an acceptable discharge point rather than leaving it to the paving contractor to improvise. Note existing catch basins, downspouts, foundation drains, garden beds, retaining edges and neighbouring grades. Preserve access to grates and clean-outs that need servicing. The responsible drainage professional should resolve any conflict with a threshold, foundation or existing drainage system before the finished surface is installed. Photograph existing conditions as a baseline and put the agreed outlet location on the plan, including any channel drain.

Plan electrical and underground services
Decide before paving whether the project needs power or other services at the pergola location. You might want lighting or other accessories, but do not assume they are included or available as add-ons. Ask which options are quoted and what electrical information the electrician needs. If you are considering the Bloomcabin Bioclimatic Pergola, confirm the exact configuration with the supplier, then have the electrician plan any feed or control points against its drawing. Clarify whether the electrician will supply fittings or only prepare the connection. Electrical work and required protective measures belong with a qualified electrician, not the paving crew.
Before digging, identify services that might cross the patio, such as utility lines, irrigation, landscape lighting and drainage pipes. Use the applicable local locate process and arrange identification of private services that a public locate may not cover. Add known routes, access covers, shut-offs and junction points to the site plan. Keep them reachable after pavers and furniture go in; avoid positioning a support over a service or a cabinet where a valve or connection must be reached. Ask the electrician and groundworks contractor to agree the route and timing in writing. Photograph or mark routes before backfilling, and update the drawing if the installed route differs from the original.
Check how the pergola meets the house
Decide whether the design is freestanding or wall-mounted. A wall-mounted model needs its connection to the house assessed separately from the patio layout. Review the current drawing for the Bloomcabin wall-mounted model, and have a qualified building professional evaluate the actual wall construction and proposed connection. A visible brick, siding or stucco finish does not show the structure behind it or establish whether an attachment is suitable. Confirm who is responsible for the structural assessment, any opening or weatherproofing work, and any review required before exterior finishes are disturbed.
Put windows and doors, eaves, downspouts, vents, lights and existing exterior equipment on the plan. The roofline and wall shape can affect available headroom and the route of water; a contractor should verify clearances from the selected product drawing, not a photograph. Include the eaves projection and wall-mounted downspout positions, not just floor-level dimensions. With a freestanding arrangement, plan circulation around each support and avoid conflicts with downspouts, access paths and service panels. With either arrangement, show where the patio meets the house so the paver is not asked to conceal a gap or change cladding without approval. Assign any wall sealing or structural work to the right trade.
Define each contractor’s scope
Write an inclusions-and-exclusions schedule before comparing bids. State who supplies the pergola, receives and unloads it, provides foundations, builds the patio, prepares any wall connection, arranges electrical work, handles drainage and assembles the unit. Identify whether site measurement, equipment, surface cuts, waste removal and repair of disturbed finishes are included or covered by another contract. If you choose the Bloomcabin Pergola, request the current written scope rather than inferring installation or foundation services from its listing. State who coordinates corrections if supplied dimensions change after measurement. Assign responsibility for work that involves more than one trade.
Record dependencies as well as tasks: who must provide final dimensions, who checks the set-out, what must be complete before the installer arrives, and who confirms that the surface is ready. Clarify whether the patio contractor is to leave an opening, cut around supports later, or finish paving around installed supports; the approach must match the approved drawings and both contracts. Put exclusions, assumptions, site access, protection of finished work and the process for approving a change in writing. If different documents show different dimensions, stop and ask which revision governs before the crew proceeds. Name one contact to coordinate scheduling interfaces, even if that person does not perform the work. A short responsibility schedule can prevent one contractor’s omission becoming another’s unpriced extra.
Approve one coordinated drawing set
Use a coordinated drawing set for local and project-specific reviews before committing to the work. The plan should identify the property and house reference points, footprint, support coordinates, finished elevations, drainage route, known services and any electrical rough-in. An elevation can clarify the wall connection and door clearances. Check with the relevant local authority about approvals for the site and structure, and ask the insurer or property manager about requirements affecting the project. Keep the approved site plan distinct from marketing images, which may not match the purchased configuration or actual site.
Make the supplier’s final model, options and orientation agree with the contractor’s plan. If the quote is for the Bloomcabin Bioclimatic Pergola configuration, request written confirmation of the chosen options and applicable drawing revision; do the same for any model. The drawing should distinguish fixed dimensions from site conditions awaiting confirmation. Date each revision, circulate it to the patio, electrical and installation teams, and keep the approved version with the order and contracts. Clearly mark superseded sketches. Even a small support adjustment can affect a footing, paving joint or service, so record and approve it before construction.

Sequence delivery and installation around patio work
Coordinate the work as a sequence, not a single installation date. Agree when the site will be measured, when groundworks need the support plan, when buried services will be checked and when the patio surface can be finished. Ask the supplier and installer for current lead-time and site-readiness information. Confirm delivery access width, turning space, overhead obstructions, unloading arrangements and a secure staging area with the carrier or installer. Establish whether unloading is to the work area or an accessible drop point. If you select the regular Bloomcabin Pergola, request current package and handling details before choosing storage; package dimensions differ from the installed footprint.
Do not schedule final paving so tightly that there is no way to resolve a mismatch between the prepared surface and approved set-out. Have the installer state what must be complete, what may need to remain accessible and how finished paving will be protected. If supports or services need to be verified before covering, make that a hold point in the contractor schedule. Any curing or other readiness interval should be set by the professional responsible for that work and the product requirements, not guessed from a generic calendar. Plan a route for people and equipment that does not cross fragile finishes; keep a clear path into the home for residents. Identify who pays for protection or repairs if work causes damage.
Use hold points before the finished surface goes down
Set a practical pre-finish review with the groundworks or patio contractor, supplier or installer, and electrician where relevant. Walk the site against the current drawing before foundations are covered, services disappear below the surface or final pavers are laid. Compare actual support points, thresholds, surface levels, drains, service access and working space with the approved plan. Give each trade time to raise a concern before the next surface hides the work; photos help, but do not replace a site check. Record any difference with measurements or photos and ask the responsible designer or supplier whether it can be accepted. Do not shift supports, drill into a finished slab or bury a conflicting service by informal agreement. Make the review a scheduled decision point, not an assumption that someone else has inspected the work.
At handover, keep the approved configuration, current drawings, contractor scope, local approval correspondence, utility-location records, as-built service routes and photos together. Give the installer final patio elevations and recorded locations of supports, outlets and drains. List unresolved items in writing, with the party responsible for each. Label files by date and revision so an old plan is not sent to a crew by mistake. This record gives the installer a clear basis for the next phase and lets you trace what was actually built if a question arises later.
Frequently asked questions
Can I choose a pergola after the patio is built?
Sometimes, but the finished layout may limit support positions, anchoring choices, drainage and electrical routes. Do not assume that pavers or an existing slab can accept a particular base. Get the selected product’s current installation requirements and have the patio condition assessed by the responsible professional before committing to a retrofit.
Do I need final pergola dimensions before groundworks start?
You need the exact footprint and support information before related foundations or paving are set out. Early planning can use approximate dimensions, but label them as preliminary and confirm the current drawing and actual site measurements before work becomes difficult to change. The landscape contractor and supplier should agree which revision governs.
Who decides whether wall or footing supports are suitable?
Use the pergola supplier’s requirements together with an assessment from a qualified building or structural professional familiar with the site. A product category or wall finish does not establish whether an attachment is suitable, and no general article can size a footing. The project scope should say who obtains that assessment and shares it with the installer.
What should I send with a pergola quote request?
Send a measured site plan or sketch showing the house wall, proposed patio edges, thresholds, intended footprint, known services, drainage features and access route. Add dated photos and note which measurements are approximate. Ask for current product dimensions, support positions, installation requirements, written inclusions and any site details needed to confirm the configuration.
Should the patio contractor or pergola installer locate services?
That depends on the contracts and the local utility-locate process. Name the party responsible for arranging identification of public and private services before excavation, and have the electrician and groundworks contractor share a current site plan. Record the final route and access points before work is covered; an existing drawing may not show every private line.
Choosing the pergola early lets its footprint, supports and service needs shape the patio before the finishes make changes difficult. The handover should leave the installer with agreed dimensions, finished levels, drainage routes and a clear division of work. Compare the site with the final drawings before paving is complete, resolve deviations with the responsible trades and retain a record of buried services. Installation can then proceed from known site conditions rather than assumptions.
