
Pergola Height: Headroom, Roof Movement and Home Proportions
Pergola planning
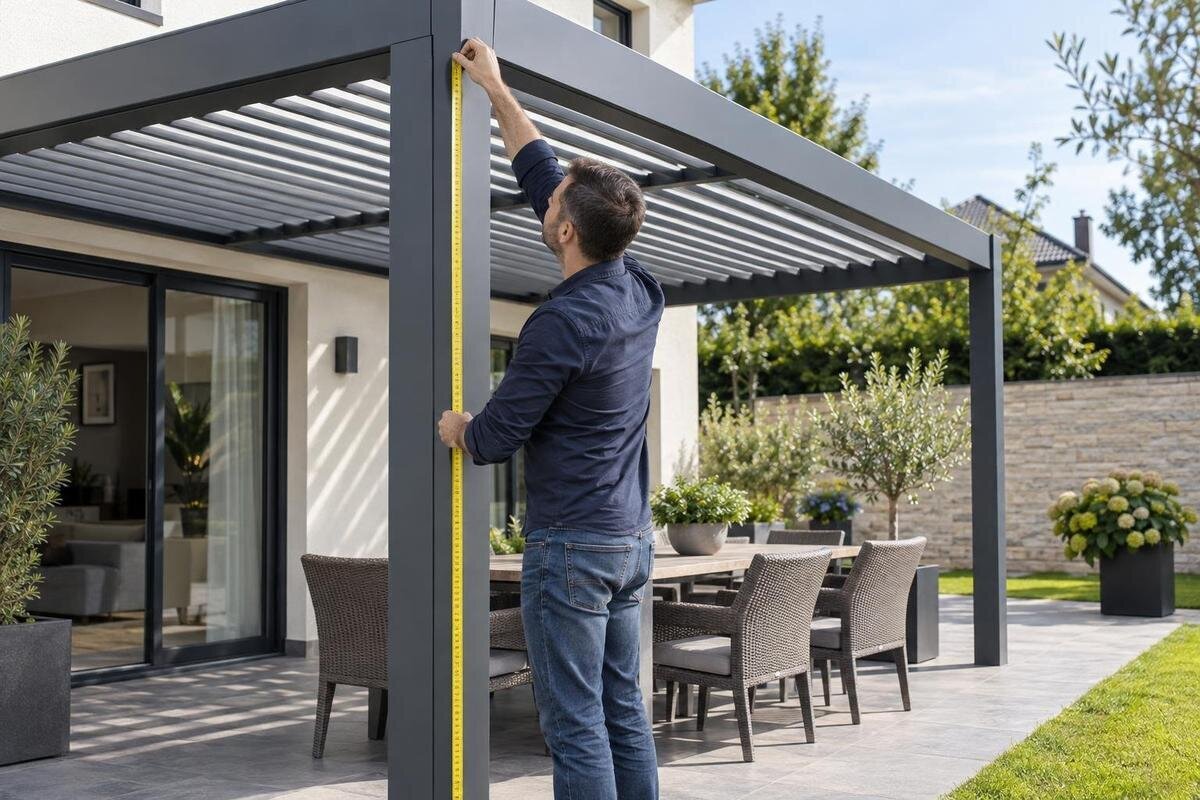
A pergola’s height is more than the distance from the ground to the roofline. The underside of a beam determines usable headroom, the roof mechanism may need clearance as it moves, and the finished patio can sit higher than the ground measured during an early site visit. Against the house, the same roofline can feel balanced or visually heavy depending on nearby eaves, doors and windows. A measured side-view drawing brings these questions together. It lets you compare the roof, people’s route, final surface and façade before a configuration is approved, rather than relying on a product photo or footprint alone.

Why height needs a side-view drawing
An overhead plan locates the posts, but it cannot show how much space remains beneath a beam or whether the roof edge approaches a soffit. Draw a vertical section through the main route from the house to the seating area, showing the wall, proposed patio surface and full pergola outline. Choose a cut that crosses the entry and likely walking path; a view through an empty centre can miss a low beam at the edge. If the ground or structure changes across the width, add a second section through the tightest point. A straight-on photo can help with façade context, but perspective distorts distances. Mark where each section is taken so everyone is discussing the same part of the project.
Use one vertical datum, usually the proposed top of the finished patio, and label the exact start and end of each measurement. Keep separate dimensions for overall height, underside of the beam and lowest clearance; those figures answer different questions. Note whether units are millimetres or feet and inches, and avoid mixing systems across drawings. If a quick sketch is not to scale, state that and write actual measurements beside it. Add a horizontal reference, such as the house wall or a measured offset from it, so each height can be tied to a real location. This prevents a single headline number from being mistaken for usable headroom.
Measure headroom from the finished walking surface
Headroom is the vertical clear distance from the surface people walk on to the lowest fixed element above them. Measure to the underside someone could encounter, not to a post top, the roof’s highest point or a product-photo silhouette. Follow the whole route: clearance may differ under an outer beam and at the centre, and an included fascia, track or trim can be the low point. For a named option, request a dimensioned elevation; the Bloomcabin Pergola listing identifies the product, but its name alone does not establish the clear dimension for your chosen configuration. Label the measured point on the drawing rather than writing only a total height.
Walk the intended route and note where people will enter, stand, move chairs or carry items. A path that looks open in plan may pass directly below a projecting beam, so measure at door approaches and along the perimeter as well as in the centre. Consider the tallest regular user and the activities that take place under the structure; do not select a number just because it appears on another pergola online. If the patio is not built, mark the assumed finished elevation as provisional. Keep raw measurements rather than rounding them early, especially where two candidate heights leave only a small difference, and note which points you measured.
Show every position of an adjustable roof
An adjustable roof cannot be judged from its closed outline alone. Depending on the selected mechanism, louvres or panels may rotate, retract or travel into space that is clear when the roof is shut. Ask for the operating envelope for the exact configuration, including closed and specified open positions, and any intermediate movement near a beam, wall, eavestrough or screen track. A drawing should show the path of the moving part, not just an arrow labelled open. Confirm whether any included accessory moves with the roof or occupies space beside it. Do not assume every system moves upward or remains within the same vertical outline; the geometry varies by design.
Show relevant roof positions as separate outlines or dashed lines on the section, and dimension the lowest clearance in each. Mark a wall, roof edge or other obstruction at its measured location, then ask the supplier to confirm that the moving parts clear it throughout operation. When discussing the Bloomcabin Bioclimatic Pergola, ask for these outlines on the drawing for your selected configuration. Keep the moving components and nearby obstructions visible together rather than on separate sketches. This check is useful where the roof sits close to the house, a window, eavestrough or fixture. Keep open-state and closed-state dimensions together so neither is overlooked during review.
Set the reference at the finished patio level
An early site measure may start from exposed soil, an old slab or an existing patio that will later be covered. None is necessarily the level people will use. Record the proposed top of finished paving or deck surface, including any planned resurfacing, and have the person responsible for that work confirm the elevation. On the drawing, show existing ground and finished patio level as separate lines. If the surface build-up is undecided, write that assumption beside the height instead of treating it as final. This avoids discovering that new paving has reduced headroom after the pergola dimensions were approved.
Check the finished patio level at the house threshold as well as beneath the pergola. A change in elevation can affect the step between inside and outside, the relationship to door openings and the way water moves across the surface. Do not raise or lower the patio simply to make a pergola look taller or shorter; have a builder or appropriate site professional review drainage and transitions before levels are changed. If different trades are setting the patio and installing the pergola, put the agreed datum and responsibility for confirming it in writing. That way, an adjustment is not based on an outdated ground line.

Include doors, windows and exterior fixtures
On a wall-side section, mark the head and swing of each patio door, the window opening, soffit, fascia, eavestrough and any exterior light or vent near the roofline. If you are considering the Bloomcabin Wall-Mounted Pergola, include these house features in the measured wall elevation supplied with your configuration request. This gives the height discussion a clear reference to the openings and fixtures already in place. Measure clearances to actual edges and note whether an opening must remain usable with a door or sash open. Include horizontal offsets as well as vertical ones: a beam can sit beside an opening rather than directly above it, yet still affect the usable space.
Include other nearby items that are easy to miss from the patio, such as a downspout, exterior outlet, security light or service panel. Their presence does not automatically rule out a height, but the drawing should make the relationship visible before a configuration is fixed. Ask the installer or relevant qualified professional to confirm required access and the proposed wall connection; do not assume a fixture can be covered or moved. If a screen or another accessory is part of the quote, show its track and full position too, because it can change how much space remains clear at the edge.
Compare the roofline with the house façade
Height also changes how the pergola looks against the house. Compare its proposed top edge with the eaves, fascia, window heads, door heads and strong horizontal lines in the siding. An outline below the eaves may look deliberately separate; one that meets a band of trim can feel more integrated or visually crowded, depending on the façade. These are design judgements, not universal rules. To compare the Bloomcabin Pergola option with your home, use its proposed side elevation alongside the measured façade. Keep the roof and beam outlines visible in the comparison, rather than reducing the structure to a single horizontal line.
Use a straight-on elevation or a carefully corrected photo and draw the beam and roof outline at the measured height. Look from inside rooms that open onto the patio, from the main seating area and from the yard; each view reveals a different relationship to the façade. A paper mock-up or photo overlay can help test the outline before work starts, but do not scale a phone photo by eye and treat it as a measurement. Include the pergola’s width in the elevation: the same height can feel different across different spans. Compare the proposed project outline, not a generic image.
Check wall-mounted and freestanding layouts differently
Wall-mounted and freestanding designs should not be compared using one unexplained height. For a wall-mounted layout, the section needs to show the proposed attachment line, the outer beam and any difference in their elevations, along with nearby eaves and soffit. When reviewing the wall-mounted pergola option, ask for both the wall-side and outer-edge dimensions on the same section. Those reference points make it clear which part of the structure each height describes. Consider the house’s existing details and the pergola’s drawn geometry together. Ask for the intended mounting point to be labelled, rather than accepting a side view that shows only the outside edge.
With a freestanding layout, check headroom at the posts and along the full route between them; a beam near an entry can affect circulation even if the middle feels open. Mark the post locations, perimeter beam and any edge that projects over the patio so the usable area is clear in both section and plan. Do not infer that moving a post or changing a height is structurally acceptable. A qualified installer or designer should confirm the supporting arrangement, any wall attachments and site-specific requirements from the actual drawings. Make sure the height and reference surface you review match the intended layout.
Record sloped ground and changing site levels
Sloping paving makes a single headroom figure particularly unhelpful. Measure the proposed finished surface at the house side, outer edge and any point where the walking route changes elevation. Show these spot levels on the section or add a second section along the slope; if the roofline stays level, clearance will not be the same over a rising surface. Avoid averaging the levels, because the highest point may be the limiting one for headroom. If a step, retaining edge or raised planter affects the path or the visible base of the structure, include it in the sketch too.
Check how the roof profile relates to both high and low ends, and keep roof-position outlines on the same drawing. If the Bloomcabin Bioclimatic Pergola listing is on your shortlist, include the measured site levels in your configuration request. Ask for the section to show those levels beneath the proposed roof profile, so the headroom at each end can be compared directly. The supplier can then distinguish product dimensions from details that depend on the patio. Changes to grade can also affect water flow and the transition at the house, so have an appropriate site professional review any proposed change before treating it as a height adjustment. Record the final surface assumption with the drawing revision.

What the supplier’s height drawing should show
A useful drawing labels both overall height and clear height, with arrows that meet the actual top and underside points. It should show the finished patio datum, post and beam outlines, wall position, nearby openings or eaves, and every relevant roof position. Add horizontal offsets where an overhang or beam sits away from the wall; an unlocated vertical dimension cannot be checked against a window or soffit. For a louvred design, ask for an operating section or movement diagram as well as the closed elevation. If your enquiry concerns the bioclimatic pergola product page, identify the selected configuration and ask for these dimensions to be shown together on its project drawing.
When comparing proposals, confirm that they use the same reference points and finished level. One document may quote to the top of the roof while another gives underside clearance; those numbers are not comparable until their endpoints are clear. Ask which dimensions are fixed, which depend on a patio not yet built and whether a changed configuration would alter the outline. Request a revised drawing if a verbal explanation does not match the page you are approving. Keep the marked-up section with the quote and note open questions, so an unconfirmed height does not quietly become the assumed build dimension.
Confirm the agreed dimensions before the order is final
Before the order is finalized, make the approved section match the selected configuration and site plan. Record the finished patio level, lowest underside, overall top height, roof positions and nearby house features that shaped the decision. For an order based on the Bloomcabin Pergola page, carry the selected configuration and agreed dimensions into the written approval. Check that the drawing revision attached to that approval is the one you reviewed, particularly if the height or patio level changed during discussions. Mark unresolved items, such as a surface level that is not yet built, as assumptions and identify who will confirm them before work proceeds.
Share the same dated drawing with the supplier, patio contractor and installer, and keep a copy for the project record. Where a wall attachment, site level or local building requirement may affect the design, ask the appropriate qualified professional or local authority to verify it; a height sketch does not replace structural or permit review. For a quote or configuration request, include the cross-section, clear measurements and a straight-on house photo, then ask which dimensions will appear on the final drawing. This makes the discussion specific without treating an online listing or informal estimate as a final specification.
Frequently asked questions
How tall should a pergola be?
There is no single height that suits every patio. Set the required clear space along your main walking route, then compare it with the roof’s movement and the home’s nearby features on a measured side view. Use the finished patio level and the exact configuration, not a height copied from another project.
Where should I measure pergola headroom?
Measure vertically from the surface people will walk on to the lowest overhead part along the route. Check the underside of beams and other parts that project into the space, including at the edges and entrance. Keep this clear-height measurement separate from the pergola’s overall height.
Does an adjustable louvre roof need clearance to open?
It may occupy a different space as it moves, but the direction and amount depend on the selected mechanism. Ask for drawings showing the relevant closed and open positions, then compare them with nearby beams, the house and any included accessories.
Will a sloped patio affect pergola height?
Yes. If the walking surface rises or falls beneath the structure, the clear distance to the roof can vary. Record the finished surface at the high and low points and show them on the drawing; an average level can hide the tightest clearance.
What should a pergola height drawing include?
Ask for a side view with the finished patio level, overall height, beam underside, post and roof outlines, and the roof’s relevant operating positions. Include nearby doors, windows, eaves and measured offsets. Label the endpoints of every height dimension and identify any levels that are still provisional.
A useful pergola height is the one that fits the finished patio, leaves clear space along the routes people use and works with the roof’s full movement. A measured section makes those requirements visible beside the home’s doors, eaves and other details. Once the drawing shows the same configuration and reference levels that will be used for the project, headroom and façade proportions can be reviewed together instead of guessed from a single overall height.
