
Dismantling and Reinstalling an Aluminium Pergola
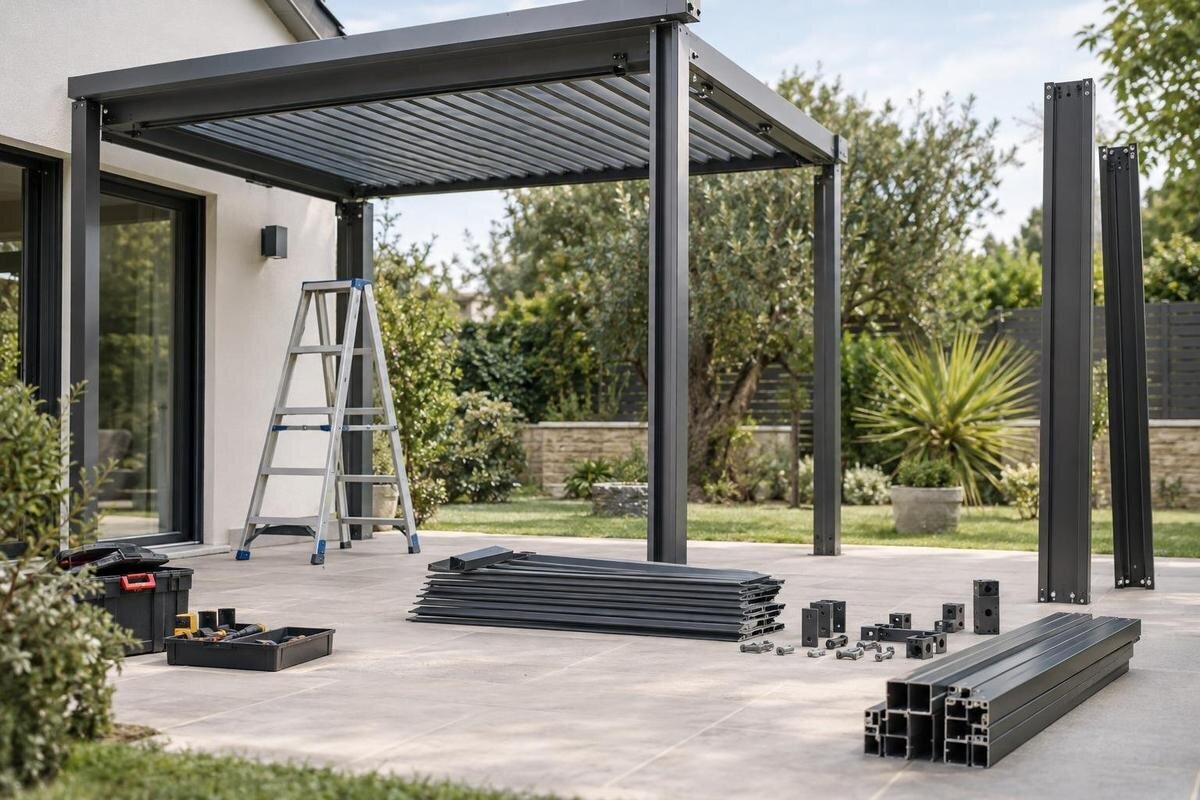
Pergola relocation guide
Moving an aluminum pergola is possible in some cases, but careful dismantling alone does not make it fit for a second installation. Its exact model, condition, fixings, documentation and destination all matter. Before anything is loosened, confirm which components may be reused, what the new site needs and who is qualified to assess the assembly and handle any powered parts.

01
Can an aluminum pergola be dismantled and reinstalled?
An aluminum pergola can sometimes be dismantled and installed elsewhere, but reuse depends on the exact model, the condition of its parts and a suitable plan for the new location. Posts and beams that separate cleanly are not automatically safe to assemble again: connectors, fasteners and anchoring details may be specific to one arrangement. The original assembly method, model revision and way the structure is fixed all matter. Treat relocation as two linked jobs—the controlled removal of the existing structure and a fresh installation assessment—not as a routine furniture move.
Before committing, ask the manufacturer or original supplier whether the model is intended to be taken apart, whether instructions for reinstallation are available and which components need inspection or replacement. Confirm that the right manual can be identified for your model rather than relying on a similar-looking product. Compare a move quote with a replacement quote before paying for transport. The Bloomcabin Pergola product page can serve as a product reference if you are considering a new unit; it does not identify an older pergola or confirm that its parts match.
Identify the exact pergola before planning the move
Look for the original order confirmation, model name or serial number, installation manual, technical drawings, parts list and service records. Note the installation year if known, whether the structure is freestanding or attached to a wall, and any components or repairs added later. Keep these records together instead of relying on a product photo or a similar-looking model: differences between versions can affect which connections and replacement parts belong to the assembly. If the paperwork is missing, photograph any identification label before it becomes inaccessible and ask the supplier to identify the unit from the information you have. Make a short record of which documents describe the original structure and which relate to later work. If a repair invoice names a replacement component, retain that reference alongside the relevant photo. Flag any conflicting model names or dates so the supplier can resolve them before parts are ordered.
Build a visual record while the pergola is still assembled. Take an overall view from each side, then close-ups of joints, post bases, brackets, roof connections, drainage outlets and any labels or controls that are present. Note where each photo was taken and write down visible damage, previous repairs or missing pieces. Do not loosen joints or remove covers just to improve a photo. Images help a manufacturer or installer assess a specific unit, but they do not replace its manual or establish that a hidden connection is sound.
02
Condition checks before disassembly
Inspect accessible frame members and connections in place before arranging removal. Note dents, bends, twisting, cracks, loose joints, elongated or damaged fastener holes, coating damage and visible corrosion or pitting, particularly where water and debris collect. Look for movement at posts or bases without climbing on, shaking or loading the structure. Photograph each concern from more than one angle, including a wider view that shows its location. A member that looks straight from a distance may have damage at a connection or on a concealed face, so do not decide that it is reusable based on appearance alone.
Check fitted or moving parts only as the product instructions allow. If the pergola has a louvered or retractable roof, screens, gutters, seals, lighting or powered controls, record what is present and whether it operates normally. Do not force a stuck mechanism or energize uncertain wiring. Report binding, damaged connections or previous makeshift repairs before anything is taken apart. Cosmetic wear and structural damage are not the same, and photos cannot determine whether a joint is safe to reuse. If a post is leaning, a joint is opening or the assembly seems unstable, keep clear and arrange a professional review rather than trying to test it.
Which components may be reusable?
Assess the pergola component by component rather than deciding that the whole structure is reusable. Depending on its design, posts, beams, roof elements, brackets, covers, gutters and other fittings may each need a separate condition check. A straight member with intact connection points may be a candidate for inspection; a bent part, cracked connection, distorted hole or damaged bracket needs a decision from the manufacturer or installer. Parts that look alike may differ in length, profile, drilling or revision. Matching pieces by appearance alone is not a reliable way to rebuild an assembly.
Treat fasteners and small connection pieces separately from large frame members. Removal can reveal corrosion, wear, damaged threads or a part that no longer fits securely. Whether it can be reused depends on the product documentation, its condition and the installer’s assessment. Do not drill new holes, bend a bracket or substitute a convenient screw to make old parts fit. If an important component is unavailable, compare an approved repair with replacing the whole assembly. The Bloomcabin Bioclimatic Pergola listing identifies another product model to consider as a complete system, not as a source of interchangeable parts.

03
Anchors, foundations and the new installation
An anchor is not automatically reusable just because it stayed in place during the first installation. It belongs to the original base, substrate and arrangement; removing it may damage the anchor, surrounding concrete or mounting point, and the new site may have different support. Have the base and fixing method assessed before deciding what can be retained. A deck, slab, prepared foundation or other surface cannot be assumed equivalent because it looks level. The installer should follow the exact pergola documentation and determine whether the existing base plates and fixings suit the destination.
Wall attachment needs its own review: confirm what the structure is fixed into, not simply what finish is visible. Siding, cladding or trim should not be treated as proof of a suitable structural fixing point. If the design is changing to wall-mounted, the Bloomcabin Wall-Mounted Pergola page identifies a separate model, but its listing does not approve your wall, anchors or existing parts. Ask the installer or manufacturer to confirm the support and connection details. Check with the local building authority about approvals for the proposed installation; do not assume an approval for the original site applies to a different location.
Assessing the new pergola site
Measure and sketch the new location before moving the pergola. Check the planned area and post positions against doors, windows, walkways, stairs, eaves and the space needed to use or service nearby equipment. Where roof parts move, consider whether they could strike a wall, branch or other obstruction. Do not assume that the existing footprint or post spacing can simply be copied: the new site and the product documentation need to agree. Mark the intended orientation on the sketch, including the wall side if applicable, and distinguish measurements taken on site from dimensions copied from the original installation. This gives the installer a clearer basis for reviewing the proposed layout without treating a rough sketch as an installation plan. For a rough product-size comparison, the Bloomcabin Pergola range is listed from 9 to 24 m²; that area is not an installation drawing, post spacing or required clearance.
Review the destination’s levels, drainage, surface condition and exposure as separate questions. Water flow, changes in soil or paving, overhead obstructions and nearby services may affect the layout or installation plan. Wind and snow exposure need to be checked against the specific product documentation and a qualified professional’s assessment. Do not calculate a suitable base or make a structural change from a generic guide. Have the intended base, clearances and any service routes reviewed before committing to transport, especially if the new position changes the height, span or attachment.
04
Disassembly, packing and transport
Once relocation is supported, agree on a dismantling sequence that follows the exact manual. Photograph each stage, label parts by position and bag related fasteners together so they are not mixed with hardware from another joint. Use labels that will not damage the finish, and keep identification marks readable. Give each component group a reference that also appears in the photo record, so the installer can relate the packed pieces to their original positions. Record parts removed for inspection separately from those accepted for reuse; a packing label should identify a component, not imply that it has been approved. Do not cut, pry or force parts free, or improvise the order when a member or mechanism may be under tension. Stop and ask the installer if the sequence is unclear. Any powered features should be disconnected by a qualified service professional in accordance with the equipment documentation.
Plan how long the parts will be out of service and how they will be moved and stored. Protect finished surfaces and connection ends from impact, twisting and rubbing; keep small parts with their labelled component group and record anything missing. Agree with the carrier or installer on secure handling rather than treating long structural pieces as ordinary loose cargo. Establish who will check the inventory at collection and arrival, and how any newly noticed damage will be recorded. Keep the packing list and photographs accessible during the move rather than enclosing the only copies with the load. If components will be stored before installation, agree on who will retain the small fittings and keep the labels and records together. If transport and storage costs shift the decision towards replacement, compare the scope for a complete replacement as well. The Bloomcabin Bioclimatic Pergola page names one product model to include in an enquiry, but does not answer questions about moving cost or site fit.
Who should handle reinstallation?
Assign reinstallation to someone qualified to work with the exact pergola system and its manual. The scope should state who checks each reused component, confirms the new base and anchor arrangement, sources any approved replacement parts and resolves differences between the original assembly and the destination. Ask for a written plan that lists what will be reused, what will be replaced and what remains subject to inspection. Where dismantling, transport and installation involve different providers, identify who will pass on the inventory, condition notes and supplier responses. Agree on who will resolve missing or damaged parts before assembly resumes, rather than leaving that responsibility unclear between quotes. The plan should also distinguish work included in the installer’s price from work assigned to another provider. If a new unit is being priced instead, Bloomcabin’s regular pergola listing identifies a model for comparison; request its installation documents and a separate project quote rather than treating a product page as technical instructions.
Do not assume motors, lighting, sensors, remotes or wiring, if fitted, can be transferred unchanged. A move may change cable routes or the relationship between controls and components, and equipment can need service independently of the frame. Leave electrical disconnection, reconnection, repair and testing to a qualified electrical professional following the manufacturer’s service requirements. Before work starts, ask the supplier whether the proposed relocation affects warranty terms, what inspection records are needed and who will handle commissioning. Do not infer coverage from the fact that the original installation worked.

05
Confirm parts support and compatibility
Before ordering a spare part or agreeing to an upgrade, send the supplier enough information to identify the original pergola: model or serial details, approximate purchase or installation date, manual or drawing, clear photos and the component’s location in the assembly. Describe what has changed and whether the structure is moving to another site. Ask for the exact part number, revision compatibility, any matching hardware and the manual or service instructions for the proposed work. If changing to a wall-mounted setup, the wall-mounted Bloomcabin model listing can identify the separate product being discussed; it does not establish that its parts fit an older frame.
Ask for a clear answer about what is approved for reuse, what must be replaced and what needs an installer or service technician to inspect. Avoid choosing brackets, bolts, controls or roof components because their dimensions look close; compatibility can depend on model revisions and how parts connect. Keep the supplier’s reply, diagrams and part references with the pergola’s records, then provide them to the installer before finalizing the quote. If the supplier cannot identify the system from the available evidence, do not treat a generic online diagram as an equivalent substitute. Resolve the identification first or compare a complete replacement.
Compare relocation with replacement
Compare the full relocation scope, not just the cost of a truck. Include inspection, disassembly, protective packing, transport, storage, approved replacement parts, preparation of the new base, reinstallation, electrical service if needed, removal of abandoned fixings and restoration at the old site. Set those items beside a replacement quote covering the new structure, installation, site work and disposal. Ask both providers to state assumptions and exclusions, especially if hidden connections or the base have not yet been assessed. Separate confirmed charges from allowances for work that remains uncertain, and ask how additional work would be priced and authorized. Check whether each quote covers the same endpoint: a packed structure awaiting installation is not comparable to a completed installation. Record any work you are expected to arrange separately, including collection or disposal, so it is not overlooked in the total. A headline figure may omit work needed to complete the installation.
Relocation is a stronger candidate when the manufacturer can identify the assembly, parts are confirmed for reuse, the new location has been reviewed and the installation scope is clear. Pause if critical records are missing, there is deformation or uncertain anchoring, matching parts cannot be confirmed, or the destination needs a different design. To compare a new system, use Bloomcabin’s bioclimatic model page to identify the model in your enquiry, then request a written, site-specific quote covering the same work as the relocation proposal. Keep unresolved items visible in the comparison instead of treating them as included or assigning them no cost. Make the decision only after both scopes use comparable assumptions.
Frequently asked questions
Can I reuse the original bolts and anchors?
Do not assume they are reusable. Their condition, fit and compatibility with the pergola and the new base need to be checked against the exact product documentation. Ask the installer or manufacturer which fixings, if any, can be retained.
Will the new site need a new foundation?
Not necessarily, but there is no general answer for every pergola or site. The model, existing base, destination surface and installation plan all matter. Have a qualified installer assess whether the destination has suitable support or needs site work.
Can I dismantle the pergola myself?
Only consider tasks that the exact instructions support and that you can do safely. Structural connections, work at height and powered features may need qualified assistance. Do not force parts apart or improvise a sequence when the manual or condition is uncertain.
What should I provide when asking for a replacement part?
Share the model or serial details, approximate purchase or installation date, manual or parts drawing, clear photos and the location of the part in the assembly. Ask the supplier to confirm the exact part and revision, compatible hardware and any required service instructions.
Could moving the pergola affect its warranty?
It depends on the terms for your specific product. Ask the seller or manufacturer in writing whether dismantling and reinstallation affect coverage, and what records or installer qualifications are required. Do not assume that a previous successful installation answers that question.
An aluminum pergola is a candidate for relocation only when both the original assembly and the new site pass a fresh review. Identify the model, document its condition, confirm the status of components and fixings, and have a qualified installer plan the destination before dismantling begins. That sequence helps preserve usable parts without assuming every old connection should be carried over. If compatibility, support or installation details remain unresolved, settle them before transport rather than rebuilding by guesswork.
