
Drainage Around a Garden Shed: Keep Water Away from the Base
Garden shed buying guide
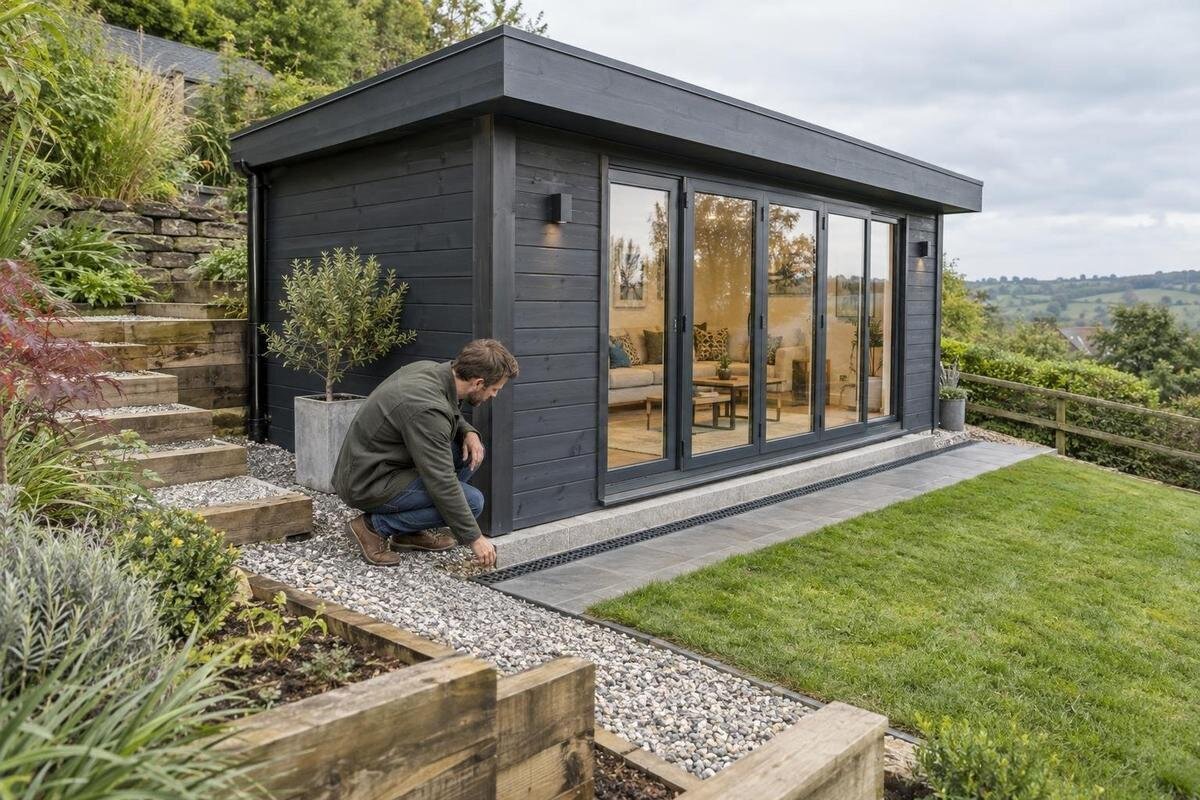
Water that collects beside a garden shed is often a sign that runoff has no clear route, not simply a problem with the spot directly under the base. Before ordering, look at how rain and snowmelt arrive, where the shed’s roof will release water, and where surface flow can safely go. A drainage plan should fit the proposed footprint and the rest of the yard. That makes site details part of the buying decision, alongside the shed’s dimensions and installation requirements.
Before you order 1
Trace where water already moves
Think of drainage as a route from source to outlet. Rain may arrive from the shed roof, a house eavestrough, higher ground or a hard surface such as a driveway. If those flows meet a hollow, a raised garden edge or a compacted patch, water can collect beside the proposed base. In some yards, the wet spot is only the last stop in a path that begins well uphill. A patio or paved walk can also alter where surface water travels, so note features beyond the planned shed area. Identify where water enters and what currently carries it out before deciding where the shed should sit. The model’s footprint can be positioned to fit the yard, but the product choice alone cannot provide an outlet for runoff.
Inspect the proposed location during or soon after a substantial rain, then revisit it during snowmelt if possible. Note where water runs, where it slows and whether puddles disappear or persist; a dry-day walk can miss a route that appears only in wet weather. Dated photographs from the same viewpoints give an installer a clearer account than a general description such as the yard gets soggy. Record the flow direction, nearby hard surfaces and any downspouts that discharge in the area. If you cannot visit during rain, ask someone who maintains the yard where water tends to stand after storms or a spring thaw. This is site information, not a drainage design: it helps you ask focused questions before committing to a model or arranging site preparation.
Check the shed location against low spots
Lay out the proposed footprint using dimensions supplied for the specific model, not an image or category label. Check whether the area overlaps a low point, a strip of runoff from higher ground, a house downspout or the route water takes beside a patio. Notice where soil or paving changes height: a raised border may trap water, while a sloping path may carry it toward the shed. Marking the footprint temporarily makes these relationships easier to see. Walk the perimeter and imagine rain crossing it from each direction, rather than checking only the side that faces the house. Note fixed references, such as a fence or building, so you can relocate the outline when comparing options.
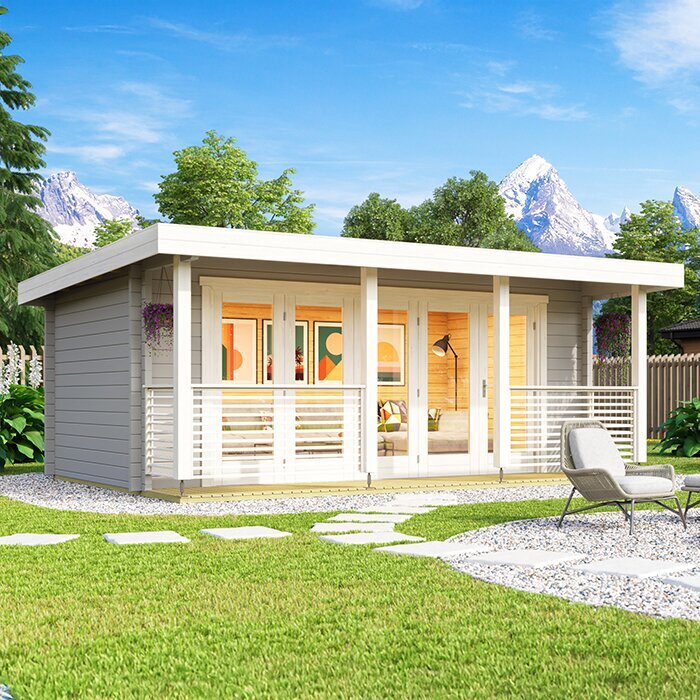
Fit the building into the drainage plan, not the other way around. Compare the candidate’s stated dimensions and installation clearances with the usable area, and leave room to maintain the route that carries water past it. The Verdana 1 garden house listing can help identify the model you are assessing, but verify the actual footprint and installation information in current product documentation; do not estimate from a photograph. If moving the shed by a small amount would avoid a flow line, that may be simpler than adding a new drain. If no workable position is clear, pause the order and ask an installer to assess the location first. Keep notes tied to the exact model so specifications are not mixed between listings.
Before you order 2
Plan for runoff from the roof
Every shed roof receives rainfall and releases it at its edges unless a collection system changes that route. Before choosing a location, identify the sides where roof water is likely to fall and whether it would land beside the base, onto an entry path or in an existing low spot. The direction can depend on the roof form and on any gutters or downspouts that are actually included or added; a product photo is not enough to settle the detail. A discharge point can create a persistent puddle if it lands where surface water already gathers. Include the roof in the site sketch, not just the walls and base, and note where several runoff paths might meet.
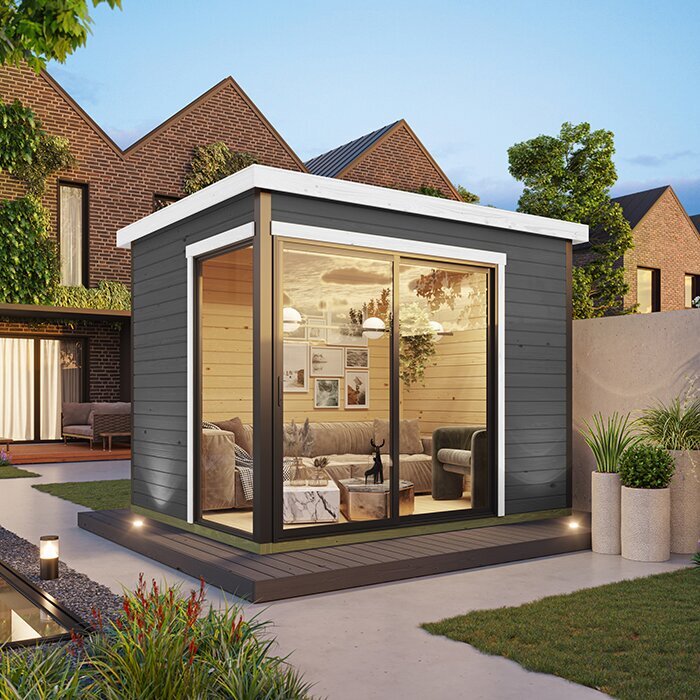
Ask the seller or installer to clarify which roof-water components are supplied, which are optional, where outlets can be placed and how they are expected to discharge. Do not assume a gutter, downspout or matching accessory is included because it appears in an image. On the Verdana 2 garden house page, identify the exact model and look for written roof and installation information, then compare it with your planned flow route. Ask whether an outlet position changes with the shed’s orientation and whether the water would cross a path. If a collection system is not part of the order, decide who will provide it and what destination is available. It should not simply empty at a shed corner or send the same problem toward a walkway, low area or adjacent property.
Plan the surface route around the shed
Once the footprint is chosen, think about the ground surface as a continuous route away from the structure. The finished area should not funnel runoff back toward a wall or form a ring-shaped hollow around the base. Natural contours, paving, soil and the location of an appropriate outlet all influence what is practical; no single grading detail works for every yard. A clear sketch can show the shed, higher ground, low points, downspout discharge and intended direction of surface flow. The aim is to carry water toward a place that can accept it, not to push it toward a neighbour or another part of the property where it will collect. If a change in level is needed, ask a qualified installer or drainage professional how it should meet the site and shed requirements rather than improvising from a generic rule.
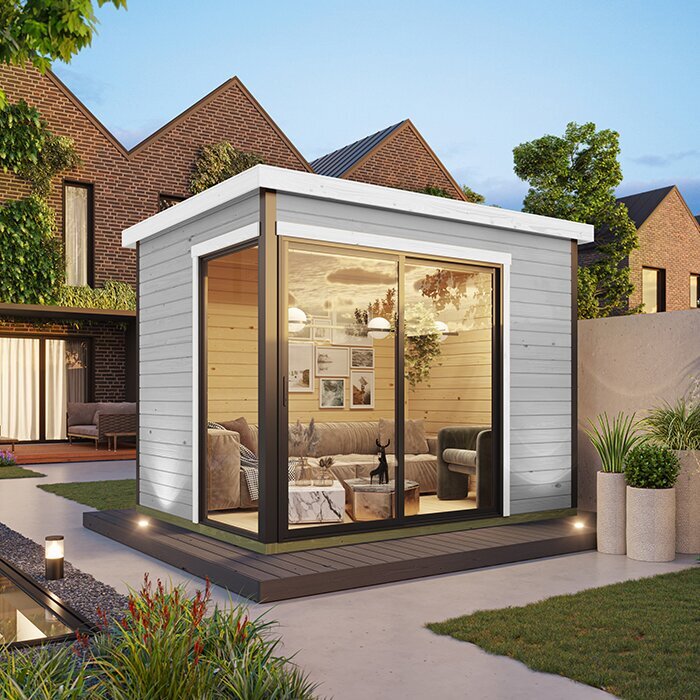
Landscaping added after installation can change that route. New paving, edging, raised beds, mulch piled along one side or a future deck may act as a barrier or carry water into the same spot. Compare the proposed shed’s stated footprint with the space needed for the ground route and inspection, not just the area occupied by the walls. The Durano garden house listing helps identify the candidate you are assessing; take dimensions and clearances from current documentation, not from the link name or a photograph. Decide where paths, beds and other planned features will sit before ordering landscape materials, so they do not close off the drainage route or create a new low point.
Before you order 3
Choose drainage measures for the site
Match the drainage approach to the source and the way water behaves on site. If roof runoff is the main issue, collecting it and carrying it to a suitable discharge point may be more relevant than adding a drain beside the base. If water crosses the yard, surface shaping or a deliberately planned channel may be considered. A low point that receives water from several directions needs a site-specific assessment. Gravel or another permeable-looking finish is not automatically a fix: it can cover the visible puddle without giving water a route out. Identify what the proposed measure will collect, where it will send the water and how the outlet will remain accessible for maintenance. The measure should address the route, not only the spot where water is visible.
Some projects need a qualified professional to assess soil, existing services, nearby structures and the available outlet before choosing a buried drain, catch basin or another system. These options are not interchangeable, and a drain without a workable discharge point can leave the original problem unresolved. If pooling is persistent or extends beyond the shed area, avoid selecting components solely by appearance or a generic kit description. When considering the Veltor 1 garden house page, use the exact product documentation for its footprint and installation requirements in the site discussion; the shed listing does not determine which drainage system suits the lot. Clarify whether the shed installer or a separate contractor is responsible for that work. Ask what routine clearing each proposed feature needs and whether it will remain reachable after the shed is in place.
Coordinate the base and drainage plan
A base and a drainage plan solve related but different problems. The base must meet the requirements for the specific shed and site; the runoff plan must keep water moving to an appropriate destination. A level pad can still sit in a low part of the yard, and a surface that appears to drain well before installation can behave differently after nearby levels are changed. Discuss order details, site preparation and water routing together instead of treating them as unrelated jobs. Do not assume that choosing a base type or levelling the shed will automatically prevent water from pooling around it. Ask for written installation requirements and have the proposed location checked against them. Confirm which finished ground level the installer expects around the perimeter and where the planned water route begins.
Before ordering, ask who will confirm final ground levels, prepare the base, direct roof runoff and deal with unexpected wet conditions during site work. The Orello 1 garden house listing identifies the model under consideration, but use current written specifications rather than its name to confirm footprint and base requirements. Ask the installer to explain assumptions in the quote: what ground preparation is included, who supplies drainage components and what happens if the prepared location does not match the plan. Get responsibilities in writing. This reduces the risk of discovering after delivery that the shed, base and drainage were each planned by different people with different assumptions. If a separate drainage contractor is involved, make sure both work scopes use the same site plan.
Before you order 4
Runoff and access at the entrance
Water management should include the route people use to reach and open the shed. Avoid setting the entrance where a roof outlet, surface channel or natural flow path is expected to discharge. A puddle immediately outside a door can make routine access inconvenient and may bring water toward the threshold. Trace the approach from a path, gate or house to the intended entrance, then note any crossing points with runoff. If a channel or pipe is proposed, ask how it will fit with access and maintenance rather than treating the entrance as an afterthought. Include the path itself in the site sketch so the shed’s position is judged against everyday use as well as drainage.
Use the chosen model’s plan or installation drawings to check which side the entrance faces and how much clear space is needed for access; do not infer door placement from a styled photograph. The Modano 1 garden house page identifies the product you are considering, but dimensioned information should guide the layout. Compare the entry with nearby downspouts, patios and proposed drains, and think about carrying bulky items through the area. Confirm from the product documentation how any doors open, since the access zone may overlap the planned path. If the product can be ordered in different configurations, verify that the quoted version matches the layout you intend to use. A clear entrance plan can rule out a location even when the shed’s footprint appears to fit.
Seasonal changes in runoff
A site should be judged in more than one season. Snowmelt, frozen ground, wet spring soil, heavy rain and fallen leaves can change where water travels or how quickly it disappears. A spot that looks dry during a warm, dry week may still sit in a runoff path when snow melts. Note whether water arrives from uphill ground or roof surfaces during seasonal conditions, and whether the intended outlet becomes blocked or inaccessible. Conditions vary with local weather, lot shape and soil, so use observations from the property rather than a generic calendar. Ask someone familiar with the yard about recurring wet areas if you cannot observe them yourself. If snow is piled near the proposed shed, note where it melts and whether the flow changes.
Seasonal information is useful when comparing shed options and planning installation timing. Ask the installer whether the site can be assessed in current conditions or whether dated photographs and prior observations would help. When reviewing the wooden garden shed M listing, confirm the exact product dimensions and installation notes from current documentation before laying out the site; do not infer the footprint from the letter M in a model name. Also account for future changes such as a paved path, garden bed, fence work or rainwater collection. A plan that leaves the outlet open and accessible is less likely to be blocked by routine yard improvements.
Before you order 5
Access for drainage maintenance
Drainage features need access to work over time. If an outlet, channel or surface route is hidden behind stored materials, dense planting or a new border, a blockage may go unnoticed. Plan enough clearance to inspect the ground around the shed, see where roof water is released and reach any system that needs clearing. Choose planting and yard storage with the runoff path in mind. Avoid filling a depression with loose material as a quick fix without checking whether water has a proper exit; concealing a wet spot does not establish that the route is working. Include the roof outlet and final discharge point in maintenance notes so you know which places to inspect after rain.
After major rain or snowmelt, look for new puddles, overflow marks or a route that has shifted toward the base, then address the cause rather than only covering the wet area. Follow the care instructions for the shed and any drainage components, and seek qualified help if a drainage system needs work beyond routine clearing. As you check the wooden garden shed S product page, confirm the exact footprint and any published access or installation clearances; do not assume the shed suits a tight site because its name includes S. If snow is piled near the shed, include the melt route in seasonal checks. A location with room to observe, maintain and, if needed, adjust the drainage plan is more practical than one where every edge is inaccessible. Recheck the route after landscaping changes, since new edging or a path can redirect water.
What to confirm before ordering
Before finalizing an order, bring the site notes and product information together. Confirm the exact model and configuration, the published footprint, base requirements and installation clearances, then compare them with the area where water can be directed. Ask how roof runoff will be collected or released, who supplies any required components and where the discharge will go. Confirm whether site grading, a surface channel or another drainage measure is within the installer’s scope or needs separate work. The goal is one coherent plan for shed position, base and water route, not an assumption that each part will be resolved by a different supplier. Keep the model name and configuration consistent across the quote, drawing and site notes.
Ask for the proposed shed position and drainage route to be described in writing, with the responsible person identified for each part. Clarify what happens if site preparation reveals standing water, an unexpected flow path or conditions that differ from the original assumptions. Make sure the location does not depend on sending runoff to an unsuitable area, and confirm site constraints with an appropriate professional or local authority rather than guessing. This is a useful point to compare more than one candidate: a model whose published footprint fits the available area may require fewer site changes than one that does not. Keep the final order, installation information and site plan together, and agree what site-readiness information is needed before installation.
Frequently asked questions
How far should water drain away from a garden shed?
There is no universal distance or slope that suits every site. Keep roof and surface runoff from collecting at the base, and confirm a suitable route and outlet using the shed’s installation information and advice from a qualified local professional.
Will gravel around a shed prevent pooling?
Not on its own. Gravel may change the surface, but if the area remains a hollow or has no outlet, water can still collect beneath or beside it. Decide where water will go before covering the ground.
Can I direct roof runoff to a rain garden or drain?
Only if that destination is appropriate for the site and can accept the flow. Ask a drainage professional whether a rain garden, existing drain or other outlet is suitable; do not assume every system can take runoff from a shed roof.
What if pooling appears only during spring thaw?
Treat it as a real site condition, not an exception. Record where meltwater comes from and whether the outlet is blocked, then use those observations when discussing the shed location and drainage plan with an installer.
What should I check before ordering a shed?
Confirm the exact model and configuration, footprint, base and clearance requirements, roof-runoff details, intended outlet, and who is responsible for site preparation and drainage. Keep the product information, quote and site plan together so the same layout is used throughout.
Good garden shed drainage is a site decision as much as a product decision. Observe runoff in wet conditions, place the footprint outside established flow paths, account for roof discharge, and keep a clear route to a suitable outlet. Then confirm how the base, site preparation and drainage work fit together. Answering those questions before ordering helps prevent a convenient-looking location from becoming the place where water repeatedly collects.
