
Planning a Family Pergola for Play and Supervision
Family pergola planning
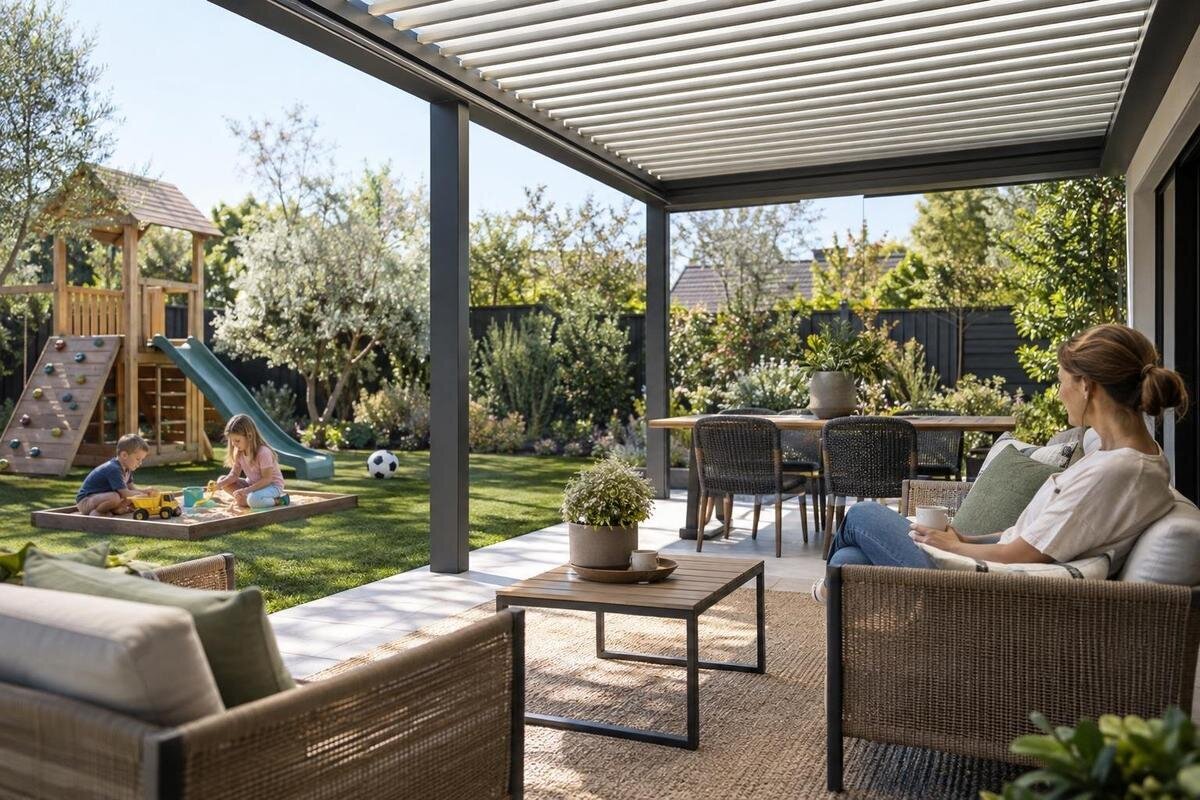
A family pergola can bring an eating area and outdoor play into one part of the yard, but fitting both beneath a frame does not automatically make supervision easy. The useful questions are where adults will actually sit or stand, which activities must remain visible, and whether the route through the space stays clear when chairs are occupied and toys are out. Plan around family routines and measured footprints, then confirm the chosen pergola configuration and its site requirements. A pergola should not be treated as child-safe by default.

Check sightlines from everyday supervision spots
Begin by listing the places an adult will supervise from: a dining chair, a lounge seat, the kitchen or patio doorway, and any regular standing work area. Mark those points on a rough site sketch before choosing a play corner. Then plot activities, not only equipment: a child crossing the yard requires a different sightline than one drawing at a table. Give more weight to the positions your family uses every day than to a single ideal viewpoint. Note whether each supervising adult will be seated, standing or moving between tasks; simply marking the patio as a supervision spot misses those differences. This is a concept sketch, not a construction or safety plan; its purpose is to show what adults can see from the places they actually use.
Test the sketch from seated and standing eye level. Sit in the actual chair and look toward the play area, then check the view from the kitchen or doorway where an adult would normally stand. Check whether the table, high-backed chair, planter, storage box, open door or pergola support blocks part of the view. A child can move behind an obstruction even when most of the play area looks open on paper, so notice the near edge and corners as well as the centre. Repeat the check from more than one usual position and in the daylight conditions when the family is likely to be outside. A clear sightline supports supervision, but it does not replace an adult’s attention.
Keep the walking route clear of play
Draw a continuous route from the house to the yard, side gate or another everyday destination before placing play equipment. Keep this route out of the main running, ball-play or ride-on area where possible, so someone carrying food or opening a door does not have to cross the play area. Use the actual door location and note which way hinged doors swing; for sliding doors, mark the opening and the space needed to stand. Include the route a visitor would use, not only the quickest path a family member takes; people may cross the space differently when others are present. If the pergola sits between indoor and outdoor spaces, the route should still work when a child is playing and chairs are occupied.
Measure the route while typical furniture is in its working position: pull a dining chair out, allow someone to pass, and include the space around a toy bin when it is open. Mark bends and narrow points, which may put objects outside a seated adult’s view. Avoid planning only for an empty patio. A loose ball, stroller or serving tray can temporarily narrow a path, so decide where these items go when not in use. Ask for dimensions of the selected Bloomcabin Pergola configuration and map them over the route; the model name alone cannot confirm that your path will remain clear.
Arrange seating around the adult’s usual tasks
Choose seats for the tasks they support. A dining chair may be used through a meal, while a lounge chair may be where an adult sits during a quieter afternoon; put each on the sketch and inspect its view instead of assuming all seats provide the same supervision. A seat facing the table can leave the play area behind the adult. Turning a chair slightly, or setting it at an angle to both the table and play area, may improve awareness without making the furniture awkward to use. If adults take turns supervising from different spots, test each regular spot rather than planning for only one person. Keep the main route open as you test.
Consider what changes once furniture is occupied: the adult’s body, a patio umbrella, a serving cart or a raised chair back can cut off the sightline. Do this check with the furniture you intend to keep, since replacing a chair later can alter the view. If the patio is attached to the house, compare a wall-mounted option such as the Bloomcabin Wall-Mounted Pergola against your seating plan using the confirmed support locations for the selected configuration. Check how those positions relate to the table, chairs and play area. Review the arrangement from seated and standing viewpoints before choosing the regular supervision seat.
Measure play equipment in use
For every toy or play item likely to stay outdoors, record the full area it needs during use. The base measurement may not include a slide’s exit path, a panel or lid that swings open, an adult standing alongside, or room for a child to move around it. If an item folds, note both its stored and in-use footprint, but reserve the larger use area for planning. Follow the manufacturer’s stated clearances and installation instructions rather than inventing a general measurement. Sketch the equipment area beside the pergola footprint and furniture. A compact item can still occupy an awkward space when in use, so plan for the activity rather than the storage shape alone.
Set equipment so children do not need to cross the principal walking route to reach it, and so play does not block an exit, gate or access to regular seating. Keep portable items in a defined parking spot when an activity ends, rather than in the route between the house and yard. Write down which items stay outside and where they go; a plan that depends on storage needs a real storage location. Do not assume a pergola is suitable for hanging, climbing or anchoring equipment: only consider an attachment if the manufacturer and a qualified professional confirm that the exact structure and installation are approved for it. When comparing the Bloomcabin Pergola with your sketch, keep the equipment’s manufacturer-specified use area separate from the pergola’s listed area.

Separate active play, quiet activities and seating
Not every family activity belongs in the same footprint. A space for drawing, blocks or reading needs a table or seat and somewhere to put materials; running games or ride-on toys need a wider movement area and a route that does not cut through adult seating. If siblings choose different activities, decide which can share the space and which need separation. Mark each intended zone on the concept plan, then see whether play and dining can happen at the same time without chairs or toys drifting into the other activity. Test the arrangement with the intended number of people, not with every seat empty. This helps avoid a layout built around a single setup the family rarely uses.
Use simple visual cues to show where an activity usually belongs: a small outdoor table, a low storage unit outside the walking line, or a consistent place to put toys away may be enough. Check that any marker stays out of the sightline being tested and does not create a trip point at the edge of the play area. Keep frequently used equipment accessible to the responsible adult without storing it beside a doorway or in a narrow passage. Decide what gets put away between activities and how much storage is available; a defined zone is easier to reset, while the open space around it gives adults room to pass and observe.
Account for posts, doors and changes in level
Map existing features before deciding where a pergola and activity zone can go. Include the house wall, doors, steps, deck edges, fixed planters, trees and any storage that cannot move. Mark proposed support locations only after confirming them for the exact configuration being considered; an attractive position on a sketch can become an obstruction in the built layout. Check the view from a seated adult’s height as well as standing height, because a support or tall feature may hide the part of the yard closest to it. Include seasonal furnishings and plants if they routinely occupy the space during play.
Keep access to doors and steps clear, and avoid letting toys accumulate at a step, doorway or narrow corner. Do not use a pergola post or furniture as a substitute for a guard or boundary the site may need; assess those issues separately with a qualified professional. For a wall-side arrangement, compare the wall-mounted pergola configuration with the measured wall, door openings and proposed play area. Include the space needed to approach each opening and use it while nearby furniture is occupied. Review any conflicts between the proposed support positions and these access points before settling on the layout.
Check shade without assuming weather protection
Shade changes with the time of day, season, orientation and overhead configuration, so observe the patio when the family is likely to use it. Note whether the preferred seats and play area are shaded then, and whether an open view remains. A check at midday alone can miss the hours when children usually play outdoors. A pergola should not be treated as guaranteed shade or rain protection simply because it is overhead; the exact model information has to establish what the chosen configuration provides. If shade or weather protection is a deciding requirement, ask the seller for the specifications and limitations before arranging play beneath it.
Do not let a screen, curtain, movable panel or added cover solve one problem by creating another blind spot or narrowing the route. Check any optional component with the product documentation and supplier, including how it changes usable space and sightlines; do not assume an accessory can be added to every structure. When considering the Bloomcabin Bioclimatic Pergola, confirm the selected overhead configuration, its shade and weather-protection limitations, and any relevant operating requirements. Use that information to assess the seats and play area at the times your family expects to be outdoors, rather than relying on the model name.
Draw the full furniture and pergola footprint
Make a scale sketch using measured patio boundaries, doors and fixed features, then draw the proposed structure and furniture at their actual dimensions. Include the practical space around each object: chairs pulled back, a person using a table, a storage lid open and the area required by play equipment. Measure the narrowest parts of the site as well as its centre; an average width can hide a pinch point beside a wall or planting bed. You can outline footprints with removable markers on the surface or use cardboard shapes, as long as the mock-up does not obstruct normal access. Seeing everything in use often shows why a stated pergola area is not the same as usable family space.
The Bloomcabin Pergola listing states a size range of 9 to 24 m², but that range does not identify the footprint of the exact option or show where its supports fall. Use the Bloomcabin Pergola size range as an initial catalogue reference, then obtain exact dimensions and a proposed layout for the configuration under consideration. Ask how the listed area relates to the selected size and compare the dimensions with the movement and furniture zones already drawn. A larger stated area is not automatically a better family fit if it narrows the yard route, interferes with a door or leaves the play area out of view.

Test the layout during everyday routines
Before committing to a layout, run through a realistic sequence at the site. Put a chair where an adult would sit, set out the planned table and equipment, and walk the route while another person occupies the main seat. Open the door, pull out a chair and place a toy bin where it will actually be stored. Try the check at the time of day the family expects to use the yard, and repeat it from any other regular adult viewpoint. A cardboard or tape mock-up is a concept test only; it cannot verify structural suitability, installation or safety requirements.
Ask whether the adult can notice movement from the places they genuinely use, whether another person can pass without cutting through play, and whether cleanup restores the clear route. If a view disappears whenever a chair is occupied or a door opens, move the furniture or adjust the proposed zone and test again. If you are comparing Bioclimatic Pergola configurations, repeat the exercise with each option’s confirmed dimensions so the mock-up reflects the arrangement being considered. Try the layout with the usual number of diners or visitors, since extra chairs can change both traffic and sightlines.
Review the arrangement as family routines change
Plan for the setup to change. A toddler’s play area, a school-age child’s games and a shared family dining space may call for different equipment, furniture positions and adult routines over time. When a play item moves or a new table arrives, update the measured layout instead of assuming the old circulation and viewing angles still work. Recheck whether growing plants or misplaced storage items and outdoor cushions obstruct a route or block a useful sightline. Note which parts of the arrangement can move easily and which depend on the proposed structure, so a small change does not quietly create a blind spot. The layout should be easy to reset when play equipment is put away.
Keep a concise record of site measurements, preferred adult viewpoints, door swings, furniture dimensions and the exact pergola configuration reviewed. That makes it easier to compare alternatives without relying on memory or a product photograph. Share the agreed play area and storage location with every adult who supervises, so equipment and furniture return to the arrangement that was tested. If the Bloomcabin Wall-Mounted Pergola listing is one option, keep its confirmed configuration details with the site sketch to distinguish that option from other layouts under consideration. Revisit the record when family routines change, noting any furniture or equipment moves that affect access or visibility.
Frequently asked questions
How can I check sightlines before choosing a pergola?
Mark the proposed play area and structure on a measured sketch, then test the view from the seats and standing spots adults will actually use. Include furniture, doors and other obstructions. A clear view helps with supervision but does not replace an adult’s attention.
How much space should I allow for outdoor play?
There is no single clearance that suits every activity. Measure equipment as it is used, including any space specified by its manufacturer, then add room for furniture, people and the walking route. Check the full arrangement against the selected pergola’s dimensions.
Can I attach a swing or climbing equipment to a pergola?
Do not assume a pergola can support attached play equipment. Only consider an attachment if the manufacturer and a qualified professional confirm that the exact structure and installation are approved for it.
Should play equipment sit under the pergola?
That depends on the equipment, the family’s preferred sightlines and the verified overhead configuration. A pergola does not automatically provide shade, weather protection or a safe play area. Check the exact product information before deciding where equipment belongs.
Which pergola model is best for family use?
There is no best model for every yard. Compare the exact configuration and dimensions with your measured route, furniture and play zones. A model name or stated area range alone cannot confirm that a layout will suit your site.
A practical family pergola layout brings together the adult’s usual viewpoints, a walking route that stays clear when furniture and toys are in use, and enough space for each play activity. Make a concept layout, test it from seated and standing positions, then compare it with the exact pergola configuration. Treat supervision and any separate protective measures as their own requirements, rather than benefits the structure automatically provides. As children’s activities and patio furnishings change, review the sightlines and circulation so the arrangement continues to suit the family.
