
Garden Shed Assembly Tools: A Practical Checklist
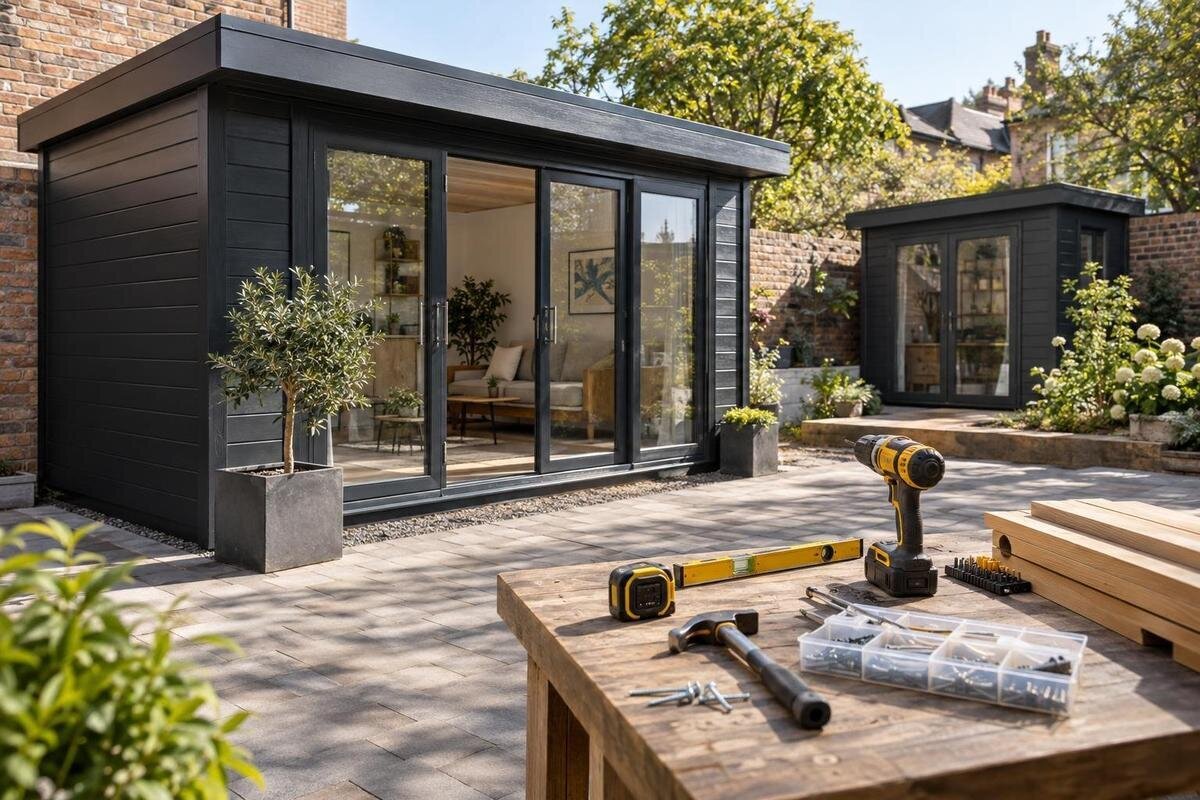
GARDEN SHED ASSEMBLY
Before assembling a garden shed, gather tools against the instructions for the exact model—not a generic checklist that assumes every fastener or fitting is the same. A tape measure, marking tools, the specified drivers and suitable protective equipment are useful starting categories, but the manual determines what is actually required. This guide helps you sort essentials from conditional tools, decide what to buy or borrow, and check that the work area and equipment are ready before assembly begins.

Pre-assembly tool checklist 1
Read the instructions for the exact shed
General online tool lists are only a starting point: garden shed kits can differ in fasteners and assembly steps, so the instructions for your exact model should determine which tools are required. Locate the correct manual before shopping and review its tool list, hardware references, diagrams and notes about equipment supplied with the package. If you are preparing for a listing such as Verdana 1 garden house, record its full product name and match it to the manual; a product title or photograph alone cannot identify the driver or bit you will need. Keep any model identifier shown on your order record with the instructions.
Turn the manual’s directions into a checklist with separate columns for required tools, tools confirmed as included, tools already on hand and questions to resolve. Note any size, bit profile or step reference the instructions provide, and mark optional suggestions separately from must-haves. Check the package contents or ask the retailer or manufacturer whether a particular tool is supplied; do not assume it arrives just because the manual names it. If the instructions are missing or do not match the model, get the right version before scheduling assembly or buying specialty bits. This can prevent duplicate purchases and last-minute substitutions.
Measuring and marking tools
Choose a tape measure that spans the distances you need to compare with the written dimensions, and check that its markings are clear and its lock works. Measure on a stable surface, using the same reference edge shown in the instructions; avoid piecing together several short readings when one continuous measurement is practical. Use the same endpoint for repeat readings, since the tape’s end hook can shift slightly. Record each result with its unit and the part or location it refers to. A carpenter’s square or straightedge can help check an edge or right-angle relationship when the manual asks for it. These tools help you compare and observe; they are not a reason to alter a component that does not appear to line up.
A pencil, notebook or removable label on a tray makes it easier to track measurements and identify parts without marking a finished surface. Use the dimensions written in the instructions rather than measuring a drawing on the page, which may not be to scale. If the manual uses a different unit from your tape, record a clear conversion rather than estimating. A spirit level belongs on the list when an assembly or base check in the manual calls for one; it cannot by itself determine whether site preparation is suitable. For a product listing such as garden house Verdana 2, keep notes with the model reference and ask a qualified installer if a base-related measurement is unclear.
Pre-assembly tool checklist 2
Match drivers and bits to the fasteners
Before choosing a drill/driver, identify the profile of the fasteners shown in the manual: square (Robertson), Phillips, Torx, hex or another shape each needs a matching bit. Those are examples, not a prediction about any particular shed. Collect the specified bits and, if required, the matching hand screwdriver, socket or hex key; an extension or bit holder is useful only when the instructions or access needs warrant it. Inspect each tip for wear and make sure it seats securely without wobbling. A poorly fitting or rounded tip can slip and damage a fastener, while a labelled case helps you find the right one without trying random bits on parts.
If the manual permits a powered driver, use the tool manufacturer’s directions to choose its mode and settings; do not assume the fastest setting or an impact driver is suitable. A mismatched bit or extra force will not correct a poor fit. Follow any instruction to start or finish a fastener by hand, and do not power-drive a step whose method is unclear. Write the specified bit or driver beside the relevant step if it could be confused with another. When matching documentation to Durano spacious garden house, confirm the product reference; a similar name can lead to a different hardware list.
Hand tools for fastening and alignment
Keep hand tools on the list only where the manual calls for them: a correctly sized wrench or socket for a named nut, a matching screwdriver for a specified hand-tightening step, or a hex key where shown. Match the size and type in the instructions rather than approximating with a near fit; an imperial-size tool may not match a nearby metric size. An adjustable wrench can cover some tasks if permitted, but loose jaws can damage a fastener, and pliers are not a substitute for the correct driver. A soft-faced mallet is not a general-purpose way to force a tight joint. Check the diagram first instead of striking a panel or joint because two parts seem reluctant to meet.
Clamps can hold an assembly temporarily only if the instructions and part design allow clamping. Choose a suitable size and use a soft pad when appropriate, but do not clamp glazing, thin trim or a finished surface unless the manufacturer says it is safe. A checklist for a listing such as Veltor 1 should treat clamps and a mallet as conditional, not automatic purchases. They must not replace specified fasteners or become a way to pull an unclear joint into place. Do not rely on a clamp as the only support for a component that could fall. If alignment needs unusual force, recheck the orientation and drawing instead of reaching for a longer handle or heavier tool.

Pre-assembly tool checklist 3
Cutting tools and consumables
Do not put a saw on the standard list unless the manual specifically describes a cut. Scissors or a utility knife may be enough to open packaging, but cut away from hands and shed parts, and avoid cutting deeply enough to reach anything hidden beneath the wrapping. Sort loose screws and fittings before discarding cardboard or plastic so small hardware is not swept away with it. Sandpaper, a scraper or another finishing tool is also conditional. Add one only when the instructions name the task and tool, not because a generic shed article recommends it. A product photo cannot confirm that trimming or sanding is part of assembly.
For a listing such as Orello 1 garden house, the title and image are not evidence that a part needs trimming. Do not enlarge a hole, shorten a component, remove material or substitute a fastener unless the exact instructions explicitly require that operation. If a documented cut is required, confirm the measurement, suitable tool, protective equipment and any direction about the finished edge before starting. If one of those details is missing, ask the manufacturer or a qualified installer rather than experimenting on a kit component. If no cut is shown in the manual, pause and clarify instead of making a fit adjustment by appearance.
Protective equipment for the work
Put eye protection and closed-toe footwear on the basic safety checklist, then choose additional protection for tasks the instructions actually describe. Hearing protection may be appropriate with a noisy power tool, and dust protection may be needed for a specified cutting operation; follow the equipment maker’s guidance on fit and use. Gloves can help when handling materials, but they are not suitable around every rotating tool, so follow the tool instructions and remove them when required. Tie back long hair, avoid dangling jewellery and choose clothing that will not catch on equipment. Check the relevant guidance again when moving from handling parts to powered work.
Before starting, make sure the manual and work area are clearly visible, set tools where they will not roll or create a trip hazard, and keep children and pets outside the work zone. Inspect a power tool, battery, cord or plug as its manufacturer directs; do not use damaged equipment or operate it in wet conditions. Keep cords clear of walking routes and follow the tool maker’s procedure before changing a bit or battery. If wind or rain makes parts, tools or footing hard to control, wait until handling is safe. For preparation tied to Modano 1, match protection to the actual listed operations rather than guessing from the product name or appearance.
Pre-assembly tool checklist 4
Keep tools and hardware organized
Set up a clean, stable place for the instructions and tools, with enough clear space to sort the components you are using. Separate screws and other small hardware into trays or bags, then label them with the manual’s part references; keep similar-looking fasteners apart rather than relying on memory. Place components on a clean, non-abrasive covering to keep grit from scratching a surface, and keep loose driver bits away from kit hardware. Check off pieces only after identifying them by their references, not just because they look alike. Return tools and fittings to their labelled places as you move through the instructions so nothing gets mixed into the next step.
Keep the relevant diagram in view, either on a paper copy or on a device placed away from dust, spills and moving parts. A pencil, removable labels for bags, a small parts tray and a container for packaging waste are simple organizational aids; they do not need to touch finished components. If you are preparing for garden shed M, write the exact model name on the checklist so the notes, diagrams and tool requirements stay together. Avoid attaching adhesive labels or writing directly on a surface unless the instructions allow it. Do not use a component as a workbench for loose tools or place a device where it could fall onto parts.
Buy, borrow or rent only what you need
Before buying anything, compare the required tool list with what you own, can borrow or can rent. Confirm the bit profile and size, socket fit or accessory compatibility named in the manual, then inspect the tool’s condition. A driver with a worn battery, cracked handle or rounded bit may not be a dependable substitute for a sound one. For a tool needed only occasionally, borrowing or renting can be an option, but check its condition and confirm that the required accessory is available. Read its operating directions before use, and make sure protective equipment fits the person who will use it. These checks help distinguish a genuine need from an attractive but unnecessary all-in-one set.
Split your shopping list into essentials for specified steps and conditional items that can wait until a need is confirmed. Replace a missing or damaged tool the manual requires, but avoid buying a saw, specialty clamp or extra fastener set on the strength of a generic shed-assembly list. Keep the tool plan with the exact order record for garden shed S so it does not get confused with another model’s notes. A broad driver-bit set is useful only if it contains the required profile and sizes; check the details before ordering. Do not buy replacement hardware simply to make an ill-fitting tool work. Ask the retailer or manufacturer about unresolved requirements before committing to a purchase.

Pre-assembly tool checklist 5
Run a pre-assembly tool check
Use a readiness check instead of relying on memory. Put the correct manual and its specified tools together; then confirm that you have a tape measure, pencil or removable labels, and any square, straightedge or level the instructions require. Add only the driver bits, hand screwdrivers, sockets, wrenches, clamps or mallet named for the steps. Set out required eye, hearing or other task-specific protection and keep the tool makers’ directions available. Note each conditional item separately, with the page or step that mentions it. A clear question column helps distinguish “confirm whether needed” from “buy before assembly.”
Inspect handles, tips, measuring tools and batteries before beginning, then make sure the correct bit fits the specified fastener without force. Confirm that any accessory is in the work area—not left in another toolbox or charger case—and that you can consult the instructions throughout the task. If more than one person is helping, record who is bringing each required tool rather than relying on a verbal assumption. If an item is missing or damaged, mark the list “not ready” and arrange the correct replacement or advice. For unclear directions, note the question and page reference before contacting the manufacturer or retailer. This avoids a rushed substitution while components are being handled.
Pause when a tool or instruction does not fit
Pause if a tool does not fit, a fastener will not turn as described, a part appears misaligned, or the instructions and kit do not agree. Check the model reference, part orientation and diagram before trying again. Do not force a connection with a mallet, switch to a larger driver, drill a new hole or replace a fastener just to get past uncertainty. If the correct tool or step remains unclear, contact the manufacturer or retailer and identify the model and instruction page. Do not continue until the right part and tool are identified; that is more reliable than borrowing a method from another shed’s video or a generic online list.
Some tasks depend on a prepared base or involve work beyond the kit’s illustrated assembly steps. A level or square can report a measurement, but it cannot settle a site or structural question on its own. Follow the product instructions and ask a qualified installer or trade professional when preparation, tool choice or a safe method is outside your experience. For work involving anchoring or a base beyond the instructions, get help rather than treating a measurement as a solution. Stop if equipment is damaged, required protective gear is unavailable or conditions make the work hard to control. A checklist is complete only when you have the required tools and understand how the instructions say to use them.
Frequently asked questions
What tools are usually needed to assemble a garden shed?
The exact list depends on the model. Common categories include measuring and marking tools, the driver and bits that match the specified fasteners, and task-appropriate protective equipment. Add a square, level, wrench, clamps, mallet or saw only when the instructions call for it.
Can I use a cordless drill or an impact driver?
Use a drill/driver only if the instructions permit it, and match the bit to the fastener. Follow the tool maker’s directions for operation and settings. An impact driver is not an automatic substitute; if the manual does not explain powered fastening, ask before proceeding.
Are tools included with a garden shed kit?
Do not assume they are. Check the package contents and product information, distinguishing tools listed in the instructions from tools confirmed as included. If the wording is unclear, ask the retailer or manufacturer before buying extras or starting assembly.
Do I need a saw or a rubber mallet?
Only if the exact instructions specify a task that needs one. A mallet is not a way to force parts together, and a saw is not a standard requirement for every shed. Do not cut or alter a component based on its appearance.
Should I buy a complete garden shed tool kit?
Compare the manual’s requirements with tools you already own, can borrow or can rent. A large set may still lack the required bit or accessory. Buy or borrow tools to match the listed steps, and check their condition before use.
Keep the checklist tied to the exact model and its instructions: measure and mark with appropriate tools, match drivers to the specified fasteners, and add hand tools or cutting tools only when a step calls for them. Check tool condition and protective equipment before starting, and pause over any mismatch rather than improvising. That approach keeps purchases focused and makes the assembly plan more predictable.
