
Can You Put a Garden Shed on Existing Paving?
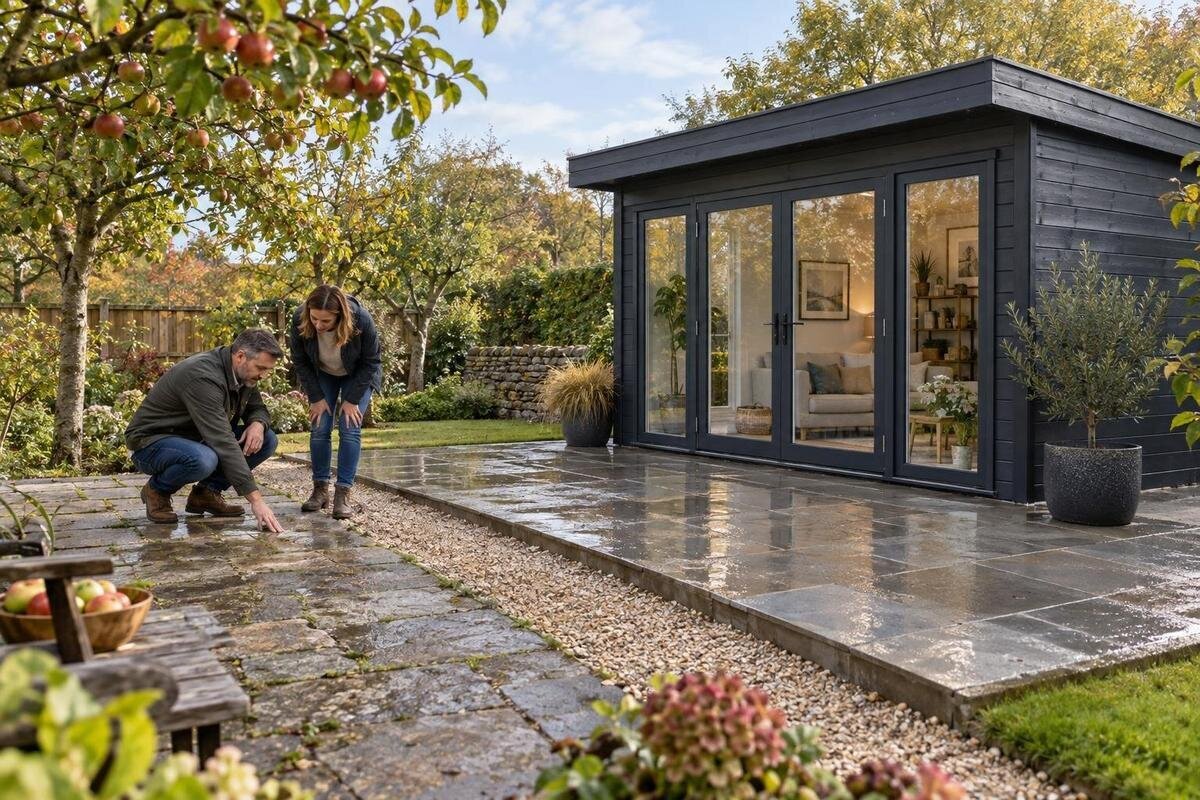
Garden shed planning
Putting a garden shed on existing paving can work in some cases, but a tidy patio is not automatically ready for one. The surface has to meet the chosen shed’s support and anchoring requirements, stay stable and even across the required footprint, and manage water appropriately. What matters depends on both the paving and the specific product. Assess those details before ordering; if you cannot tell how the patio was built or whether it can be anchored, ask the installer what needs to be confirmed.
01
When existing paving can work
An existing paved patio can work as a base for a garden shed only if it meets the chosen shed’s stated requirements. The surface must be stable and even enough for the required support arrangement, cover the actual bearing footprint, and allow the specified anchoring method. Water also needs a route away from the building. These are separate tests: paving that looks sound may still be uneven, too small or unsuitable for the required connection. A surface is not automatically a foundation simply because people have walked on it for years. Base the decision on the paving’s construction, condition and the individual shed’s instructions, not appearance alone.
Before choosing a model, find its base dimensions, any stated level tolerance, whether it needs continuous support, and the approved anchoring approach. Compare those details with the paving you already have; do not infer them from product photos, a model name or another buyer’s setup. Read the information for the Verdana 1 garden house as guidance for that specific item, not as proof that your patio is suitable. If its listing does not explain the base or anchoring requirements, ask the seller or installer before ordering. Save the response with your site notes so the answer refers to the same model and paving area. Note whether the instructions refer to the overall footprint, rails or another support arrangement; those terms may describe different outlines.
Inspect paving for movement and damage
Inspect the area that would sit beneath the shed, not just the visible edge of the patio. Look for cracked or chipped slabs, pavers that rock, settled corners, opened joints, low spots and signs that bedding material has washed out. One mark on a stone does not tell you what lies below, but repeated movement across the footprint deserves attention. Note whether damage is isolated or repeated across adjacent units; that pattern gives an installer useful context. Take close-up and wide photographs, then record where each issue falls relative to the proposed corners and support lines. A location note is more useful than a general impression that the surface looks sound.
Check the patio after rain and during ordinary use, when water paths or movement may be easier to notice. Pay attention to transitions near steps, lawn edges, drains and old repair patches; a neat surface can still include shifted units or washed joints. Mention recent repairs and, if known, why they were done. Do not try to prove capacity by placing a heavy load on the paving. If stones move, corners have settled, or damage is concentrated under the proposed shed, ask someone familiar with the construction to assess it. For the Verdana 2 garden house, keep that site check separate from the listing: product information cannot confirm the patio’s condition at your address. If conditions change seasonally, note whether movement or ponding appears after heavy rain or snowmelt.
02
Check evenness against the shed’s requirements
Check evenness across the whole footprint in several directions, including from corner to corner and across paving joints. A long straightedge and level can reveal a rise, dip or abrupt change that is hard to see from one edge. Record where it occurs and whether it lies under a planned support line; a single measurement through the middle may miss a difference at the perimeter. Distinguish an overall fall across the patio from local unevenness between slabs. Both may matter to the shed’s installation, but they are different site conditions and should be described separately. This is an initial check, not a way to set a universal tolerance. Check the actual paved area, not a nearby section that only appears to be at the same height.
Use the chosen shed’s instructions to find any stated level tolerance, and ask the seller or installer if none is given. Do not assume a small difference can be corrected with loose shims, extra paving or an improvised platform. Any remedy must maintain the required support, drainage and anchor positions, not merely make the floor look level. When reviewing the Durano garden house, use its actual documentation for this answer; the name and photos do not show the base requirements. If instructions are silent, send measurements or a simple sketch and ask for clarification before delivery is arranged. A level reading on one line cannot confirm that every corner meets the same requirement.
Match the paved area to the shed’s base footprint
Measure the paved area against the shed’s base or bearing footprint, not only the outside dimensions or roof outline. A roof projection, wall line and supporting base can have different dimensions, so use a current product drawing to identify which measurement controls the required surface. Check both width and depth and mark joints, edges, cut-outs and areas with damage. A footprint that fits on paper may put a support point beside an unsupported edge or across a repaired section. Don’t assume spare patio space on one side compensates for missing support on another; the full arrangement specified for the shed matters. If drawings label floor, wall and base dimensions separately, note each one distinctly. If two drawings give different measurements, ask which one governs the support layout.
Allow room beyond the support footprint for door operation, carrying items, assembly and routine access to the exterior. Mark the proposed outline on the paving with removable chalk or tape, then check it against fences, steps, planting and other obstructions. Confirm overhangs and any clearance guidance in the item’s instructions rather than assuming they match the wall dimensions. The page for the Veltor 1 garden house is a place to check that specific product, not evidence of its size or fit; verify its actual external, base and projection dimensions before deciding. If space is tight, map the required anchor points and door area as well as the walls, so the final layout does not depend on an unverified corner position.
03
Follow the path of rainwater and snowmelt
Watch the patio during rain or snowmelt, and after watering nearby plants. Note where puddles form, which direction runoff travels, and whether water collects along the proposed shed footprint. Check for downspouts or nearby paved surfaces that send water towards the site. Existing paving may have a fall to move water; that is not automatically a problem, but the fall must be compatible with the shed’s base requirements and must not direct runoff under the building. If weather has been dry, make a point of observing after the next rainfall instead of relying on a single dry-day inspection. Note whether water drains quickly or remains after nearby areas have cleared, and whether it exits at an edge or is trapped by a raised border.
Look for washed-out joints, damp soil at the edge or recurring ponding that could affect the surface around the shed. Consider how installation changes the water path: a roof may send rain to places that were previously open, so check where roof runoff will go using the product drawing and site layout. Do not block an existing drain path or make drainage changes by guesswork; discuss persistent pooling with the installer. For the Orello garden house, as with any chosen model, compare the product’s base instructions with the runoff you observe. The product name cannot show how water behaves on your property, so resolve that site question before ordering or installation.
Confirm how the shed can be anchored
Treat anchoring as a separate question from levelness. The shed’s instructions should identify how it is secured and what the connection must engage; the patio surface alone does not tell you whether that method is possible. Interlocking pavers, a large slab and a continuous-looking surface can have different construction beneath them, and a visible stone is not necessarily the material an approved fastener is meant to hold. Do not assume fastening into the top layer, omitting anchors or relying on the shed’s weight is acceptable. Ask where anchors are required, which parts of the existing base must be assessed, and whether the proposed locations coincide with joints or edges. Don’t carry over an anchoring solution from a different building without checking the instructions for this one.
Have the installer identify the surface and substrate, then compare the proposed method with the written instructions for the exact shed. If an anchor point lands at a joint, near an edge or over a repair, flag it rather than choosing a different fastener yourself. The Modano 1 garden house listing should be checked for its own assembly and anchoring information; its appearance does not establish what the patio can accept. Where the layers below are unknown or the details are unclear, ask a qualified installer to assess the connection. Keep that confirmation in writing, and avoid altering the paving until the plan and substrate are understood. Changing the attachment method may also make it inconsistent with the product’s requirements. If an approved secure method cannot be confirmed, revise the base plan before placing the order.
04
Find out how the paving was built
Find out how the paving was built if you can. Separate units may sit on a bedding layer and supporting base; large slabs may have joints or a different support arrangement; a continuous-looking surface may still conceal repairs or changes in thickness. Those descriptions are clues, not proof of capacity or of what lies below. Check old invoices, drawings or repair records, and ask the previous installer when that information is available. If records are missing, label what is known and unknown rather than calling the base concrete or compacted by guesswork. You are not expected to calculate capacity; the aim is to give the shed installer reliable facts for assessing the required support and anchors. A surface plan may not show the depth or support layers below.
Be precise about changes beneath the footprint: an old trench, patio extension, repaired crack, step edge or transition to soil can have a different construction from the middle of the paved area. These details do not automatically rule out a shed, but they should be included in an assessment, especially when they coincide with support or anchor positions. Avoid treating a thin top layer that looks like concrete as proof of a continuous concrete base, or accepting a guess as confirmation. For the garden shed M listing, check the item-specific base requirements, then tell the installer what you know and cannot verify. A site visit may be more useful than a broad assurance when hidden layers or anchor locations are in question; ask for an assessment or documented plan if uncertainty remains.
Plan delivery access and clearances
A suitable base is not enough if the chosen shed cannot be brought in or assembled without interfering with the site. Trace the route from the delivery point to the patio: note gate width, sharp turns, steps, uneven paths, overhead branches and places where components might have to be staged. Ask the seller or installer about the delivery format and access needed for the selected model; do not guess at component sizes or assembly methods from a photograph. A narrow route can change how materials are handled, so confirm it before committing. Also agree where materials can be placed while work is under way, without obstructing the patio or paths. If the route crosses a lawn or planting, ask whether staging space is needed and where it should be.
Then check clearances around the finished shed. Leave space for the door to open fully, for people to carry stored items, and for ordinary cleaning or maintenance; use the actual drawings for any overhang or required gap. A narrow paved strip may fit the base yet leave an awkward entry or no access to an exterior wall. Check nearby fences, walls, trees and steps against both the outline and the approach to the door. Use the listing for the garden shed S listing to look up its dimensions and installation details; do not infer that the letter S guarantees a fit. Check how the entry will work in wet weather as well as on a dry day.
05
When paving needs repair or a different plan
If inspection finds loose or broken paving, a pronounced uneven area, recurring ponding or no confirmed anchoring method, pause before installing the shed. Ask whether a local repair is appropriate, whether more extensive work is needed, or whether another base plan should be designed for the site. The right answer depends on the existing construction and the shed’s requirements; there is no universal remedy for every paved patio. A tidy patch or new surface layer may improve appearance without resolving support, drainage or anchoring, so ask what issue the proposed work addresses and what caused it. Resolve major unknowns before the shed is ordered or delivered.
Once a repair or alternative is proposed, ask how it will meet the shed’s required footprint and anchor locations, whether it will preserve runoff, and who is responsible for preparing and accepting the finished base. Avoid covering movement with loose boards, loose pavers or improvised shims; a covering can hide a problem without correcting it and may not follow the product instructions. Changes in surface height can affect door access, exterior clearances and neighbouring paving, so recheck the layout after any base work is planned. If part of the original patio will remain, make sure the installer assesses the whole support area, not just the repaired patch. Clarify what must be ready before the shed arrives, and what will be checked before assembly begins.
Resolve base questions before ordering
Before placing an order, assemble a concise site record: the exact product name, its base drawing, measurements of the paved area, notes on cracks or movement, drainage observations and anything known about the paving layers. Share it with the seller or installer and ask for a clear response on whether the existing paving meets the product requirements. Ask what must be changed, who will do that work, and whether base preparation and anchoring are included in the installation scope. Clarify points the listing does not cover before agreeing to the order. Photos taken before any preparation help tie the discussion to the actual site. Date the photos and observations so later changes can be distinguished from the first assessment.
Confirm that the answer applies to your actual site and chosen shed, not just to paved patios in general. Keep the written dimensions, allowed level variation, anchor details and any required preparation together with the order information. If site findings conflict with product instructions, or the installer cannot confirm the anchor method, resolve that difference before delivery rather than expecting adjustments on the day. When the paving, drainage, dimensions and installation plan align, the existing surface may be usable. If they do not, the next decision is how to prepare a suitable base, not how to make an unsuitable patio seem acceptable. Keep any site-assessment note with the installation paperwork.
Frequently asked questions
Can I put a garden shed directly on patio pavers?
Possibly, if the paving is stable and within the shed’s level tolerance, supports its required base footprint, manages water appropriately and allows the specified anchoring. Check the product instructions and the condition beneath the surface; pavers alone do not guarantee suitability.
Do the paving stones need to cover the whole shed?
Match the paved area to the shed’s required support footprint, not simply its roof outline. If the instructions call for a particular base arrangement, every required support location must be accommodated. Confirm dimensions and clearances from the product information or installer rather than estimating from photographs.
Can I anchor a shed into paving stones?
Don’t assume a stone or slab is an acceptable anchor point. The approved method depends on the shed’s instructions and the construction beneath the paving. Have the installer confirm what the anchor must engage and whether the existing patio can provide it; don’t substitute fasteners by guesswork.
How can I tell if existing paving is stable?
Look for rocking stones, cracks, settlement, open joints, washed-out bedding and repeated movement, especially under the planned footprint. These are warning signs, not a complete capacity test. Record what you see and have an installer assess uncertain or damaged areas before installation.
Should I address drainage before installing a shed?
Yes, if water repeatedly pools at the proposed footprint or runs towards the structure, address the cause in the base plan first. Check the shed’s level requirements as well; flattening a patio without considering runoff can create a new problem. Ask the installer about a site-specific remedy.
Existing paving is a possible starting point, not a guarantee of a ready-made base. The decision comes from bringing four facts together: the patio’s condition, the actual support footprint, the way water moves and the anchoring method the shed requires. Check those points for the exact product before ordering, and ask an installer to assess hidden construction or uncertain connections. If the paving meets the requirements, you can plan around it with greater confidence. If it does not, identify the necessary work first; a corrected base plan is easier to arrange before delivery than after the shed arrives.
