
Post-Storm Pergola Check: What to Inspect from Ground Level
Pergola maintenance
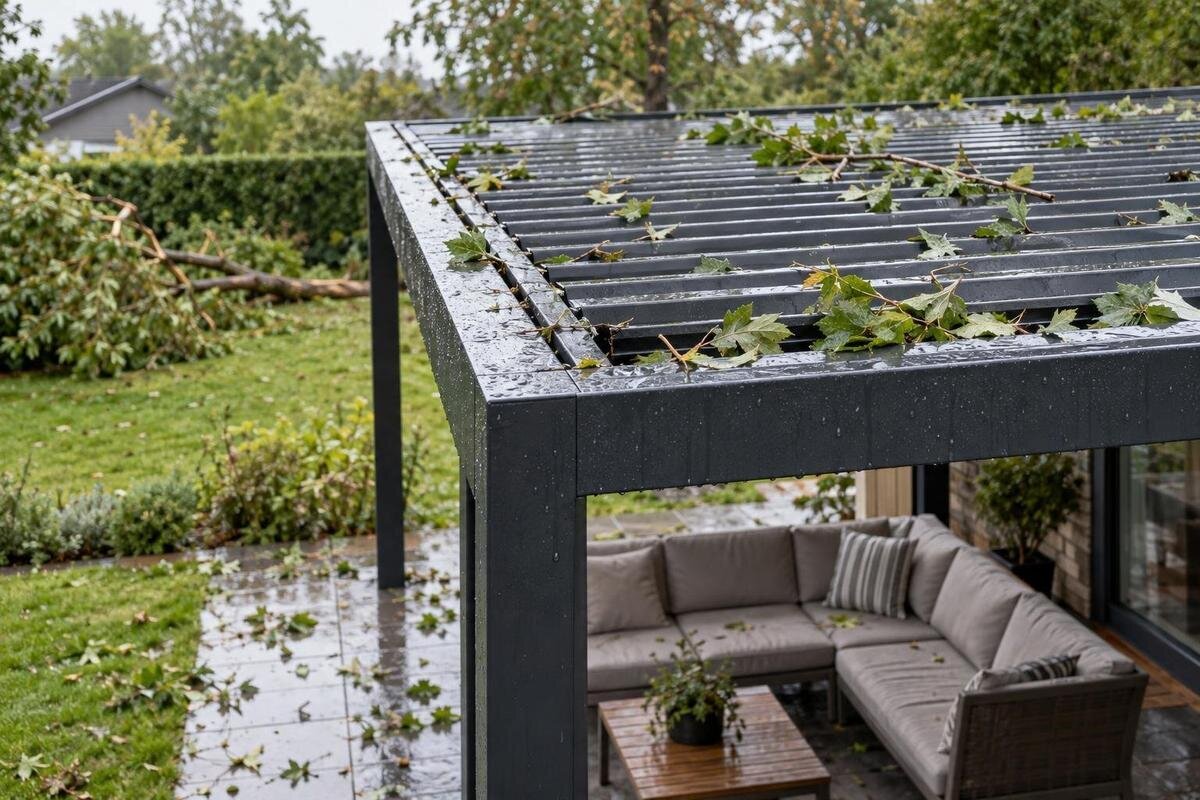
Once the storm has passed, inspect your pergola only from safe, stable ground. Do not climb onto the structure, use a ladder to view the roof, push a post to test it, or operate a mechanism that may be damaged. First make sure active weather, falling debris, downed wires and other immediate hazards are no longer putting anyone at risk. Then compare the visible frame with its usual appearance, note water and ground changes, and photograph anything unusual. A ground-level review can help you describe a concern; it cannot confirm hidden fixings or prove that a structure is safe to use.

Wait until the site is safe to approach
Wait until active weather has passed and loose debris is no longer moving. A lull in rain is not enough if strong gusts, lightning, falling branches or unstable material remain. Choose a viewing point on firm, level ground, outside the area a damaged post, roof part, tree limb or wall component could fall into. Keep other people and pets clear. If you see a downed power line, a seriously leaning frame, shattered glazing or material hanging overhead, do not approach for a closer look. Contact the appropriate emergency or utility service if there is immediate danger.
A ground-level check means staying on the ground and outside the pergola. Do not climb a ladder, stand on furniture, step onto the structure, reach overhead or walk below a suspect roof. Do not push a post, pull a beam, shake the frame or clear wedged debris to see what moves. If you cannot view a detail from a safe position, note that it is unseen rather than taking another route beneath a damaged section. A visual check cannot establish that an unstable-looking structure is safe to occupy.
Record the storm and establish a baseline
Write down the inspection date and time, what the storm involved as far as you know, and where you were standing. Separate direct observations from assumptions: record that water crossed the patio rather than deciding a drain is blocked, or note a branch near the frame without saying it struck unless you know it did. Mention delayed signs, such as a later drip or a fragment on the ground. Note whether poor light, wet surfaces or debris limited what you could see. If someone else witnessed an event, distinguish their account from your own observations.
Compare the pergola with photos taken under normal conditions, installation records, invoices or the manual, if available. Copy the exact product name and any identifier already recorded; do not climb or reach to read a plate. The Bloomcabin Pergola listing can help identify a catalogue name, but matching wording alone does not confirm which version is installed or which part fits. Note familiar reference points, such as the house side or a particular post, so later photos can be matched to the same location. Keep the original comparison image rather than relying only on a cropped copy.
Look for changes in the pergola’s overall alignment
View the full outline from more than one safe position, without circling beneath a loose roof. Compare post lines, beam heights and roof edges with earlier photos or with one another. Look for a new lean, twist, sag, raised corner or part that now sits out of line. Perspective, a sloping deck and camera angle can make a frame look uneven or hide a change, so treat these as observations, not a structural test. When possible, take a repeat photo from the same spot; a wide view can be easier to compare than a close-up.
Notice whether visible joints still meet as before. A new gap, shifted cover, separated beam end or connector that appears displaced may deserve attention. Do not loosen a cap or pull on a member to check it. When reporting a concern about a Bloomcabin Bioclimatic Pergola, describe where the change appears rather than simply saying that the frame looks crooked. Record which corner or side appears different and how it compares with your earlier view, without drawing a conclusion about the cause. If a member seems to have moved, keep the area clear and arrange a professional assessment before using the pergola.
Inspect visible post bases and wall connections
Look at post bases only from a safe distance at ground level. Record a base that appears shifted from its usual position, a newly visible gap, fresh cracking or crumbling around a connection, a post no longer centred over its support, or displaced trim. A cover can hide what is behind it, and a crack in paving can have more than one cause; neither appearance is a diagnosis. Do not kneel beneath a beam, touch exposed fixings or try to tighten or reset anything. If a base is partly obscured, note that rather than moving debris to see it.
For a pergola attached to a house or another wall, inspect the visible junction from outside the potential fall area. Look for a new gap, an edge that appears loose, pulled-away finish, fresh debris or a change in the line where the structure meets the wall. If your records identify a Bloomcabin Wall-Mounted Pergola, include that model name when reporting the concern, along with the location of the affected wall connection. A gap in cladding does not prove that a hidden fixing has moved, and a neat-looking cover does not prove the connection is intact. Photograph the junction and nearby wall from the ground, then have apparent separation or movement assessed.

Check overhead members and roof components from the ground
From a safe position, scan every visible edge of the roof or canopy, the beams around it, and any panels or slats. Note missing, bent, displaced or hanging parts, torn fabric if present, an unusual sag or debris lodged overhead. Pergolas do not all have the same roof components, so check only what your structure actually has and record any area you cannot see safely. If you consult the Bioclimatic Pergola listing alongside your product records, keep the model name separate from your description of visible damage. Label roof photos by side or corner and state which parts are obscured.
Do not climb to inspect the upper face, sweep leaves off the roof, tug on a loose edge or move a panel to see whether it works. A displaced overhead part may shift unexpectedly, and a ground-level view cannot reveal hidden damage. If anything is hanging, markedly shifted or appears likely to fall, move away from beneath it and keep others out of the area. Do not try to hold it in place or remove it. A qualified installer or service professional can decide whether closer inspection is safe.
Look for blocked drainage and unusual water paths
Look for signs of where water travelled, not a presumed fault. From the ground, note unusual overflow, fresh streaks on posts or walls, a puddle that was not normally there, sediment, washed debris or water collecting at a visible outlet. Some pergola designs have drainage components and others may not; check the manual or product records before assuming there is a channel, gutter or outlet to inspect. A wet area after heavy rain does not by itself show that a drain is blocked. Record where the water ended up and whether you could see its route.
If a drain, eavestrough or downspout is visible without reaching overhead, note whether water appears to have escaped its usual route. Do not climb, poke into a drain, remove a cover or clear material from a raised channel while damage is uncertain. For a wall-attached structure such as the Bloomcabin wall-mounted model, keep runoff photos with the installation details and identify the section of wall shown. Note whether the water seems to come from the pergola, the house or somewhere you cannot identify. Include the viewing position and any obstruction that prevented you from following the water’s route. Report repeated overflow or water near a building connection for assessment.
Note damage to screens, controls, lights and wiring without testing
If the pergola has screens, a canopy, lighting, a motor or other accessories, view them only from a safe place. Look for a torn or displaced screen, a track that appears detached, cracked control housing, loose cable, broken cover or part hanging down. Note whether the concern is on the pergola, an accessory or a nearby fixture; an unlit light or stationary mechanism does not by itself identify a failed component. If you use the Bloomcabin Pergola product page as a reference in your report, describe the affected accessory separately. Record its visible location and condition rather than assuming the pergola’s model name identifies every attached item.
Do not operate a switch, remote, crank or moving roof mechanism to test it if you see damage, suspect water exposure, or notice unusual noise or resistance. Do not touch exposed wiring, wet controls, broken fittings or cables that may be under tension. Photograph visible concerns from a distance and note whether they were already known. Leave electrical checks and repairs to qualified service personnel. A visual inspection cannot establish that an electrical component is safe, and opening a control housing is not part of a ground-level check.
Check the patio, nearby ground and surrounding structures
Look beyond the frame to the surface around it. From ground level, note fresh cracks in paving, lifted or shifted pavers, washed-out soil, a new depression or water pooling near a post. Record fallen branches, impact marks, damaged fencing or a downspout that now empties toward a support. These signs may help a professional understand the event, but they do not establish that a footing has moved. A single puddle after heavy rain is not proof of a persistent drainage problem; note when you saw it and whether you had a useful earlier comparison.
Check the nearby house wall, deck edge, garden bed and adjacent structures for fresh contact marks or displaced material, without entering a place where debris or unstable parts could fall. Photograph debris on or beside the pergola only if you can do so safely; do not lift or drag a branch to reveal what is underneath. Note anything that obscures your view, such as a hedge, stored items or fallen material, so an assessor understands which areas were not visible. The aim is to record the scene, not to clear it or assign a cause.

Take photos that make the concern easy to assess
Begin with a wide view that shows the pergola’s position relative to the house, patio or other fixed features. Add a medium view of the affected side and closer images of visible details only when you can take them from safe ground. Include a consistent landmark in the frame where possible, and note which corner or side the photo shows. Use camera zoom rather than moving under a suspect roof or reaching above your head. A short series taken from clear viewpoints can show context better than one tightly cropped image.
Keep the original files, add the date and a brief note about what each image shows, and include an older comparison photo if one exists. Copy the make and model from paperwork instead of guessing from appearance. For an enquiry about a Bioclimatic Pergola from Bloomcabin, include the labelled photo series so the wider scene and individual concerns can be viewed together. Keep side and corner labels consistent across current and older images. Do not approach to add a ruler, place an object against a damaged part or mark a component. A note can explain what the camera cannot show, such as an obscured base or a roof area outside your view.
When to seek professional help and what to report
Stop the inspection and keep people clear if you see a new lean, a connection pulled away, a displaced base, a visibly bent or loose overhead part, significant impact damage, cracked glazing or an electrical concern. Do not use, load, repair, brace or dismantle the pergola based on a ground-level impression. Ask a qualified pergola installer, contractor or other relevant professional to assess apparent structural movement. Electrical concerns should go to qualified electrical service personnel. If there is immediate danger, seek appropriate emergency or utility help rather than approaching the structure.
For an assessment, provide the inspection date, what changed, your safe viewing points, photos, any previous issue and exact product information from paperwork. Ask what closer inspection is needed and whether any proposed part must be matched against the exact manual and model. If the assessment leads to a replacement enquiry, the Wall-Mounted Pergola listing identifies that product name and lists an area range from 9 to 24 m²; neither establishes fit for your site or compatibility with existing attachments. Keep the storm findings separate from any later repair or replacement decision, so the report remains a clear record of what you observed.
Frequently asked questions
When is it safe to inspect a pergola after a storm?
Wait until active weather and immediate hazards, such as falling debris or downed wires, are no longer putting people at risk. There is no fixed waiting period that makes every site safe. If the frame is leaning or parts are hanging overhead, keep clear and get appropriate help rather than approaching for a closer look.
Can I use a ladder to check the roof?
No. This checklist is limited to what you can see while standing on safe ground. If the roof or a connection is not visible from there, note that it could not be checked and ask a qualified professional to assess it. Do not climb onto the pergola or stand beneath a damaged area.
Should I operate the roof, screens or lights to test them?
Do not operate a mechanism if you see damage, notice unusual resistance or noise, or suspect water has reached a control. Avoid touching exposed wiring, wet controls or broken fittings. Record what you can see and leave electrical checks or repairs to qualified service personnel.
What photos are useful for a post-storm check?
Take a wide view that shows where the pergola sits, then closer views of visible concerns from a safe position. Include the same viewpoint as an older photo when possible. Date and label the files with the side or corner shown; do not climb, reach overhead or place a measuring object against a damaged part.
Which signs should prompt a professional assessment?
Get professional advice if you see new movement, a shifted base, a gap at a wall connection, a bent or hanging overhead part, significant impact damage or a concern involving wiring. These observations do not identify the cause, but they are reasons to keep clear and avoid using or testing the pergola.
Treat the inspection as a record of visible change, not a pass-or-fail test. Clear photos and precise notes can help a professional focus on the right area; when movement or damage is apparent, leaving the structure untouched and the area clear is more useful than trying to make it look normal. Keep the baseline and storm observations together for any later assessment.
