
How Level Should a Garden Shed Base Be?
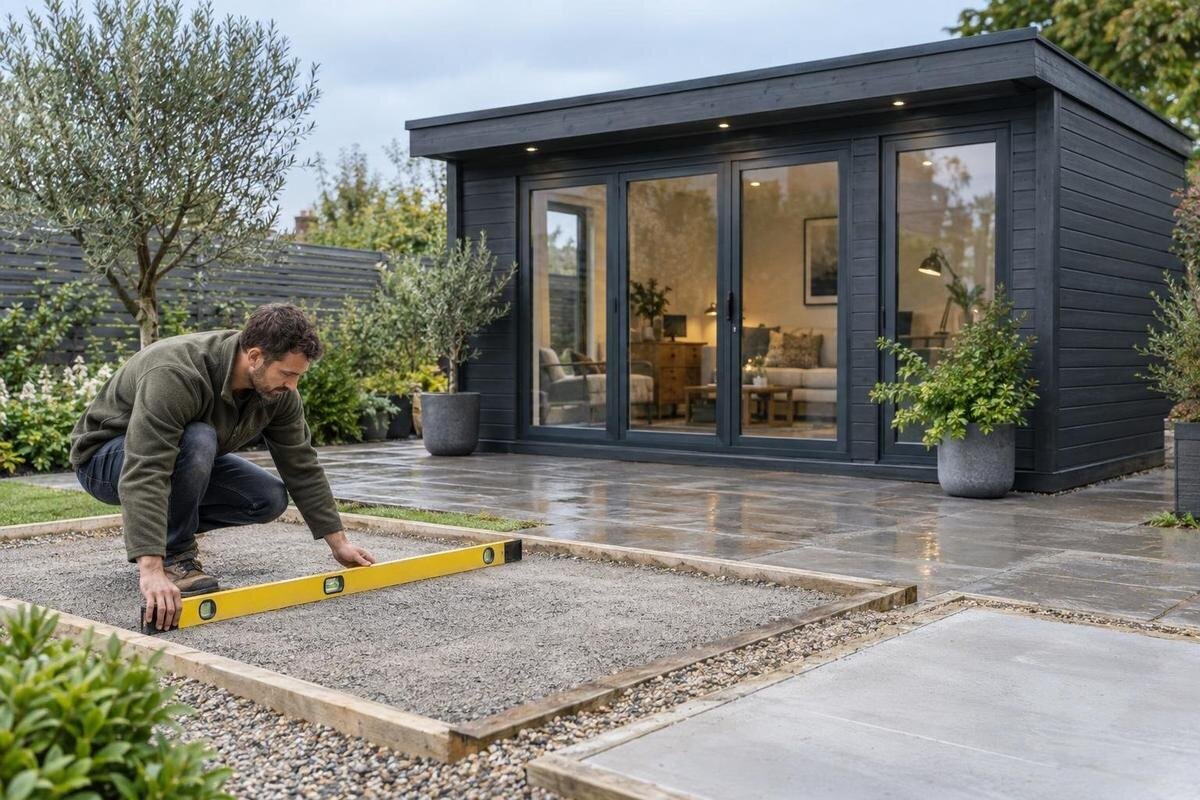
Garden shed planning
How level should a garden shed base be? It needs to meet the installation tolerance for the exact shed model across the whole area that will support it. Checking only one corner or one edge can miss a high spot or dip elsewhere, and a surface that looks even may still slope. There is no universal allowance that can be quoted without the model’s instructions. Before you commit to base work or an installation date, confirm the permitted variation, footprint, support arrangement and anchoring requirements for the shed you plan to buy.

How level should the base be?
Set the base to the tolerance in the installation instructions for the exact model. In practical terms, the entire area that supports the shed should form a level, even surface, not just the spots where one wall or corner sits. The allowed variation, if any, can differ with the design and support arrangement, so a number used for another shed is not a reliable substitute. If the guide gives a maximum deviation, follow its measuring method and reference points. If it says only that the base must be level without explaining what variation is acceptable, ask the supplier or manufacturer before preparing the base.
Use the exact model name when you request that information; the Verdana 1 garden house identifies the item you have in mind. Ask which parts of the base need support and how the specified levelness is checked. A model name or product photo alone does not establish the tolerance. Keep the answer with your order and site-preparation notes, especially if different people will prepare the base and assemble the shed. Confirming the requirement before work starts can help avoid having to alter a finished surface. It is also useful to ask whether the tolerance applies before or after any flooring or other supplied base components are fitted. That distinction can affect when the final measurement should be taken.
Level and flat describe different things
Level describes orientation: whether a surface is horizontal. Flat or even describes its shape: whether it follows a consistent plane rather than having a hump, hollow or abrupt change in height. A smooth plane can still slope from one side to the other, while a base may look level along its edges but rise in the middle. A garden shed base needs to meet the selected model’s requirements for both its overall level and the consistency of its support. Treating the two words as interchangeable can hide a problem during planning.
When reviewing a base plan, ask how the installer will check both conditions and which areas they will test. A reading along one edge tells you about that line, not whether the full footprint is even; a visual inspection has the same limitation. The centre matters as well as the perimeter, along with any internal support areas shown in the instructions. Describing a concern precisely is useful: a lower back edge and a dip in the centre are different observations, and both are more informative than saying the base looks a little off. Marking the locations of readings on a simple sketch can make the results easier to discuss. It also helps distinguish an isolated surface imperfection from a consistent slope across the base.
Why uneven support can affect assembly
Shed components are intended to meet in particular positions. If one corner of the base is higher, the floor or frame may sit out of alignment as parts are assembled and fixed together. Panels may not meet as intended, and a door can bind or leave an uneven gap. These are possible signs of a problem, not a diagnosis of every shed. A consistent supporting surface helps parts meet as designed, rather than relying on fasteners or adjustments to compensate for a twist. Follow the model’s instructions rather than judging the base by appearance alone.
If assembly starts to feel forced, pause and check whether the base meets the requirements before continuing. Do not try to draw misaligned parts together or use a door as a levelling gauge; that can turn a base issue into extra assembly work. For a particular choice, such as the Garden house Verdana 2 model, ask the supplier or installer who can verify the prepared surface and what should prompt a pause. Checking before the walls are assembled is generally simpler than investigating a fit problem after more parts are in place. Take note of where the resistance occurs rather than making repeated adjustments. A pattern at one side or across a diagonal can give the person assessing the base a clearer starting point.
Get the base requirements before preparing the site
Before preparing the site or buying materials for the base, look for installation notes that specify its dimensions, support areas, permitted variation and measuring method. Also check whether the instructions describe a separate floor, where the structure is supported, and any anchoring requirements. Use the guide’s own reference points rather than comparing measurements taken in different ways. If the instructions say only “level” without explaining what that means for the model, do not treat the missing detail as permission to choose your own tolerance. Ask for clarification before work begins.
If the documentation does not settle the question, give the supplier or manufacturer the exact model name, such as the Durano spacious garden house, and request the relevant installation guidance. Do not infer base requirements from a similar-looking shed or a product photograph. If one contractor will prepare the base and another will assemble the shed, share the same instructions with both and agree who will check the surface. If the model or site plan changes before the work is done, confirm that the earlier guidance still applies rather than assuming it does. Ask for the guidance in a form that can be retained with the project records. This reduces the risk that verbal instructions are remembered differently by the people carrying out the work.

How to check level across the full base
Check the completed base with a suitable spirit level and straightedge, or a laser level, using the method required by the shed’s instructions. Measure in both the long and short directions, and check along the perimeter and across the centre. Include the areas that will carry the floor, walls or other supports identified in the installation guide. A longer straightedge can help reveal a local high or low spot that a short tool might not span. Do not rely on one reading at a corner or on the apparent slope of the surrounding ground.
Use the same approach at each check point and record where readings differ, so the installer can compare them with the model’s requirements. For example, include the selected product identity, such as Veltor 1, in the notes you share. Avoid averaging away a high spot or assuming that one satisfactory line proves the whole surface is acceptable. If readings are unclear or the instructions use a method you cannot interpret, have the installer confirm the result before assembly. The aim is to check the actual supporting area, not simply to show that one part of the base is horizontal. Repeat the check after any correction, using the same reference points. Otherwise, a repaired area may appear improved without showing whether it now aligns with the rest of the supporting surface.
Levelness does not confirm stability or drainage
A base can be level when measured and still be unsuitable if its support is unstable. Movement, settlement or erosion can change the surface and leave parts of the shed supported differently over time. Consider whether the completed base is firm and whether its supporting arrangement follows the model’s instructions. If the site has a history of movement or water collecting near the intended location, discuss it with the installer before work proceeds. A level reading is one check; it does not establish how the base will perform under the conditions at the site.
Plan water management around the shed without deliberately pitching its supporting surface to make water run off. The shed needs to meet its levelling requirements, while the surrounding site should not direct water towards the base. The suitable approach depends on the site and the installation plan, so ask for professional guidance if you are unsure how to handle runoff. When making that enquiry, identify the chosen model—for example, Orello 1—rather than relying on a general description. Do not assume a product image or name answers questions about drainage or support. Consider where rainwater already travels during wet weather and where snowmelt may collect. Those observations can help the installer assess the site without changing the specified supporting surface.
Match the base to the footprint and entry layout
Confirm the required base dimensions from the installation information instead of assuming they match the outside dimensions of the shed’s walls. The supporting surface must extend to the areas the design requires; a mismatch can leave part of the structure without its intended support or put support in the wrong place. Check the plan for the location of the floor, perimeter and any internal supports. If a dimension is unclear, ask whether it refers to the base, the assembled floor or another part of the structure before work is measured out.
Set the position and orientation before the base is fixed in place. Check where the entrance will face, whether there is room to use it, and how the shed parts will reach the installation area. The model name is useful when asking for a drawing or clarification; for instance, you can identify Modano 1 garden house without assuming its dimensions from the name. Confirm the relevant measurements from its documentation. If you change the planned orientation or location, review the base layout and access again rather than carrying forward a plan made for the earlier position. Also leave clear working space around the planned footprint while the shed is being assembled. Access that is adequate for everyday entry may not provide enough room to handle components or inspect the outer edges of the base.
Recheck the surface before installation
Measure after the base work is complete, not only while the site is being prepared. Work on the surface can introduce a high point, dip or change in level, so check it again before the shed is assembled. Clear away loose material that interferes with checking the supporting areas, then follow the method and reference points in the instructions. If the readings fall outside the stated tolerance, stop and ask how the surface should be corrected. Do not rely on the shed settling into place or on the assembly process to compensate for an uneven base.
Agree in advance who will inspect the finished surface and who is responsible for any correction. If an installer will do the final check, make sure they have the same model information and base plan you used. The wooden garden shed M listing can help identify which item you mean when arranging that discussion, but its name alone does not confirm base requirements. If the intended model, base layout or site conditions change, recheck the instructions before installation rather than relying on measurements taken for a different plan. Record the date of the final check, particularly if there will be a delay before assembly. A later site change, damage to the surface, or accumulation of loose material can make an earlier result less useful.

Mistakes that can lead to avoidable rework
A common mistake is to check only the corners, or to decide by eye that the base is level because its top looks smooth. Neither approach shows what is happening at the centre or along every supporting area. Another is to treat a firm surface as proof that it is level: firmness and orientation are separate checks. A base can also pass a quick check in one direction and still slope or vary in another. Use the model’s instructions to guide the inspection, and do not rely on another shed’s accepted tolerance as a shortcut.
Avoid correcting a low area with loose packing or improvised shims unless the installation plan specifically approves that method. A quick adjustment can create a different support problem, and forcing the shed components into alignment is not a substitute for a suitable base. If you find an uneven area, ask the base installer or shed professional to recommend an approved correction before assembly begins. The material used for a base does not, by itself, make the surface level or suitable; check its finished condition against the same model-specific requirements. Do not cover a questionable area before it has been measured and assessed. Once a floor or other component is in place, locating the original high point or dip can be more difficult.
What to confirm when ordering the shed and base
Treat base preparation as part of the shed purchase, not as a detail to solve from a photograph after ordering. Before committing to site work, confirm the model’s required footprint, support arrangement, levelling tolerance and measuring method. Ask who will prepare the base, who will check it, and who will arrange any correction if it does not meet the instructions. These points help you understand what the installation plan includes and whether the people involved are working from the same requirements. If the answer to any of them is unclear, resolve it before the base is built.
Keep the shed choice and site plan linked throughout the order. If you are discussing the wooden garden shed S listing, for example, use that model identity when asking for its installation guidance; do not assume that a different shed’s dimensions or base plan will carry over. Confirm delivery and assembly access as well as the base location, and revisit the requirements if the selected model changes. This makes it easier to catch a mismatch while the base can still be checked and corrected, rather than during assembly. Keep copies of the final plan, measurements and installation guidance together. They provide a practical reference if a question arises between ordering, site preparation and the day the shed is assembled.
Frequently asked questions
Is there one standard tolerance for every garden shed base?
No. The permitted variation depends on the shed’s installation requirements. Check the instructions for the exact model, and ask the supplier or manufacturer if they do not state how level the base must be.
Can I slope the base slightly so water runs off?
Do not assume a sloped support surface is acceptable. The shed’s base needs to meet its levelling requirements; plan water management around the site without changing that surface unless the instructions specifically allow it.
How can I check whether the whole base is level?
Use a suitable spirit level with a straightedge, or a laser level, and check in more than one direction. Include the perimeter, centre and support areas shown in the installation instructions, then compare your readings with the stated tolerance.
What if the base is level at the corners but dips in the middle?
Do not assume it will be acceptable. A dip can leave part of the shed without the intended support. Ask the installer or manufacturer how to correct it before assembling the shed.
Should I prepare the base before ordering the shed?
Confirm the chosen model’s base dimensions, support arrangement and levelling tolerance first. After the base is complete, check it again before installation so any mismatch can be addressed before assembly.
Treat levelness as a model-specific installation condition, not a visual preference or a number borrowed from another project. Check the full supporting area for overall level and local high or low spots, then consider stability, dimensions and water management separately. Confirm the requirements before ordering or preparing the site, and inspect the completed base again before assembly. That sequence gives the shed its intended support and lets you address a mismatch before it becomes an installation problem.
