
Pergola Gutter Overflow: A Step-by-Step Diagnosis
PERGOLA DRAINAGE
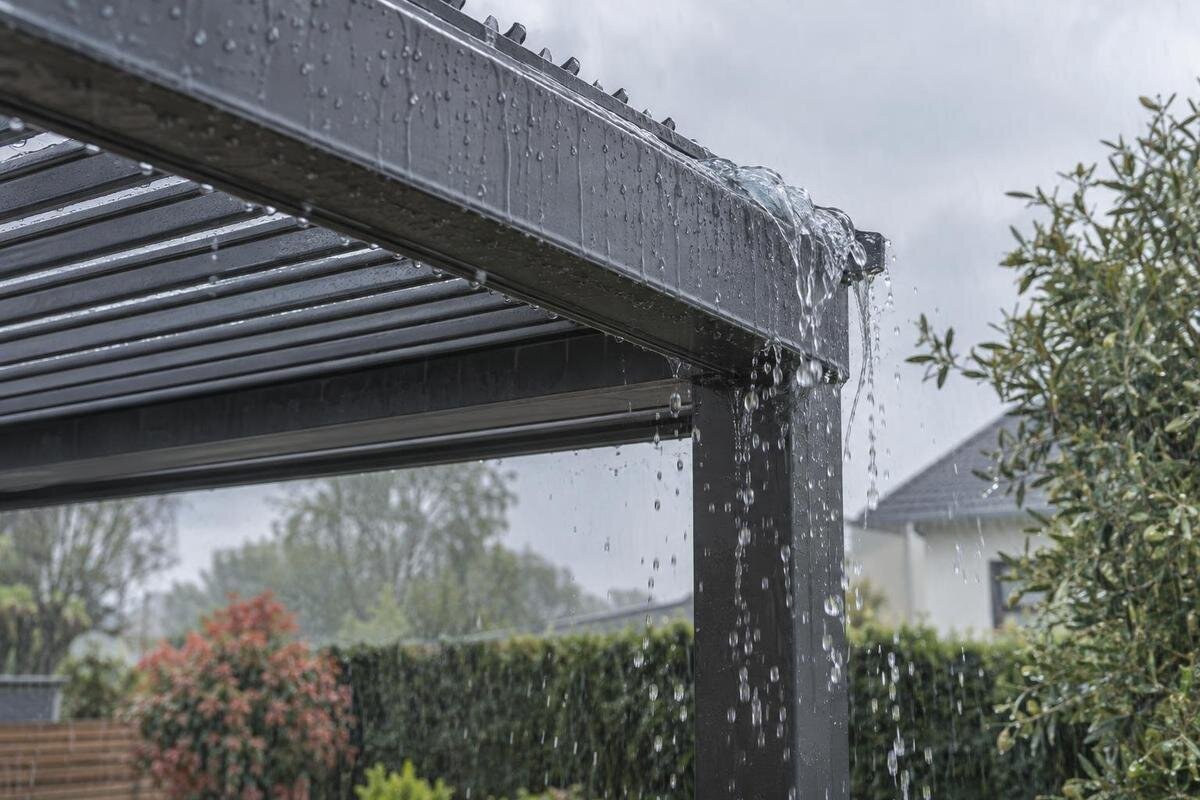
Water spilling over a pergola gutter is a symptom, not a diagnosis. Debris is one possible cause, but a restricted outlet, a blockage farther down the downspout, water missing the channel or flow beyond the model’s stated limits can look similar from below. Follow the route in order, from the roof edge to the discharge point, to narrow the cause without assuming that every overflow calls for more cleaning or that every pergola handles rain the same way.

Safe observation from ground level
Treat the overflow as a tracing problem: find the first point where water leaves its intended route, rather than starting with a seasonal cleaning checklist. Observe only when conditions are safe and you can remain on the ground. Do not climb onto the pergola, stand beneath a sheet of runoff, or inspect during a storm. From a dry, safe position, note whether water spills over the gutter edge, appears at a seam, or backs up near an outlet. These are different failure points, even if they leave puddles in the same place.
Before the next suitable rain, note the roof position and any side enclosure or screen. During your observation, record the rain’s direction and when the spill begins. If the instructions specify how the roof should be positioned for rain, observe it in that position; do not move roof components just to create a test. A short video from the same safe viewpoint can show whether the overflow is continuous or comes in bursts. Identify each location consistently, such as the corner nearest the house or the outlet beside the patio, so your notes remain easy to compare. Record what you actually see separately from what you suspect is causing it. If you have a Bloomcabin Pergola, identify the exact model and use its drainage diagram; a product image or a diagram for another roof layout cannot establish your water route.
Locate the first point of overflow
Stand where you can see the roof edge and as much of the gutter run as possible, then trace the water from the splash on the ground towards its highest visible source. If water spills over the gutter’s outer lip, the problem may involve water capture, gutter flow or the outlet. A drip from one connection points towards a seam or joint. Water that drops past the gutter while the channel remains dry suggests it may not be entering the gutter at all. A wet post or wall can be the visible end of a hidden route, so do not assume that the wet surface is where the problem begins. Describe the location precisely: water spilling over an edge, escaping through a connection and running down a post are different observations, even when they produce the same puddle.
Look for the earliest wet mark, not just the biggest puddle. Runoff can travel along a beam, post, wall or paving before falling, and wind can carry it away from its source. Compare what happens at each corner and along the full edge; a quick sketch can help you mark the exact segment. If the pergola sits beside a building, check from a safe distance whether water could be coming from the building’s eavestrough or roof instead. Separating the source prevents a clear pergola outlet from being blamed for runoff it never collected.
Check how water reaches the gutter
Once you have confirmed that water is coming off the pergola roof, check how it enters the gutter. During a safe observation, watch whether runoff reaches the channel or passes over its outer edge, behind it, or between sections. Leaves or other material at the roof edge can divert flow; a gap, shifted component or poorly seated connection can also send water outside the intended route. A gust may carry water sideways, so one wind-driven splash does not prove the gutter is blocked. Note whether water enters the channel before escaping, and compare more than one point along the edge.
Record any visible gap, but do not bend a channel, adjust brackets or reseat a roof part as a trial. The intended transfer path varies by design, and a small-looking feature may direct water into an internal channel. For a Bloomcabin Bioclimatic Pergola, use the exact model’s drainage drawing to confirm where water should travel before deciding that the gutter is misaligned. If the entry point is hidden or the roof-to-gutter connection looks loose, have the installer assess it rather than opening or forcing the assembly.
Inspect the gutter outlet for restrictions
With the source localized to the gutter, inspect the outlet area only from a position you can reach safely, and only after rain and wind have passed. Look for loose leaves, seed pods, roof grit or other material gathered at the opening, as well as a screen or strainer that is visibly covered if the design uses one. A clear-looking gutter farther along does not rule out a plug at the narrowest point. Note whether the water level rises before spilling and whether the overflow is near the outlet or at the opposite end; those details help distinguish a local restriction from a broader flow problem.
Remove only loose debris that the product instructions allow you to reach without climbing, dismantling parts or forcing tools into the opening. Do not chip ice, pry out a fitted screen or push a sharp rod into a route that may contain a seal or hidden channel. If the opening is clear but water still accumulates there, the restriction may continue inside a frame or downspout. For a Bloomcabin Wall-Mounted Pergola, check its own drawing rather than assuming the outlet sits where it does on a different model; part of the route may not be visible from below.

Trace the downspout to its discharge point
Follow the water beyond the gutter outlet to the downspout’s lower end. If the opening at the gutter is clear, look from the ground for a disconnected joint, a visibly compressed section, debris at the discharge, or an outlet that is obstructed or submerged. On some designs, part of the route may run inside a structural post, so a clean exposed section does not prove the entire path is open. Do not disconnect a pipe or force water into a concealed passage to test it; an internal restriction needs a safe, model-appropriate inspection.
Notice the sequence: does water escape at a joint while the gutter level stays low, or does overflow begin as flow through the lower route slows? A leak at a connection and a backed-up downspout need different repairs. Where both ends are visible from a safe position, record what happens at the gutter and discharge during the same observation. If you cannot see the lower outlet, mark that part of the route as unobserved rather than describing it as clear or blocked. This gives the installer a specific gap to investigate. If you are comparing the Bloomcabin Pergola model page with another configuration, confirm the documented outlet and downspout route for the exact model rather than assuming that a product photograph reveals it. An installer can assess a hidden blockage without you dismantling the drainage route.
Use the flow pattern to narrow the cause
Treat the shape and timing of the spill as clues, not as a diagnosis by themselves. Overflow confined to one corner after water has been flowing for a while can fit a local restriction near that outlet. Water escaping at the same joint from the beginning points more towards that connection or the way runoff reaches it. A spill along a long section only during a very heavy burst may mean the incoming flow exceeds what that route can carry in those conditions, but it does not prove that the whole gutter is undersized.
Compare the observation with what happens in a different, safe rain event, keeping the roof in the same permitted position. If the same spot overflows in light, steady rain after accessible debris is removed, that debris has not fully explained the problem; a hidden restriction or another cause may remain. If the symptom changes with wind direction, water capture or exposure may be involved. Record which conditions stayed the same and which changed, including the spill location, its timing and the visible flow at the discharge. A comparison is less useful if the roof position, wind and rainfall all differ and you treat only one of those changes as the explanation. More than one cause can coexist: a partly restricted outlet, for example, can make a high-flow event worse. Avoid treating one storm, isolated drip or puddle as proof of a particular defect.
Compare the event with the model’s drainage limits
Separate what you observed from what the pergola was designed to handle. Record the rain’s duration, apparent intensity and direction, along with the roof’s operating position; then compare those conditions with the exact model’s drainage diagram and weather-performance information. A channel can be clear and still overflow when water arrives faster than its route can carry it, while wind can alter where water lands. These possibilities do not tell you the model’s limit. If the applicable operating conditions are unclear, ask the supplier or installer for the model-specific information.
Do not assume that all pergolas share one rainfall threshold or that a product image promises a dry area in every storm. Nor does one exceptional event alone establish an installation fault. For the Bioclimatic Pergola model, match the drainage diagram and weather information to the roof position and intended enclosure; do not apply details from a different model. Keep your description of the event separate from the stated limits: “overflow began during a heavy burst” records an observation, but does not establish that the design limit was exceeded. If the available information does not explain how the observed conditions relate to the design, identify that as an unanswered question. This distinction helps you discuss a possible capacity limit without prematurely ruling out a restriction or connection problem.
Check wind, nearby roofs and enclosure changes
Check whether the pergola is collecting water from somewhere else or whether rain is being blown off course. A nearby building roof or eavestrough may discharge onto or beside a wall-mounted structure, while wind can carry rain across the gutter edge. If water appears only with a particular wind direction, compare the wet marks on the roof, wall and gutter instead of assuming that the downspout is plugged. A hose, sprinkler or other water source can also mimic a leak, so note whether the spill coincided with rainfall.
Later additions can change the route or the access needed to inspect it. Side screens, enclosure panels, guards or a rerouted downspout should be checked against the documentation for that roof and accessory combination; do not assume an add-on leaves water capture unchanged. If you are assessing a Bloomcabin wall-mounted configuration, confirm the drainage route and suitable enclosure in the exact model information rather than extrapolating from a freestanding layout. Do not seal an overflow opening or add fittings as a quick fix without approval.

Know when cleaning is not the fix
Cleaning is a useful diagnostic action when you have found accessible debris that could obstruct the route. Remove loose material only by a method the instructions permit, then note what changed. Be specific about the result: did water stop spilling at the same location, did the spill become smaller, or was there no visible change? A partial improvement is worth recording rather than treating it as either a complete repair or a failed clean-out. The aim is not to turn this diagnosis into a calendar of annual chores. A blocked downspout, runoff bypassing the roof edge and flow beyond the stated limits call for different responses, even if the gutter itself is clear. Repeating a full clean without identifying where water escapes can consume time while leaving the actual cause untouched.
If the spill returns after visible debris is gone, stop repeating the same clean-out and revisit the route. The blockage may be deeper, a joint may be displaced, or the inflow may exceed the documented arrangement. Do not alter the slope, drill another outlet, add sealant or bend a channel to make water run faster; those changes can redirect water or damage a connection. For the regular Bloomcabin Pergola model, base any adjustment on its instructions and an installer’s assessment, not on a fix copied from a different roof.
Record the evidence for a repair assessment
Give an installer or supplier evidence they can use. Record the model and configuration, where water first leaves the route, whether the gutter is full, what happens at the outlet and lower discharge, the roof position, any enclosure, and the rain and wind conditions. A short video or simple sketch is more useful than a photo of a puddle alone. Include whether the issue began immediately or after a delay and whether you removed visible debris. Keep the observation at ground level; do not create a risky inspection just to get a closer image.
Ask the installer or supplier to identify the intended water path, confirm the outlet and downspout arrangement for that model, and explain whether the observed conditions fall within its stated limits. Frame the assessment around the unresolved part of your observations: water bypassing the gutter, a joint that starts dripping immediately, or a gutter that fills while the lower discharge slows. Ask how the proposed repair addresses that particular symptom rather than accepting a general recommendation to clean everything again. If you are choosing a new pergola, request the drainage and configuration information before relying on the appearance of a listing. The Bloomcabin Bioclimatic Pergola listing identifies a model, but the exact drainage drawing and any enclosure-compatibility information explain how its route works. Use those details to compare the configurations you are considering, without assuming that similar-looking pergolas have identical drainage arrangements.
Frequently asked questions
Does an overflowing pergola gutter always mean it is blocked?
No. Water may be missing the gutter, an outlet or downspout may be restricted, or the flow may be beyond the model’s stated limits for those conditions. Start by finding where water first leaves its intended route; a puddle below the pergola does not identify the cause.
Can I inspect the gutter while it is raining?
Only observe from a safe, dry position at ground level, and only if visibility and footing are good. Do not climb onto the pergola, stand under heavy runoff or work in a storm. If conditions are unsafe, wait and use a video or notes from a later, suitable rain.
Will testing with a garden hose show whether the gutter is clear?
Not necessarily. A hose can deliver water differently from rainfall and may create a misleading result. Use a water test only if the instructions for the exact model permit it and it can be done safely. Never use a pressure washer to force water through a gutter or hidden drainage route.
Should a pergola gutter overflow during heavy rain?
There is no universal answer for every pergola and weather condition. Compare what happened with the drainage diagram and stated limits for the exact model. One intense storm does not, by itself, prove a defect; repeated overflow in conditions the model is meant to handle deserves a closer assessment.
What information should I give an installer?
Share the exact model and configuration, the first point where water escaped, the roof position, any enclosure, and the rain and wind conditions. A short video from a safe location, plus notes on whether the gutter and downspout were visibly carrying water, can help narrow the cause.
A useful diagnosis identifies where water first leaves its intended route, what happens between the gutter outlet and the downspout, and which conditions were present. That evidence separates a reachable obstruction from a connection issue, a hidden restriction or a question about the model’s limits. Once you can describe the first failure point and compare it with the correct drainage information, an installer can assess the cause without relying on guesses based on a puddle or a single storm.
